Office - Membership - End of Month - Month End Wizard
Table of Contents
Overview
Monthly, Clubs perform month-end activities associated with the Membership module. The biggest portion of this month-end process is generating Member statements, and emailing or mailing the statements to a Club’s Members. To ensure Statements reflect the appropriate charges and desired messages, Clubs must perform the proper preliminary steps, and then execute the Month End Wizard to process the Member Billings, Minimums, and Late Fees as applicable. Once Generated, Statements can be printed or emailed. Once finalized, the A/R aging details can be tied to the General Ledger.
Required Permissions
Membership Module
Month end Wizard
Accessing the Tool
The Main tools utilized in this process will be found in the Membership Module of the application.
Prepare for Statement Generation
Post Open Batches
To ensure all charges are properly included in the Member statements:
Post all Charge batches for the period
Enter and Post all Payments for the period
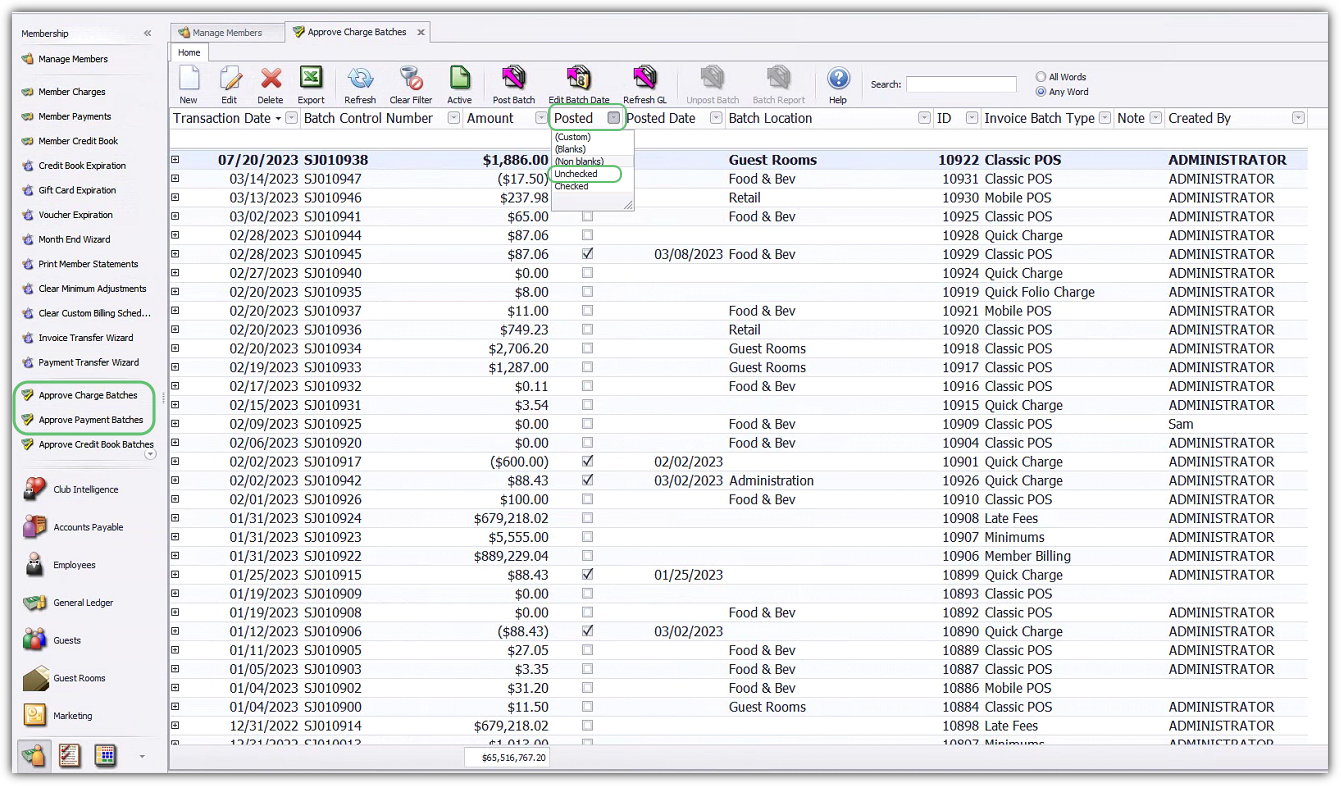
Navigate to the Approve Charge Batches grid.
Then navigate to the Approve Payments Batches grid within the Membership module.
In each grid, set the filter on the Posted column to Unchecked. Unposted batches will display. Post any batch with a Transaction date in the period you are closing.
Enter Statement Messages
Next, update the Statement Messages that will appear on the Member Statements. This is an excellent opportunity to promote an upcoming event, or pass along any additional information to Members.
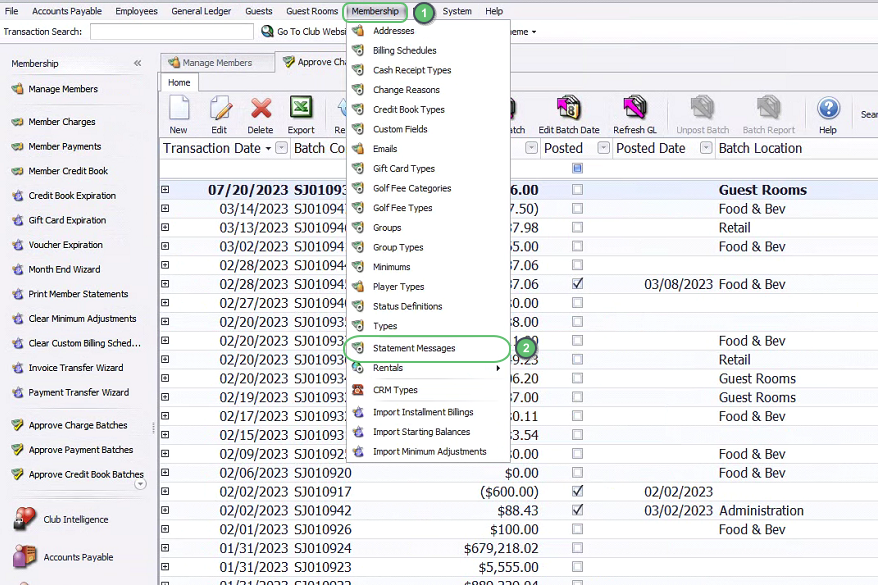
To access Statement Messages:
Click on Membership in the top menus.
Select Statement Messages from the drop-down menu.
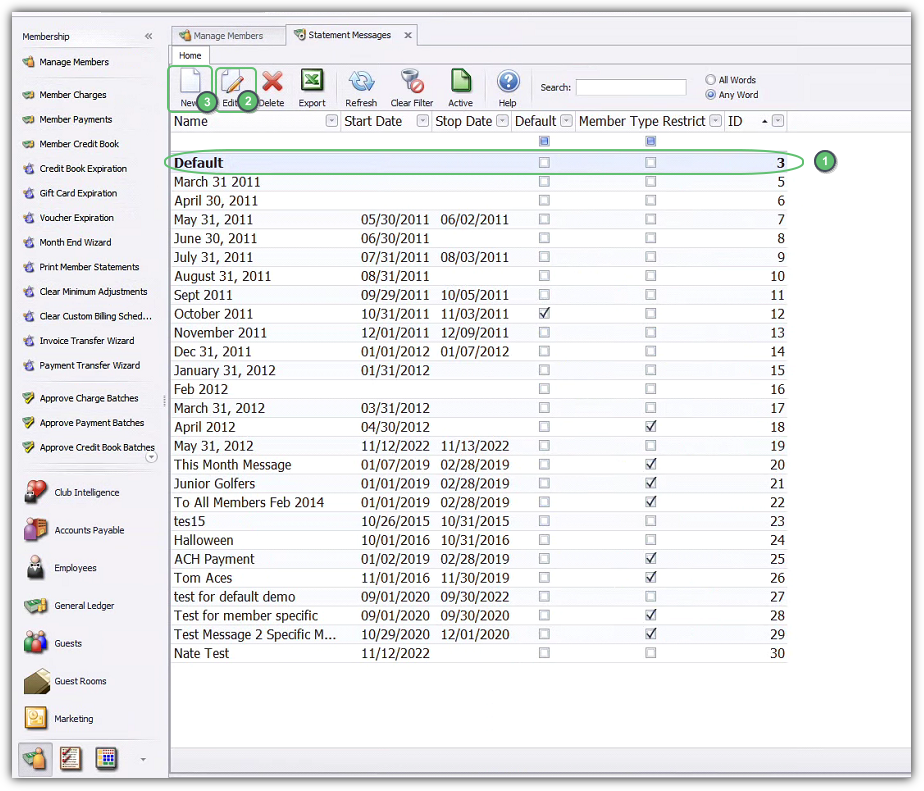
Editing Statement Message
From here, Edit a previous statement message by:
Clicking on the message, and then selecting Edit
Or create a new message by clicking the New button.
Creating New Statement Message
When creating a New message:
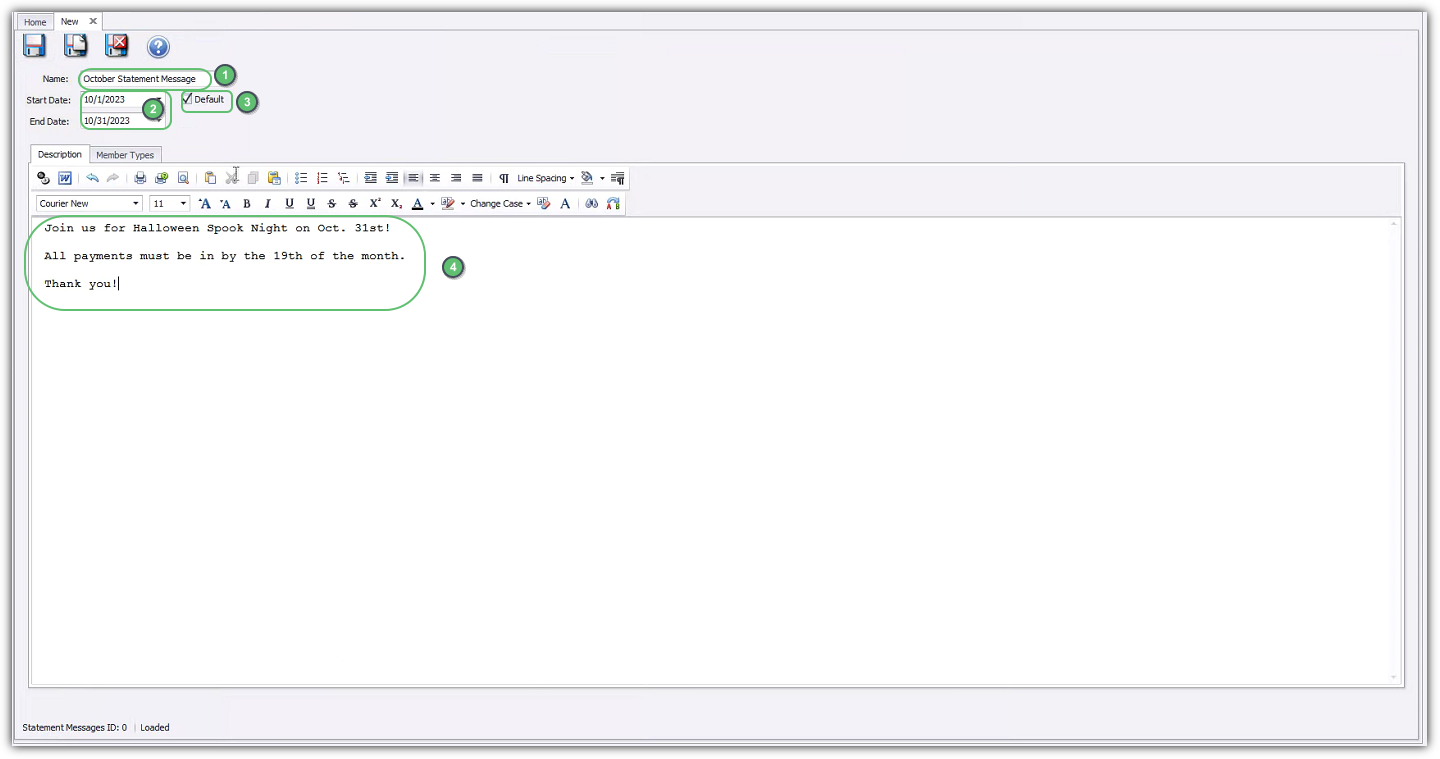
Give the message a Name.
Include a Start Date and End Date for the message as applicable.
Mark the message as the Default message if it is to be utilized as the current message, by checking the Default box.
Enter message. Keeping the formatting simple and the message relatively short will ensure the message fits into the statement message box.
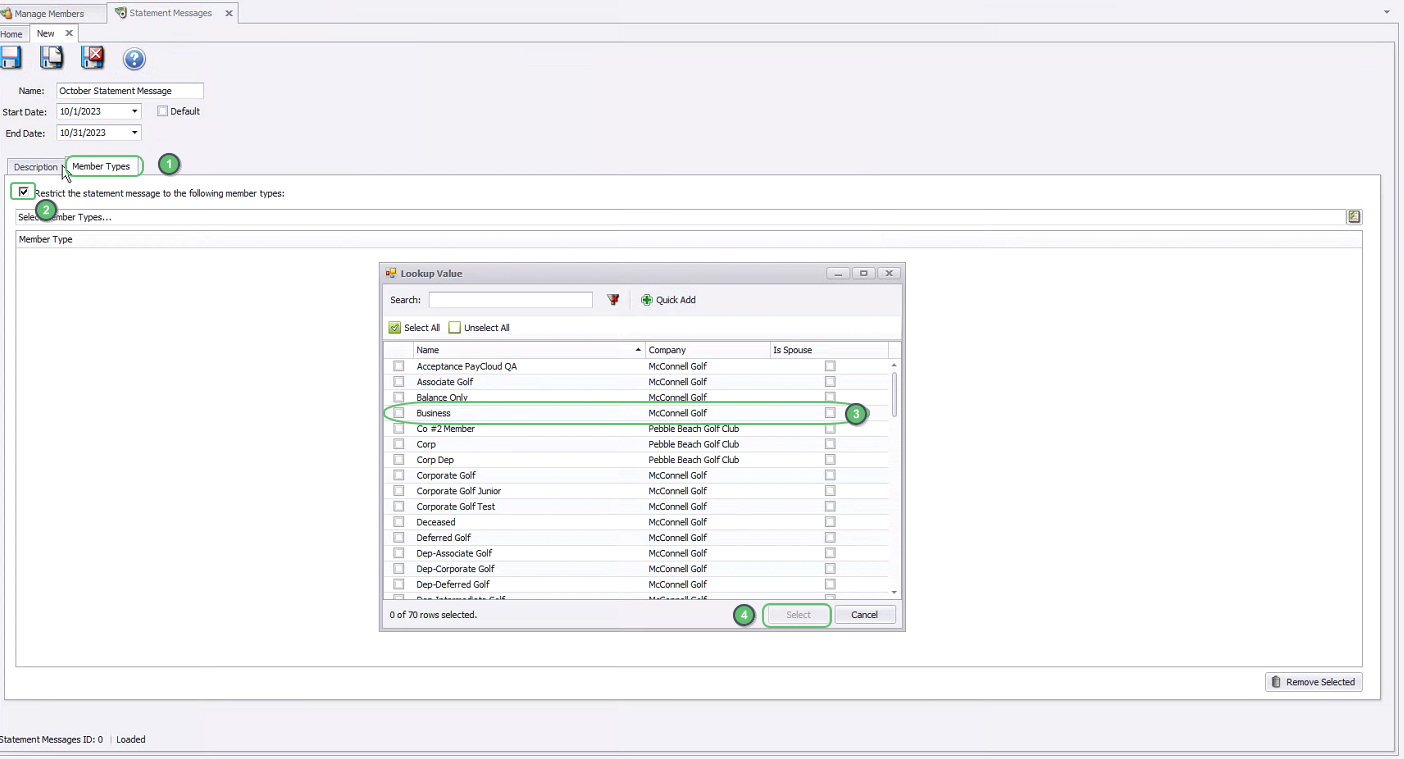
Also note there is a Member Types tab. This tab should be utilized to designate which Member Types should receive the message. To designate a Member Type, check the Restrict the statement message to the following member types: box. Then, click the Member Selection box, and designate the Member Types to include. Then, click Select. If the message applies to all Members, disregard this tab.
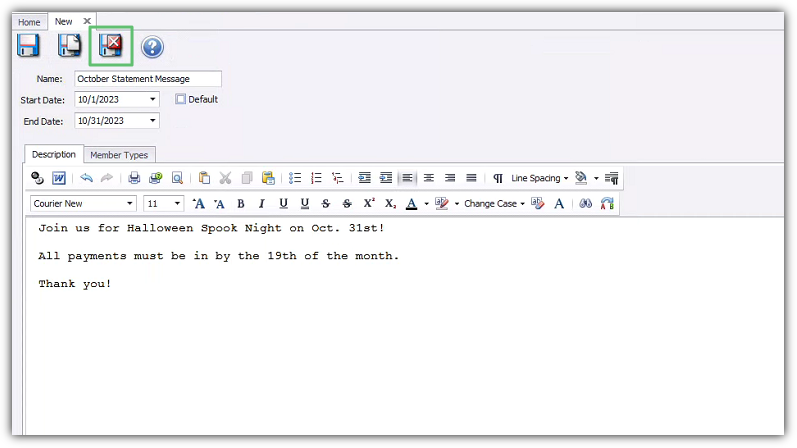
When finished, click Save and Close.
Past Due Messages
The Office System has the ability to place canned Past Due Messages on any Member’s Statement who is over 30, 60, or 90 days past due. Please follow instructions below to create/ update a Past Due Message.
Accessing the Tool
To create/update a Past Due Message:
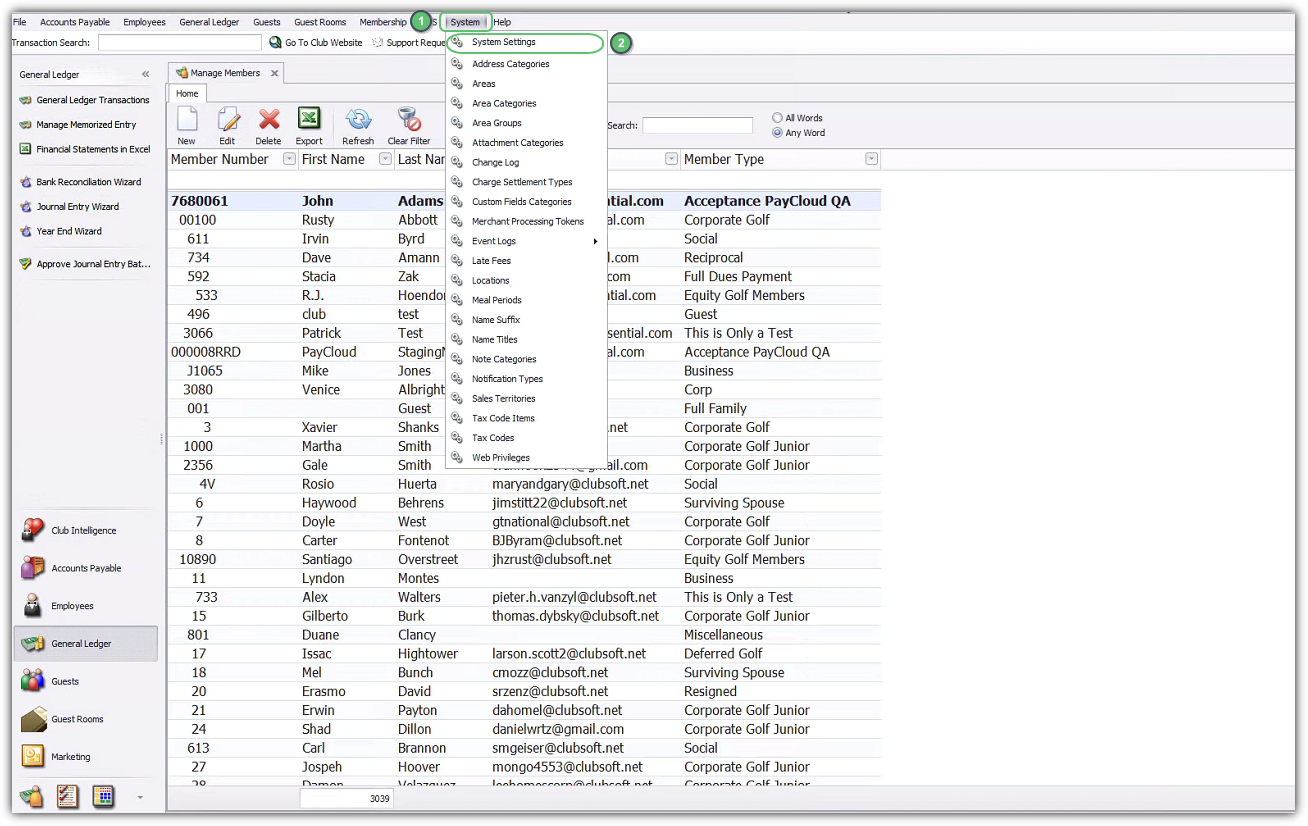
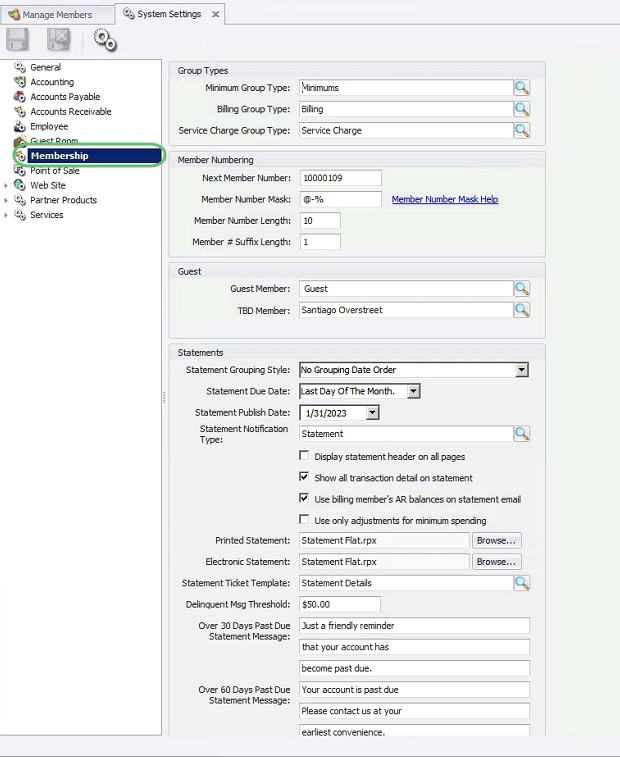
Select System across the top toolbar and choose System Settings.
Navigate to the Membership tab on the left pane of System Settings.
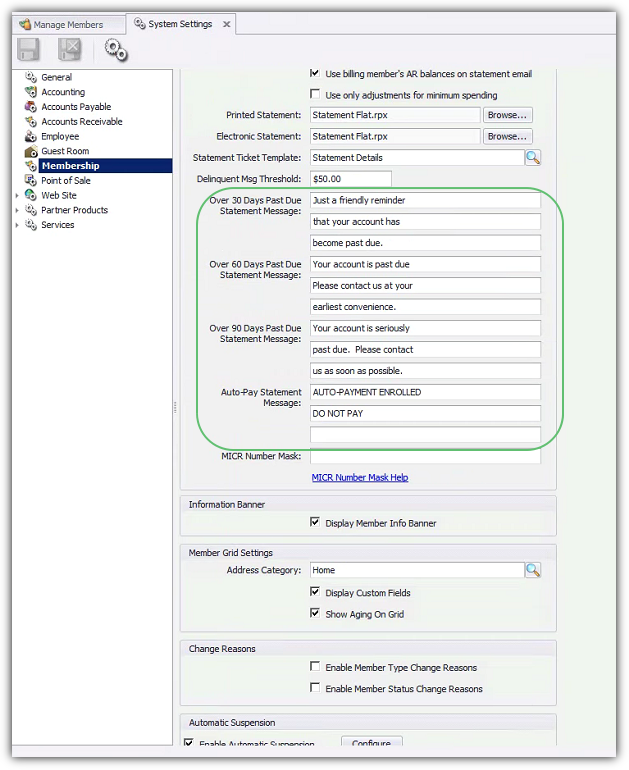
Use the Over 30, 60, or 90 day Past Due Statement Message section to enter your canned message.
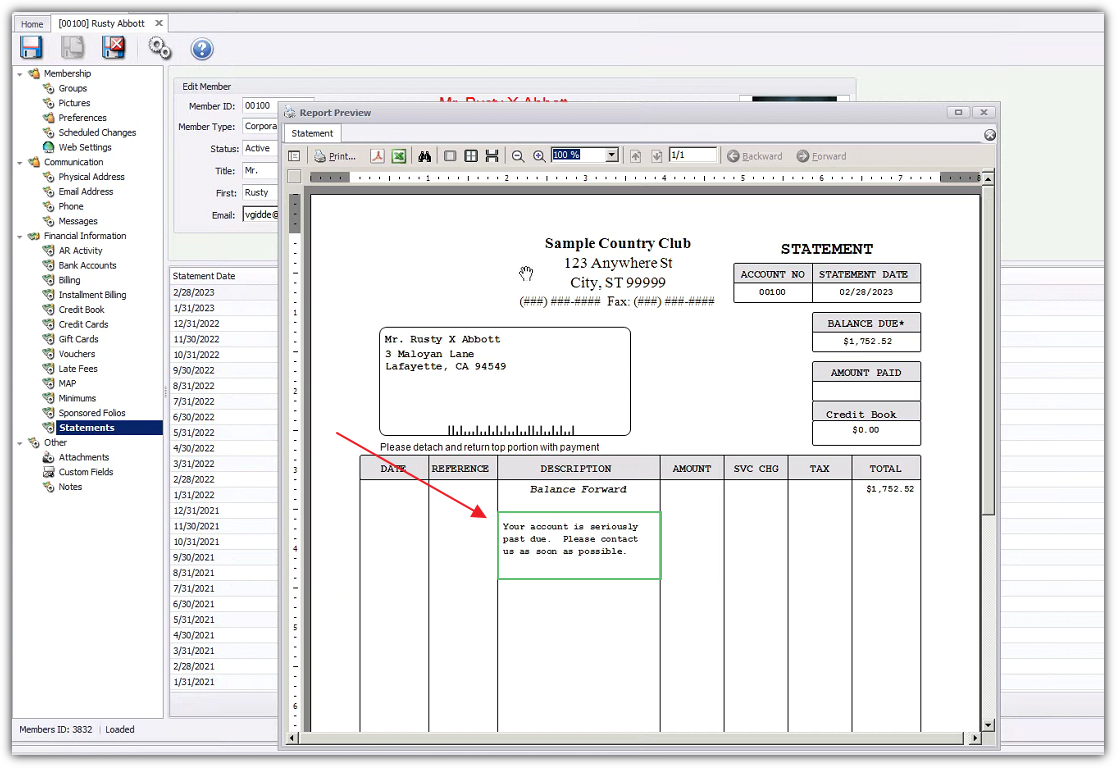
Now, the corresponding message will appear on a Member’s Statement if they are Past Due.
Month End Processing
Once preliminary steps are complete, launch the Membership, Month End Wizard.
To access the Month End Wizard to generate the statements:
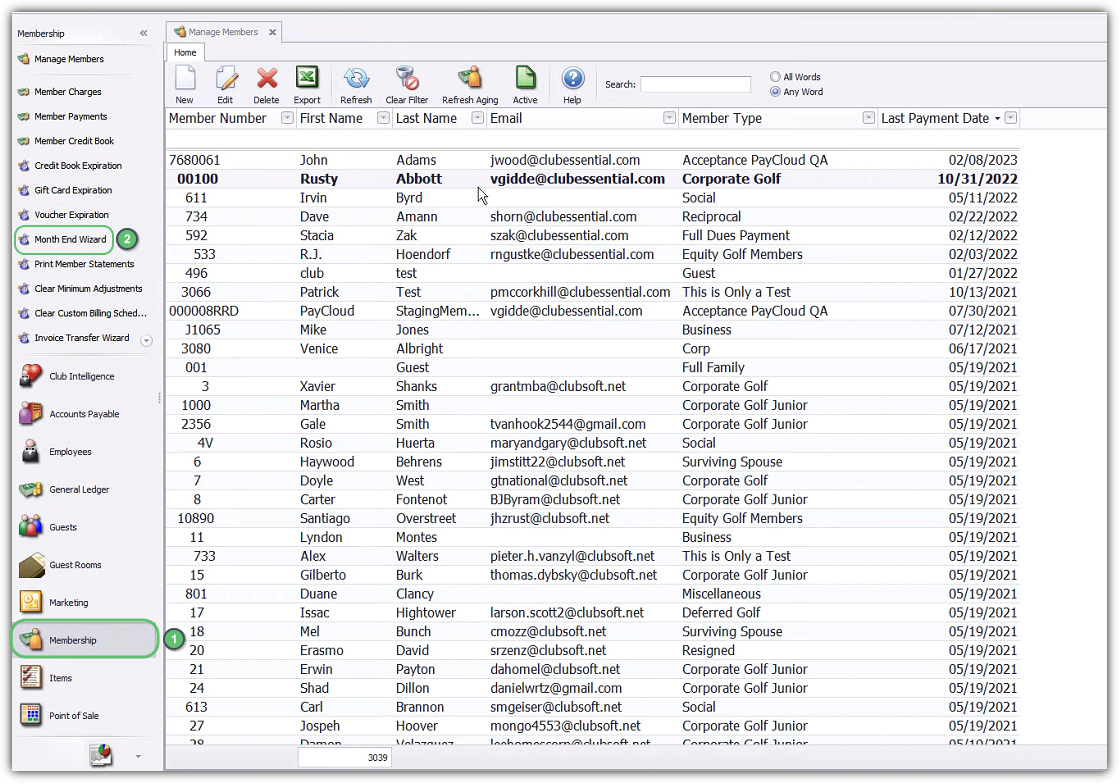
Click on Membership
Then, click on the Month End Wizard option.
Month End Wizard
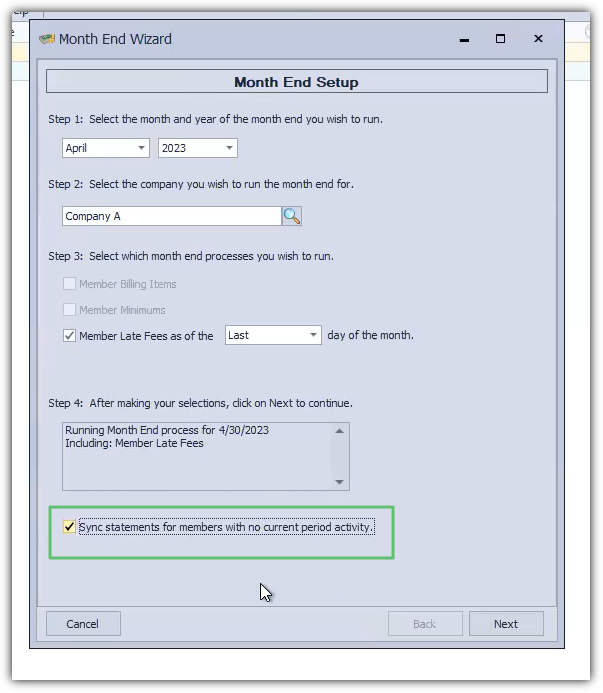
Once the Month End Wizard launches:
Designate the Month and Year of the month end process to run.
Select the Company (if more than one exists) to process.
Select the month end processes to run.
Check the box to designate if you would like the members with no activity to receive a statement.
Click Next to continue.
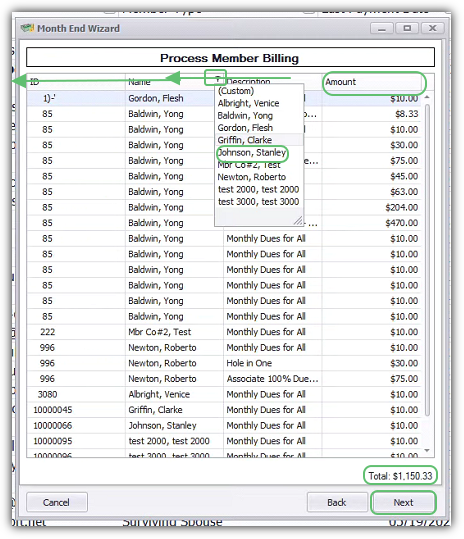
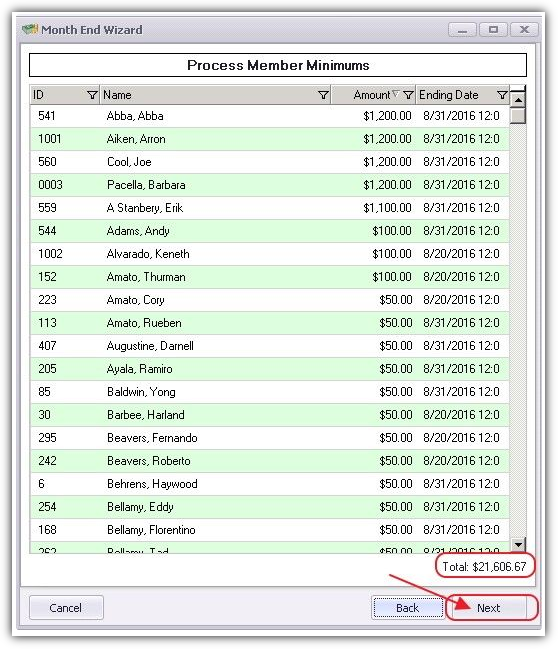
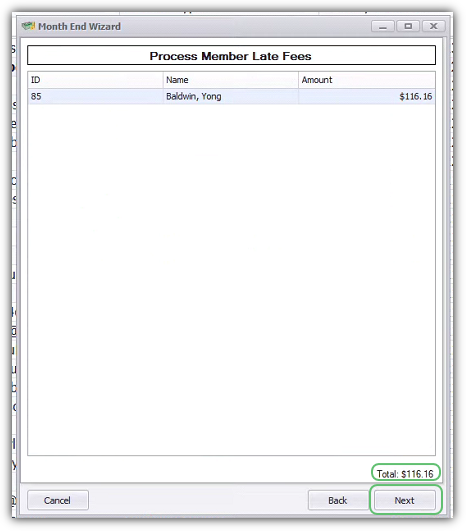
The next screens summarize the results of the selected month end processes. In each of the following screens, grid filters, navigation, and sorting are all available to assist with reviewing the data. To re-organize columns, click on column heading of column to be moved, and drop in new desired location. Once filter is set, the filter on the column will turn blue. To see all records, set filter back to (All). Click on column heading to sort data and display arrow in the direction of the sorting. In all screens, the total amount to be billed will be displayed in the bottom right-hand corner. Click Next to continue through all month end processes previously selected.
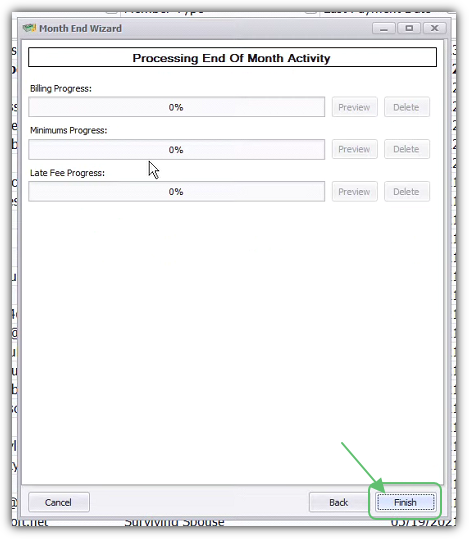
Following the individual summaries of the Month End processes selected for processing, the Process End of Month Activity screen will then appear. Click Finish to begin processing the billings displayed on the previous screens.
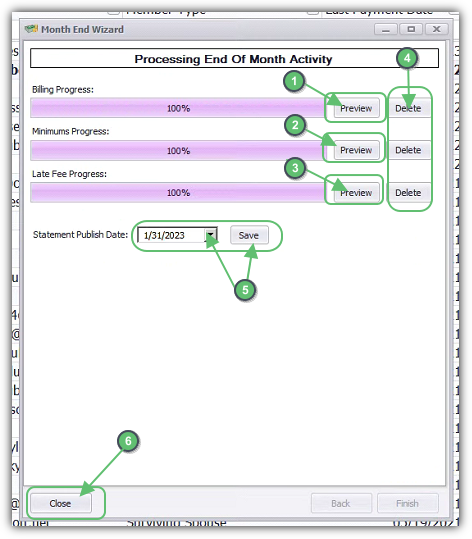
Once all billings have completed processing (100%), the batches are available for review and posting. On this screen:
Preview Billing.
Preview Minimums.
Preview Late Fees.
Delete any that do not look correct.
Populate the new Statement Publish Date field. click Save. This date should be set to the last date of the Month for the Current Statement period.
Warning - Only set the Statements Publish Date if you have completed all the batches. If you do not use specific batches at your club, set the date when all batches that your club will run have been complete and posted.
When finished, click Close.
Note that the End of Month Wizard can be run as many times as necessary, as long as the generated batches have been deleted. Additionally, the Wizard may be closed, and the generated batches may be reviewed/posted at a later date.
Batch Editing/Deletion/Un-posting/Posting
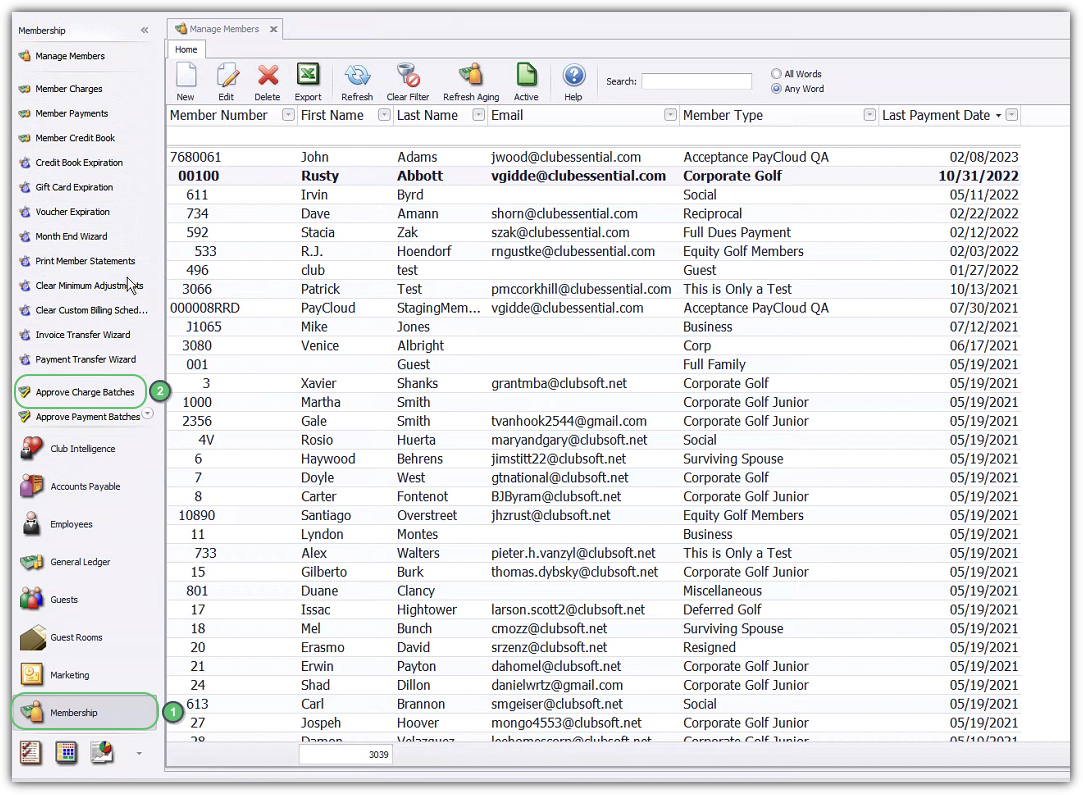
While previewing, posting, and deleting the batches are available options within the Wizard, once generated, the batches can also be accessed for editing/deletion/un-posting/posting in the Membership, Approve Charge Batches tool.
Remove a Member’s Charge from the Billing (Unposted Batch)
Once in Approve Charge Batches, find desired batch:
Click on the "+" icon next to the batch to expand it and show the different charges in the batch.
Right-click on the name of the Member’s charge you want to remove.
Select Delete from the shortcut menu to eliminate charge from batch.
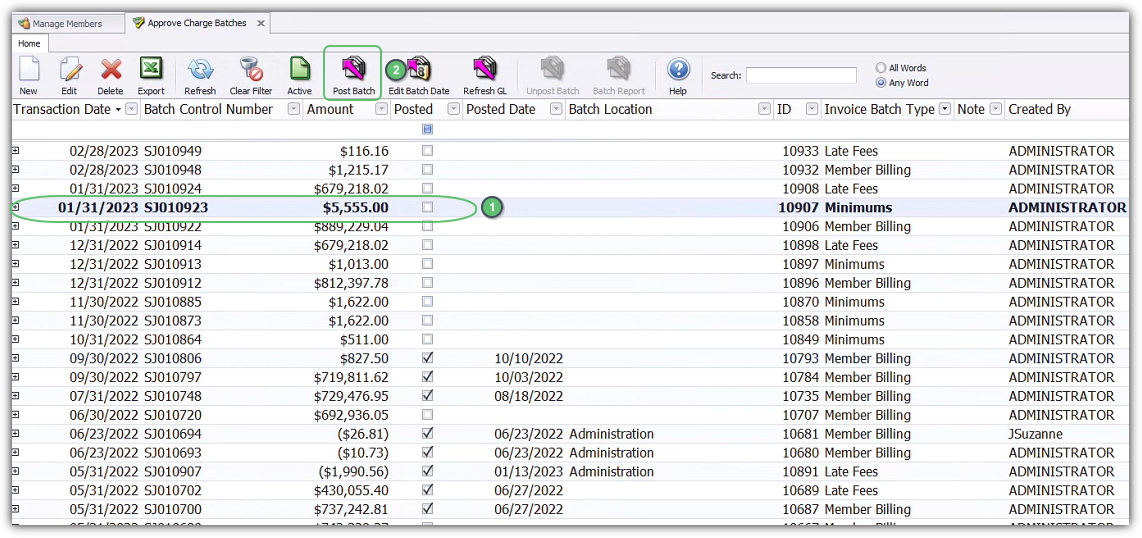
Delete a Batch (Unposted Batch)
Once in Approve Charge Batches:
Find the desired batch, and right-click on it.
Select Delete from the shortcut menu, and confirm deletion to eliminate unposted batch.
Un-post a Batch (Posted Batch)
Once in Approve Charge Batches:
Find the desired batch, and highlight it.
Select the Un-post Batch icon. Once unposted, the batch can then be deleted, or edited, and re-posted.
Once in Approve Charge Batches:
Find desired batch, and highlight it.
Then, select the Post Batch icon to post the unposted batch.
Statement Date Population
While populating the Statement date is an option within the Wizard, this date may also be entered by choosing:
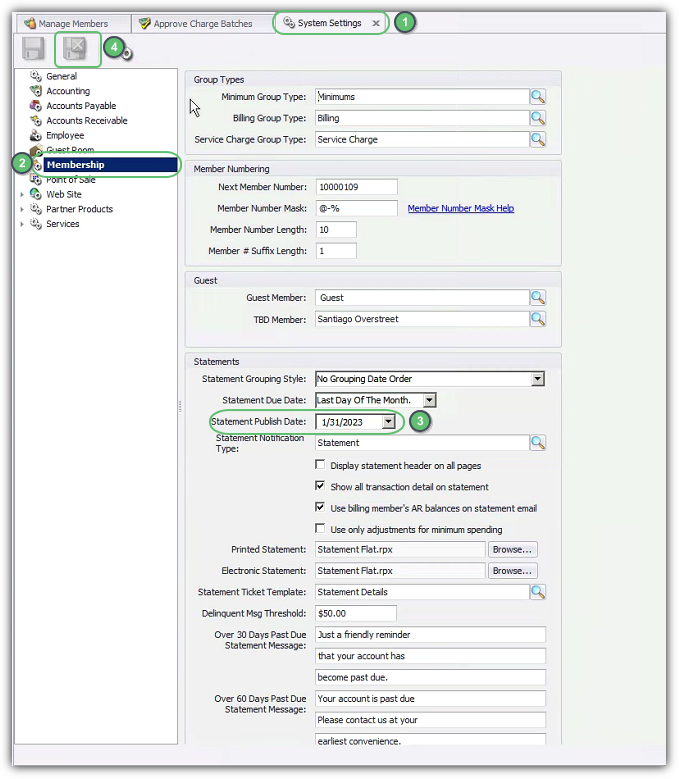
System, and System Settings from the top menu.
Navigate to the Membership tab,
Populate the Statement Publish Date.
Click Save and Close to continue. Remember this date should be set to the last date of the Month for the Current Statement period.
Best Practices
Post all period batches prior to generating statements.
FAQs
