Office - Marketing Module
Overview
Note: This Module is ideal to use for accounting related marketing communications (ie, delinquent members report, account balance, etc). For Office Clients who do not have a Clubessential Website, the Marketing Module allows clubs to communicate with their members via email or text messages. Emails can be sent to all members, specific members using notification types, filter options on the member grid or by using the report feature. Text messages can also be sent using the marketing wizard. The Marketing Wizard option can be used to complete all the steps necessary to create a marketing email. Use Case
|
Content
Accessing the Tool
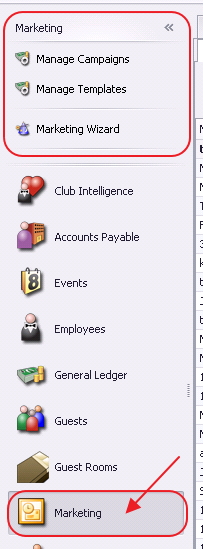
The Marketing Module can be accessed by selecting Marketing on the user menu. The module opens on the Manage Campaigns Grid.
Manage Campaigns
This portion of the Marketing Module allows you to set up campaigns to track email statistics such as how many emails were sent and read. To ensure statistics and data associated with the campaign are accurate, a Campaign should be utilized only once. Administrators can create a new campaign in this section or ‘on the fly’ in the Marketing wizard.
Note: The Manage Campaigns Grid will display previous email blast statistics.
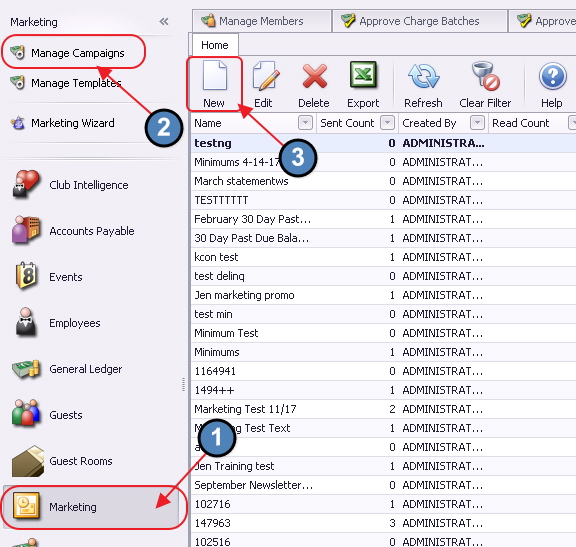
To create a new Campaign, in the Marketing Module, choose Manage Campaigns, and click the New icon.
Then,
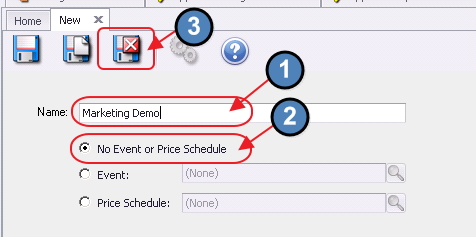
1) Name the campaign.
2) Leave the default setting for the option: No event or price schedule.
3) Click Save and Close.
Note: To link a campaign to an Event or a Price Schedule, put a check on the option you want, and then click the Search icon to search for the respective Event or schedule.
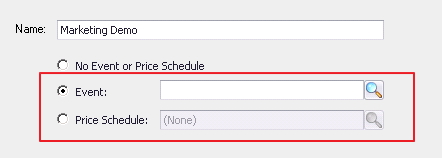
Event: Use when linking to an event from the Office Calendar into the campaign.
Price Schedule: Use when linking the campaign to a price schedule.
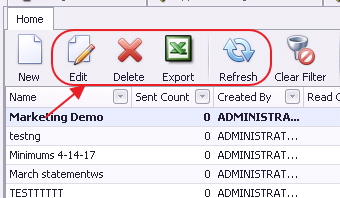
Once the Campaign has been created, you will then be able to Edit, Delete, Export to Excel or Refresh the campaign in the grid.
Manage Templates
Create templates to format the body of the email. Templates can be used repeatedly; changing the information as needed. For more information on the editor toolbar within the Template, see the appropriate Editor Guide (CS Web - Classic Editor (Old Editor), or Paycloud - Hosted (New Editor)). In the marketing template, there are additional plug-in options on the right of the screen. These options allow you to customize information in the template such as member information, financial information, and attach documents. Templates can be created ahead of time or ‘on the fly’ in the Marketing Wizard.
In the Marketing Module, choose Manage Campaigns, and click the New icon.
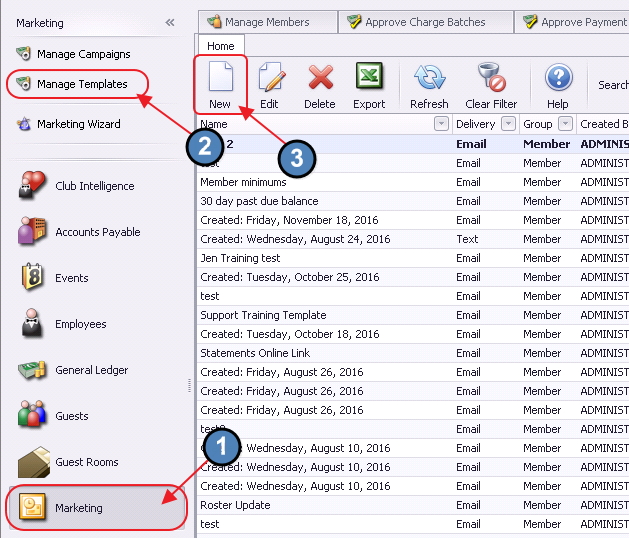
Then,
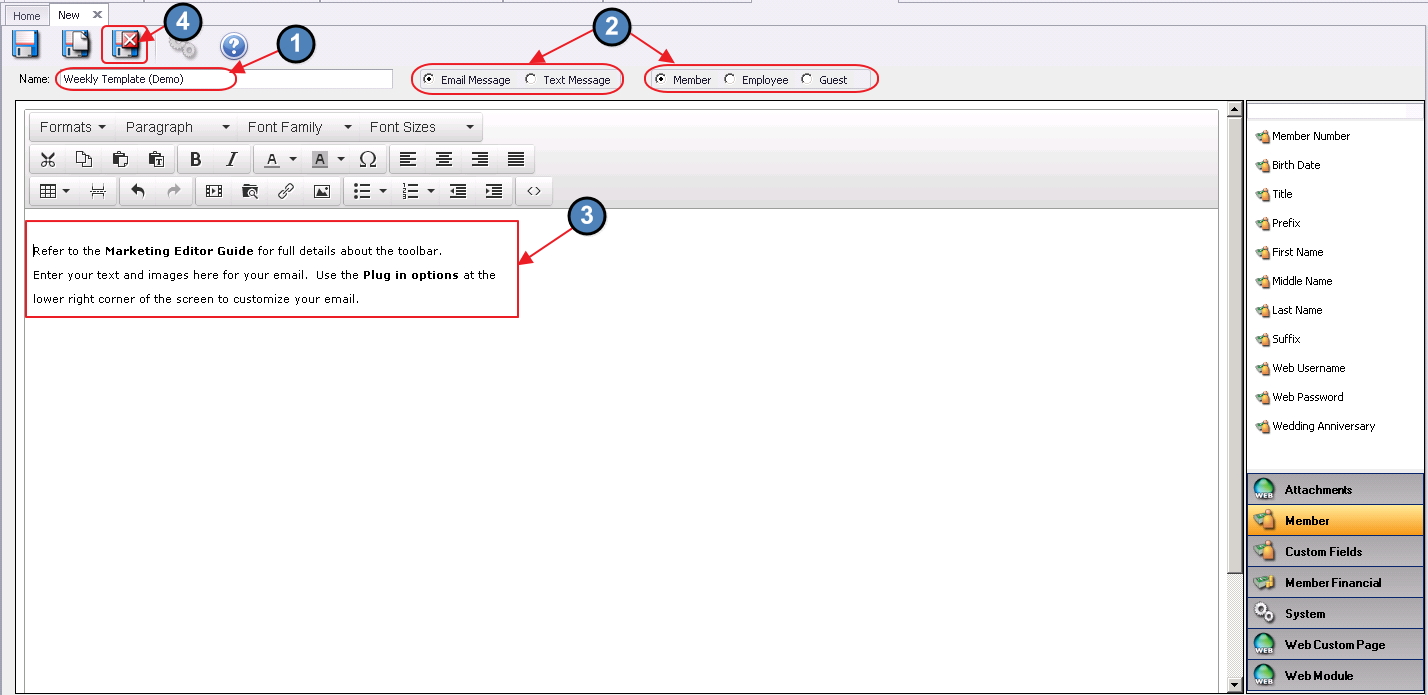
1) Name the Template.
2) Check the default setting for Email Message and Member.
3) Enter text and images into the body of the editor.
4) Click Save and Close.
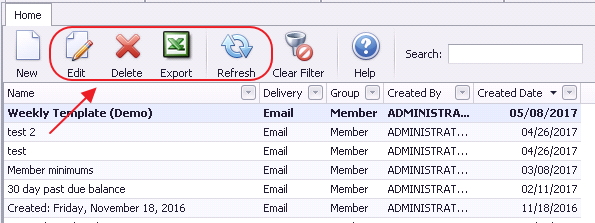
Once the Template has been created, you will then be able to Edit, Delete, Export to Excel or Refresh the template in the grid.
Marketing Wizard
The Marketing Wizard pulls all the steps into one simple process to create and send an email. You may go directly to this step and bypass creating a campaign and template separately. New campaigns and templates may be created in the Wizard or you may select an existing one that has already been created.
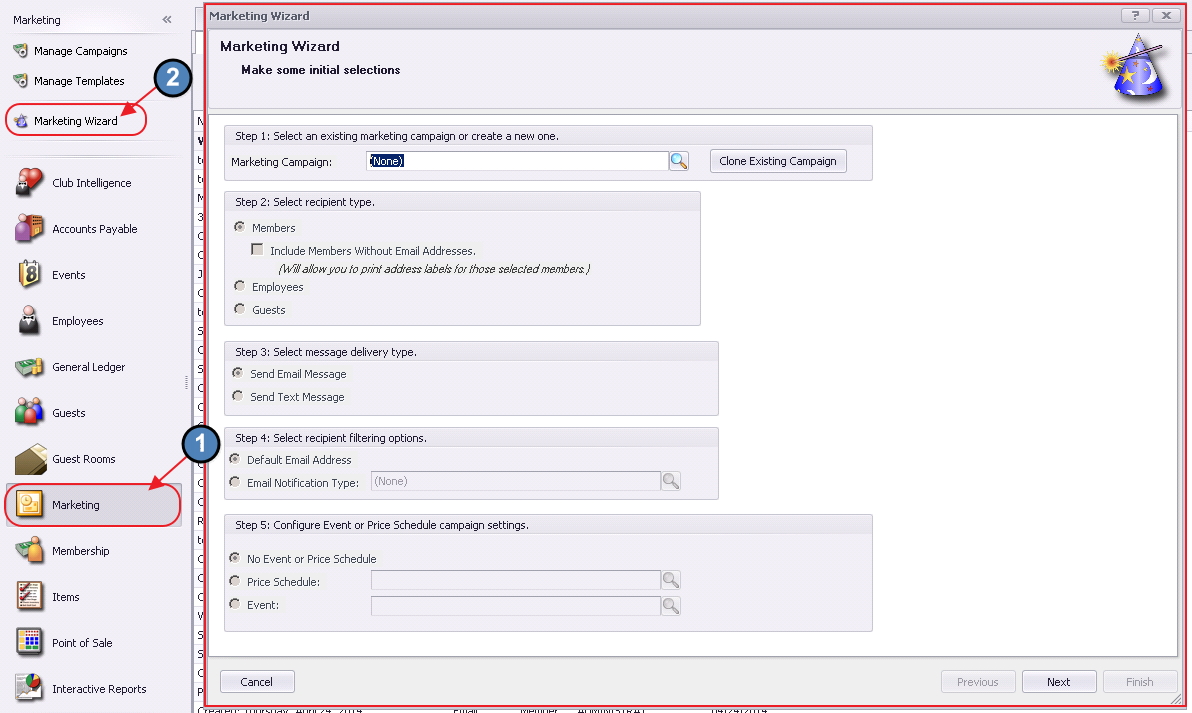
Marketing Wizard - Screen 1 (Initial Selections)
Step 1 - Choose an existing Campaign, or create a new one.
- To choose an existing campaign, click on the search icon, and then select an existing campaign from the list. Remember, however, that a campaign should only be used once (to preserve statistical and data integrity). If you would like to reuse functionality of an existing campaign, use the cloning feature discussed below.
- To create a new campaign, click on the search icon, and then click on the New icon (sheet of paper).
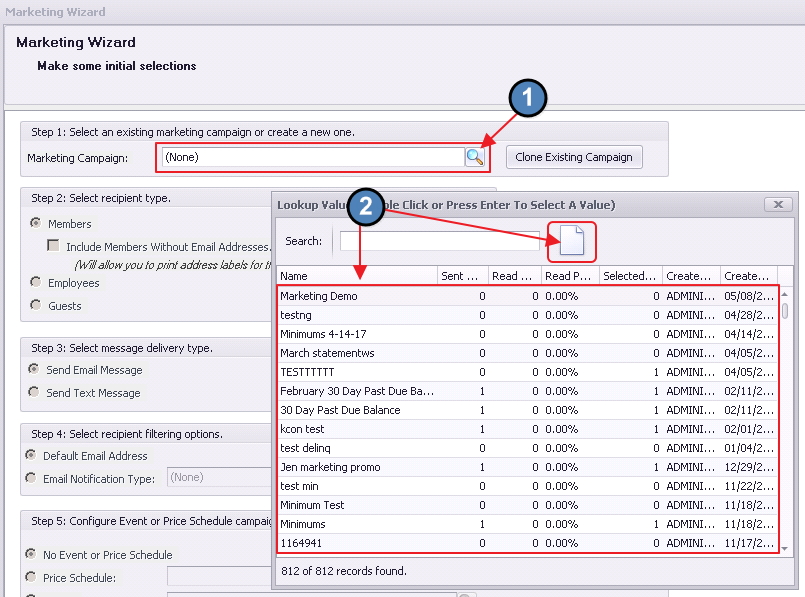
Note: As an alternative to the above, you can clone an entire campaign, by choosing the option below. Cloning keeps all the criteria the same for your email, but allows you to individually track the stats as if it was a new campaign, and allow you to provide the campaign a new name. This is the preferred method when you would like to reuse the functionality within an existing campaign.
Step 2 - Select recipient type: Members, Employees, or Guests.
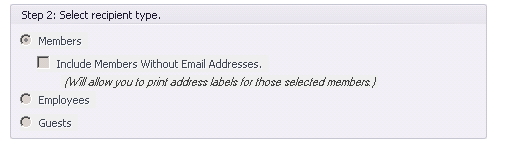
- Members - This will default to the member grid on the next screen. There is an option to Include Members without email addresses. Placing a checkmark in this box will prompt you at the end of the wizard to select a printer to print labels for members who do not have an email on file.
- Employees - This will default to the employee grid on the next screen.
- Guests - This will default to the guest database.
Step 3 - Select message delivery type: Email or Text.

- Email - Sends your message via email from the system.
- Text - Sends your email message as a text. In order for this to work, members must have valid mobile phone number and carrier information listed in their member profile.
Step 4 - Select recipient filtering options: Default or Other.

- Default - The system will send to the members default email address on file. Only 1 email can be set as the default per member.
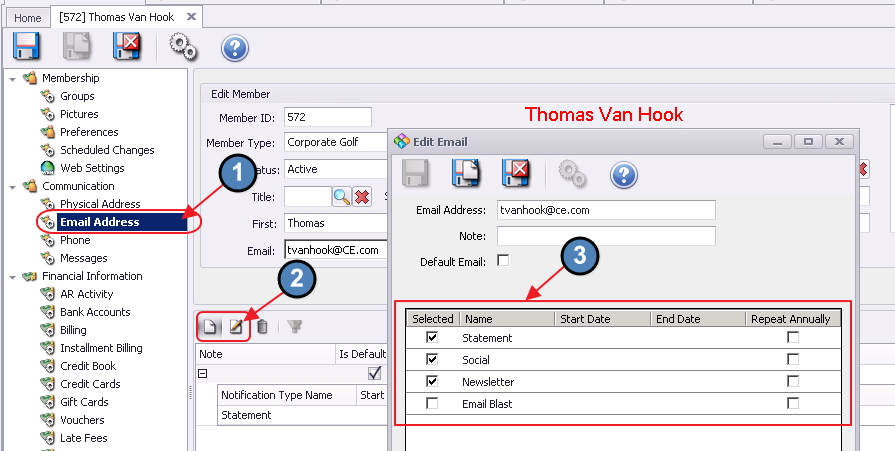
- Notification Type - Click the Search icon to view/select the notification type. Using the Notification Type option will only send to members who have flagged their email on file for that specific notification. Members that have multiple email addresses on file and have them flagged for the same notification type will receive duplicate emails. When you view the member grid on the next screen, only the members who are flagged for the selected notification type will have a check mark next to their name.
Note: Notification Types can be set up under System, Notification Types.
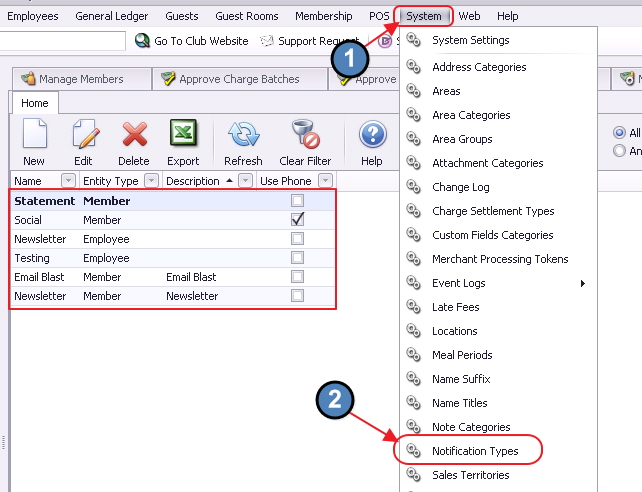
An Admin can flag a member for a notification type such as Newsletter, Social, etc on the email tab in the member’s record.
Step 5 - Configure Event or Price Schedule campaign settings: None, Price Schedule, or Event.
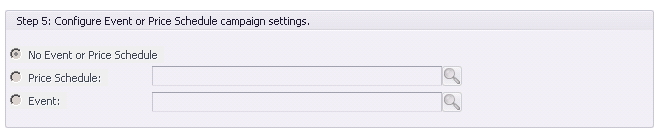
- No Event or Price Schedule - This is the option typically selected; it is the default.
- Price Schedule - Click the Search Icon to select a price schedule to link to the email (Ex: coupon for a discount).
- Event - Click the Search icon to select an event from your calendar in CMA to pull that event information into the body of the email. *Only works with the CMA calendar.
Click Next to proceed.

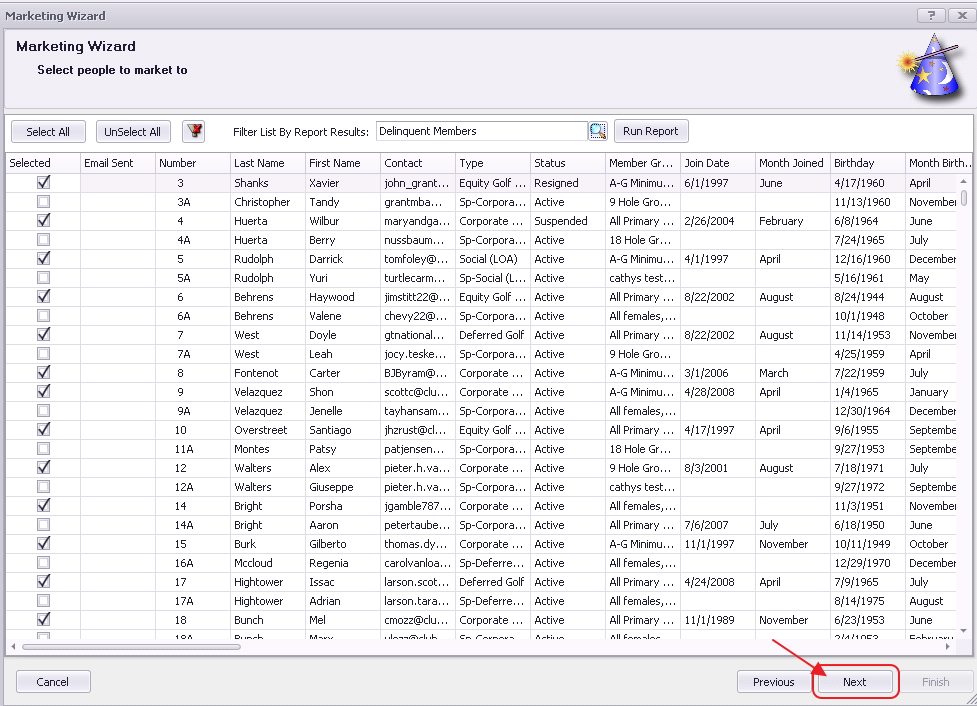
Marketing Wizard - Screen 2 (Recipient Selection)
This screen allows you to target specific recipients. If you selected the default email address option in Step 4, all members with default emails will be checked. If you selected Email Notification type, only members who are flagged for that notification will have a check by their name.
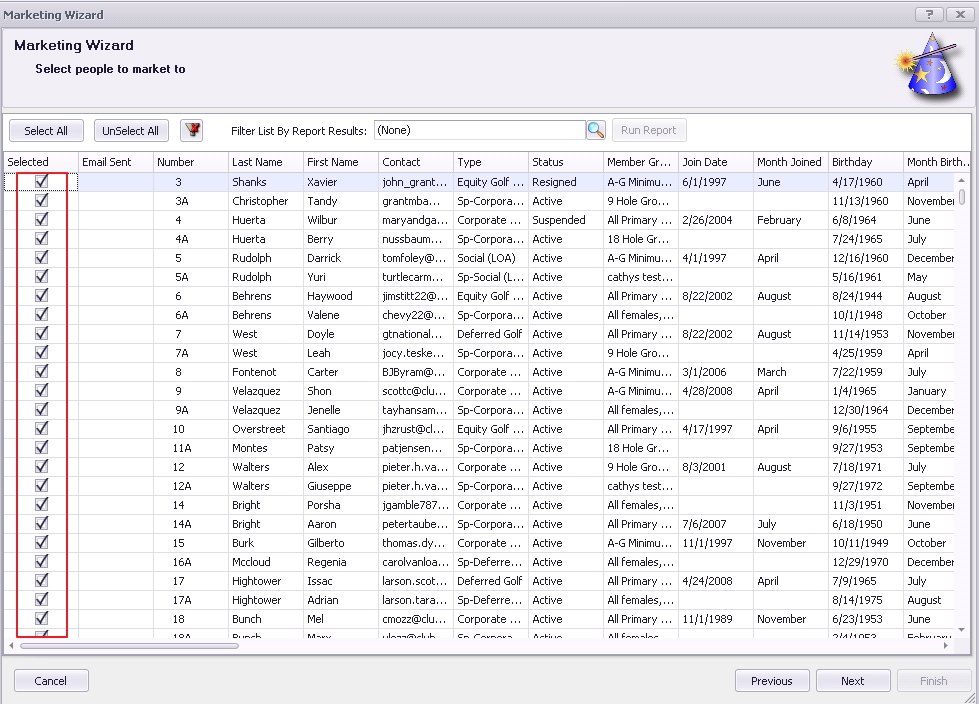
There are additional Filter options on this screen as well.
1) Select All - This will place a checkmark next to each members name in the grid.
2) Unselect All - This will clear the grid of all check marks, giving you a fresh start.
3) Clear Filter icon - This will clear any filters that have been applied.
4) Column Filters - Each column has a filter icon that will provide filter options. Hover over column to view.
Example: Click the filter icon on the Status column and highlight the status you want to include in the email blast. See Grids guide for more information on using grids.
5) Sorting - Click on any column heading to sort by that column.
6) Filter List By Report Results - Uses reports to help target specific members based on spending, birthdays, and many other criterion.
- Click the Search icon to view a list of available reports, and then select the desired report.
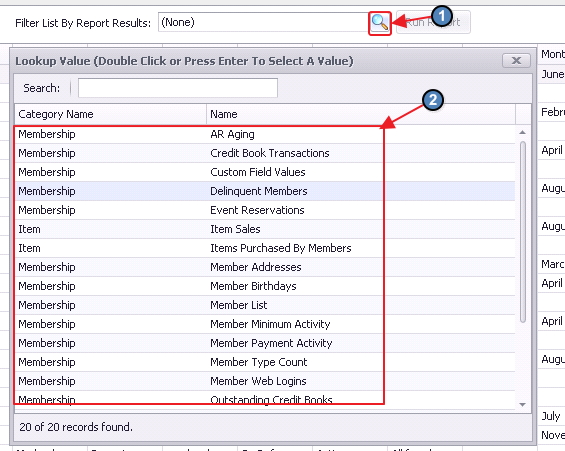
- Once the report loads, set the appropriate criteria, and click View Report. Ensure results returned are desired list for populating the recipients of the Marketing effort. Once list is proper, click Market to These Results.

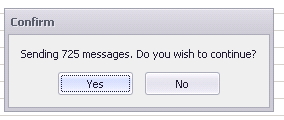
The following popup will appear:

- Click Yes to replace current list of Members checked, with Members from the report results.
Click No to append the Members appearing on the report to the existing list of Members.
Once Members have been selected, click Next to proceed.
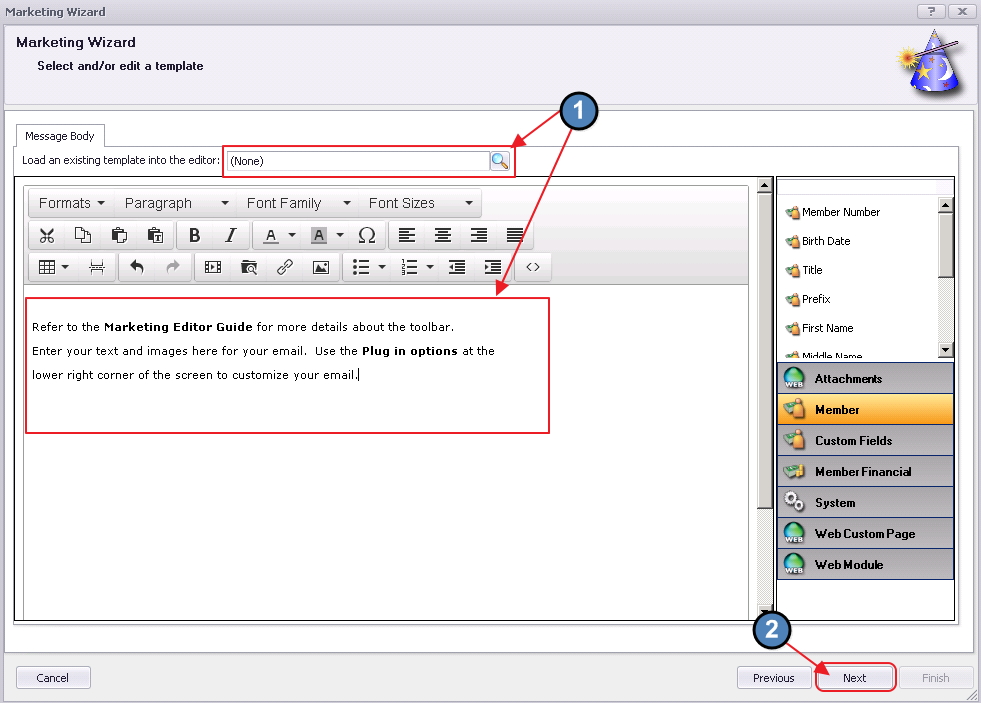
Marketing Wizard - Screen 3 (Template Selection)
Select an existing template by clicking the Search icon OR create/edit the blank template by adding text into the editor area. Refer to the Marketing Editor Guide for details about the toolbar and the plug in options in the editor.
When finished, click Next.
Marketing Wizard - Screen 4 (Email Configuration Screen)
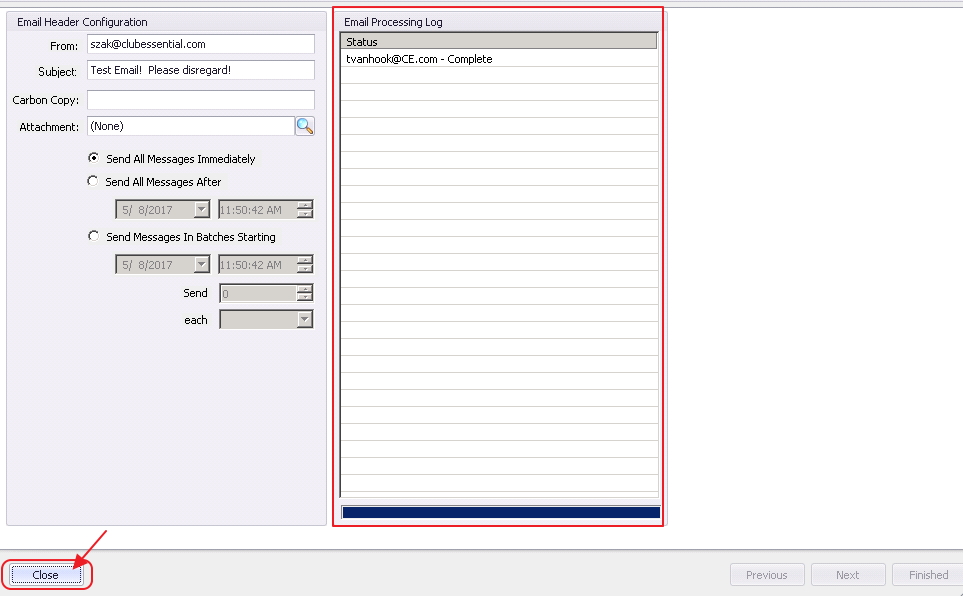
Populate the From field or allow to auto-populate based on the email in System settings. Enter a Subject for the email, specify email for carbon copies (optional), add attachments as necessary (optional), and specify Sending preferences. Click Finish when complete.
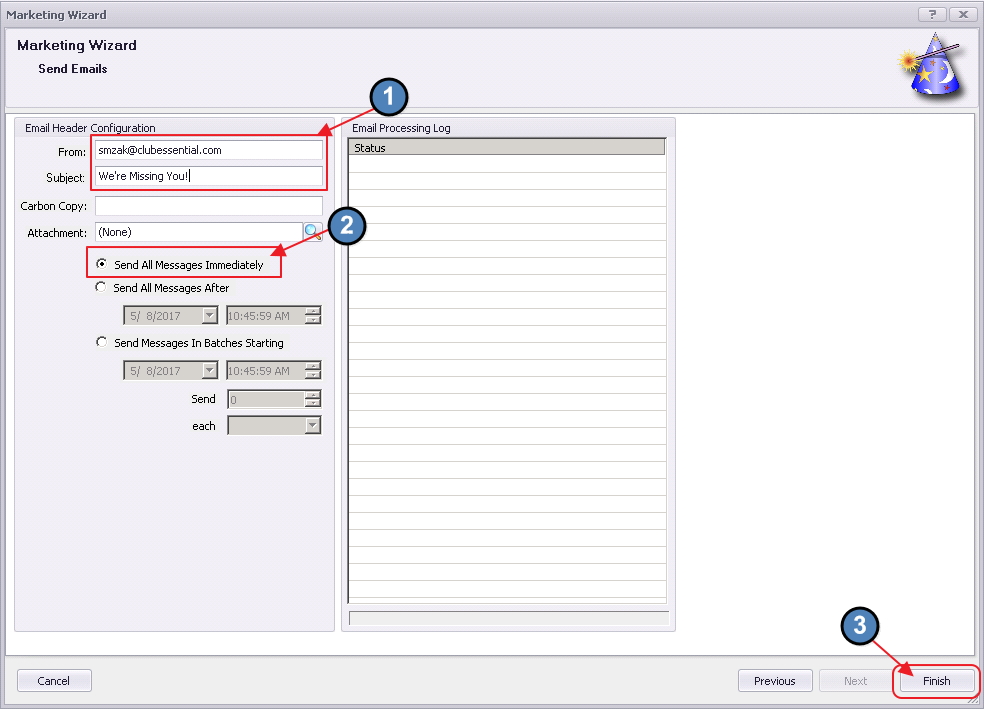
Note: Additional Options on this screen are as follows:
- The Carbon Copy field is optional to add a cc to an email.
- The Attachment field can be used to attach a document; however it is recommended that you attach documents in the body of the email using the hyperlink tool. Attachments added using this Attachment option will appear at the very bottom of the email.
- Send All Messages After option allows you to set a future date/time to send the email. If you need to cancel an email scheduled for a future date/time, you must contact Office support to do this for you.
- Send Messages in Batches option allows you to break up when the email goes out and how many emails to send out in a given period of time.
(Clubessential now offers a third party integration called Send Grid. This is an email hosting software with a whitelisted IP address. This will help clients send email and prevent SPAM, and would replace the client email host, resolving issues of email limitations.)
Once Finish has been clicked, a confirmation message will appear confirming the number of emails to be sent.
Click Yes to continue, or No to abort. Messages will be sent. Email Processing Log will update as messages are sent. Click Close to exit.
Best Practices
Ensure Member profiles are up to date with information that will allow Marketing Blasts to be effective.
Ensure your Blast Emails are targeted to the specific Members who the Message is relevant to increase open/read rates.
FAQs
Q. How can I tell how many emails were read in my blast send?
A. Review Statistics found in the Manage Campaigns grid. Selected Count, Sent, Read, and Read Percentage information is available here.