Overview
The Manage Timekeeping Module allows users, with the proper permissions, to edit an Employee’s existing Timesheet, create a new Timesheet, and delete a Timesheet. Timekeeping can be managed in both the POS and the Back Office System. In this guide, we will review each option. Use Case An F&B Manager needs to edit the clock in time of a Server who forgot to clock in. |
Content
Manage Timekeeping in the POS
In this section, we will review the proper procedures to follow when Managing Timekeeping in the POS.
Please Note: Only users with the proper permissions will have these options available at the POS.
Accessing the Tool
To access the Timekeeping tool in the POS:
1) Log in to the POS as normal and select Timekeeping.
.png?version=1&modificationDate=1504607984537&cacheVersion=1&api=v2&width=350&height=260)
2) The Manage Timekeeping Module will launch.
Editing an Existing Timesheet
To edit an existing Timesheet:
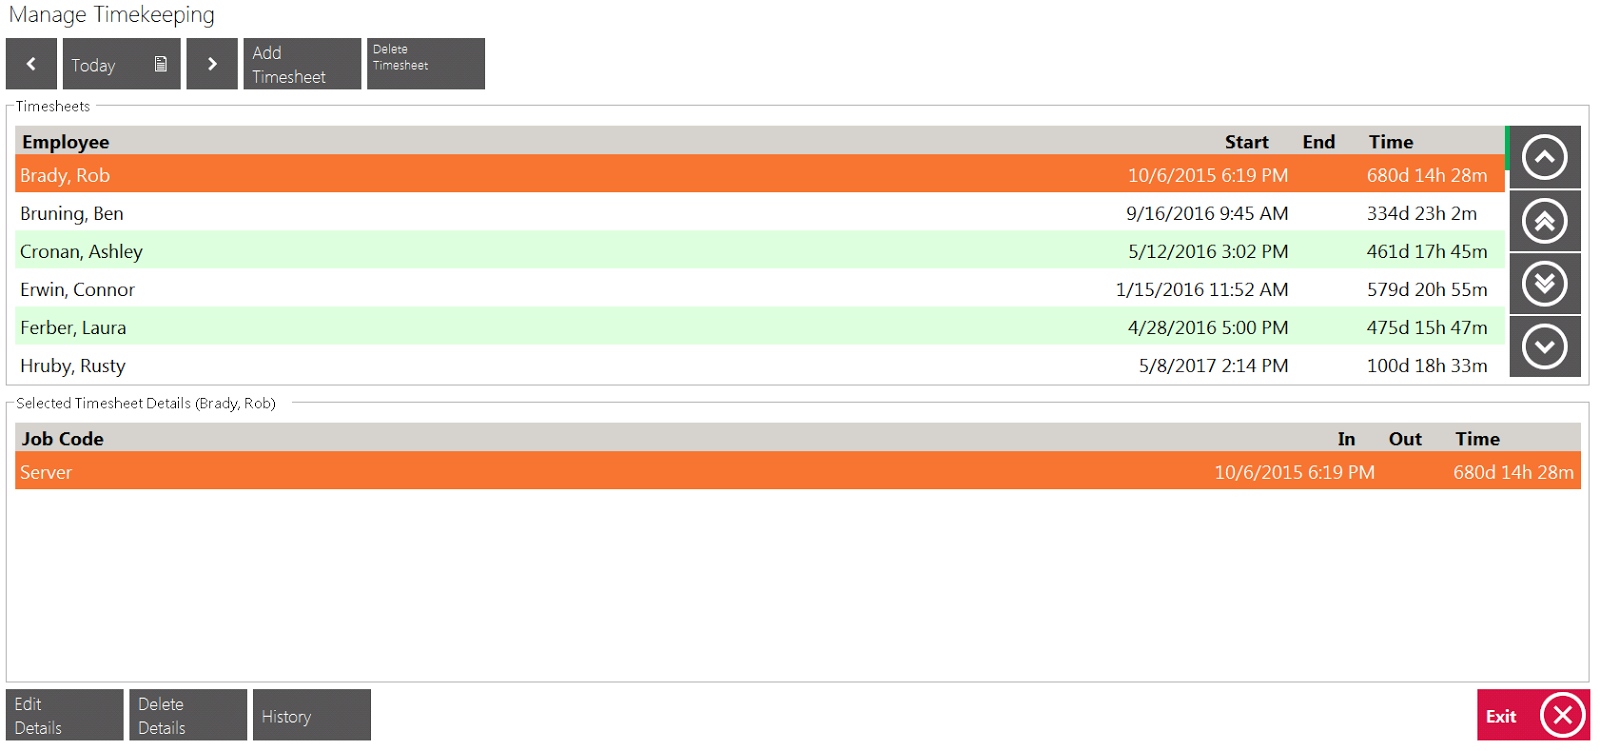
1) Use the Date field to select the applicable Date in which the Timesheet occurred.

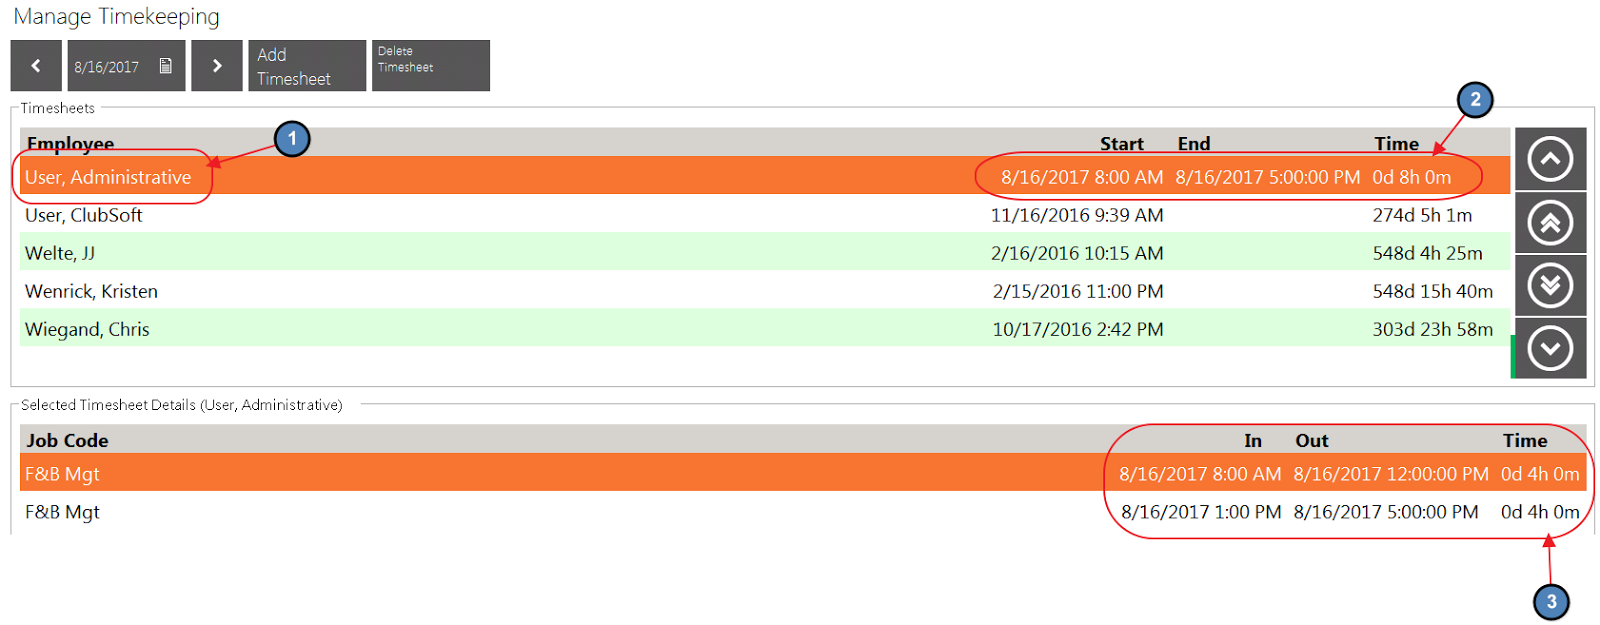
2) Select the applicable Employee from the Grid.
Please Note: The top section of the Grid displays Shift totals (In Hours Worked) for the Employee, while the bottom section displays the Employee’s Timesheets that make up the total of the Shift (For example, the Employee could have two Timesheets for one Shift if the Employee clocked out for Lunch).
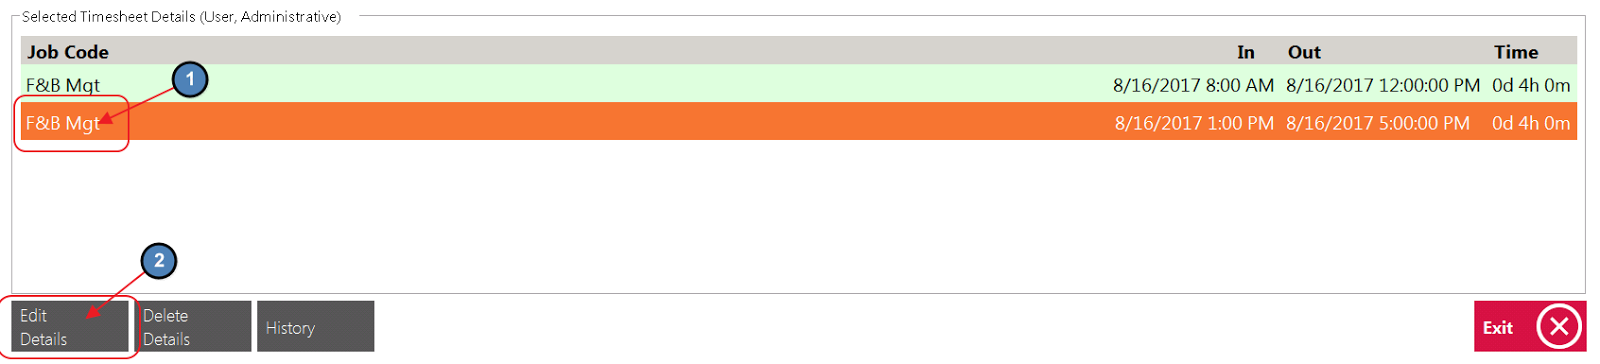
3) Be sure to select the correct Timesheet from the bottom grid labeled Job Code (If there is more than one), and select Edit Details.
4) Please review available options below:
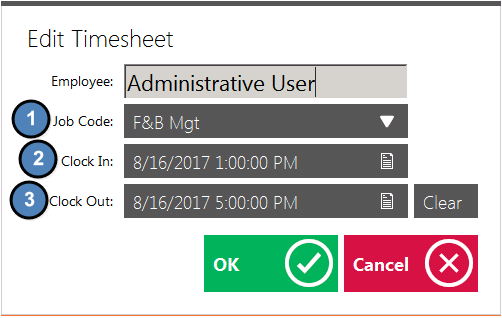
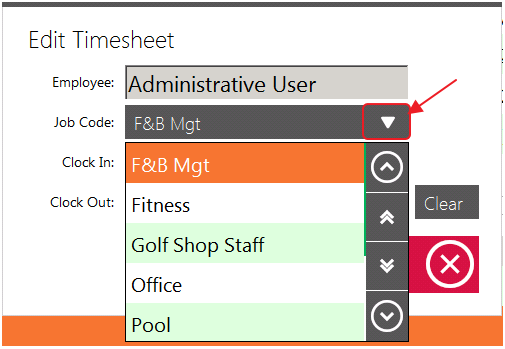
Job Code
The Job Code assigned to a particular Timesheet can edited by selecting the drop-down arrow. The Lookup Value will display all Job Codes assigned to the Employee.
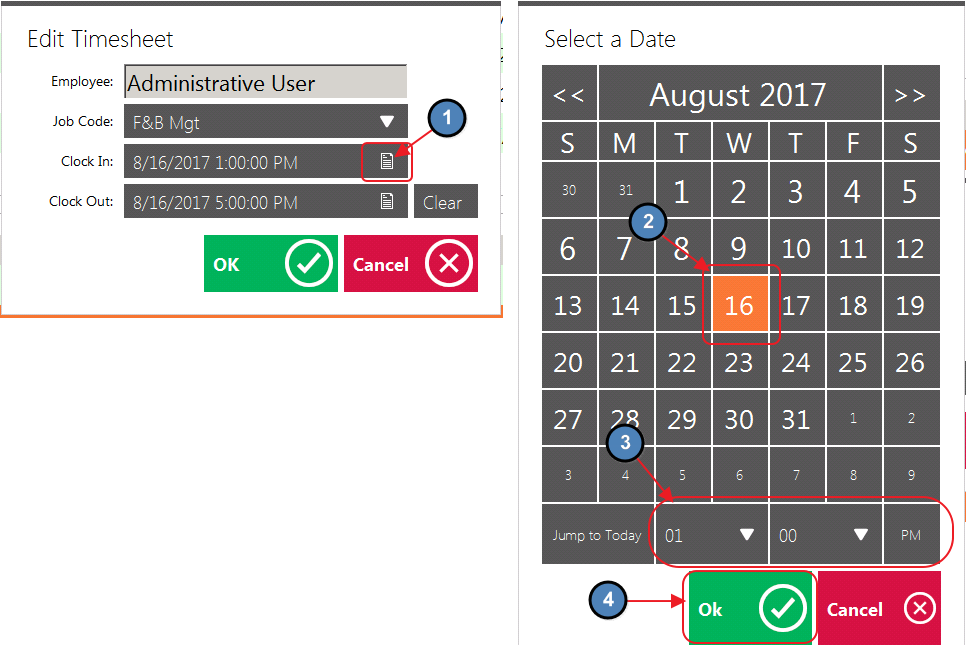
Clock In
The Clock In Date/Time of a particular Timesheet can be edited here. Select the Lookup Value for a more user friendly interface.
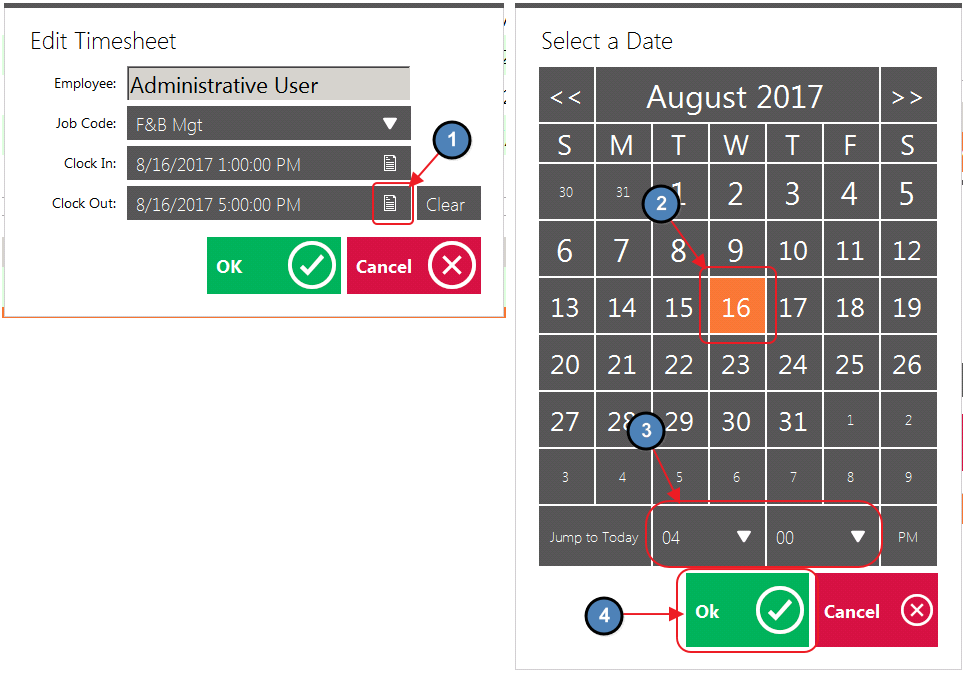
Clock Out
The Clock Out Date/ Time of a particular Timesheet can be edited here. Select the Lookup Value for a more user friendly interface.
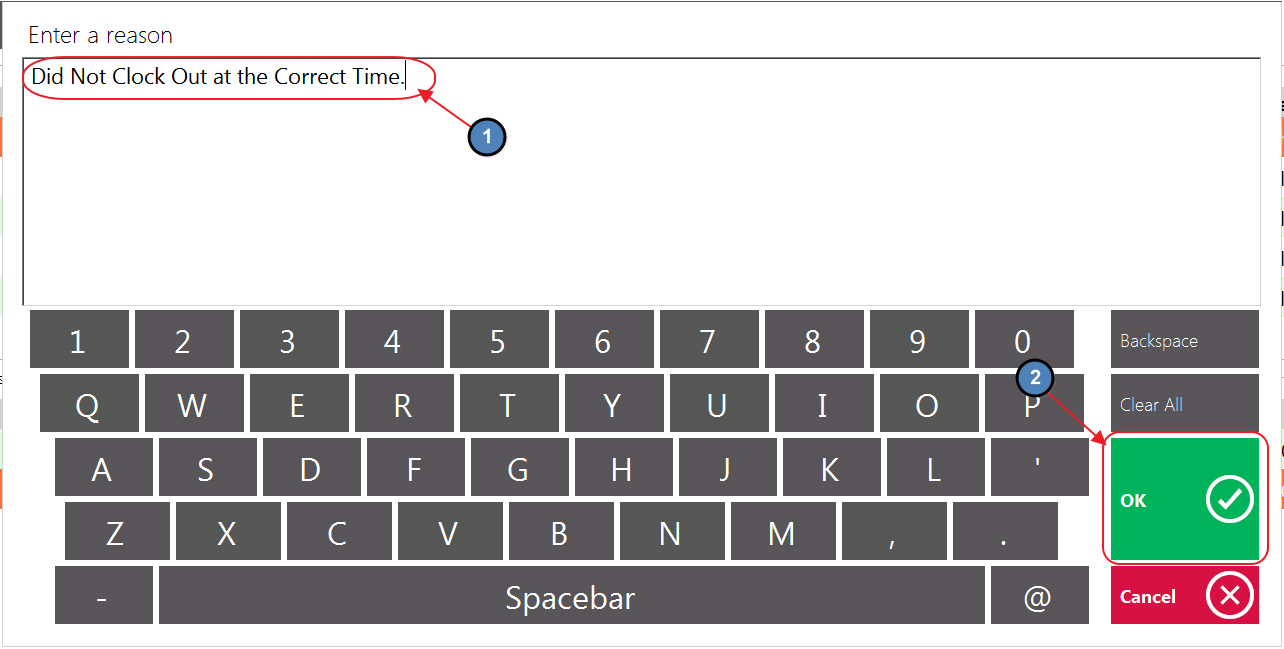
5) Select OK once edits are complete.

6) Lastly, Enter a Reason for editing the Timesheet.
Creating a New Timesheet
Best Practices
Set up buttons for both Rain Check Items (Issue, and Redemption) on the POS main screen for easy access.
FAQs
Q: Can I give a rain check a fixed expiration date, like 12/31/2017, rather than having it expire in 365 days?
A: Rain check settings established in the CMA will provide a default expiration date to populate upon issuance, however, the date may be overridden to a fixed date like 12/31/2017 upon issuance in the POS.
Downloadable Guide