...
Create the first Event Item using the appropriate Item Category and Group. This would be a Non-Prepaid Item.
Next, duplicate this Event Item however making this version Prepaid. On the prepaid Item:
Retail Price - This price should include tax and service charge
Item Category - Select the newly created Category specifically for events; the new Prepaid Events Item Category
Tax Inclusive - Check this box to ensure tax is calculated
Sales Account - Select the new Event Deposit Liability account
Website
Next will be the process of enabling the billing for the Event on the Website.
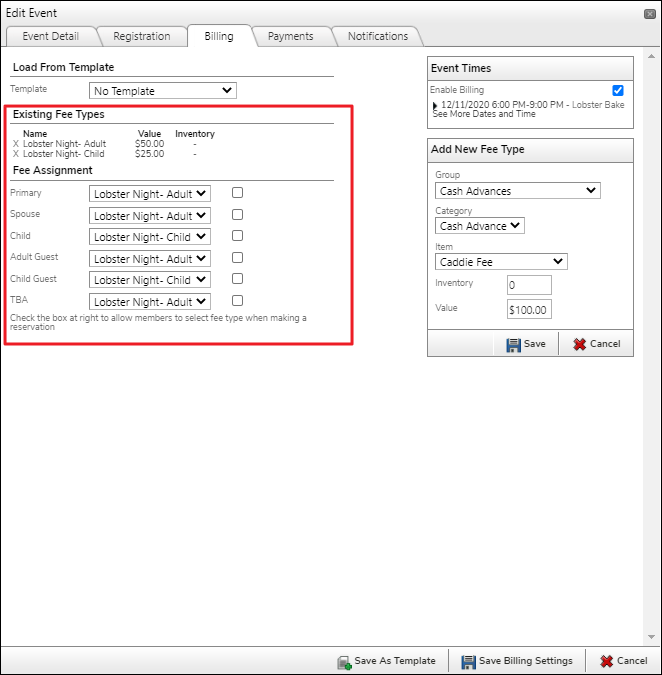
Open the Event and navigate to the Billing tab. Checkmark Enable Billing at the top right. Enabling this box opens the Add New Fee Type options where the User can add the PrepaidItem details for this event.
Once the Fee Type has been save, this will now appear under Existing Fee Types on the left. Under Fee Assignment, assign the prepaid Items to each member relationship as needed . If the member will be choosing one of the prepaid items, leave the dropdown as “No Fee Assigned”.

or select the checkbox to let the member pick which fee.
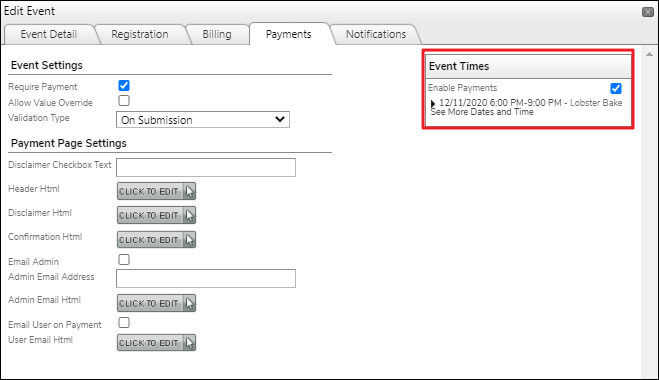
Switch over to the Payments tab and check Enable Payments to allow members to pay online.

Lastly, navigate to the Registration tab. Under Email Notification, add the Website Administrator email address to ensure notifications are received when a Member registers for the Event. Then click Save Registration Settings.
Managing Incoming Payments
...
When the Administrator receives the email notification that a payment has been made, sign into PayCloud (Online Payment Portal). Expand the Reports drop down on the left hand menu and click Payment History. Filter this report to view any incoming Member Event payments.
Date Range - Set the date range to show payments made when the notification was received
Payment Type - Filter the Payment Type to either Event or Form, depending on what the payment is for
Status - Confirm payment is Approved or Pending
Point of Sale
The final step to pull in the payment will be creating the tickets within your Mobile POS.
Sign into Mobile POS into the specific Event Area. Select the Events tab from the top menu. Use Date Picker to select the date of the Event and then the Event itself from the drop down list.
Select the registration you received the notification for and then select Create Ticket. Close

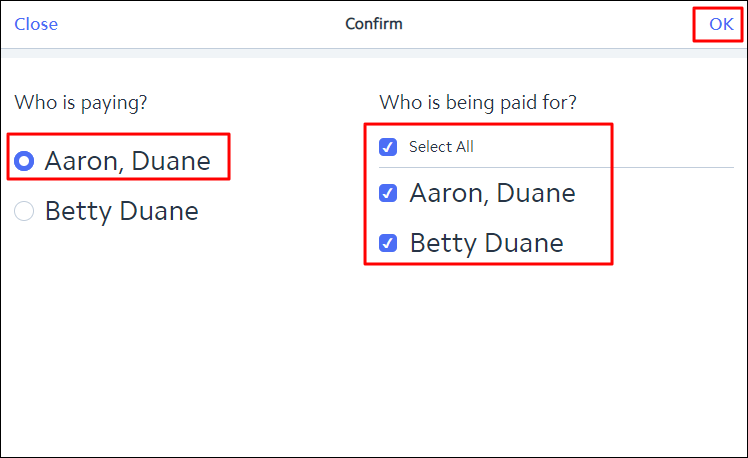
A pop-up window will appear and ask who is paying and who is being paid for.
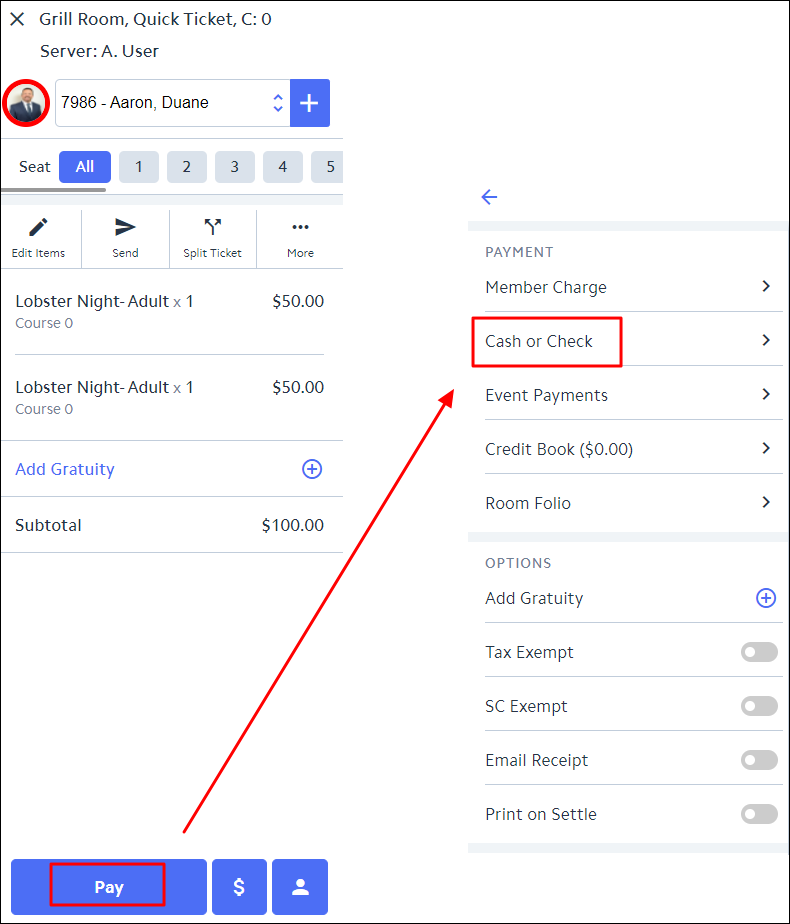
Once the ticket is open, nothing else needs to be added. Select Pay and then close the ticket using Cash or Check.
Day of Event (or after)
CMA
Navigate to the Interactive Reports module of the left hand menu. Search for the Items Purchased by Members Report to get the full number of prepaid Items purchased related to the Event or Form using the following filter selections:
Start and End Date - Set the date range for the time period that registration was open
Items - Select the Prepaid Liability Account Item
Include Tax and Service Charge - Check this box to include Tax and Service Charge
Point of Sale
The next step is to create and close out a ticket for the entire event using Mobile POS.
Sign into Mobile POS.
Select Create Ticket .
Use Guest account for memberusing the Guest Account for the member.
Add the number of items sold of the regular non-prepaid items (same amount in the report)
Add the negative of the same amount of the liability item (prepaid item)
Close the ticket
to Cash
Ticket will net out to $0.00
CMA
Finally, approve the Charge Batch within CMA.
...
Select the Membership module on the left side menu.
Click
onApprove Charge Batches.
- Ensure
Double click the GL posting associated with this event to review the details of the payment. Make sure the amount as seen in PayCloud is
correctdebiting and crediting the correct amounts. Once verified, click Approve Batch.
Recognizing Payments Immediately
...
Member initiation fees
Banquet Deposits deposits (if not using our banquets Banquets system)
Any type of payment that would go on a member or non member account within CMA
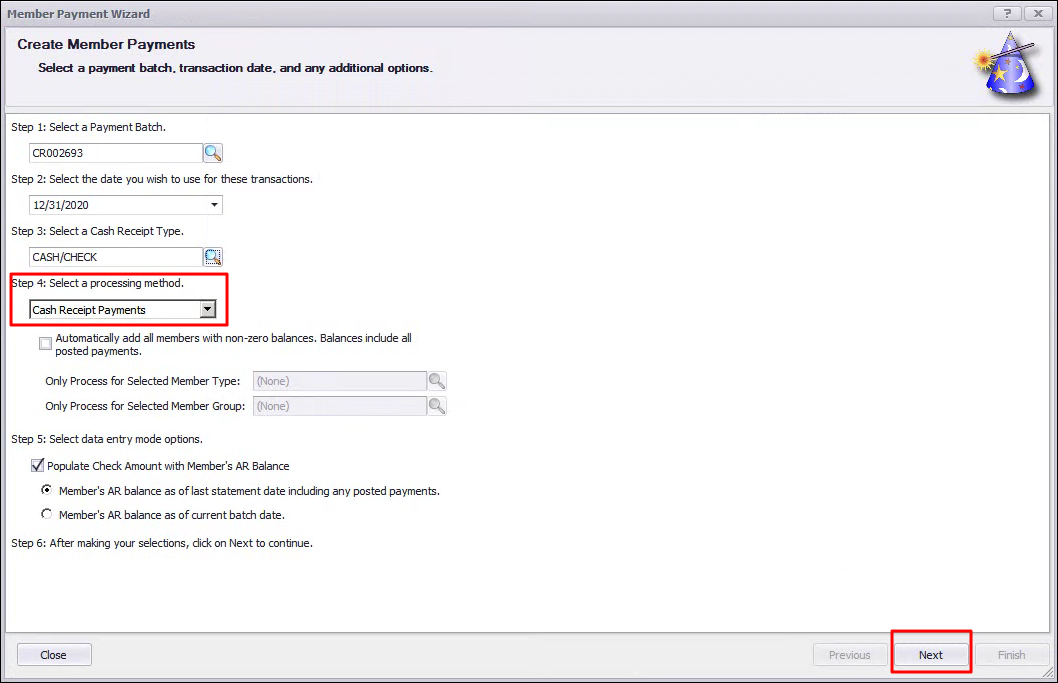
Option 1 - Cash Receipt Batch
Sign into Office CMA.
Select the Membership module on the left hand menu.
Click on Member Payments.
Either use the “Quick Add” Quick Add to start new batch or Choose choose an open batch from the payment date.
If using a new batch, choose the Cash Receipt Type. It will most likely be cash unless a special receipt type has been created.
Add the
Member Number, the Amount, and adjust from the
AR ledger to whichever asset ledger you need the payment to go into
Option 2 - Journal Entry
Sign into Office CMA.
Select Click the General Ledger Select module on the left side menu.
Click Journal Entry Wizard.
Either use the “Quick Add” Quick Add to start new batch or Choose choose an open batch from the payment date.
Input Select the Cash Account that for the settlement will use (ex. 1001 - Operating Cash Account).
Input the reference and Description field Enter Reference, Description, Debit (the amount of the payment as a DebitEnter a ), and the Credit (the Liability or Revenue Account as a Credit
...
). Then, select Preview
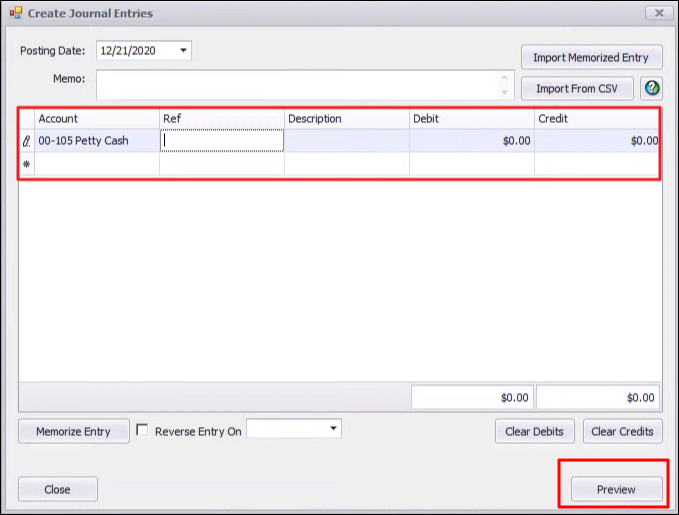
After previewing, you can post the batch.
