...
With the exception of Month End Billings and day to day POS Charges, all Member Charges and Adjustments are recorded using the Member Charge Wizard. In this document, we will discuss how to process Member Charges at both the individual Member and Member Group level, as well as how to Edit/ Unpost an existing Member Charge Batch. In addition, we will also walk through entering a Negative Member Charge, to Credit a Member’s account. Use Case
|
Content
|
|---|
...
Step 2 - Select Members to indicate individual Members are to be charged. Please see the Charging a Member Group section of this document for a demonstration on charging Member Groups.
...
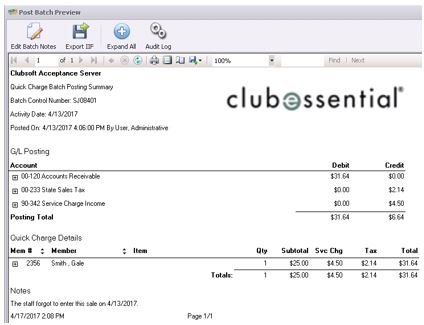
Note: To exit the Batch prior to batch completion, click Close at any time. Batch will automatically be saved, and can be re-opened by selecting Member Charges and choosing the appropriate batch from the lookup list.
Post the Charge
When Finish is selected, a Batch Preview will populate.
...
In this section we will step through an example of how to bill by Member Group. To begin, please navigate to the Member Charge Wizard as described in the Accessing the Tool section of this document.
...
For more information on Member Groups, please see our Member Groups document.
2) Area - Use the lookup button to select the Area where the sale took place.
...
If any Member needs to be removed from this screen, select the arrow to the left of the Member in question and hit Delete on your keyboard.

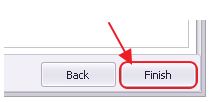
Click Finish.

Upon hitting Finish, if there are one or members in the Member Group with 'Do Not Allow Member Charge Privileges' status set, you will be able to override this setting and allow charges to be processed. Members will still retain their 'Do Not Allow Member Charge Privileges' status and continue to be prevented from Member Charging at any POS.

Post the Batch
Verify the GL Posting is correct and select Post Batch.
...
Crediting a Member's Account (Negative Member Charge)
Negative Member Charges are used to make corrections and Credit a Member’s account when necessary. In this section, we will demonstrate entering a Negative Member Charge to Credit a Member for a mistakenly entered Late Fee.
To begin, please follow the same steps as described in the Entering a Member Charge - Individual Member section of this document.
However, in the Price field, please enter a Negative Dollar Amount in the amount the Member should be credited. In this example, we are crediting a Member for an erroneous Late Fee, therefore, the Late Fee Item must be charged.

Click Finish and Post the batch as normal.
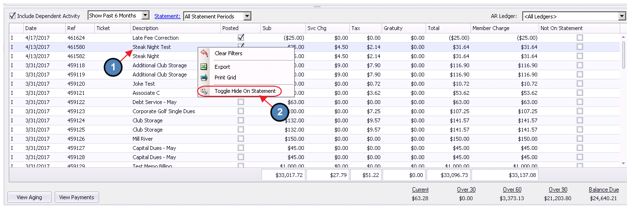
AR Activity - Member Profile
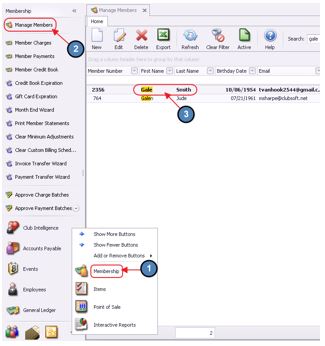
Charges posted to a Member’s Account can be viewed on the AR Activity tab within the Member’s profile.To access this tab, please navigate to the Membership Menu, select Manage Members, and double-click the appropriate Member.
Select the AR Activity Tab and a list of charges and payments posted to the Member’s Account will populate. This is known as the AR Activity Grid.
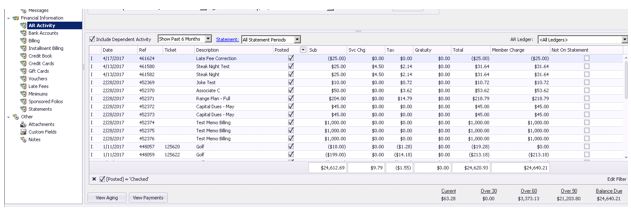
Double-click on a particular charge to view additional details on the charge.

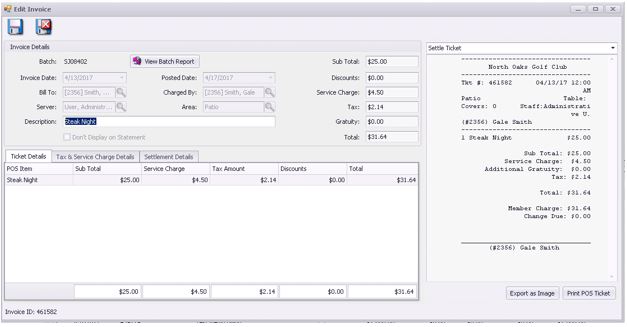
Invoice Details
Invoice Details appear at the top of the Edit Invoice screen.

1) Batch - The Batch the charge was posted from.
2) View Batch Report - Select this to view the Batch Report of the Charge Batch associated with this Invoice.
3) Invoice Date - The date on the Invoice.
4) Posted Date - The date the Batch was posted.
5) Bill To - The Member the charge will be billed to.
6) Charged By - The Member who made the charge. This is primarily used to reference Dependent Members who created charges to a Primary Member’s Account.
7) Server - The Employee who entered the charge.
8) Area - Area at the Club where the charge took place.
9) Description - This is the Description that will show on the Member’s Statement. If necessary, the Description here can still be edited after the Batch has been posted. Be sure to select Save & Close after adjusting the Description.
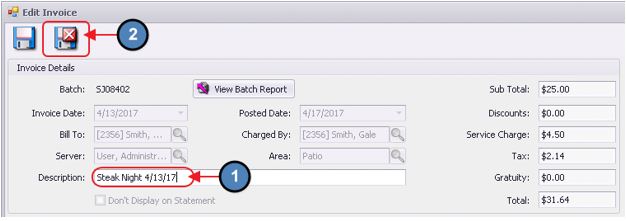
10) Don’t Display on Statement - If for any reason a charge needs to be hidden from a Member’s statement, simply right-click on the charge within the AR Activity Grid and select Toggle Hide on Statement
11) Totals - To the right of the Invoice Details is a quick snapshot of the Subtotal, Discounts, Service Charge, Tax, Gratuity, and Total of the Invoice.
Ticket Details
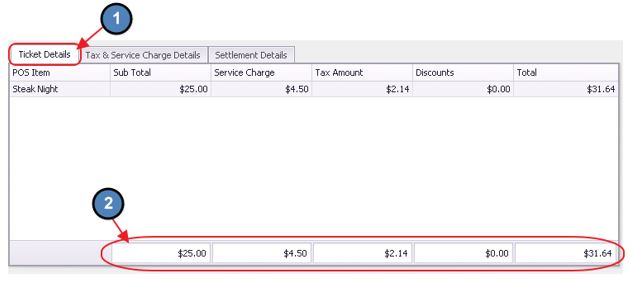
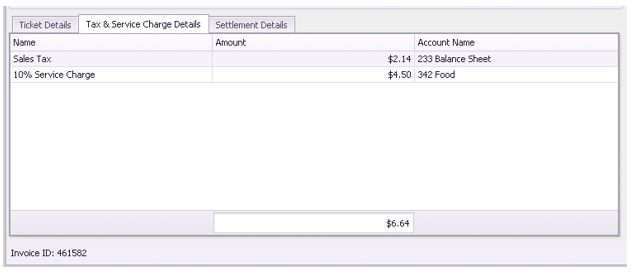
Tax & Service Charge Details
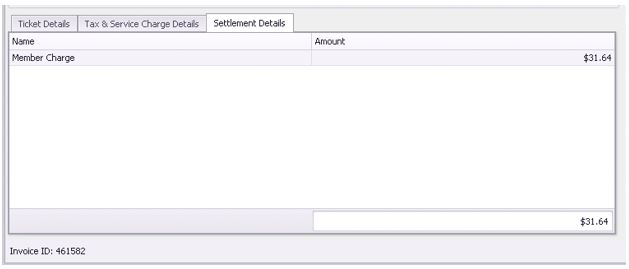
Settlement Details
Export Image/Print POS Ticket
...