Office - Member Charges
- Stacy Zak
- Benjamin Hacker
- Danielle Donley (Unlicensed)
Table of Contents
- 1 Overview
- 2 Required Permissions
- 3 Accessing the Tool
- 3.1 Entering a Member Charge - Individual Member
- 3.1.1 Post the Charge
- 3.2 Charging a Member Group
- 3.3 Editing Posted Charges
- 3.4 Crediting a Member's Account (Negative Member Charge)
- 3.5 AR Activity - Member Profile
- 3.5.1 Invoice Details
- 3.5.2 Ticket Details
- 3.5.3 Tax & Service Charge Details
- 3.5.4 Settlement Details
- 3.5.5 Export Image/Print POS Ticket
- 3.1 Entering a Member Charge - Individual Member
- 4 Best Practices
- 5 FAQs
Overview
With the exception of Month End Billings and day to day POS Charges, all Member Charges and Adjustments are recorded using the Member Charge Wizard. In this document, we will discuss how to process Member Charges at both the individual Member and Member Group level, as well as how to Edit/ Un-post an existing Member Charge Batch. In addition, we will also walk through entering a Negative Member Charge, to Credit a Member’s account.
Required Permissions
Accessing the Tool
To access the Member Charge Wizard:
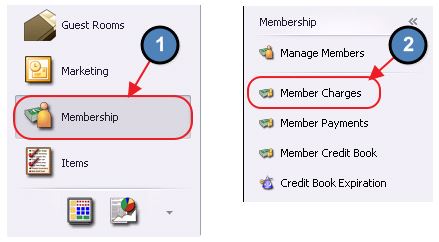
Select Membership from the left user menu and choose Member Charges.
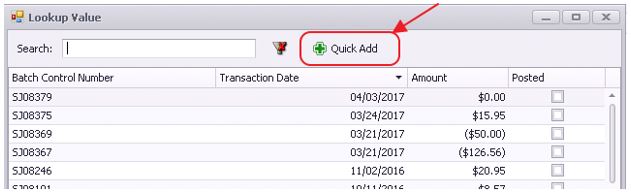
Select Quick Add.
The Member Charge Wizard will launch.
Entering a Member Charge - Individual Member
In this section we will discuss entering a Member Charge at the individual Member level. To start, please navigate to the Member Charge Wizard.
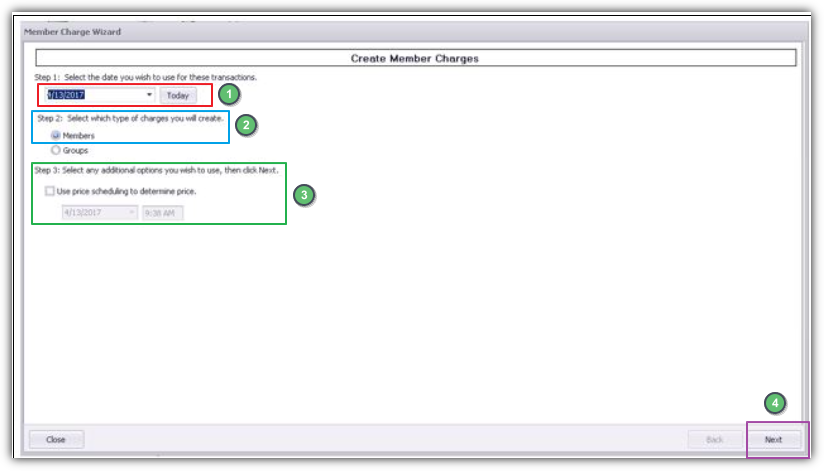
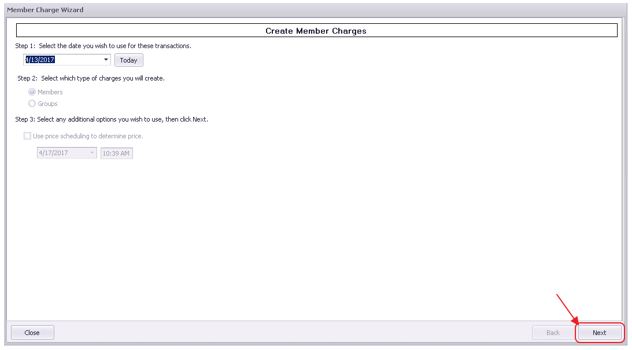
Verify the Transaction Date. This is the date the transaction will post to the member’s account and to the General Ledger.
Select Members to indicate individual Members are to be charged. Please see the Charging a Member Group section of this document for a demonstration on charging Member Groups.
If you would like the system to use a Price Schedule to determine the Price to be charged, select this box and then specify the time the system should look at to find the Price Schedule.
For more information on Price Scheduling, please see the Manage Price Scheduling section of our Items Manual.
Click Next
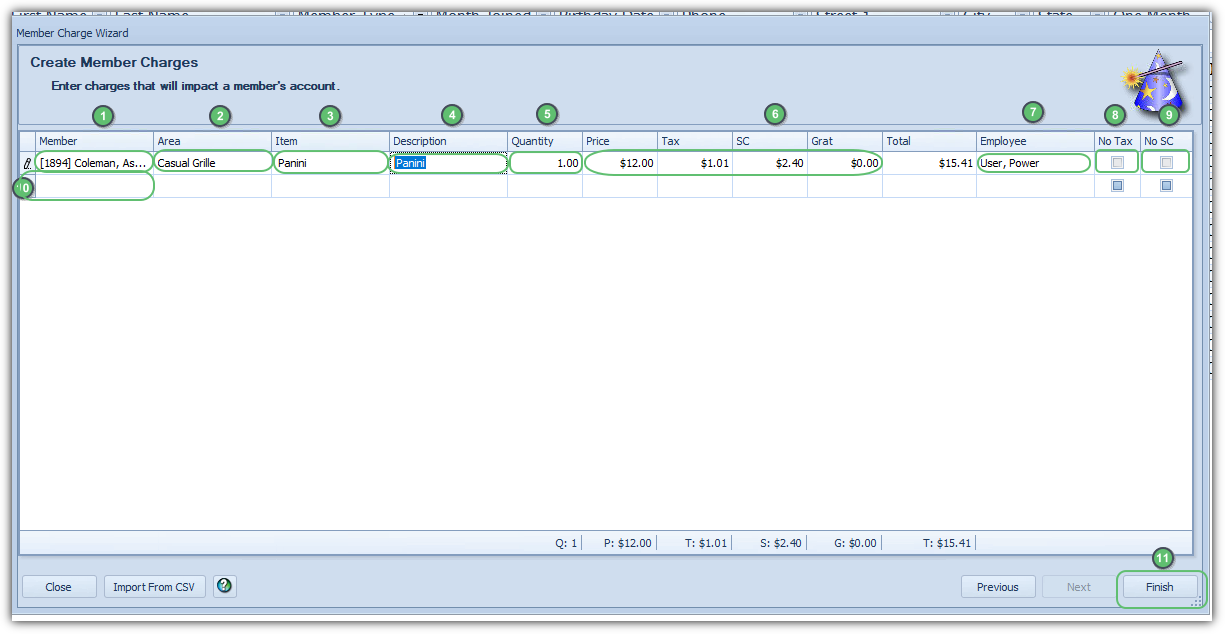
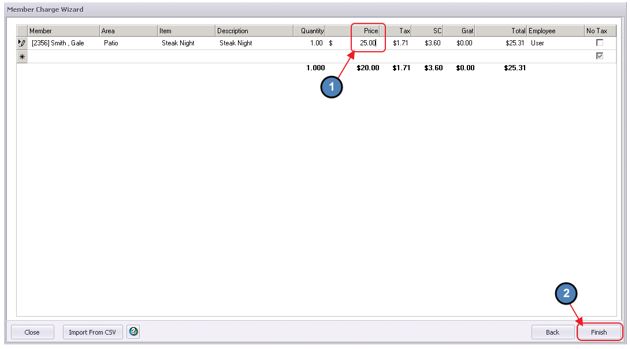
The following Charge Entry screen will appear next based on selections made in Screen 1 of the Wizard. The Charge Entry screen is used to specify the Member, Area, Item, and Quantity to be charged. Please follow the below instructions:
Select the Member by utilizing the lookup button, or simply begin typing the Member’s name.
Use the lookup button to select the Area where the sale took place.
Note: When charging Billing Items (Dues, Late Fees, etc.) be sure to select the Administration Area.
Use the lookup button to select the Item to be charged. The Item selected here determines the GL Accounts to be hit when the charge is posted.
Important: It is important to remember that everything charged to a Member’s account is tied back to an Item that is found on the Club’s Master List of Items. This includes Items that are typically sold at the POS such as F&B Items and Golf Merchandise, as well as Administrative Items such as Dues and Late Fees.
A Description will auto populate. This is the Description that will show on the Member’s Statement at Month End. The Description can be edited on this screen if a more in depth description is necessary.
Enter the Quantity of the Item to be charged.
The Price, Tax, and Service Charge (SC) will auto populate based on the Item’s Price and the Quantity Entered. Add any Additional Gratuity in the Grat field.
If necessary, the Price of the Item can adjusted. The Tax and Service Charge will recalculate based on the Price entered.
The Employee field will default to the Employee entering the charge.
If the charge should be exempt from Sales Tax, check the No Tax box.
If the Charge should be exempt from Service Charge, check the No SC box.
Enter additional charges on the next line as applicable
When all charges have been entered, click Finish.
Batch Exit and Re-Entry
Note: To exit the Batch prior to batch completion, click Close at any time. Batch will automatically be saved, and can be re-opened by selecting Member Charges and choosing the appropriate batch from the lookup list.
Post the Charge
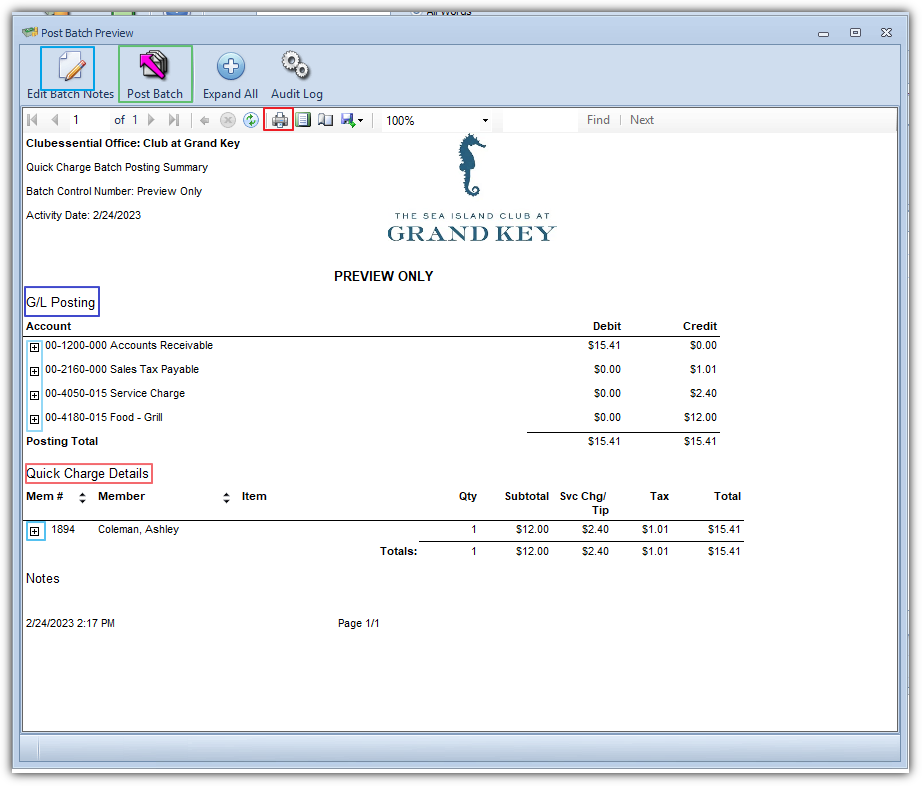
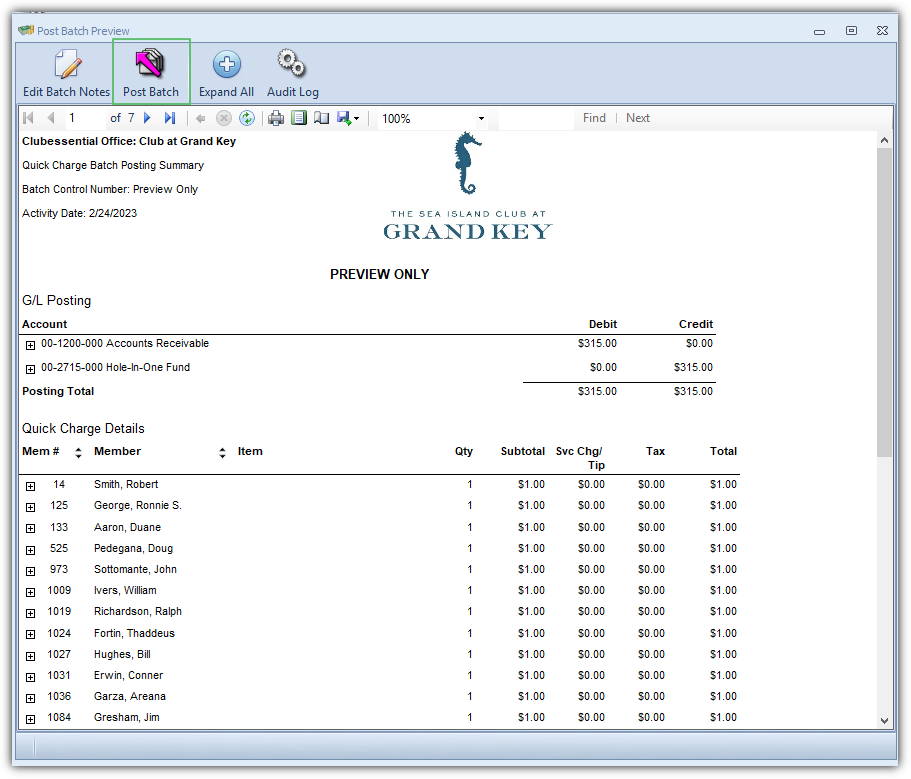
When Finish is selected, a Batch Preview will populate:
G/L Posting - The top portion of the report displays a summary listing of the Debits and Credits resulting from the batch for your review prior to posting. Use the (+) to the left of the General Ledger Account to drill down to the specific charges that are hitting these Accounts.
Quick Charge Details - The bottom portion of the report displays a list of charges by Member that are included in the Batch. Use the (+) to the left of the Member Number to drill down to the specific Items that are being charged to each Member.
Use Expand All to expand all Quick Charge Details.
Notes - To add a note to the report, select Edit Batch Notes, type out your message, and select Save & Close.
Post the Batch - After verifying the GL Posting is correct, select Post Batch. This will post the charge to the Member’s Account and General Ledger.
Print Batch Report - If necessary, select the Printer Icon to print a paper copy of the Batch Report.
Charging a Member Group
In this section we will step through an example of how to bill by Member Group. To begin, please navigate to the Member Charge Wizard as described in the Accessing the Tool section of this document.
Setup Group Charge Defaults
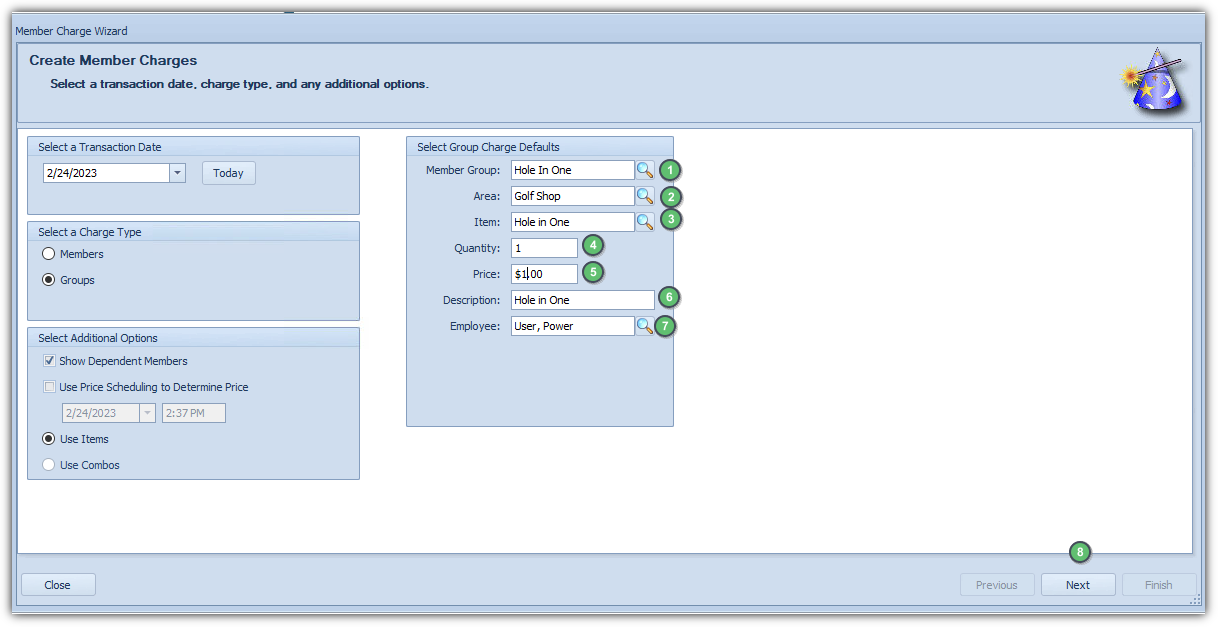
The Setup Group Charge Defaults step will populate when Groups is selected in Step 2. Please follow the below instructions.
Member Group - Use the lookup button to select the Member Group to be charged. Each Member within this Member Group will populate and will be charged on the next screen.
For more information on Member Groups, please see our Member Groups document.
Area - Use the lookup button to select the Area where the sale took place.
Item - Use the lookup button to select the Item to be charged. The Item selected here determines the GL Accounts to be hit when the charges are posted.
Important: It is important to remember that everything charged to a Member’s account is tied back to an Item that is found on the Club’s Master List of Items. This includes Items that are typically sold at the POS such as F&B Items and Golf Merchandise, as well as Administrative Items such as Dues and Late Fees.
Quantity - Enter the Quantity of the Item to be charged.
Price - The Price and Description will auto populate based on the Price and Description of the Item selected above.
Description - If necessary, both the Price and Description of the Item can be adjusted.
Employee - The Employee field will default to the Employee entering the charge.
When finished entering the above, click Next.
Member Charge Wizard Screen
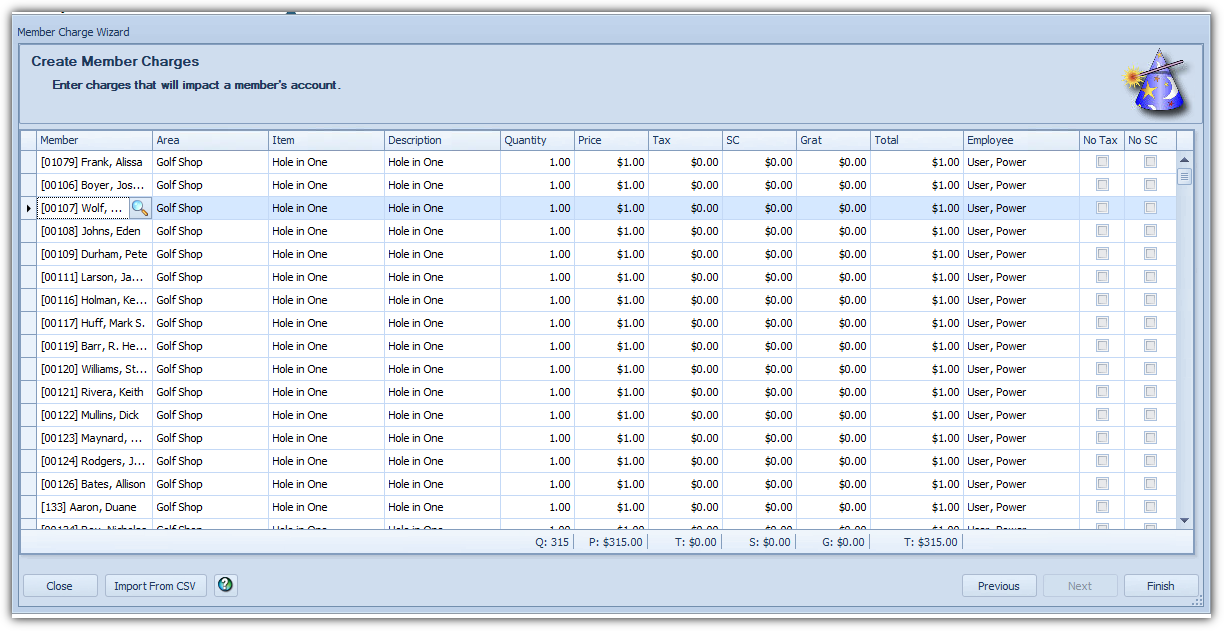
After Next is selected, each Member within the Member Group selected above will populate on the Charge Entry Screen.
If any Member needs to be removed from this screen, select the arrow to the left of the Member in question and hit Delete on your keyboard.
Click Finish.
Upon hitting Finish, if there are one or members in the Member Group with 'Do Not Allow Member Charge Privileges' status set, you will be able to override this setting and allow charges to be processed. Members will still retain their 'Do Not Allow Member Charge Privileges' status and continue to be prevented from Member Charging at any POS.
Post the Batch - Verify the GL Posting is correct and select Post Batch.
Editing Posted Charges
All Charge Batches can be unposted unless they are reconciled within a bank rec, in which case the system will not let the user un-post the batch.
To un-post a Charge Batch:
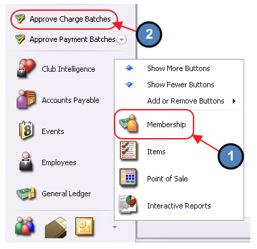
Navigate to the Membership menu and select Approve Charge Batches.
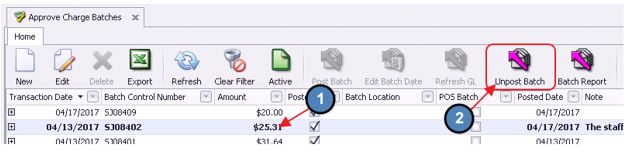
Click to select the Charge Batch that needs unposted and choose Un-post Batch.
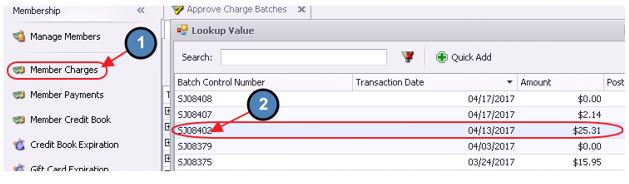
In addition, once a Charge Batch is unposted, the edits can only be made within the Member Charge Wizard found via Member Charges. Select the unposted Charge Batch from the lookup and make the necessary edits.
Select, Next to move to the Charge Entry screen.
Make any needed adjustments to the Charge, select Finish, and proceed to post the batch as normal.
Crediting a Member's Account (Negative Member Charge)
Negative Member Charges are used to make corrections and Credit a Member’s account when necessary. In this section, we will demonstrate entering a Negative Member Charge to Credit a Member for a mistakenly entered Late Fee.
To begin, please follow the same steps as described in the Entering a Member Charge - Individual Member section of this document.
In the Price field, please enter a Negative Dollar Amount in the amount the Member should be credited. In this example, we are crediting a Member for an erroneous Late Fee, therefore, the Late Fee Item must be charged.
Click Finish and Post the batch as normal.
AR Activity - Member Profile
Charges posted to a Member’s Account can be viewed on the AR Activity tab within the Member’s Profile. To access this tab:
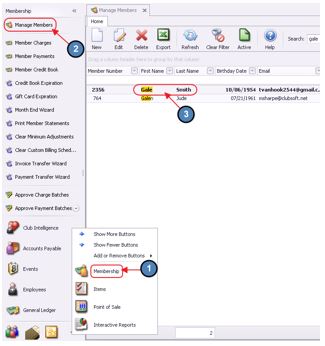
Navigate to the Membership Menu, select Manage Members, and double-click the appropriate Member.
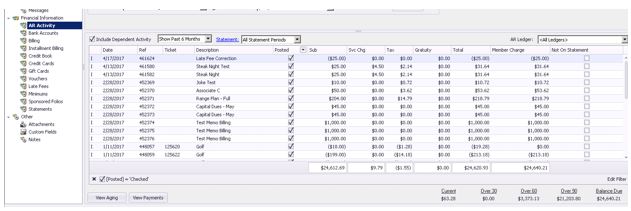
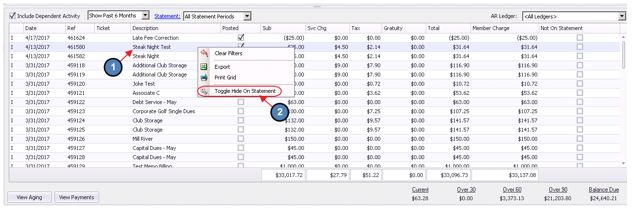
Select the AR Activity Tab and a list of charges and payments posted to the Member’s Account will populate. This is known as the AR Activity Grid.
Double-click on a particular charge to view additional details on the charge.
A common way of crediting a member for a specific invoice is to use the “Credit Ticket and Post” option while viewing the charge from the AR Profile. If this option is used to credit the member for a purchase, you cannot edit or adjust the batch once completed. This is a final action.
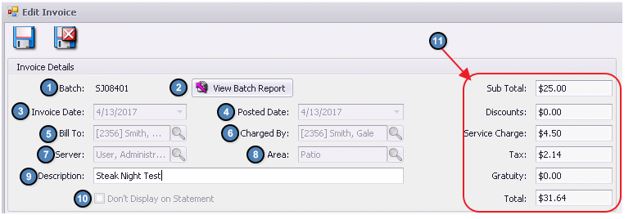
Invoice Details
Invoice Details appear at the top of the Edit Invoice screen:
Batch - The Batch the charge was posted from
View Batch Report - Select this to view the Batch Report of the Charge Batch associated with this Invoice
Invoice Date - The date on the Invoice.
Posted Date - The date the Batch was posted.
Bill To - The Member the charge will be billed to.
Charged By - The Member who made the charge. This is primarily used to reference Dependent Members who created charges to a Primary Member’s Account.
Server - The Employee who entered the charge.
Area - Area at the Club where the charge took place.
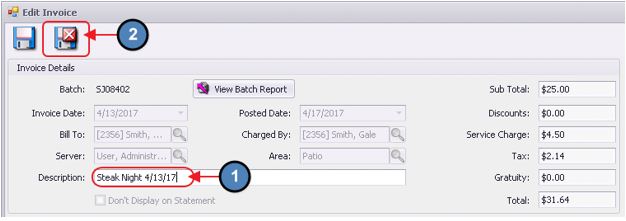
Description - This is the Description that will show on the Member’s Statement. If necessary, the Description here can still be edited after the Batch has been posted. Be sure to select Save & Close after adjusting the Description.
Don’t Display on Statement - If for any reason a charge needs to be hidden from a Member’s statement, simply right-click on the charge within the AR Activity Grid and select Toggle Hide on Statement.
Totals - To the right of the Invoice Details is a quick snapshot of the Subtotal, Discounts, Service Charge, Tax, Gratuity, and Total of the Invoice.
Ticket Details
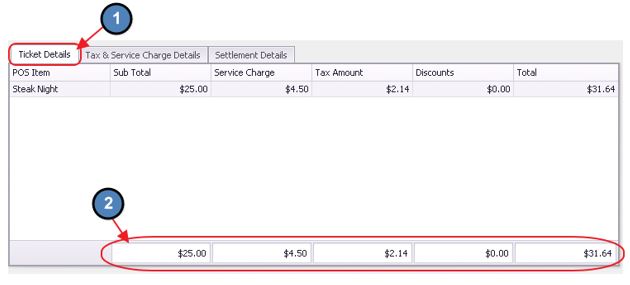
Ticket Details load in the bottom half of the Edit Invoice screen, and provide the user with a summary view of the POS Items charged on a particular Charge/Invoice, as well as the Subtotal, Service Charge, Tax Amount, and Discounts associated with each Item. In addition, a Totals Row for each of these columns is present at the bottom of the screen.
Tax & Service Charge Details
The Tax & Service Charge Details tab displays a list of the Tax Code Items, the Tax/Service Charge Amount, as well as the GL Account being hit by the Tax Code Item.For more information on Tax Code Items, please view our Tax and Service Charge Guide.
Settlement Details
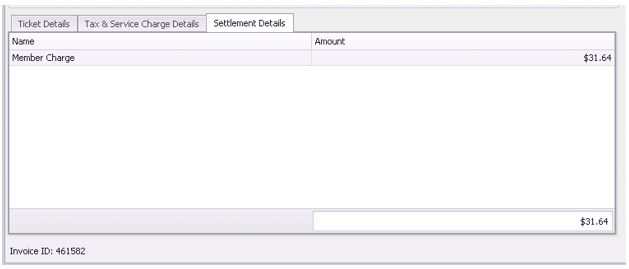
The Settlement Details tab display a list of the Settlement Types used to settle the Invoice.For more information on Charge Settlement Types, please view our Charge Settlement Types Guide.
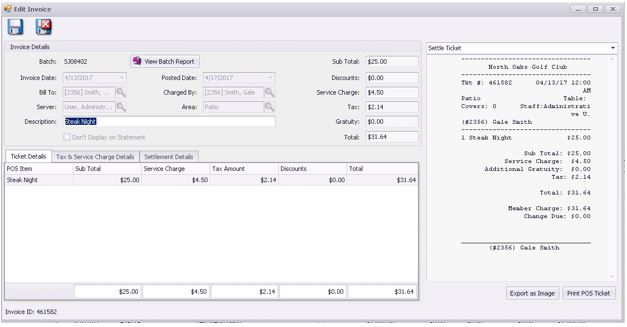
Export Image/Print POS Ticket
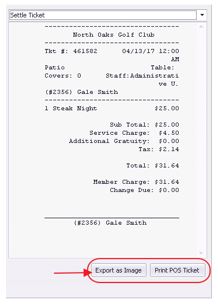
If necessary, the Invoice’s Settle Ticket can be Exported as an Image or printed as a POS Ticket.
Best Practices
When multiple Members are receiving the same charges, set up Member Groups and utilize the Charge by Member Group feature within the Member Charge wizard to more efficiently assess the Member Charges.
Apply Credits to Members against the Item that was charged in error to ensure g/l distribution for the credit is proper.
Easily review details of any Member Charge by going to the Member’s profile, and reviewing the A/R tab.
FAQs
Q. Why can’t I unpost a Member Charge Batch?
A. Charge batches that have been reconciled in a bank reconciliation cannot be unposted.
Q. How do I exclude a Member charge from appearing on a Member’s Statement?
A. Within the Member’s profile, A/R tab, right-click on the charge to exclude, and then select Toggle Hide on Statement.
