Office - Member Groups
- Stacy Zak
- Benjamin Hacker
- Joshua Morrison
Table of Contents
Overview
Member Groups are designed as a club specific solution to an array of organizational purposes. Specifically, Member Groups can be used for Billing, Minimum, Mailing/Marketing, and Reporting purposes. In this manual, we will discuss how to create both Static and Dynamic Member Groups.
Required Permissions
Manage Members
Add/Edit/Delete Member Groups
Accessing the Tool
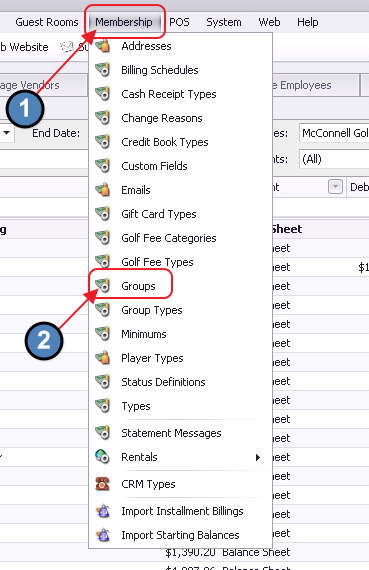
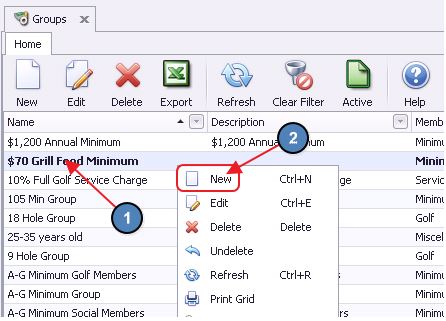
To access Member Groups:
Select Membership across the top toolbar.
Choose Groups.
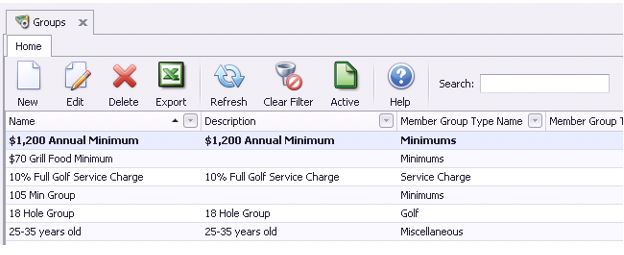
The Member Groups Grid will launch.
The primary functions associated with managing Member Groups are embedded in the Member Group setup screen, which can be accessed by double-clicking on an existing Group, or clicking the New button.
Creating a New Member Group
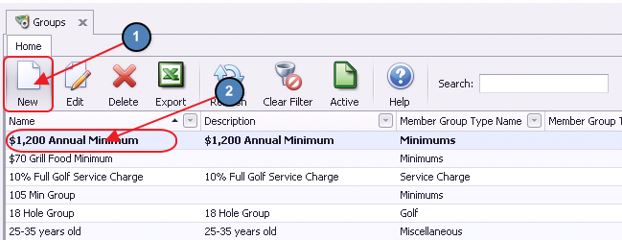
To create a new Member Group,
Navigate to the Member Groups Grid and perform either of the following to launch the Member Groups setup screen:
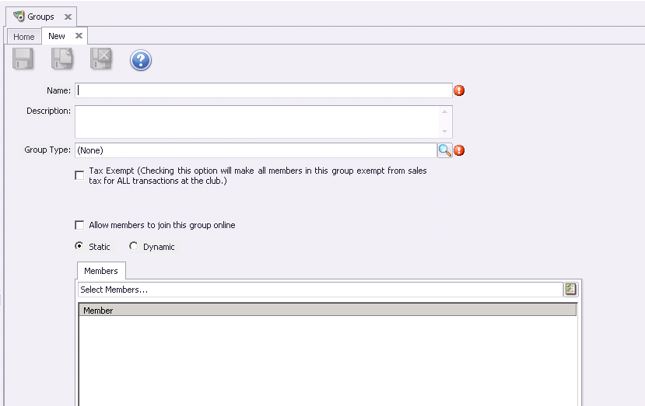
The Member Groups setup screen will launch.
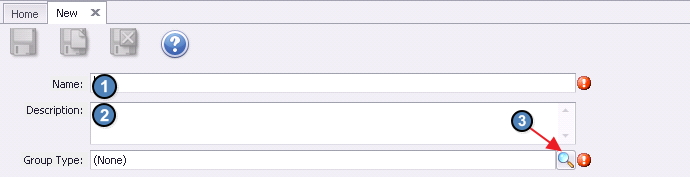
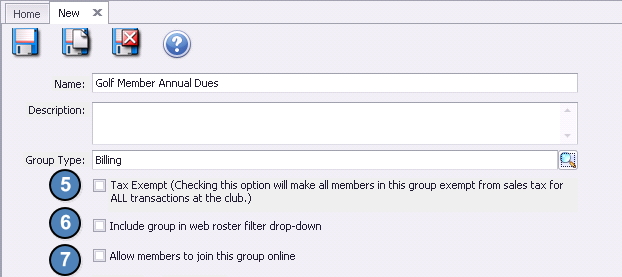
For all Groups, provide a:
Name.
An additional Description (if desired).
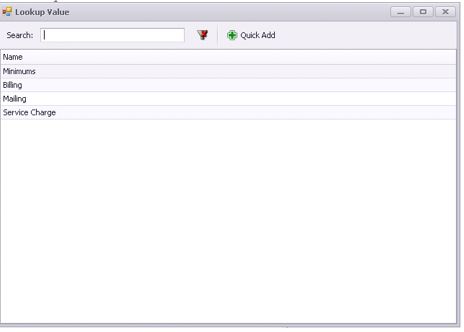
Choose the Group Type relevant to the New Group. Note: the lookup feature may be utilized to assist with Group Type.
Once Group Type Lookup Value screen launches, select appropriate Group Type.
Note - the Group Type is an internal reference. Other than Minimums, all Group Types will behave in the same manner. Please refer to our Minimums guide for more information on the Minimum Group Type.
If members within the Member Group should be exempt from tax on all transactions at the club, please check, Tax Exempt.
Please refer to our Unification – Groups guide for more information on the Allow members to join this group online check box.
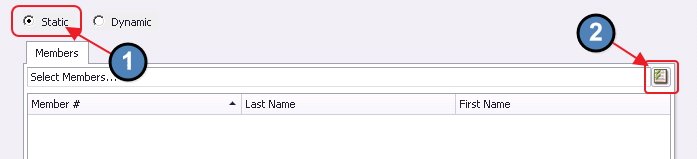
Static Groups
Static Groups are created by manually adding members to groups and can include any member, regardless of their setup.
To establish a Static Group:
Select the Static option (Selected by Default).
Then add Members to the Group by clicking on the Member selection box.
Members can also be added to a Member Group through the New Member Wizard or the within a Members Profile. Please see our Membership Management guide for more information.
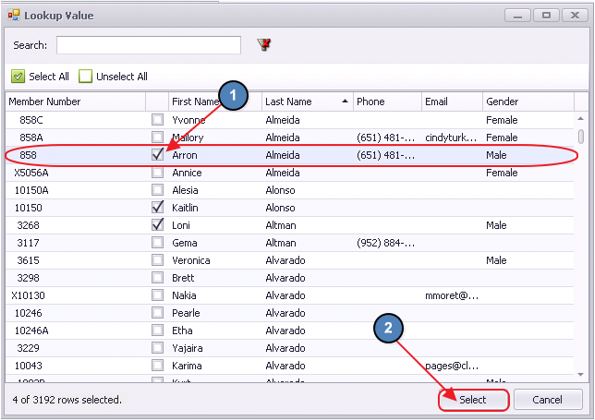
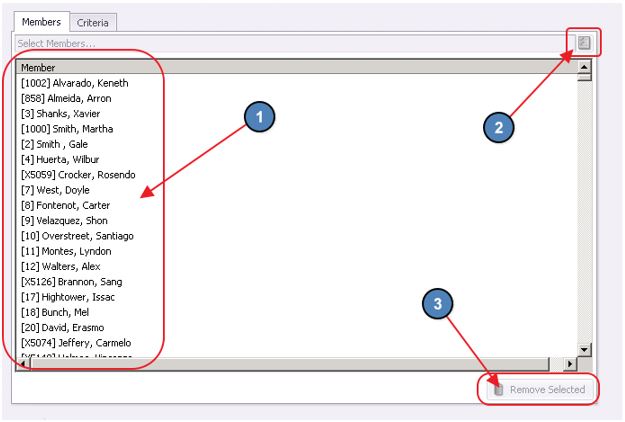
Check Members to include in Group, and then, click, Select.
The selected members will display in the Selected Members screen.
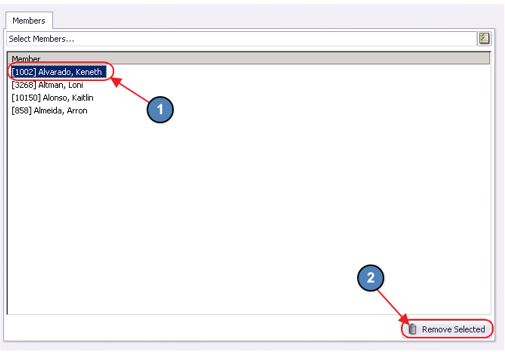
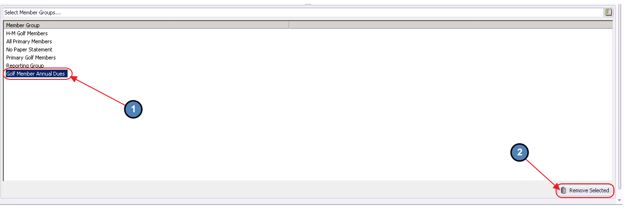
To remove a member from a Static Group, please perform either of the following below:
Highlight the Member in question from the Selected Members screen within the Member Group and choose Remove Selected.
Navigate to the Groups tab within the member’s profile, highlight the Member Group in question from the Selected Member Groups screen and choose Remove Selected.
Dynamic Groups
Dynamic Groups automatically add members based on defined rules/certain criteria for inclusion within the group.
To set up a Dynamic Group:
Select the Dynamic option.
Confirm Dynamic Group setup by clicking, Yes.
Then, specify parameters/criteria of the Group. Multiple filters may be applied, but may also be left blank if not applicable. Age, Gender, Birth Month, Member Status, Member Type, Member Groups, Spouse, #Non-Spouse Dependents and their respective age ranges, years of Membership, MAP Score and Report Criteria may all be used to define how Membership within the Group will be generated.
Note: When using the #Non-Spouse Dependents filter, enter the number of child/dependents for the search, do not leave blank or use "0".
IE. If "2" is entered, the group will include any primary member with "2 or more" dependent/children.
If "5" is entered, the group will include any primary member with "5 or more" dependent/children.
The Age filter should only be applied if the club has included a Date of Birth on each dependent/child record in Office. Otherwise, results will not be accurate.
Note: To utilize the Report Criteria, click, on the Valid Reports option to view which reports can be utilized to define Membership.
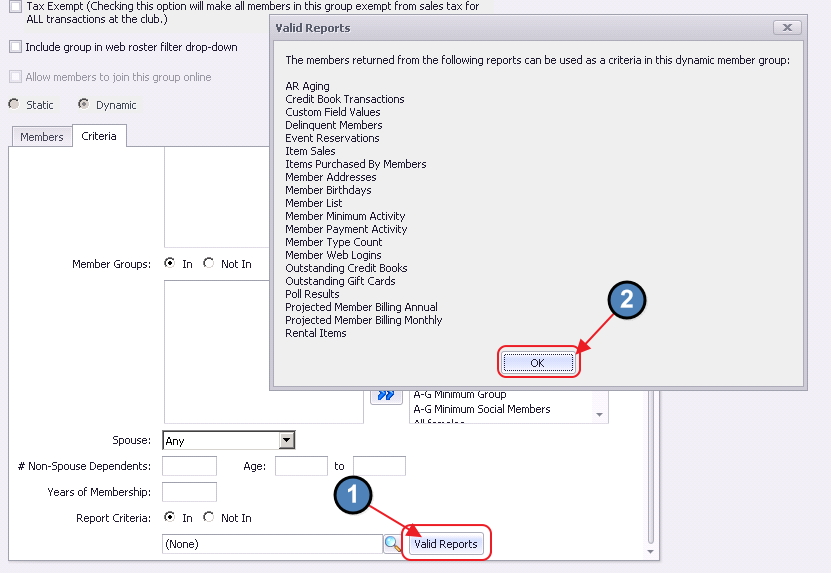
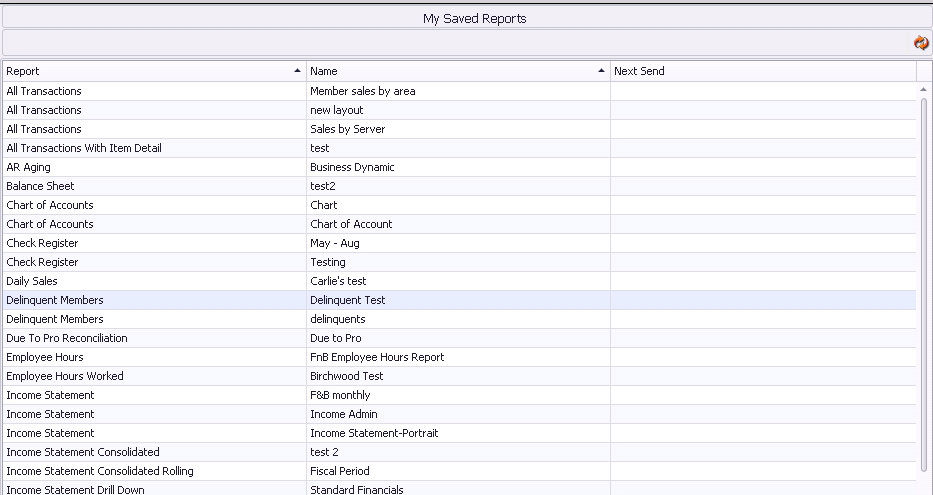
If a new report is needed, navigate to Interactive Reports, create and save the report (to a recognizable name).
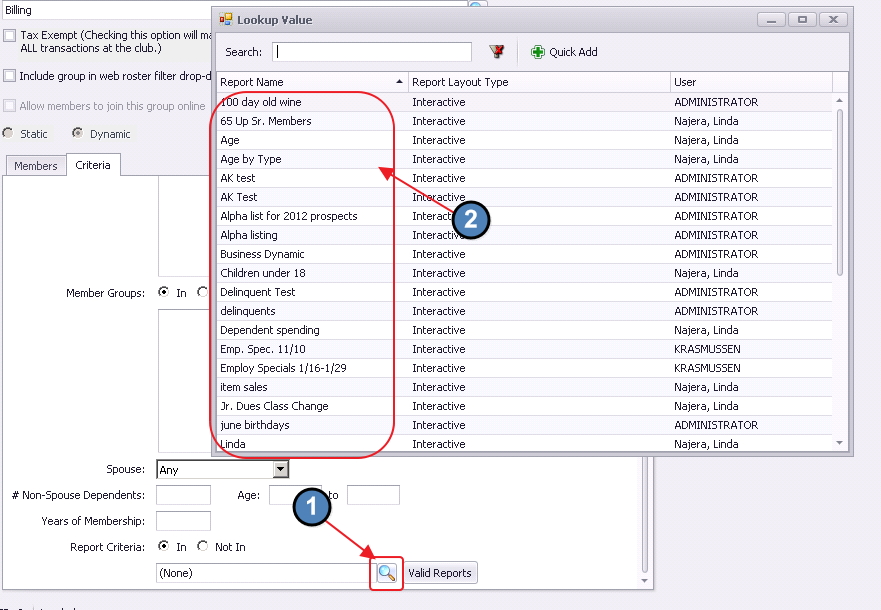
Navigate back to the Group setup screen, and then choose the new report utilizing the Report Lookup feature.
Members who meet the criteria specified will be listed on the Members tab. However, please note that the Member Lookup and Remove Selected feature have been disabled on the Members tab. The only way a member is added to the group is if they meet the criteria specified, and the only way to be removed from the group is to fall out of the specified criteria.
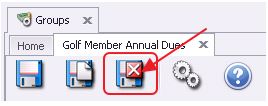
Be sure to select Save & Close when set of the new Member Group is complete.
Best Practices
Set Dynamic Groups to target the exact group you are looking for, based on specified criteria - ie - Birthday’s this month, Member’s with an overdue balance, or Member’s in a specified Membership type.
Use Static Groups to manually specify a group of people ie - Board Members, Special Interest Committees, Members with Bag Storage, or Members with Cart Plans for example.
Members that are in a tax exempt group will only have taxes waived for items purchased if the tax code item assigned at the item category or item group level is set to be exemptible.
FAQs
Q. Can Members be part of more than one Group?
A. Yes, Members can belong to any number of Static, Dynamic, and/or mixtures of these Group
