Office - Rentals
- Stacy Zak
- Benjamin Hacker
- Emily Latham
- Ali Duncan
Table of Contents
- 1 Overview
- 2 Required Permissions
- 3 Accessing the Tool
- 3.1 Rental Categories
- 3.2 Rental Billing Schedule
- 3.2.1 General Information
- 3.2.2 Schedule
- 3.3 Rental Types
- 3.4 Rental Items
- 3.4.1 Accessing the Tool - Rental Items
- 3.4.2 Create a New Rental Item
- 3.4.2.1 Removing a Member
- 3.5 Rental Billing Summary in Member Profile
- 3.6 Reporting
- 3.6.1 Interactive Reports
- 3.6.2 Rental Items Grid
- 4 Best Practices
- 5 FAQs
Overview
The Office System allows clubs to track, as well as bill their members for Rental property at the club. Rentals encompass a three tier hierarchy to their setup. At the highest level are Rental Categories, which are attached to Rental Types, and lastly Rental Types are linked to Rental Items. In this guide, we will discuss each tier of this hierarchy as well as how to create a new Rental.
Important:
Please note that a Billing Schedule will also need to be created and linked to a Rental Type. This is what prompts the system to apply the billing to the member.
Required Permissions
Membership
Add/Edit/Delete Rentals
Accessing the Tool
Rental Categories
Rental Categories are used solely for reporting purposes. However, please note that each Rental Type must be associated with a Rental Category. With this in mind, it is essential to keep Rental Categories consistent and easy to track. Examples of Rental Categories can include, Men’s Lockers, Ladies Lockers, Club Storage, Slips etc.
To access Rental Categories:
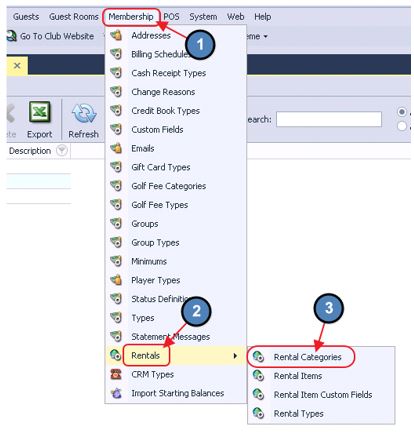
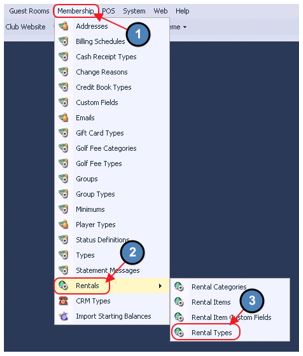
Select Membership across the top toolbar, hover the mouse over Rentals, and select Rental Categories.
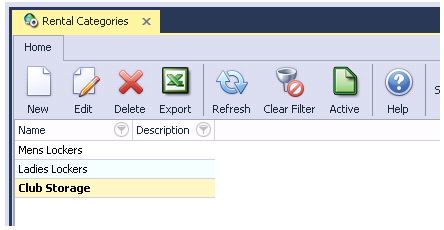
The Rental Categories Grid will launch.
The primary functions associated with managing Rental Categories are embedded in the Rental Category setup screen, which can be accessed by double-clicking on an existing Category, or clicking the New button.
Create a New Rental Category
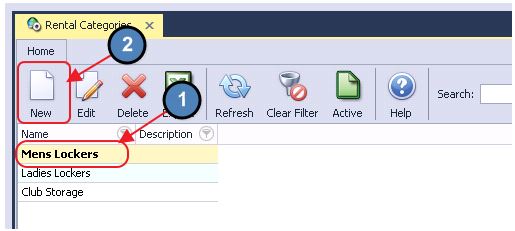
To create a new Rental Category:
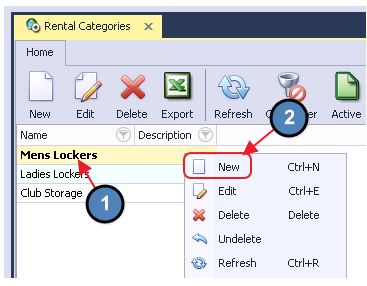
Navigate to the Rental Categories Grid and perform either of the following to launch the Rental Categories setup screen:
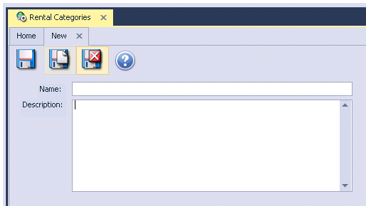
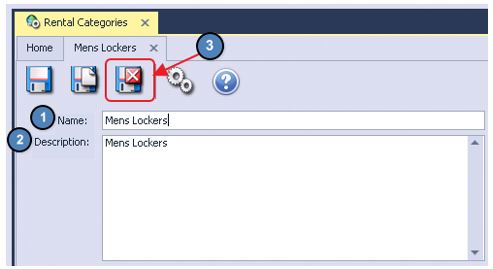
The Rental Category setup screen will launch.
Simply enter a Name and Description for the Rental Category and select Save & Close.
Rental Billing Schedule
As previously mentioned, a Billing Schedule will need to be created to be linked to a Rental Type. The Billing Schedule will then be linked to any member(s) that are attached to Rental Items of a specific Rental Type.
To create a Rental Billing Schedule:
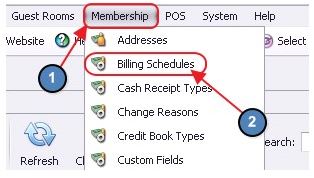
Navigate to Membership across the top toolbar and select Billing Schedules.
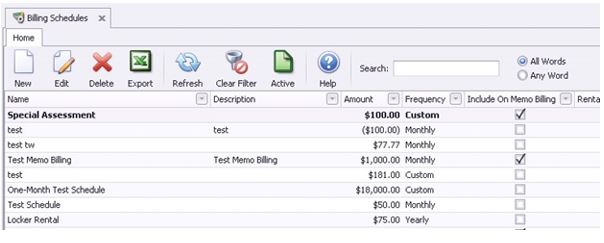
The Billing Schedules Grid will launch.
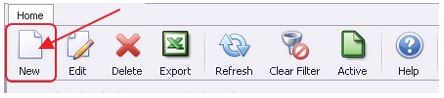
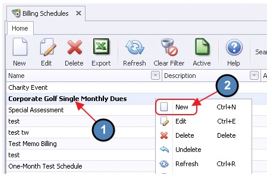
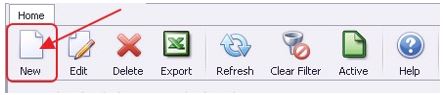
Click the New icon on the toolbar. OR
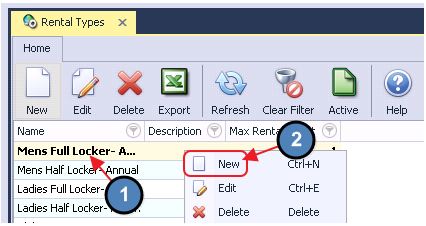
Right-click anywhere on the Billing Schedules Grid and select New.
General Information
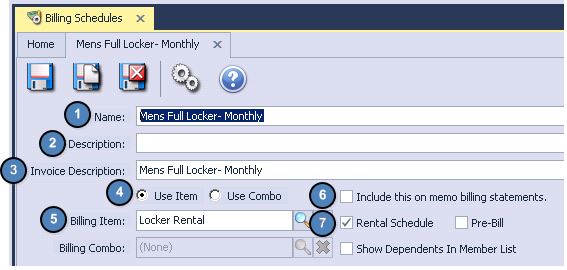
Name - Enter the Name of the new Billing Schedule.
Description - Enter a Description. (Optional)
Invoice Description - This will be the Description that appears on the Invoice at the corresponding Month End.
Use Item - This tells the system that the entity to be charged at Month End is an Item. This will be selected by default.
Billing Item - Select the Billing Item to be charged for the Rental Schedule at Month End. The Billing Item determines the GL in which the charge is posted.
Include This on Memo Billing Statements - If checked, the Billing Schedule will be included on any Memo Billing Statements sent for the corresponding Month End.
Rental Schedule – Check this box to indicate this Billing Schedule was created for Rental purposes.
Important: Any Billing Schedule applied to a Dependent Member will also show on the Primary Member’s account.
Note: Other fields shown here (Pre-bill, and Show Dependents In Member List) do not apply to Rentals, and therefore can be ignored.
Schedule
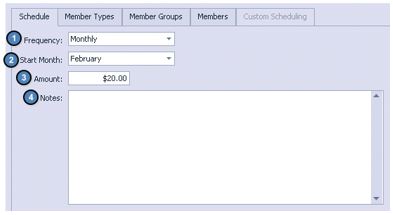
Frequency - Select the frequency of the Billing Schedule (Monthly, Quarterly, Semi- Annual, Yearly, or Custom).
Start Month - Select the month the Billing will start.
Amount - Enter the Amount to be billed.
Notes - Add any additional Notes to the Billing Schedule.
Because this is a Rental Billing Schedule, the Member Types, Member Groups, and Members tabs can be ignored. The Billing Schedule will be applied to the member based on the Rental Item they rent/occupy.
Rental Types
Rental Types determine the maximum number of occupants permitted for a specific type of Rental, as well as the Billing Schedule to be charged to the attached occupants.
Accessing the Tool - Rental Types
To access Rental Types:
Select Membership across the top toolbar, hover the mouse over Rentals, and select Rental Types.
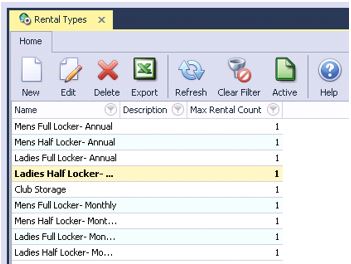
The Rental Types Grid will launch.
The primary functions associated with managing Rental Types are embedded in the Rental Type setup screen, which can be accessed by double-clicking on an existing Type, or clicking the New button.
Create a New Rental Type
To create a new Rental Type:
Navigate to the Rental Types Grid and perform either of the following to launch the Rental Types setup screen:
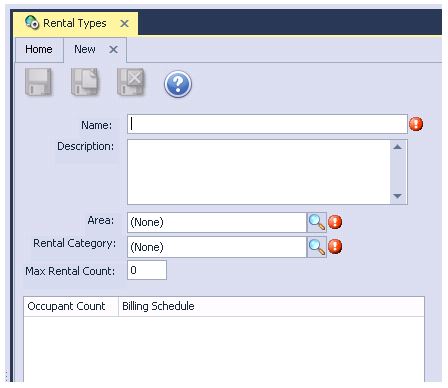
The Rental Types setup screen will launch.
Please see below instructions:
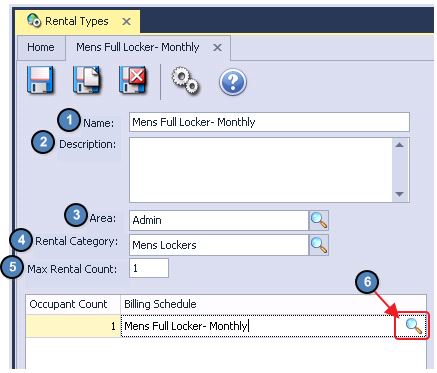
Name - Enter a Name for the Rental Type.
Description - Enter a Description. (Optional)
Area - Select the Admin Area. Because Billing Schedules are linked to the Admin Area, this Area will also need to be selected for the Rental Type.
Rental Category - Select the appropriate Rental Category (Ex. Mens Locker).
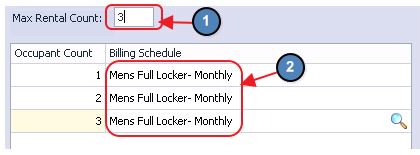
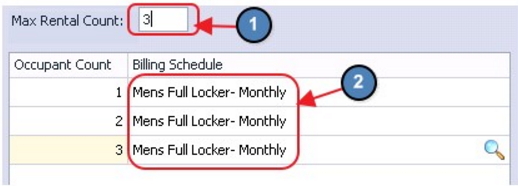
Max Rental Count - Enter the maximum number of occupants/members that can occupy a Rental Item of this Rental Type. The amount entered here will determine the number of Occupant Count Lines that populate at the bottom of the screen. This is where you will apply the Billing Schedule.
Billing Schedule - Use the lookup value and select the Billing Schedule created in the previous step.
Important:
If multiple occupants/members can occupy a Rental Item of this Rental Type, be sure to apply a Billing Schedule to each Occupant Count Line. Often, this will be the same Billing Schedule so each member is charged the same amount.
Rental Items
Rental Items represent the specific entities at the club that can be rented. Examples include Locker Numbers, Club Storage Numbers, or Slip Numbers. Rental Items are linked to a Rental Type, this is what tells the system the appropriate Billing Schedule to apply toward members attached to the Rental Item.
Accessing the Tool - Rental Items
To access Rental Items:
Select Membership across the top toolbar, hover the mouse over Rentals, and select Rental Items.
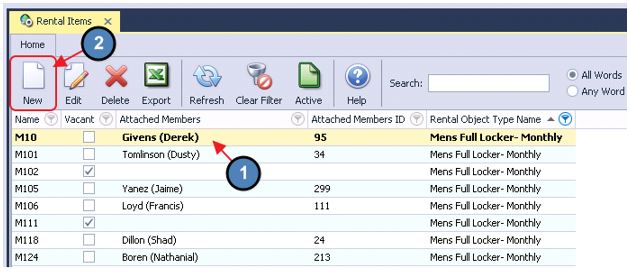
The Rental Items Grid will launch.
The primary functions associated with managing Rental Items are embedded in the Rental Item setup screen, which can be accessed by double-clicking on an existing Item, or clicking the New button.
Create a New Rental Item
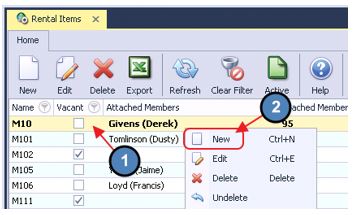
To create a new Rental Item:
Navigate to the Rental Items Grid and perform either of the following to launch the Rental Item setup screen:
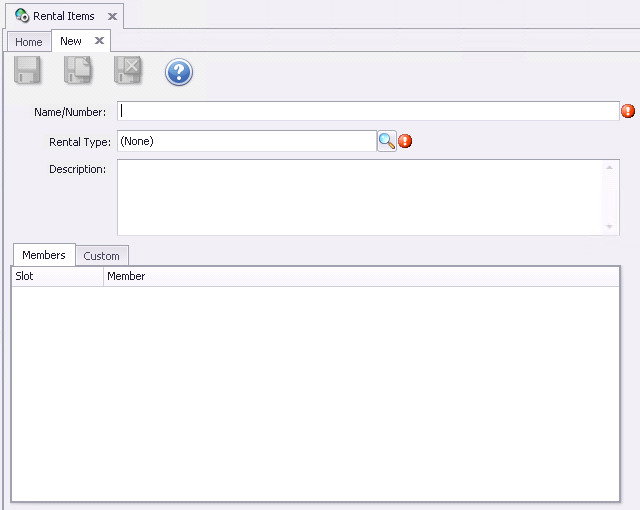
The Rental Item setup screen will launch.
Please see below instructions:
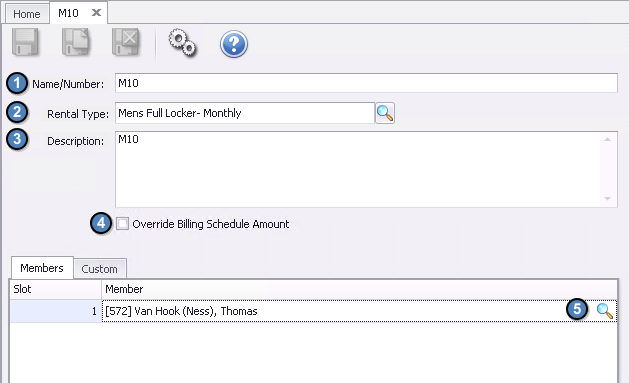
Name/Number - Enter a Name/Number for the Rental Item (Ex. M10 to represent “Mens Locker number 10”).
Rental Type - Select the appropriate Rental Type to be associated with the Rental Item. Remember, the Rental Type selected here will determine the Billing Schedule that is applied to the member(s) attached to the Rental Item.
Description - Enter a Description of the Rental Item (Optional)
Override Billing Schedule Amount - When selected, an Amount option will appear that allows the user to override the amount driven from the Billing Schedule that is applied.
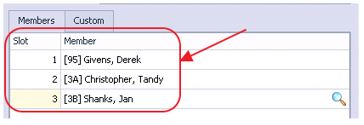
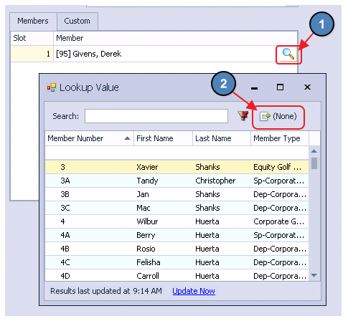
Members - On the Members tab, use the lookup to select the Member who is currently renting the Rental Item.
Note: If the attached Rental Type allows multiple members to be attached to the same Rental Item, multiple Slots will be available to the user.
Custom - If Custom Fields are relevant to the Rental Item, they can be entered on the Custom Tab.
Important: If multiple occupants/members can occupy a Rental Item of this Rental Type, be sure to apply a Billing Schedule to each Occupant Count Line. Often, this will be the same Billing Schedule so each member is charged the same amount.
Removing a Member
To remove a member from a Rental Item, select the lookup and choose None.
Rental Billing Summary in Member Profile
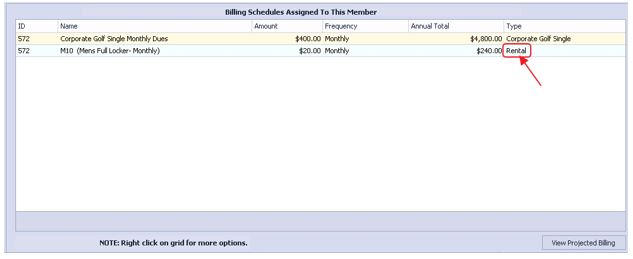
A summary of the Rental Billing Schedules applied to a member is available on the Billing Tab within the member’s profile.
To access this tab:
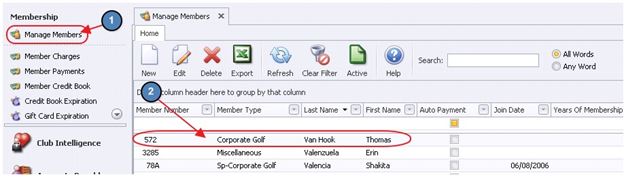
Navigate to the Manage Members Grid.
Select the member in question.
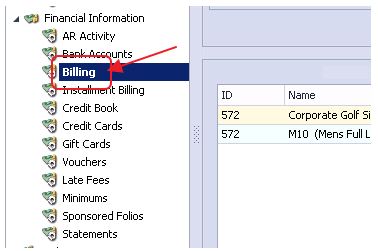
Select Billing on the left pane within the member’s profile.
Any Billing Schedule applied by a Rental Item will read Rental in the Type column.
Reporting
Reporting for Rental Items is available either within our Interactive Reports module, or using the Rental Items Grid. In this section, we will explore each option.
Interactive Reports
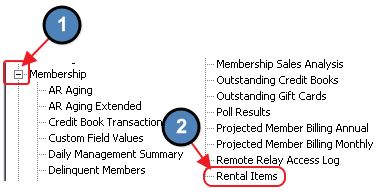
To access the Rental Items standard report:
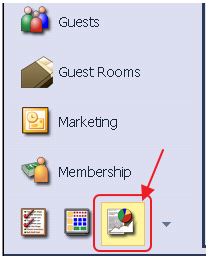
Select Interactive Reports from the left user menu.
Please see below for a description of each filter of the Rental Items report:
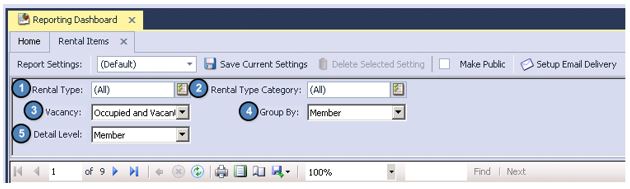
Rental Type - Select the Rental Types the user would like to view on the report.
Rental Categories - Select the Rental Categories the user would like to view on the report.
Vacancy - The Vacancy filter provides three options:
Occupied and Vacant - Occupied and Vacant Rental Items will be included on the report.
Occupied Only - Only occupied Rental Items will be included on the report.
Vacant Only - Only vacant Rental Items will be include on the report.
Group By - Allows the user to group the report either by Rental Item or by Member. This a great tool to use when the user would like to primarily see Rental Items vs. Members or vice versa. However, please note that the report can be expanded to view either level.
Detail Level - Select the detail level of the report, either by Member or Rental Item.
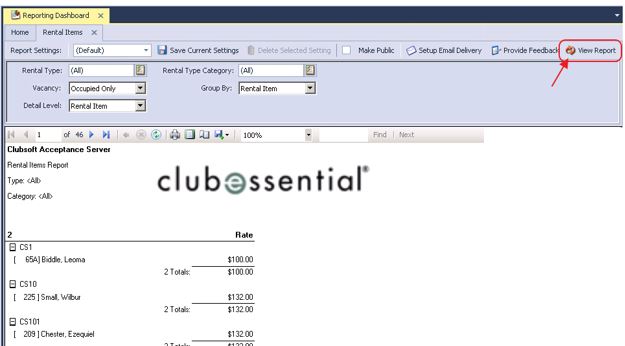
Once the desired filters are applied, select View Report on the top right of the screen.
Rental Items Grid
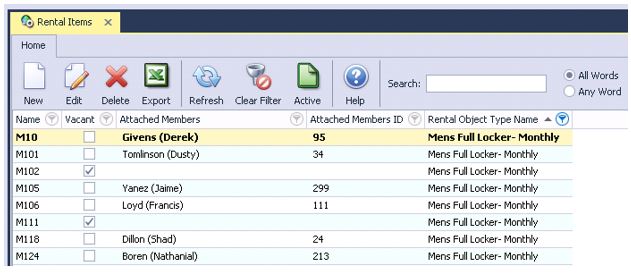
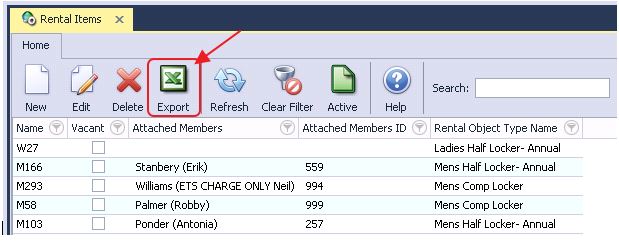
Another quick reporting tool to use is the Rental Items Grid itself. Just like all Grids within the Office system, the Rental Items Grid can be filtered, customized, and exported to Excel based on the available columns.
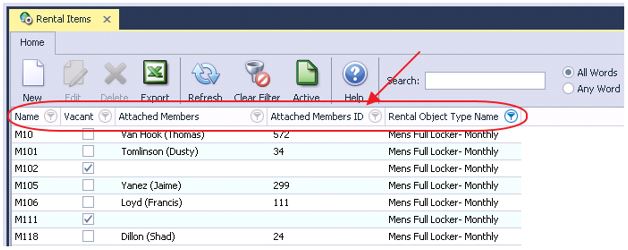
The most often used Column Headers for Rental Items include:
Name - Name of the Rental Item.
Vacant - If checked the Rental Item is Vacant, if unchecked the Rental Item is currently occupied.
Attached Members - Name of the member(s) attached to the Rental Item.
Attached Members ID - Member Number of the member(s) attached to the Rental Item.
Rental Object Type Name - The Rental Type associated with the Rental Item.
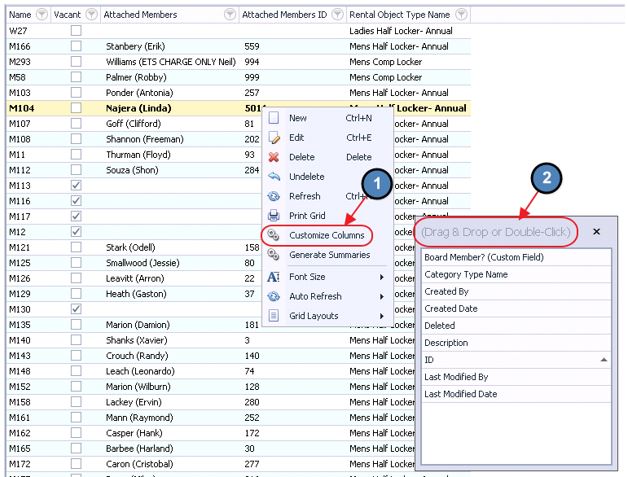
If these columns are not included on the present Grid, simply right click and select Customize Columns. Double click or drag and drop any columns the user would like to add to the Grid.
To export the Grid to Excel, select the Export tool on the toolbar. The system will export the Grid to Excel based on current filters, sorting, and column headings.
Best Practices
To ensure additional Rentals are not billed to Resigned Members, immediately classify Resigned Members to a Resigned Status. This will prevent additional Rental Billings from processing.
FAQs
Q. Can Members have more than one Rental?
A. Yes, Members can have multiple rentals, and be billed for them based on their individual billing schedule attached to the Billing Item.
