Versions Compared

Key

  • This line was added.
  • This line was removed.
  • Formatting was changed.

...

Table of Contents

Table of Contents

...

minLevel1

...

maxLevel

...

7

...

Overview

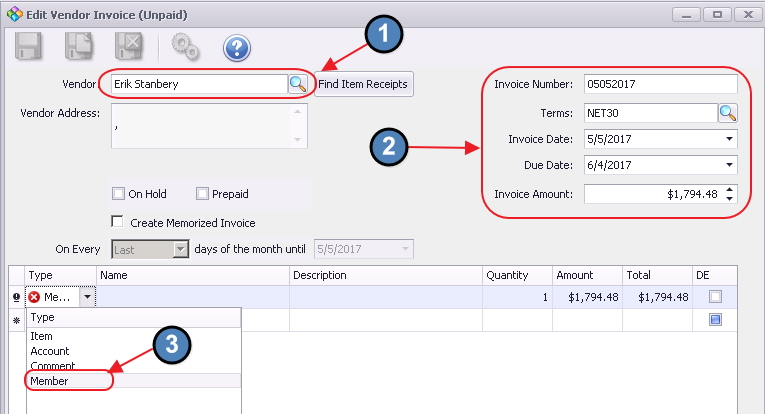
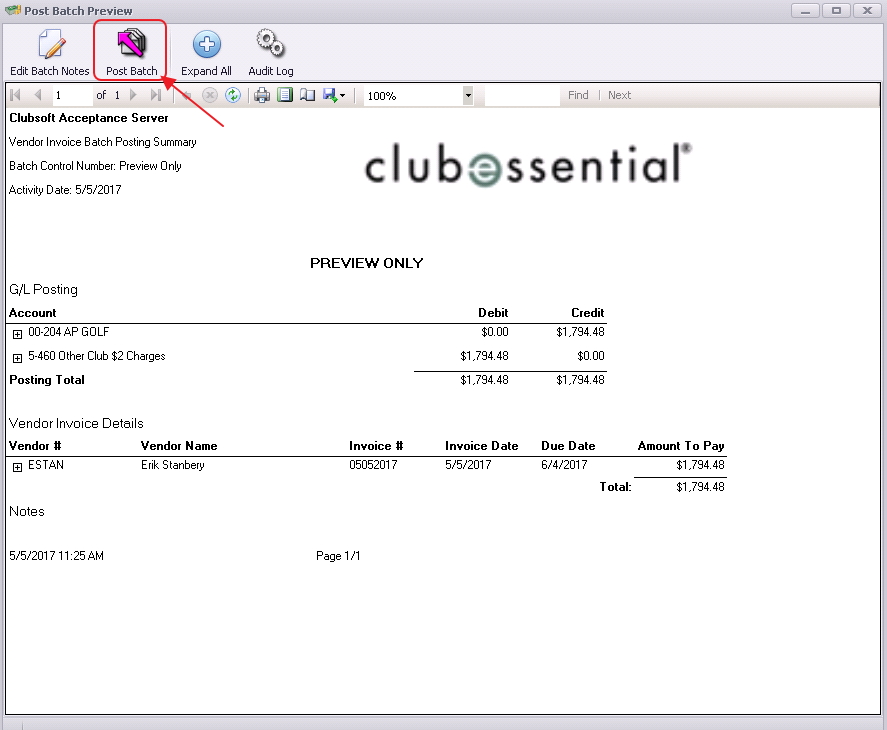
The reciprocal charge feature enables a user to enter an invoice for a reciprocal club and create the charge for the member at the same time. Once the invoice batch is posted, the system will create a charge batch under Approve Charge Batches in Membership, which can be posted to charge the member’s account.

Note: Once the Vendor Invoice Batch is posted and the membership batch is created, there is no longer a connection between the two batches. Changes to the membership batch will not affect Accounts Payable. Any service fees charged to the members for processing reciprocal charges would be done through the Membership module as a separate Member Charge.

Use Case 
  • Grand Key Club has a reciprocal agreement with another private Club (West End Club),  allowing their members to play one another’s golf courses on an arranged basis.  Mr. Smith (a Grand Key Club member) played West End Club’s course last week.  Grand Key just received an invoice from West End for Mr. Smith’s round. Grand Key enters the invoice to pay the West End Club, and simultaneously bills Mr. Smith for his play.


Content

Table of Contents
maxLevel4
minLevel2
excludeNon-Member Payments


...

exclude

...

Table of Contents

Setup Member as a Vendor

To properly process a refund check, the member in question will also need to be setup as a Vendor. Please see our Manage Vendors manual for more information on how to setup a new vendor.

Create a Refund Check

  1. Access the Invoice Receipt screen by selecting Accounts Payable from the user menu and choosing Enter Vendor Invoices (the invoice entry screen).

Image Removed

  1. Follow instructions for Standard Invoice Entry. Complete the heading of the Invoice Receipt Screen. Please be sure to select the newly created Vendor.

  2. The Invoice Amount should equal to the amount needed to net the member’s credit balance to zero. Under Type option, select Member.

Image Removed

  1. Then, in the name section, select the member to be charged. Use the lookup feature for assistance. Once Member is located, double-click to select and populate the Name field.

...

  1. The Description will default to Vendor Name. It is recommend to add a reference to a refund check in this field. This will display on the member statement, and can be adjusted if necessary. Leave Quantity at the Default. Enter the Amount of the

...

  1. refund, and click, Save and Close.

...

  1. Click Finish, and proceed to post batch.

Image Removed

Image Removed

  1. The invoice will then need to be paid and printed as normal. Please see our Pay Bills and Print Checks guide for more information.

Post Charge Batch to Member Account

  1. Once the invoice batch has been posted, the system creates a charge batch under Approve Charge Batches in Membership, which is then posted to charge the member’s account.  This will net the Balance Due on the member’s account to zero.

  2. Select Membership from the user menu and choose Approve Charge Batches.

Image Removed

  1. A new batch will auto-populate based on the Invoice Batch.  Click to select the batch and choose Post Batch.

...

  1. This will open the batch for review. Select Post Batch after review is complete.

Image Removed

Best Practices

...

Member Balance

  1. Once the Charge batch is posted, the member will have a net balance of zero on their account.

...

A. Go to System, System Settings, Accounts Payable tab. Ensure the Reciprocal Member Charges, Charge Item is populated properly.

Image Removed

Image Removed


Downloadable Guide

Billing Reciprocal Charges to Members - Guide

...

Image Added