| Table of Contents | ||||||||
|---|---|---|---|---|---|---|---|---|
|
Overview
An Item is a fundamental component of the Office system. Anything chargeable to a Member/Guest must be set up as an Item. An item fits into one of (3) categories: (1) Food and Beverage, (2) Retail, or (3) Billing. Items have a Child Relationship with Categories, which have a Child Relationship with Groups. Therefore, a Group, and a Category must first exist before an Item can be added to the system. Items are considered a "Module" within the Office system.
Use Case When initially setting up the system, or as new Items are added to Dining, Retail or Billing areas of a Club, Administrative Users will need to know how to Add a New Item. Example of an Item is as follows: *Food (Item Group) *Entree (Item Category) *Lobster Ravioli (Item) *8oz Steak (Item) *Trout w/Crab Sauce (Item) |
Video
This video walks Users through how to create a new Item; beginning first with basic criteria relevant to all (3) item types (utilizing a Retail Item example), and then moving through the characteristics unique to the Food and Beverage, and Billing Items specifically.
Note: Sections of the videos have been referenced below with corresponding times in the video for ease of access
| Total Video (Length) | 8:56 | |||
|---|---|---|---|---|
| Create a New Item | 0:26 | Item Inventory Settings | 5:05 | |
| Item Fields | 0:45 | Food and Beverage Item Specifics | 6:01 | |
| Item Settings | 1:42 | Billing Item Specifics | 8:29 | |
| Item G/L Distribution | 4:54 |
Content
|
|---|
Navigation
Within the Clubessential Office Product:
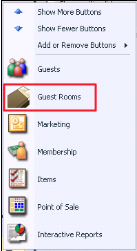
Click on "Items"
Click on "Manage Items"
Then, click, “New.”
Item Setup screen will launch.
To set up an item, General Fields, General Settings, G/L Account Settings, Inventory Settings, and Additional Settings (specific to Item type) must be entered and saved.
General Item Fields
In the top of the Item Setup Form, the general fields for the Item must be defined.
First, the “Name” field for the Item must be entered.
Once name has been entered, hit the “tab” key to move to the next field.
“Description” field will auto-populate with contents from “Name” field; however, this may be edited.
Next, populate the “Retail Price” and “Member Price” fields. If the Member Price and the Non-Member Price (Retail) are the same, both fields can be populated with the same amount (as shown below).
Then, choose appropriate “Item Category” (Parent Relationship to Item). The lookup box may be useful in identifying the proper Item Category.
Search by name, and then select appropriate Category.
The “Qty on Hand” field cannot be populated, and is used to display existing (Inventoried) Items current on hand quantities. For new items, this display-only field will always be zero.
The “Average Cost” field as calculated through the receipt of Inventory is displayed in this box. When setting up a new Item, this field will be $0.00. In the future, if history is not available, and an average cost is needed to calculate an Inventory Adjustment amount, this field may be populated.
General Item Settings
The “Ask for Price” option (when checked), indicates that when the Item is selected at the POS, a price will need to be input. Typically, this option is selected for Miscellaneous Items.
Example from POS if Item is marked as “Ask for Price.” When Misc. Ball is selected as an Item, the following screen appears for price to be input.
The “Ask for Name” option (when checked), indicates that when the Item is selected at the POS, a Name will need to be input. Typically, this option is also selected for Miscellaneous Items.
Example from POS if Item is marked as “Ask for Name.” When Misc. Item (such as Open Food) is selected as an Item, the following screen appears for name to be input. The name entered here will print on the prep printer tickets sent to the kitchen, as well as the receipts.
The “Ask for Quantity” option (when checked), indicates that when the Item is selected at the POS, a Quantity of the Item will need to be input. Typically, this option is selected for Miscellaneous Items (such as Open Bar).
Example from POS if Item is marked as “Ask for Quantity.” When Misc. Item (such as Open N/A Beverage) is selected as an Item, the following screen appears for Quantity to be input.
Check, “Credit Book Eligible” if Item can be paid with Member Credit Book, (or Member Sweeps as some Clubs call it.)
Check, “Inventoried Item” option if Item will be part of the Perpetual Inventory, where costs and quantities will be maintained and managed within the system.
The “Track Countdown” option may be enabled for an Item that has a limited quantity. Most often, this option is useful to a Food and Beverage Manager monitoring the limited quantity of a Daily Special or other limited item. By entering a quantity in the Track Countdown field, the system prevents overselling the Product. When the countdown reaches zero, the Item is no longer available for ordering.
The “Daily Special” option may be checked to allow the Item to be shown in the Daily Specials section of the POS.
For example, an Item marked as Daily Special, would appear as an option after the Daily Specials button was selected in the POS.
When the “Auto Increment Seat” option is checked, every time the Item is ordered, the System will automatically navigate to the next seat. Note: this is an Option at the Category level as well.
When the “Auto Increment Cover” option is checked, every time the Item is ordered, the System will automatically add another Cover count to the order. Note: this is also an Option at the Category level.
When an Item has the “Disable ability to discount” option checked, the Item will not be able to be discounted at the POS.
The “Active” option should always remain checked, unless the Item is no longer used in the system.
The “Don’t Display at POS” option (if checked) will prohibit an Item from appearing at the POS.
When the “Round of Golf” option is checked and the Item is sold, this metric will also be tracked, and can be reported on utilizing the FInancial Report Writer.
When the “Ask for Guest” option is checked, the system will prompt User to enter a Guest Name when the Item is selected. This is most often associated with Guest Fees.
For example, when a “Guest Fee 18” item is selected (and the item is marked “Ask for Guest”), the system will prompt the User to enter a Guest name.
Having Guest information helps with tracking Visits, sending notifications, and other Club Marketing efforts.
When the “Tax Inclusive” option is checked, the system will back out the Tax and Service Charge Rules from the Prices set up in the system for the Item. In the example below, $14.95 would represent the all-in, final price paid by the Member/Guest.
The “Allow Fractional Quantity & Price” option (when checked), allows the Item to be sold in increments other than whole units. This option is most commonly used by Yacht Clubs selling Gallons (or fractions thereof) of gasoline.
In this section, the Item is designated into one of the following categories:
FnB: Food and Beverage Items
Retail Item: Merchandise Item, Greens Fee Item, Court Fee Items
Billing Item: Dues, Late Fees
G/L Override Account Settings
Below the General Item Fields and Settings, is the area to define G/L Account Overrides. If this section is left blank, the system will default the Item G/L distribution to accounts defined at the Item’s Group and Category levels. The Account Lookup feature may be used to assist in Account selection. If one or many accounts are defined differently at the Item level, the Item level will override the Item’s Group and Category settings.
...
Inventory Settings
...
In the Inventory section of the Item Setup file, additional fields can be populated to assist with Inventory tracking, and sourcing.
...
...
The “SKU Number” may be manually entered, or auto-generated by the system to assist with item tracking. Once the Item is saved, the system will automatically generate a SKU number or unique number identifier to associate with the item.
...
The “Preferred Vendor” option may be populated for the Item based on the Vendor most often selected for supplying the item. The Lookup button can be used for assistance in finding and selecting the desired Vendor.
...
The “UPC Code” or barcode number can be entered for the item. This item allows the Item to be associated with a barcode number that can be read through the system when selling or inventorying the items.
...
The “EPIC Code” is related to a future feature.
...
The “Default Vendor Ref” field can be can populated with the Preferred Vendor’s reference number for the Item (the number the Vendor uses in their system to identify the item). Having this number populated can help when re-ordering the item.
...
Generally, the “Allow To Be Sold Without Qty Available” option should not be checked to ensure the Item’s proper costing of goods sold. If, however, the need exists for an item to be sold prior to its original costing, the option does exists to exist to allow this to occur.
Additional Settings
Food and Beverage Settings
In addition to the Fields and Settings already covered, when setting up a Food and Beverage Item, a few more settings will specifically become relevant.
When creating a Food and Beverage Item, the “Modifiers” section of the file enables Modifier Groups to be attached to the Item. This is particularly relevant with Items that contain options. For example, a Hamburger Item (or other meat Item), may have a Modifier Group attached called, “Cooking Temperatures”, which would contain Rare, Medium Rare, Medium, etc, and would allow a Member to order a Hamburger as desired.
To attach a Modifier Group to an Item, click on the Modifier Group Lookup button.
Search for the appropriate Group, check the desired Modifier Group, and click, “Select.”
When more than one Modifier Group is attached to an Item, after selecting a Group from the listing, the “Move Up” or “Move Down” buttons may be selected to modify the order in which the Modifier Groups appear at the POS during order entry.
Next, in the Point of Sale section of the Item file, some additional options exist specific for Food and Beverage Items.
The “Default Send” field is where the Item (as it appears on the Kitchen Prep Printer) can be set. This field will default with the Item’s Name; however, this can be edited.
The “Ticket Message” field can be utilized to add a message to the receipt when the Item is ordered. Ticket messages can also be established at the Category level.
$Tip: Cross-marketing upcoming events in the Ticket Message can be extremely effective. For instance, if there is an upcoming Scotch tasting, a Ticket Message could be attached to Scotch Items, notifying the Members who order Scotch of the upcoming event.
The “Bin Number” field can be populated for Items stored in numbered Bins (like Wine). Once populated, the Staff can then look up items in the POS by Bin Number for ease of reference.
The “Cook Time” field is related to a future feature.
Assigning a “Default Course” to the item can be helpful when it is customary for the Staff to send food orders to the kitchen by course.
Additionally, in the “Print Configuration” section of the Item file, instructions can be added to specify which prep printer this item will print to once ordered from the POS. Note: Any instructions set at the Item level will override those established at the Category level.
Billing Item Settings
When creating a Billing Item, an "A/R Override" account must be specified. This is the General Ledger account that will be debited when the Item is charged.
Save and Close
Once Item Fields and appropriate Settings have been designated, click, “Save and Close,” to complete the addition of the new item.
FAQs
Q. Can an Item belong to more than one Category?
A. An Item can only belong to one Category and one Group. You can, however, have an unlimited number of Items in a Category and an unlimited number of Categories in a Group.
Downloadable Guide
...
Table of Contents
| Table of Contents | ||||||
|---|---|---|---|---|---|---|
|
