| Table of Contents | ||||||||||
|---|---|---|---|---|---|---|---|---|---|---|
|
Table of Contents
| Table of Contents | ||||||
|---|---|---|---|---|---|---|
|
...
...
...
Use Case(s)
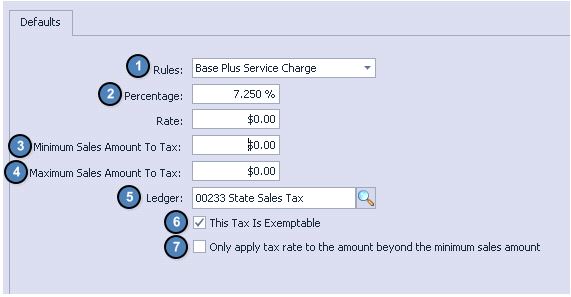
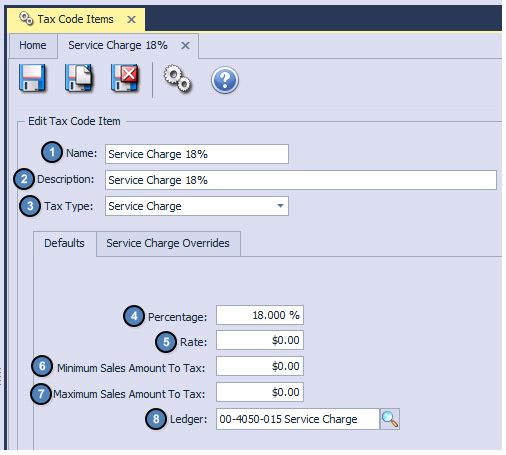
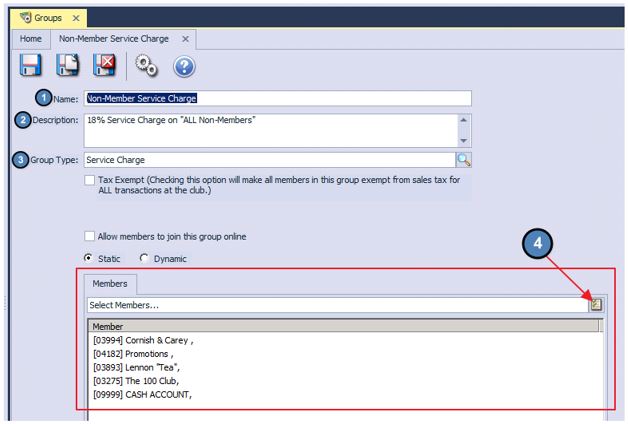
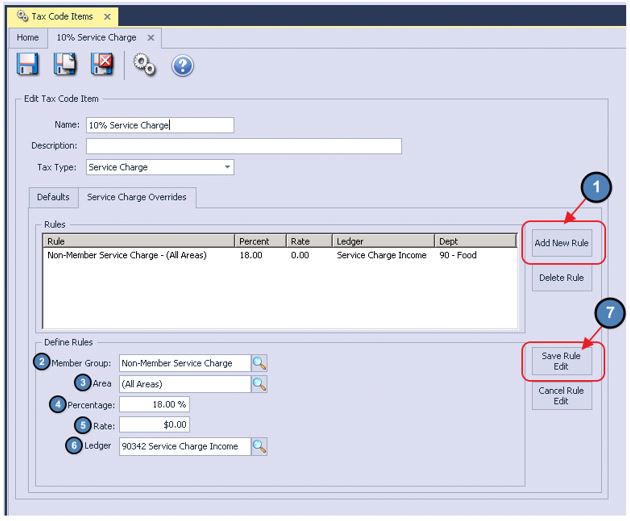
Due to specific arrangements made with a Member to retain their Membership, a Club has agreed to charge the Member a reduced Service Charge fee. The Club will ensure the reduced Tax Code Item is applied by specifying the rules in the Tax Codes, and ensuring the Member is assigned to the Reduced Tax Code Service Group.
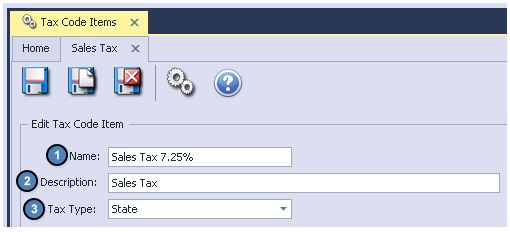
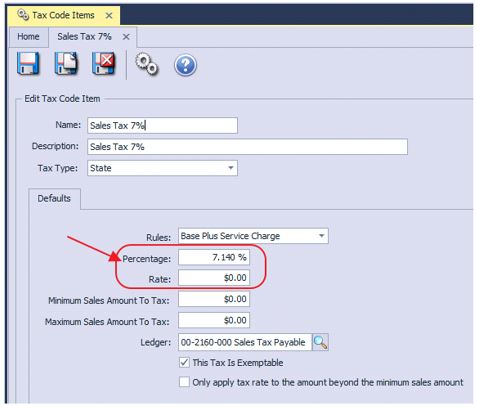
Due to the recent election, local sales tax will be increasing .25% next month. The Club will update the Tax Code Item after Club operations end the last day of the month, and prior to business opening the first day of next month to ensure the increase in sales tax is properly applied.
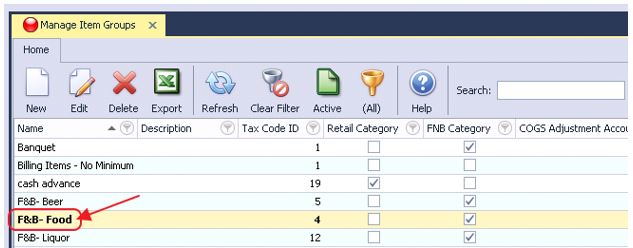
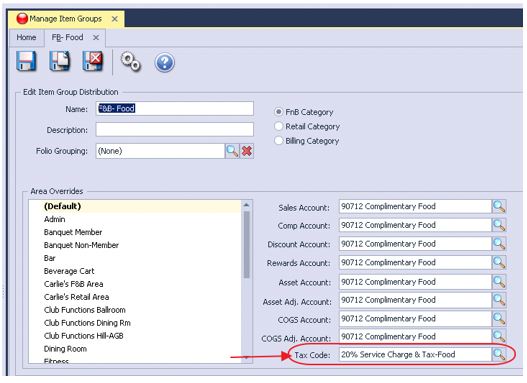
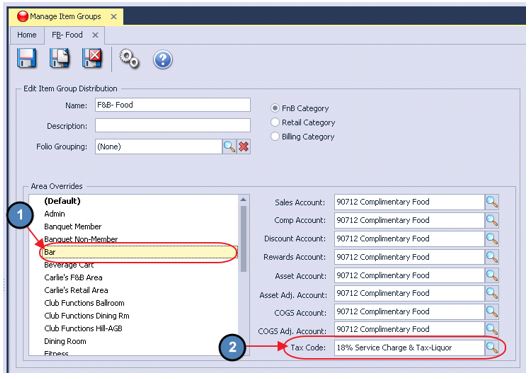
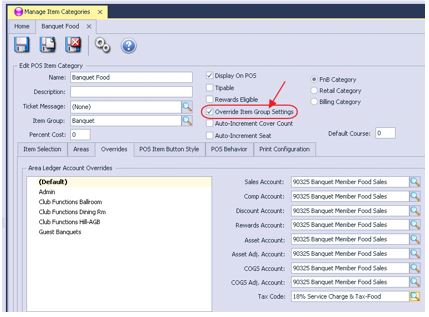
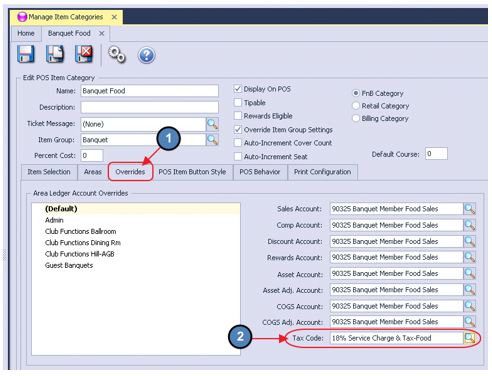
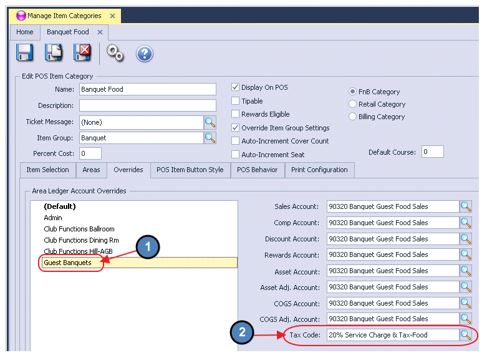
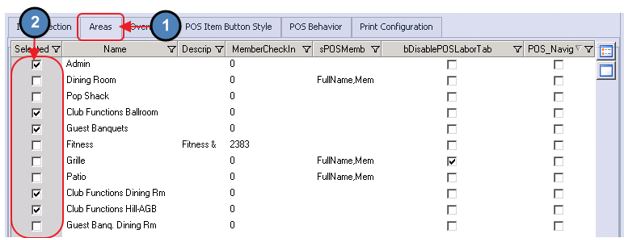
When certain Items are sold in designated areas of the Club, certain taxes/service charges no longer apply. As such, the Club will set up Area Tax overrides.
...
|
|---|
...
...
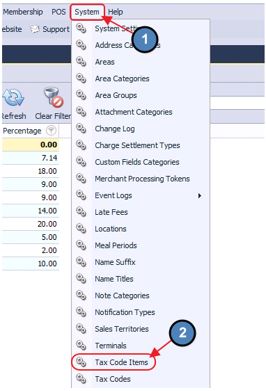
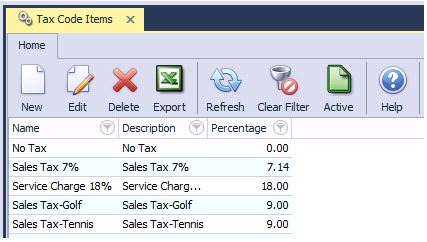
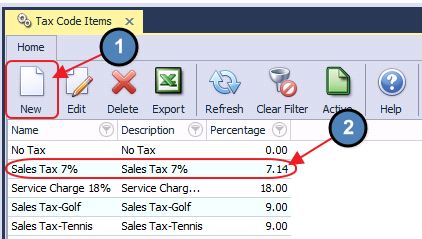
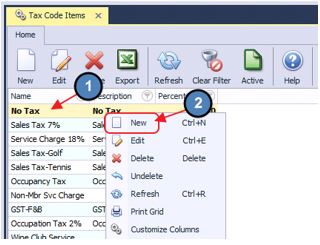
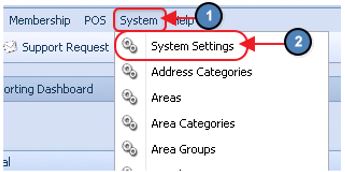
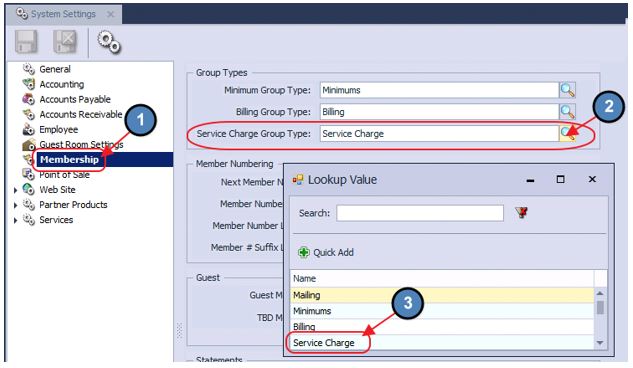
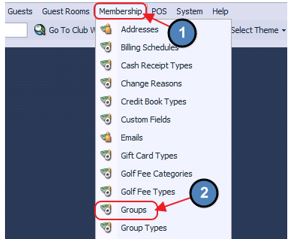
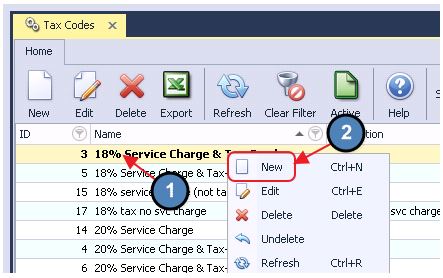
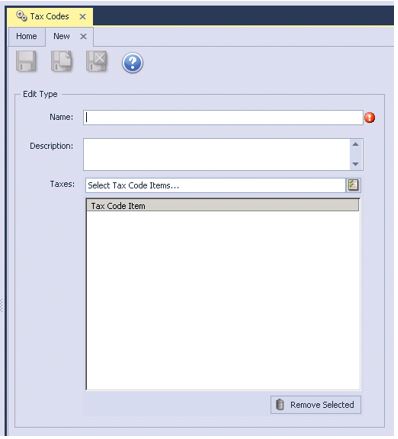
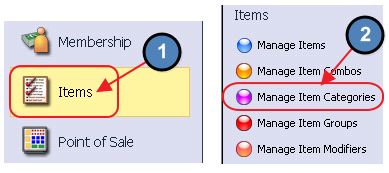
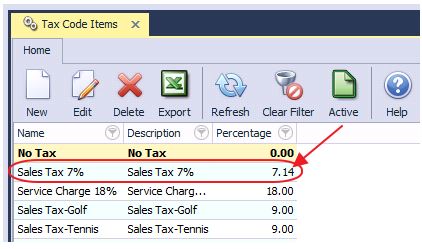
Accessing Tax Code Items
...
...
...
...

...
...
...
...
...
...

...
...

...

...

...
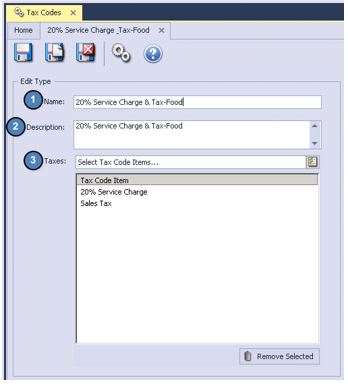
Example:
...
...
...
...
...
...
...
...

...
...
...
...
...
...
...
...
...
...
...

...
...
...
...
...
...

...
...
...
...
...
...
...
...
...
...
...

...
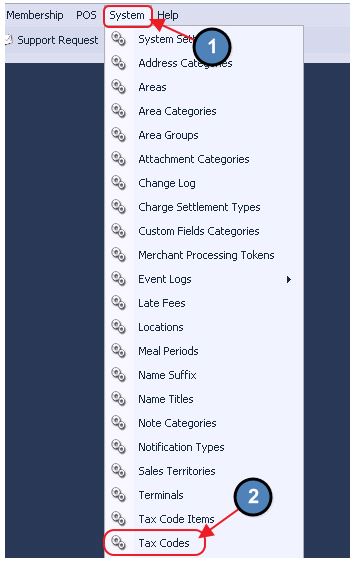
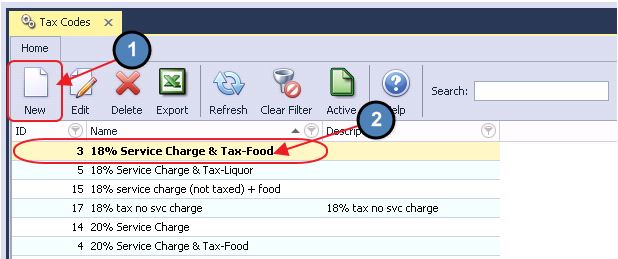
Tax Codes
...
...
...
...
...
...
...
...
...
...
Best Practices
When ticket splitting is required, ensure to enter Items as normal, and then hit the Split Ticket button to launch the Ticket Splitting screen.
Ensure ticket to be split (or tickets with Item(s) to split) is marked as “Selected” in the Split Ticket screen, prior to attempting to move Items to another ticket.
When combining Tickets, ensure all tickets are at the same table prior to merging them by utilizing the Change Table feature in the main POS screen. Once all tickets are at the same table, utilize the Split Ticket feature to combine the tickets.
FAQs
Q: I need to move an Item back to its original ticket - how do I do that?
A: Ensure the new ticket created is marked as “Selected” in the Split Ticket screen. Then, highlight the Item from the left screen on the Split Ticket screen, and then click on the original ticket to return the item to it.
Q: When splitting a ticket by a fixed amount (ie - $10.00 on one ticket, and the remainder on another), how do I ensure the $10.00 ticket is the final amount due, inclusive of all tax, etc?
A: When splitting a ticket to a fixed all-inclusive amount, ensure to check the Tax Included box, located on the Split Ticket screen when splitting the ticket.Can I give a rain check a fixed expiration date, like 12/31/2017, rather than having it expire in 365 days?
Downloadable Guide
...
