Versions Compared

Key

  • This line was added.
  • This line was removed.
  • Formatting was changed.


...

Table of Contents

Table of Contents
minLevel1
maxLevel7
excludeTable of Contents

Widget Connector
width600
urlhttps://vimeo.com/manage/videos/686844699

...

Video

This video contains highlights from a training Webinar given on Articles.

Note: Sections of the video have been referenced below with corresponding times in the video for ease of access

Total Video (Length)4:30   
Accessing Articles0:50 Article Settings2:07
Article Interface Overview1:14 Adding Content2:47
Adding Articles1:55   


Content

Table of Contents
maxLevel4
minLevel2
excludeAxis - Articles


Image Removed

Accessing Articles

To access Articles follow the steps below depending on your access role.

...

Use Case(s)

Articles have multiple uses, such as: blogs, tournament results, meeting minutes, or news announcements. The Article Plug-in is typically added on the member home page, however, the plug-in may be added anywhere throughout the website as desired. Clubessential can assist with adding and designing the Article Plug-in.


Accessing the Tool

  1. Hover overAdmin bar in the left hand corner of the screen

...

Image Removed

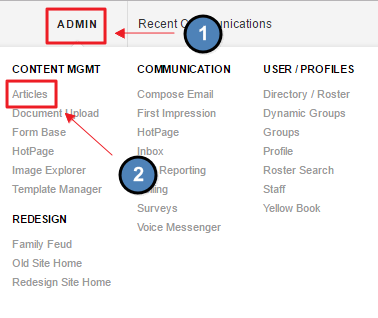
Editors: Hover over Admin in the main navigation, select Main Tools, and then Articles.

Image Removed

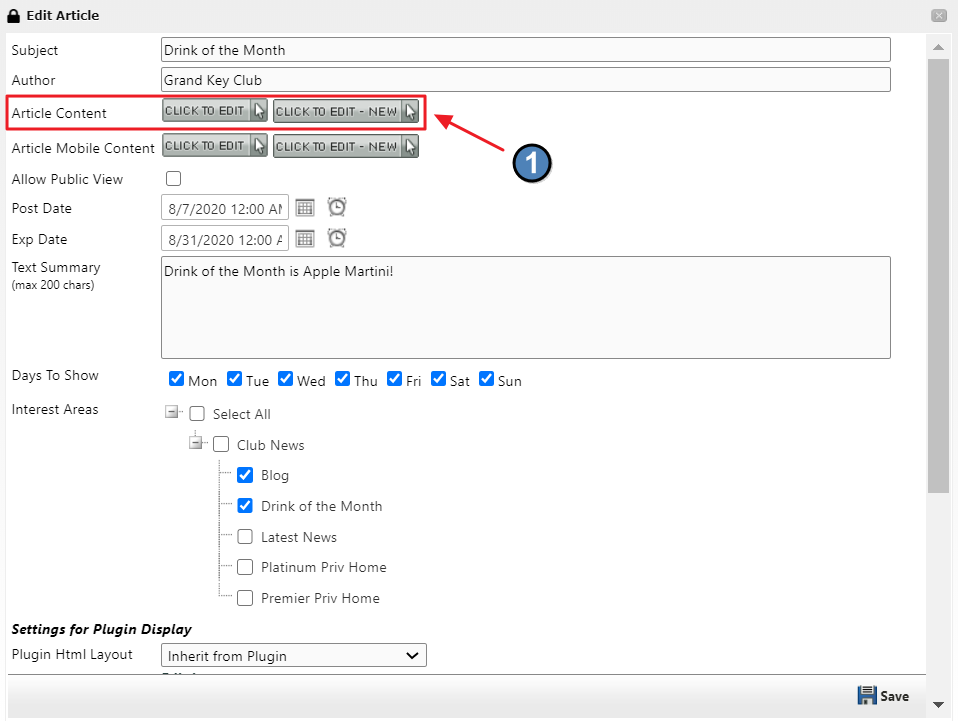
The following Article Interface screen will launch.

Image Removed

...

  1. Click Articles.

Article Interface

  • Current Articles: shows all publishedArticles.

...

  • Archived Articles: shows allArticles that are now Archived.

...

  • Unpublished Articles: shows Articles that are still being edited and not yet published, or archived.

...

  • Filtering: similar to calendar filtering, allowing the users to choose which Category of Articles to view.

...

Adding Articles

Click the Add Article button.

...

Image Removed

This will bring up the Add Article Interface.

Image Removed

  • Title: this will display on the Article Listing when is the Quick View Display.

...

Image Removed

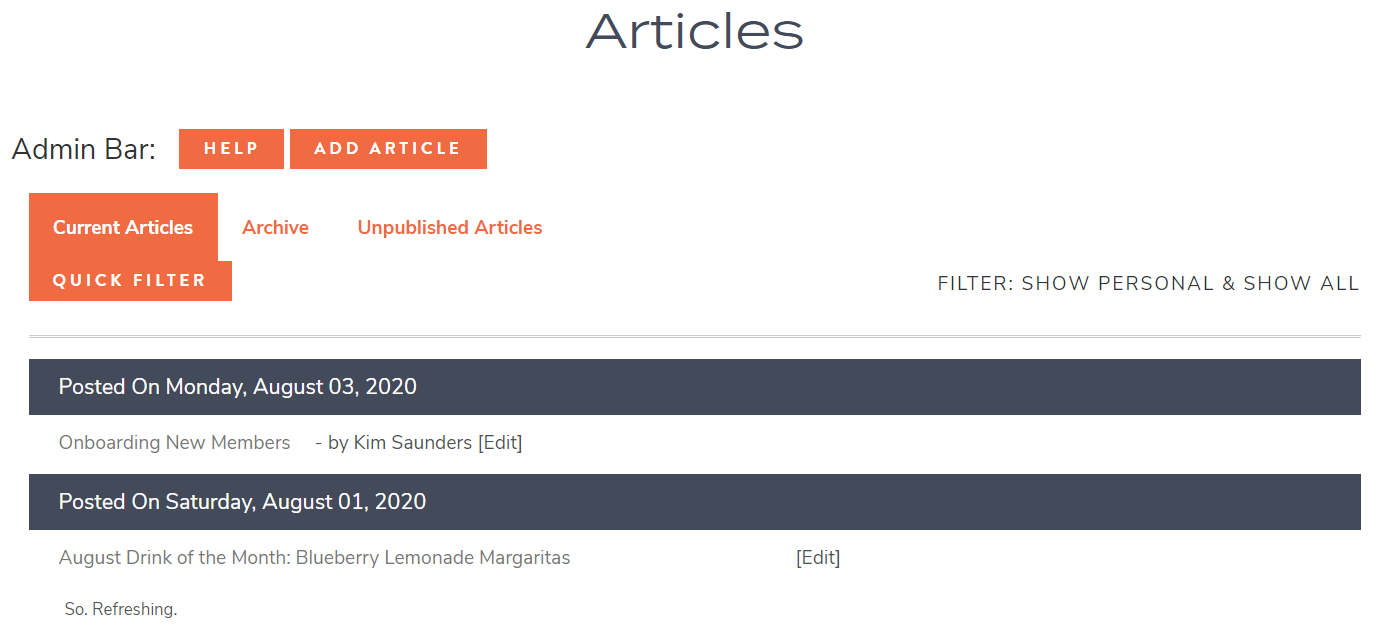
Article Listing Quick View Display:

...

  • Author: this will display in the Listing View under the Current Articles tab.

...

Author in Listing Viewing Display:

Image Removed

  • Post Date: allows for creation prior to posting.

...

  • Set a date and time to post.

  • Expiration:

...

  • moves the

...

  • article to

...

  • Archived

...

  • at the set date.

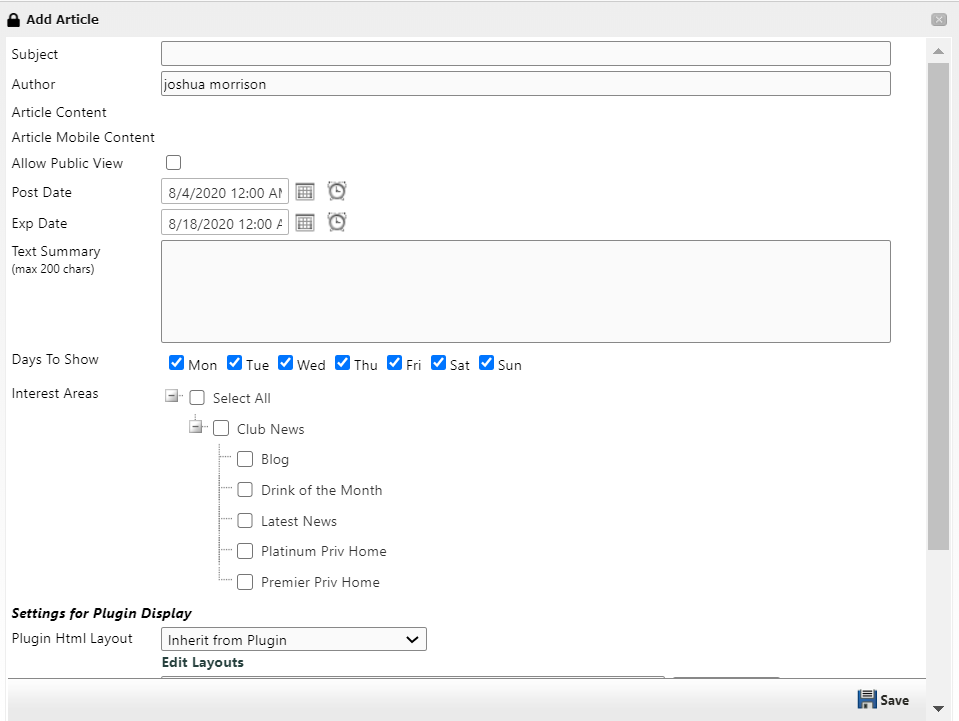
    • May set a date and time to expire.

Image Removed

  • Text Summary: allows for a short description of the Article. This usually shows on the Quick View Display.

...

Image Removed

Text Summary is Listing Display:

...

  • Days to Show: choose which days the Article should show on. This could be all days, or select days.

...

  • Interest Areas: choose a Category for the Article to be assigned to. This is how Articles are distributed throughout the website. Note: you must assign an Interest Area to save and continue.

...

  • Settings for Plugin Display: for advanced use. Designs the layout of the Articles. Set-up by Clubessential.

Image Removed

  • Image Source: if the Article display is using a thumbnail image, add an image here. This will launch the Image Explorer, so an image can be chosen.

...

Image Removed

...

Image Removed

  • Once the image is added, you will see the thumbnail in the Image Source section.

Image Removed

  • Image Link URL: add event, document, page, or hyperlink.

...

  • Full Article Link: this is the ‘read more’ text that will display on the on the Article Quick View Display. This

...

  • can be set to a desired text. Example: Read More, Click Here, Continue, etc.

...

Full Article Link in Quick View Display:

Image Removed

  • Date Style: set-up by Clubessential, but used for the Article Quick View display.

...

Save to continue to add content to the Article.

Image Removed

...

  • Two buttons will now appear beneath the Add Article Interface. Open the "Click to Edit" to access the

...

  • Legacy Editor or select "Click to Edit - New" to begin adding content with the new editor.

...

  • Once the

...

  • Editor is open, open content, imagery, and hyperlinks to create content. Save in the

...

  • Editor when finished.

...

Save again in the Articles Interface.

...

 Image Removed

...

...

...

...

...

...


Q. How does the Member Charge All function work?

A.  This feature is not applicable in the Dining Reservations system.  It is applicable for Events and Tee Times.  See respective guides for more information.


Q. Can Birthday cake be added as an Option when making a reservation?

A. Yes, Birthday Cake can be created as an option, similar to the High Chair/Booster seat options that can be set up.  The Options do come over to the POS, and are visible in the Options column in the main Dining Grid.

Q. Can a Reservation be made directly from the Point of Sale?

A. Yes, a reservation can be made directly from the POS by utilizing the Admin Dashboard.  Once the Dashboard has launched, select the Dining Room, the time, and then make the reservation utilizing the Reservation form.  The information exists in real-time within the POS once the Reservation has been booked.

Q. How do I know if I am set up for Dining Unification?

A. Contact your Account Manager.  If you don’t know who your Account Manager is, email am@clubessential.com, and someone will follow up with you to let you know.

Downloadable Guide

Axis - Articles


...

Image Added