...
Table of Contents
| Table of Contents | ||||
|---|---|---|---|---|
|
...
|
...
|
...
| Widget Connector |
|---|
...
|
...
|
...
|
...
Video
This video provides an overview of how to use the Axis tool functionality to Directory Management.
Note: Sections of the video have been referenced below with corresponding times in the video for ease of access
| Total Video (Length) | ||||
|---|---|---|---|---|
Content
|
|---|
...
Use Case(s)
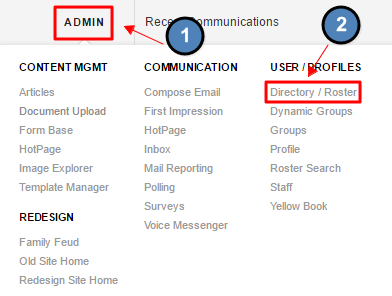
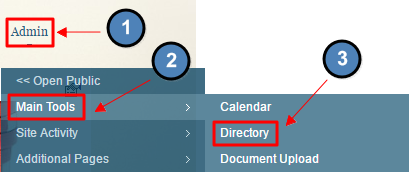
In order for any member, or staff member, to have access to the website, they must first be active in the Directory. The Directory is used to house member information such as: membership status, membership start and expiration date, contact information, affiliated groups or organizations, and account information. The Directory is also used to provide login information, and website privilege level (no access, member access, editor access, admin access).
...

...

...
...
...
...

...
...
...
...

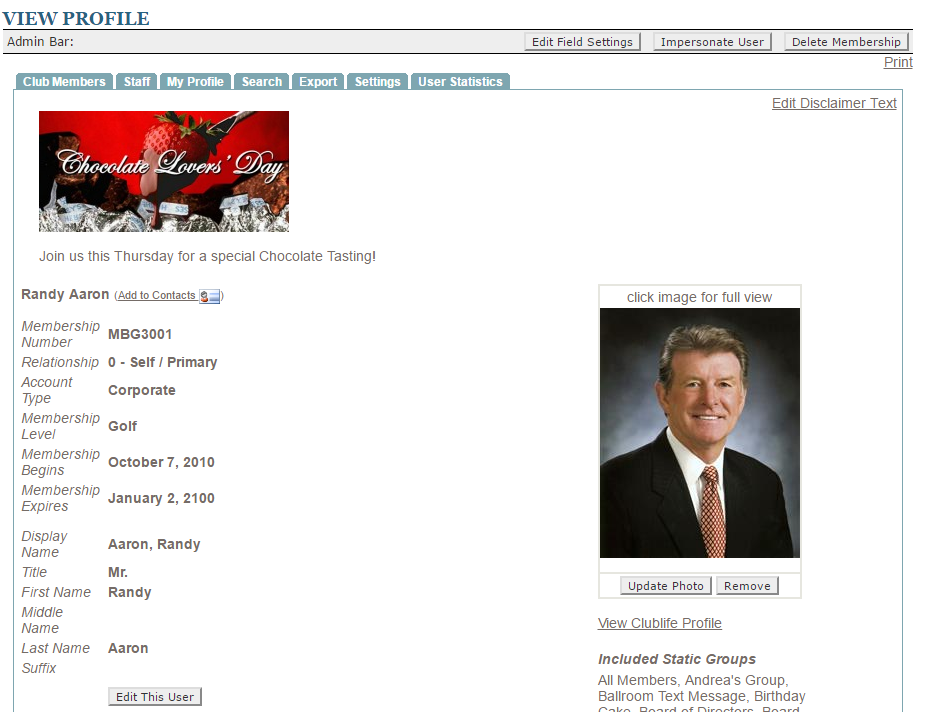
Members in the Directory will typically be listed by Last Name, First Name along with their contact information such as: local address and phone number.

...

Editing member profiles will be discussed later in this guide.

...
...
...

The fields that are displayed in the Club Members tab can be customized to offer other information provided in the Directory. Clubessential Support can assist with customizing this layout as needed.
Note: Fields that are listed in the Club Members tab will show to members.
At the bottom of the member’s list, is a legend that is important to note for future troubleshooting with member’s accounts and recognizing website privilege level.

...

...
...
...
...
...

...

...

...
...
...

...
...
...

...
...
...

...
...
...
...
...

...
...
...

...

...
...
...
...
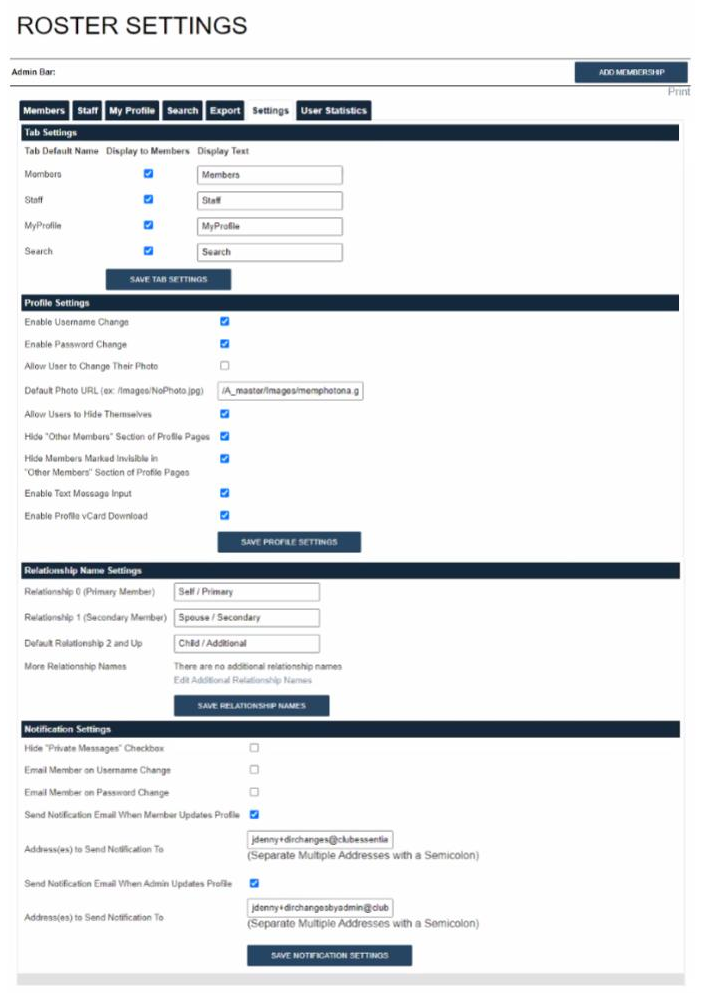
Under Notification Settings checkmark or uncheck options like Email Member on Username Change to alter the notifications members receive when making changes in the Directory.

...

...
...

...
...
...
...
...
...
Memberships may need to be added manually on the website for circumstances such as adding Staff members. Since most club’s member directory will be based on an accounting sync there is no need to add members manually, in fact it is not recommended to add members manually in most cases. Members should always be added to the accounting system first to allow the sync to pull information into the website.
The Add Membership button is located in the Admin Bar of the Directory. This will be available on any tab within in the directory, so you may use it in any location of the directory itself.
Click the Add Membership button to begin adding a new membership.

Follow the text field prompts to add in relevant information. Fields with a red asterisk next to them are required and information must be added.

When adding a Membership Number for a Staff member, it is recommended to use their last name and not an actual number as to not conflict with actual member numbers. If you are adding a member manually, be sure that the member number is not in use and is recorded in the accounting system so there are not duplicates. Duplicate membership numbers will lock both accounts out of the website until unique membership numbers are assigned.

Add a username and password for the user and provide this to the user for their first login.

Beneath the username and password field, there are two checkboxes for ‘Ask user to change username/password on next login’ and ‘Lock User From Logging In’. The first option is always checked by default, this will prompt the user to update their information upon first login. The second option is only used if the user must be locked out of the website.

The User Type and Admin Level are extremely important when setting up a new account since this will denote if the user is a member or staff and provide the appropriate privilege level.

Admin Levels:
- No Admin Access: access to the website, but no Admin or Editor access
- Editor: access to Editor functions (typically used for staff that may edit pages on the website and use limited modules)
- Admin: access to Admin functions (fully managers of the website)
Once the appropriate information has been added to the profile, click Create Membership at the bottom of the page to add the membership.
If you receive a pop-up denoting the password is not secure, click OK to override as this is a temporary password only used for the first time login.
Editing Profiles
You may edit a member or staff member’s profile by clicking on their name in the directory.

Once in their profile, click the Edit This User button.

From here, you can update any field as needed. Click Save Member at the bottom of the screen to update the information.
FAQs
...
Best Practices
- It is best to never add members manually as members should be synced from the accounting system only.
- When adding Staff members, be sure to set their user type to Staff so the staff member shows in the staff directory and not in the member directory.
Downloadable Guide
Directory Management
