Office Office Help Home
| Table of Contents | ||||||||||
|---|---|---|---|---|---|---|---|---|---|---|
|
...
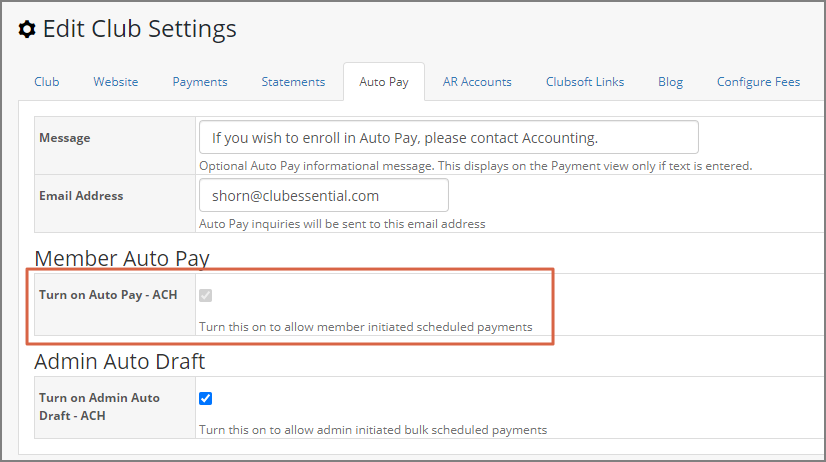
Once the token has been converted, to get started with Auto Pay, you must first enable or Turn On Auto Pay, for your club. To do so, click on System, and Club Settings. From here, select the Auto Pay tab across the top. Turn on either or both Auto Pay options (Auto Pay - ACH or Auto Pay - Credit Cards) depending on your Club’s requirements.

Allow Partial Payments
...
Please Note: These features are only available to clubs with CE Payments, Elavon (ETS) or PaySimple. The ability to turn on Auto Payments for other processors is not a possibility at this time.
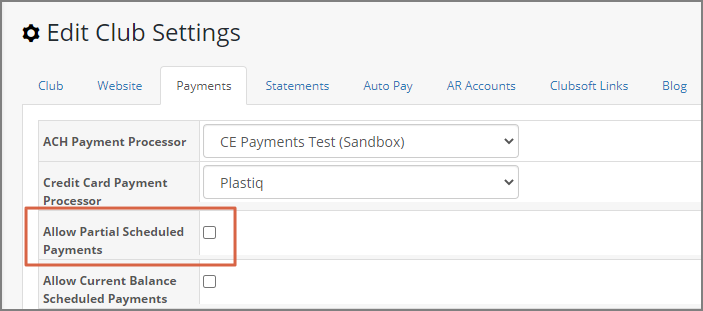
Allow Partial Payments
Next, determine whether your Club will allow partial payments or whether your Club will require the full statement balance to be paid. To allow partial payments, check the Allow Partial Payments box.

Blackout Dates
...
For example, blocking out the first or last few days of the month may be helpful to ensure a smooth month-end process. Place a check in the box next to the day(s) to black out. Checking Last Days of Month will block out the 28th through the last day of the month.

Informational Message
You can optionally display a message/admin email on the 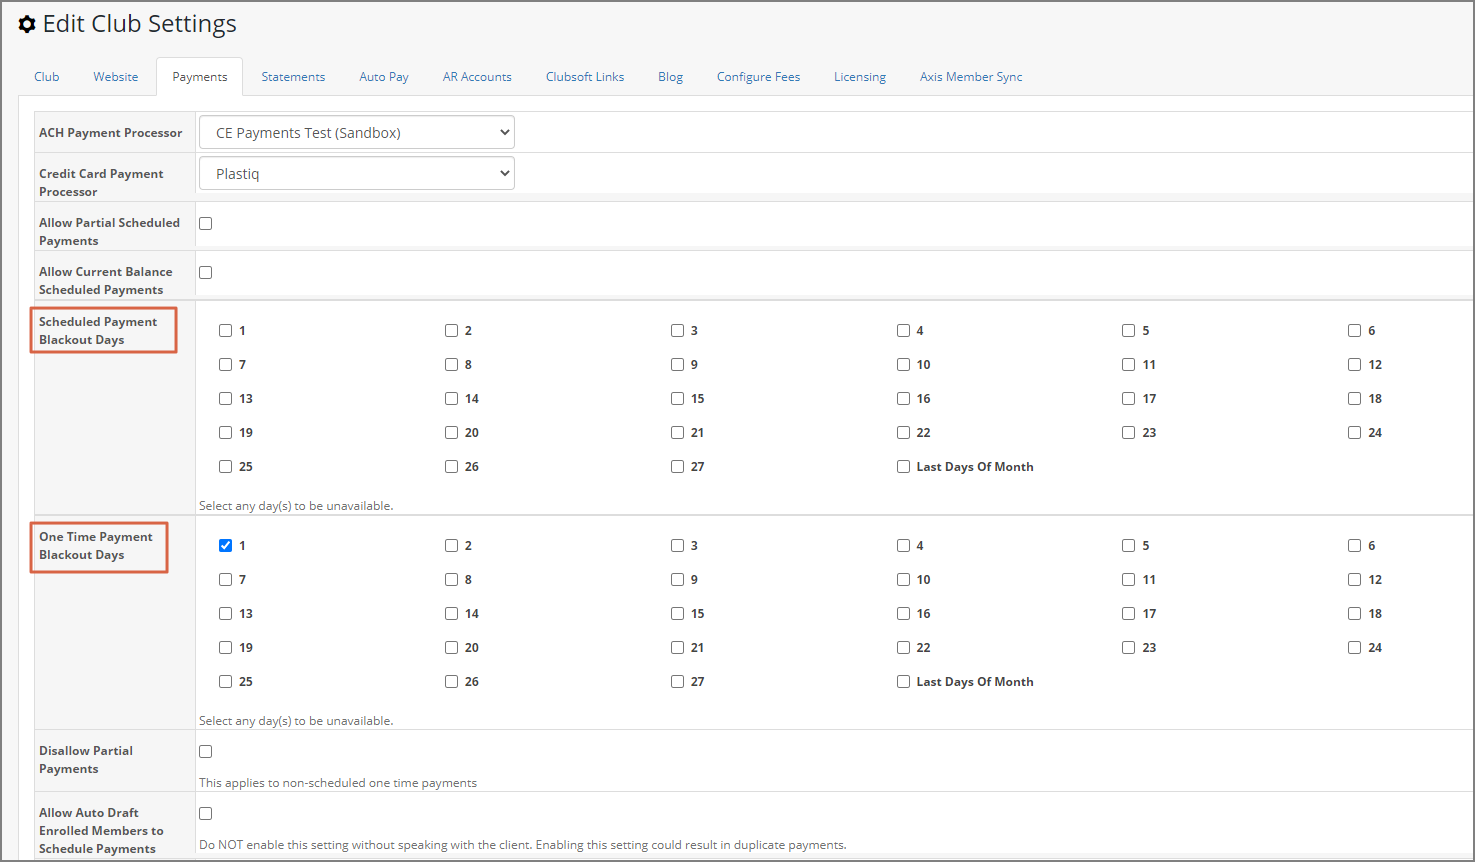
Please Note: If there are currently Scheduled payments date set, the club will be unable to blackout those dates. The Admin can log into the member's Paycloud Profile and reschedule the Payment. Then they can blackout the date.
Informational Message
You can optionally display a message/admin email on the Make a Payment page, to better assist members in configuring payments.

Club Settings - Statements
...
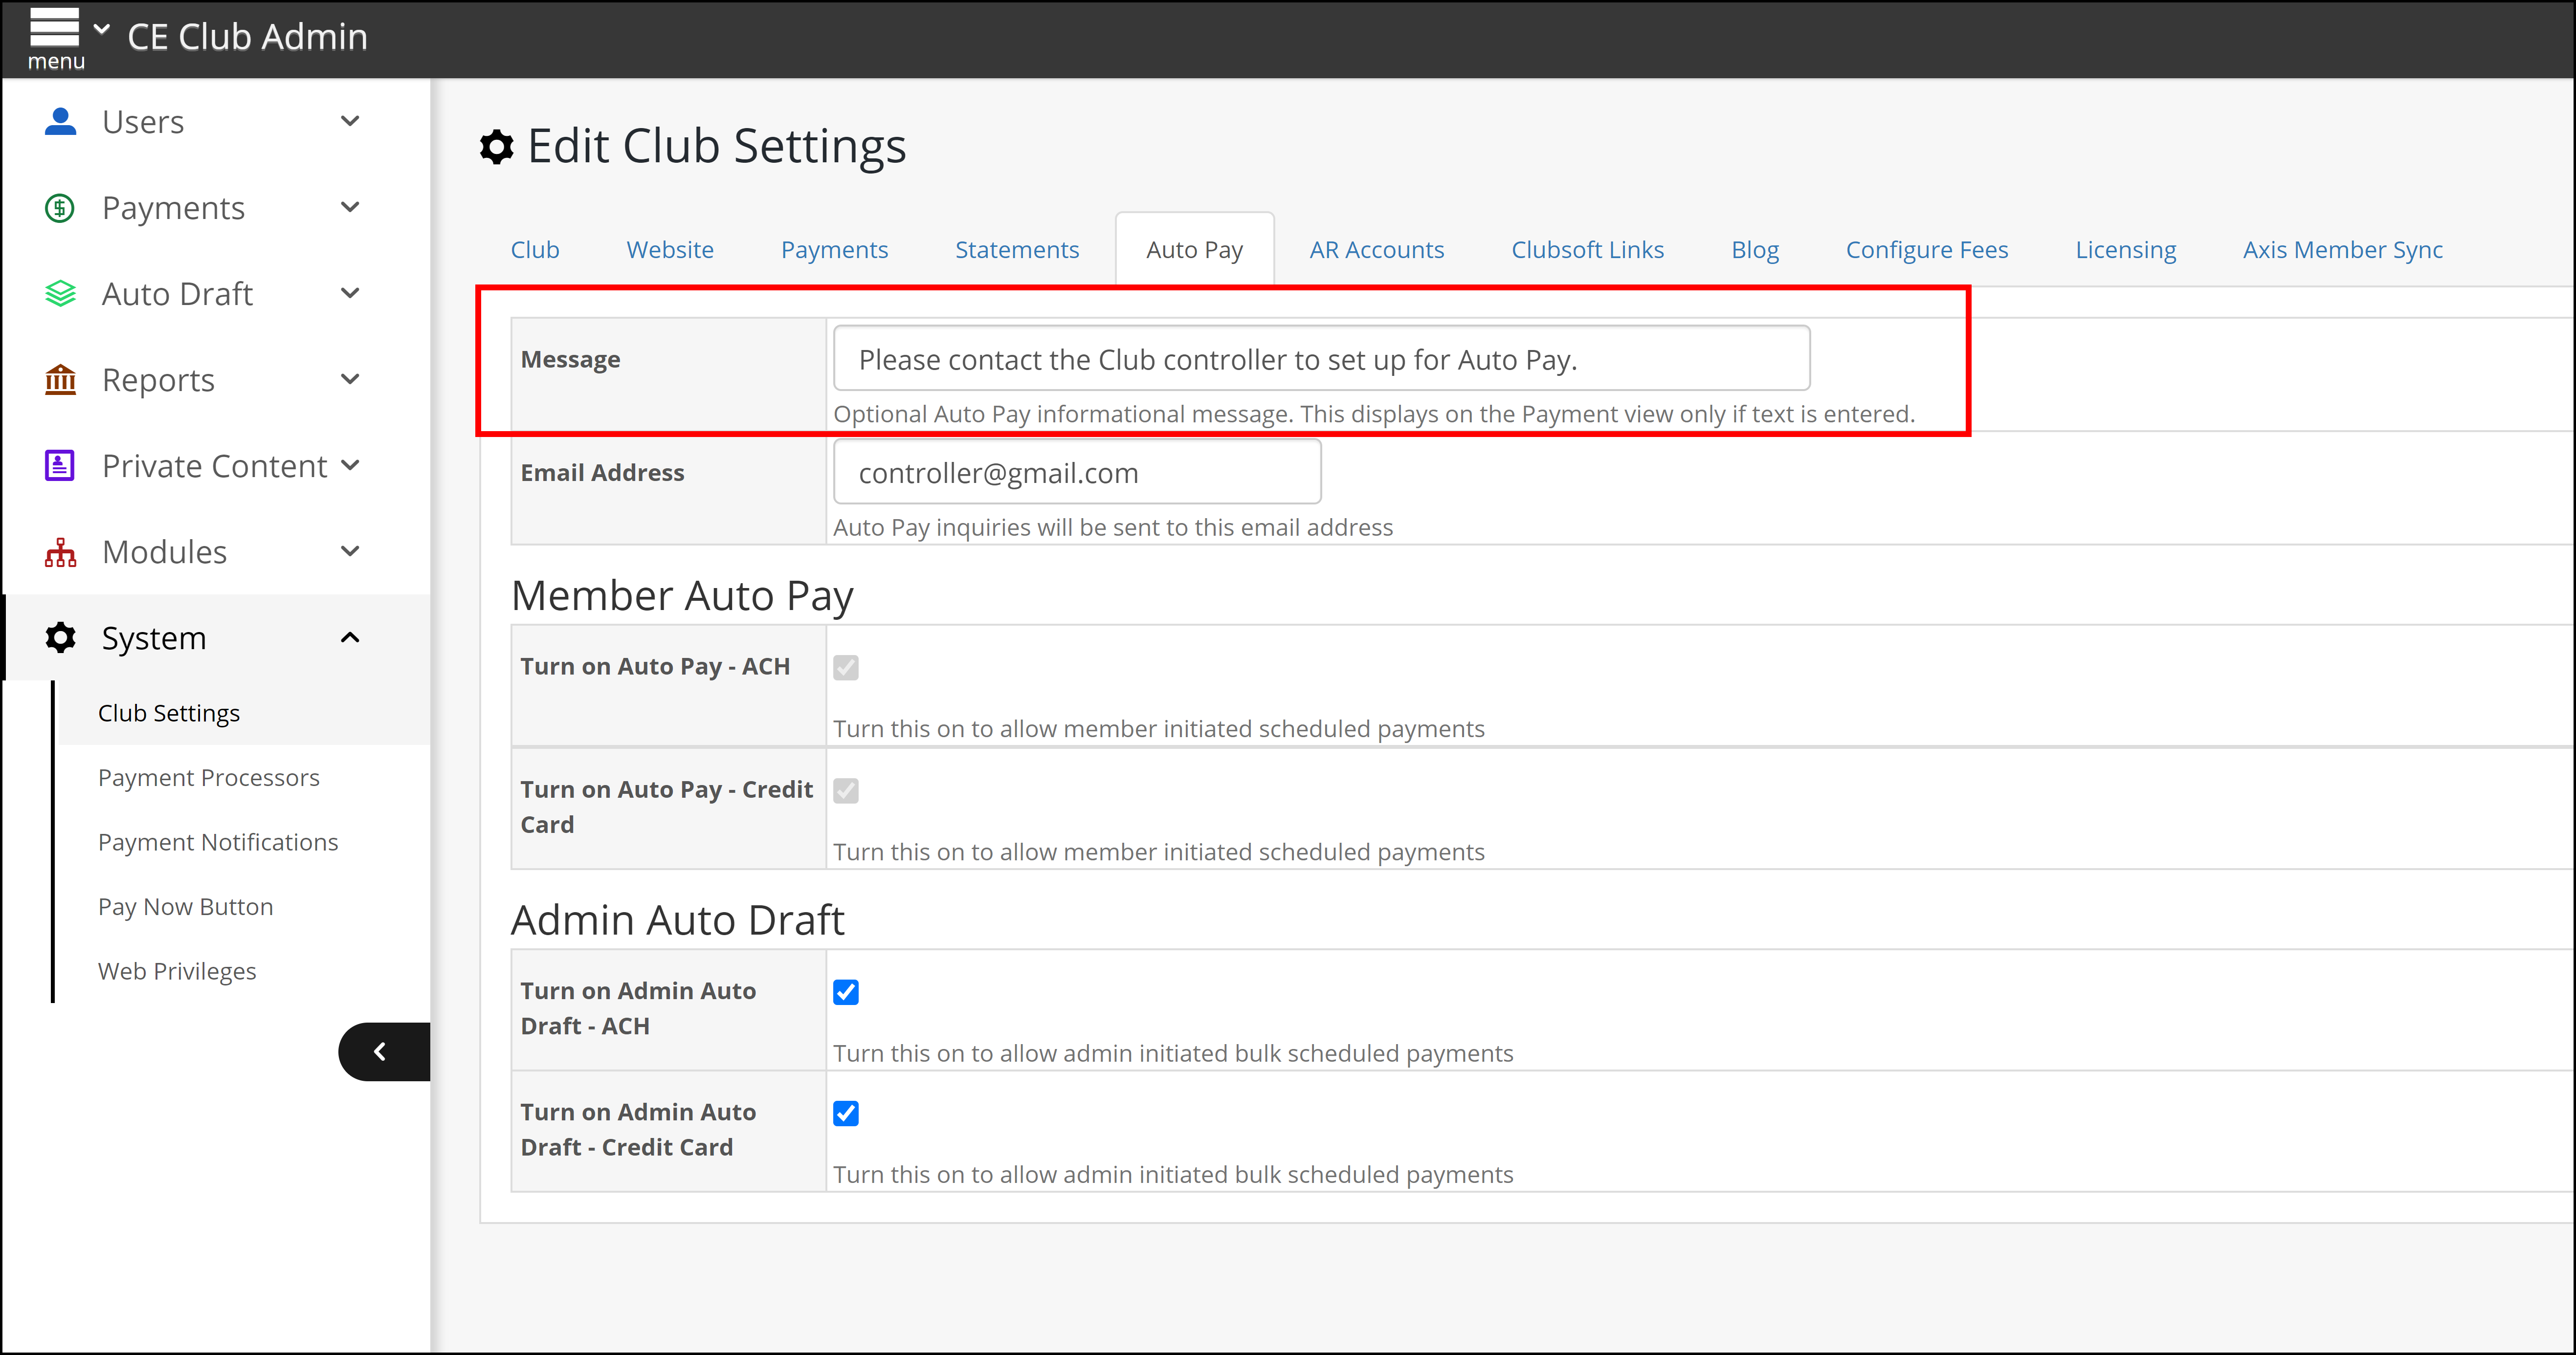
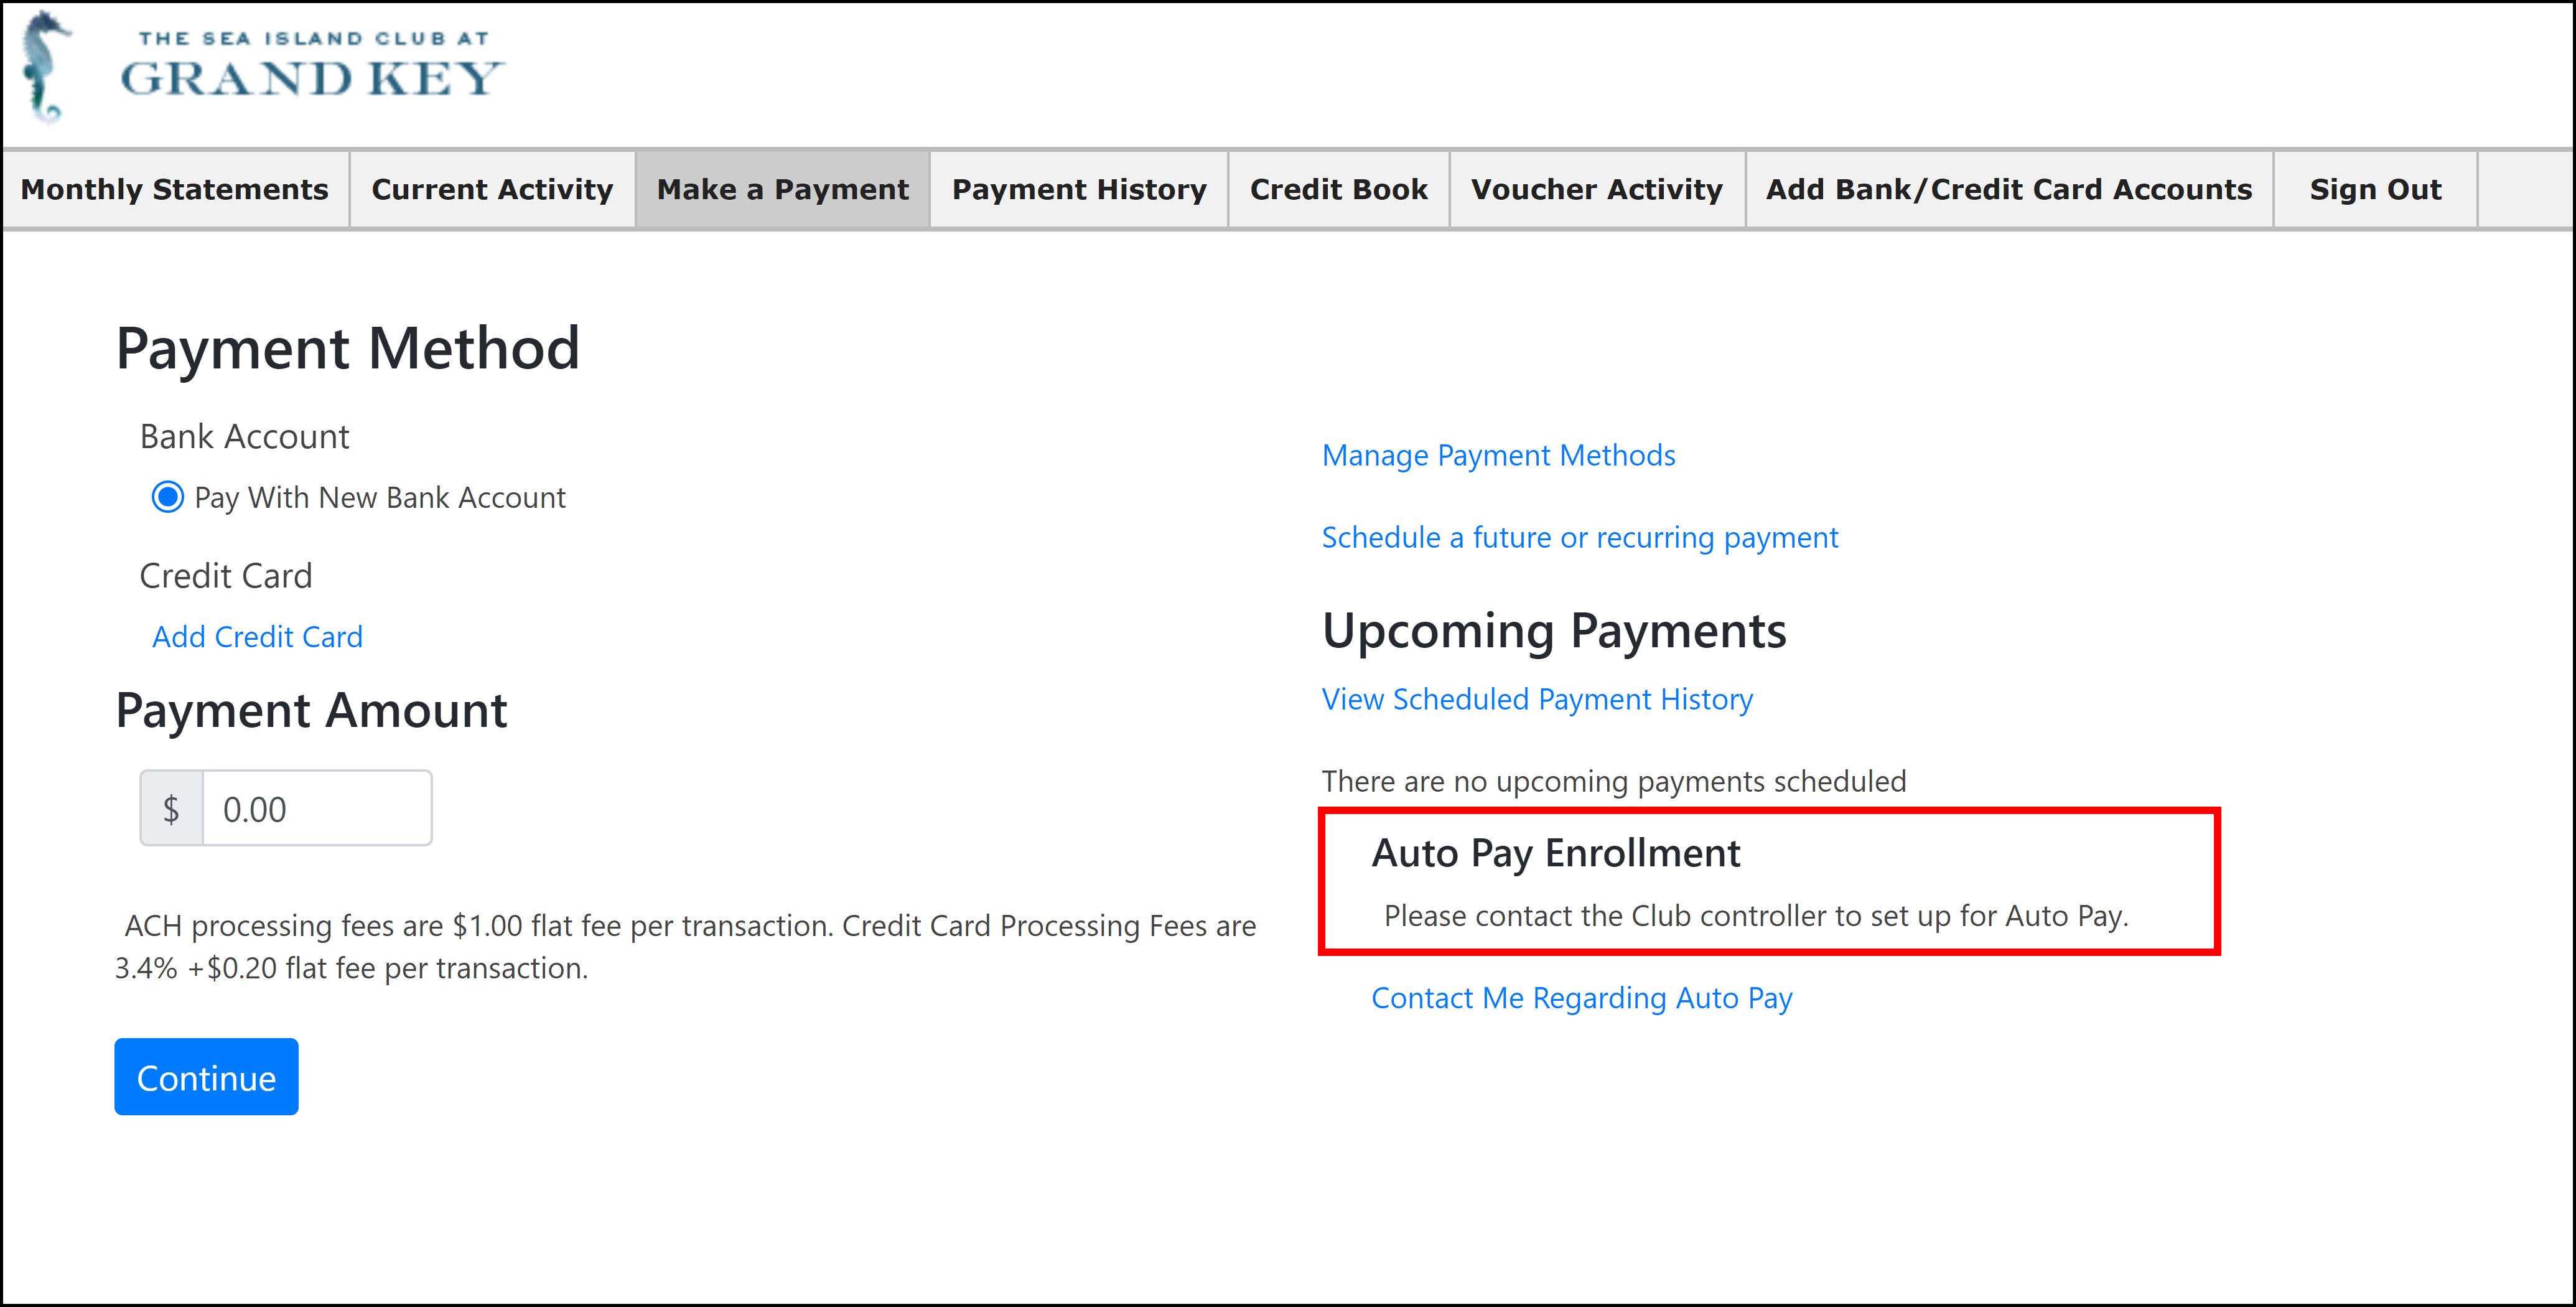
Please Note: The Contact Me Regarding Auto Pay does work and will send to whichever email address is listed in the settings above.
Club Settings - Statements
The Statements tab contains information relevant to statement settings and appearance.
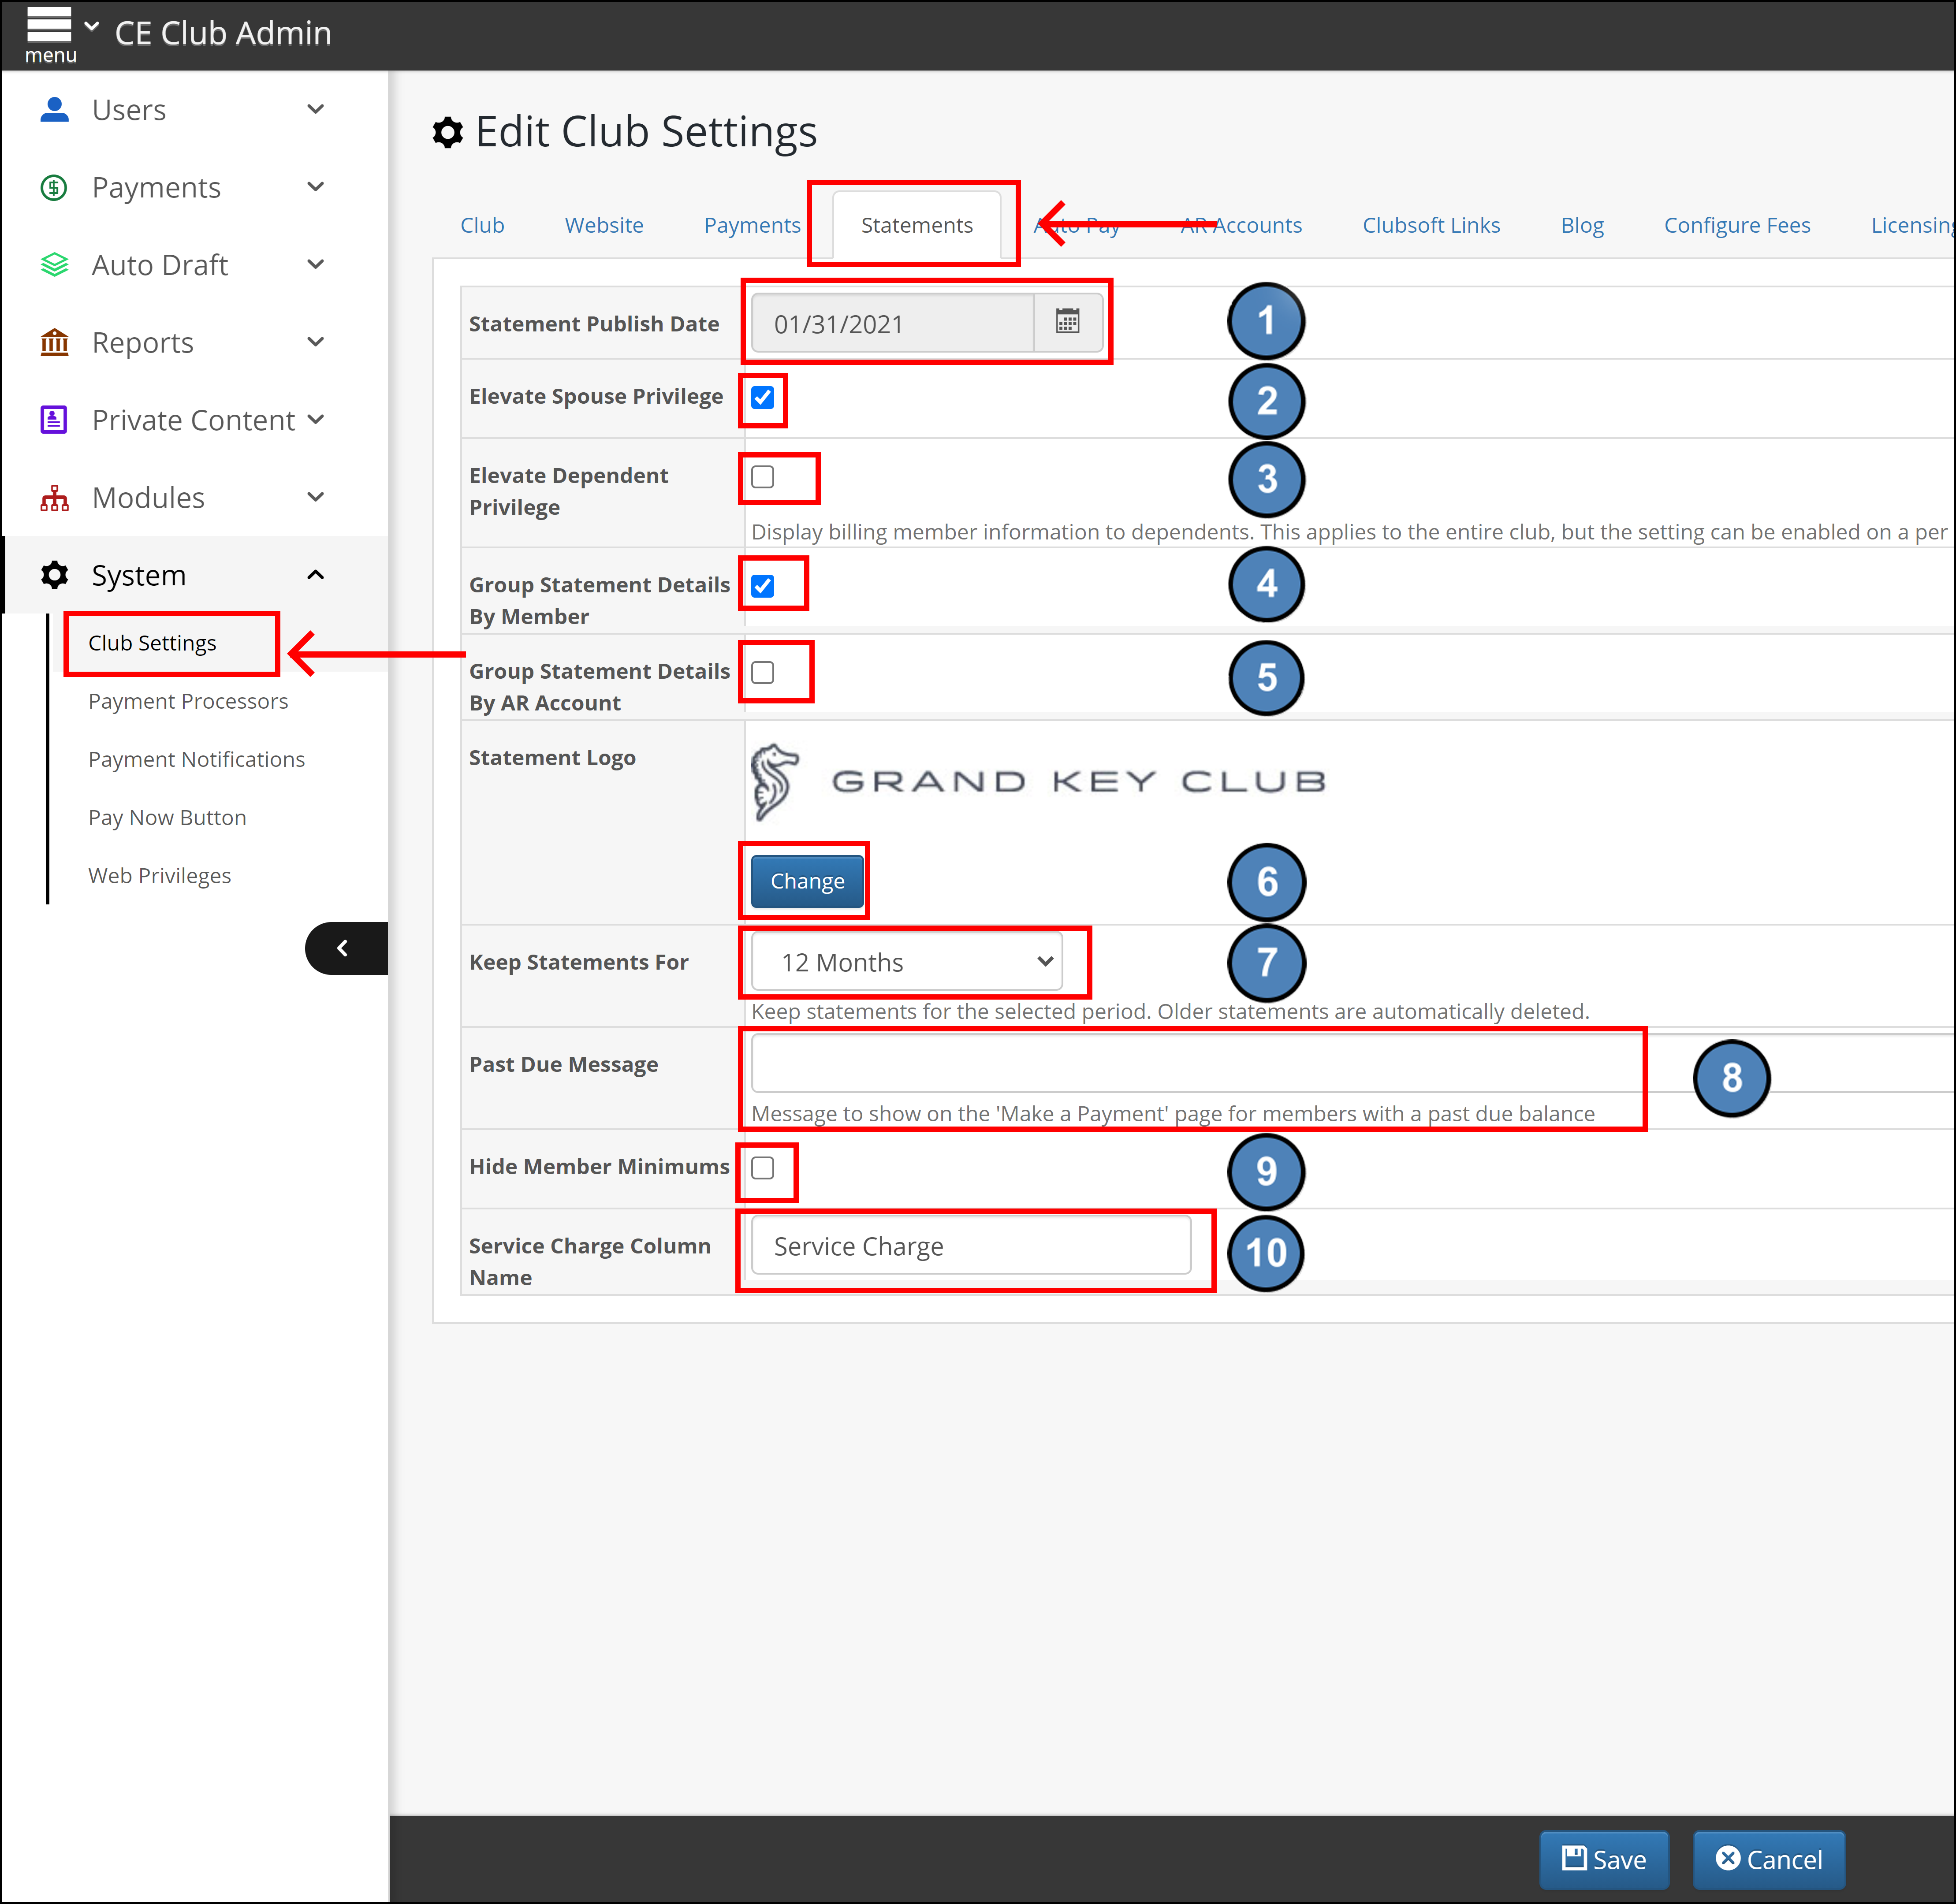

1. Statement Publish Date
...
- This date feeds from
...
CMA. If
...
this needs to be changed, check the date under System, System Settings, Membership in the
...
Club Logo
The logo appearing on the Statements may be changed here. Click to upload.
Keep Statements For
This field controls how many months of statements will be viewable online for the Members. After selected time, system will purge older records. In the event you set this for a longer period of time than initially set, you will need to do an initial statement push from the database to populate the additional periods.
Edit Service Charge Column Name
If your Club is assessing Members a service fee as part of the Payment options, optionally, edit the Service Charge Column Name (i.e. - Service Charges are not legal in your state, and you are assessing an Admin Charge instead).
Dependent Privileges
Users have the ability to check a setting that will elevate privileges of Dependents to view statements, gift cards, and credit book balance of the linked Billing Member. Dependents, upon logging in, are then able to view the main Billing Member’s statements, gift card balances, and credit book balances.

Multiple AR Accounts
Within Club Settings and Statements, Users can set the Statement view to show Multiple AR Accounts.

Please Note: This feature also needs to be set up in Office; option to Sync Multi AR Data to PayCloud, as shown below.

Users also have the ability to change the Statement Display Name of each account to avoid confusion. Display Name can be accessed from Club Settings, then AR Accounts.

Club Settings - Website
The Website tab contains the Landing page that can be set for Members when they connect to PayCloud. Initially this is typically set to display Statements. Oftentimes, however, Clubs accepting online payments may choose to change this to Make a Payment.

Club Logo
The logo appearing on the Statements may be changed here. Click to upload.
Keep Statements For
This field controls how many months of statements will be viewable online for the Members. After selected time, system will purge older records. In the event you set this for a longer period of time than initially set, you will need to do an initial statement push from the database to populate the additional periods.
Edit Service Charge Column Name
...
CMA.
2. Elevate Spouse Privileges - Allows spouse members to view statement details when logging into Paycloud from the website.
3. Elevate Dependent Privileges - Elevates privileges of Dependents to view statements, gift cards, and credit book balance of the linked Billing Member. Dependents, upon logging in, are then able to view the main Billing Member’s statements, gift card balances, and credit book balances.
4. Group Statement Details by Member - Organize the details of the statement by each member in the member family.
Please Note: Cannot be selected at the same time as Group Statement Details by AR account.
5. Group Statement Details by AR Account - Organize the details of the statement by each AR that has transactions.
Please Note: Cannot be selected at the same time as Group Statement Details by Member.
6. Statement Logo - The logo appearing on the Statements may be changed here by clicking the Change button.
7. Keep Statements For - Determines the number of months statements will be viewable online for the Members. After selected time, the system will purge older records.
8. Past Due Message - The message that will display on a member's statement when they have a past due balance.
9. Hide Member Minimums - Disables the Minimum information that shows at the bottom of a member's statement.
10. Service Charge Column Name - The name of the service fees assessed to on the member payments.
Multiple AR Accounts
Within Club Settings and Statements, Users can set the Statement view to show Multiple AR Accounts.
Please Note: This feature also needs to be set up in CMA; option to Sync Multi AR Data to PayCloud, as shown below.
Users also have the ability to change the Statement Display Name of each account to avoid confusion. Display Name can be accessed from Club Settings, then AR Accounts.
Club Settings - Website
The Website tab contains the Landing page that can be set for Members when they connect to PayCloud. Initially this is typically set to display Statements.
...
Oftentimes, however, Clubs accepting online payments may choose to change this
...
Club Settings - Payments
This setting dictates what payment options appear for your Members to make an online payment. Available options are those that have been set up for your Club.
...
to Make a Payment.
Payment Notifications
...
Turn on email notifications to your Members by checking the Payment Processed and/or the Payment Error settings. When Payment Processed setting is enabled, an email will be sent to Member confirming successful payment. Payment Error setting generates an email to Member when payment was attempted, but not successfully processed.
Please Note: The error notification is only for CE Payments.

Missing Payment Account, if checked, will send a reminder to the Member three days before the scheduled payment date for all those without an associated payment account.
...
Users can edit Admin notifications to send when a Payment has Failed, and update the email to which the notification will go, under Club Settings, then Payment Notifications. If you would like to add multiple email addresses, separate with a comma.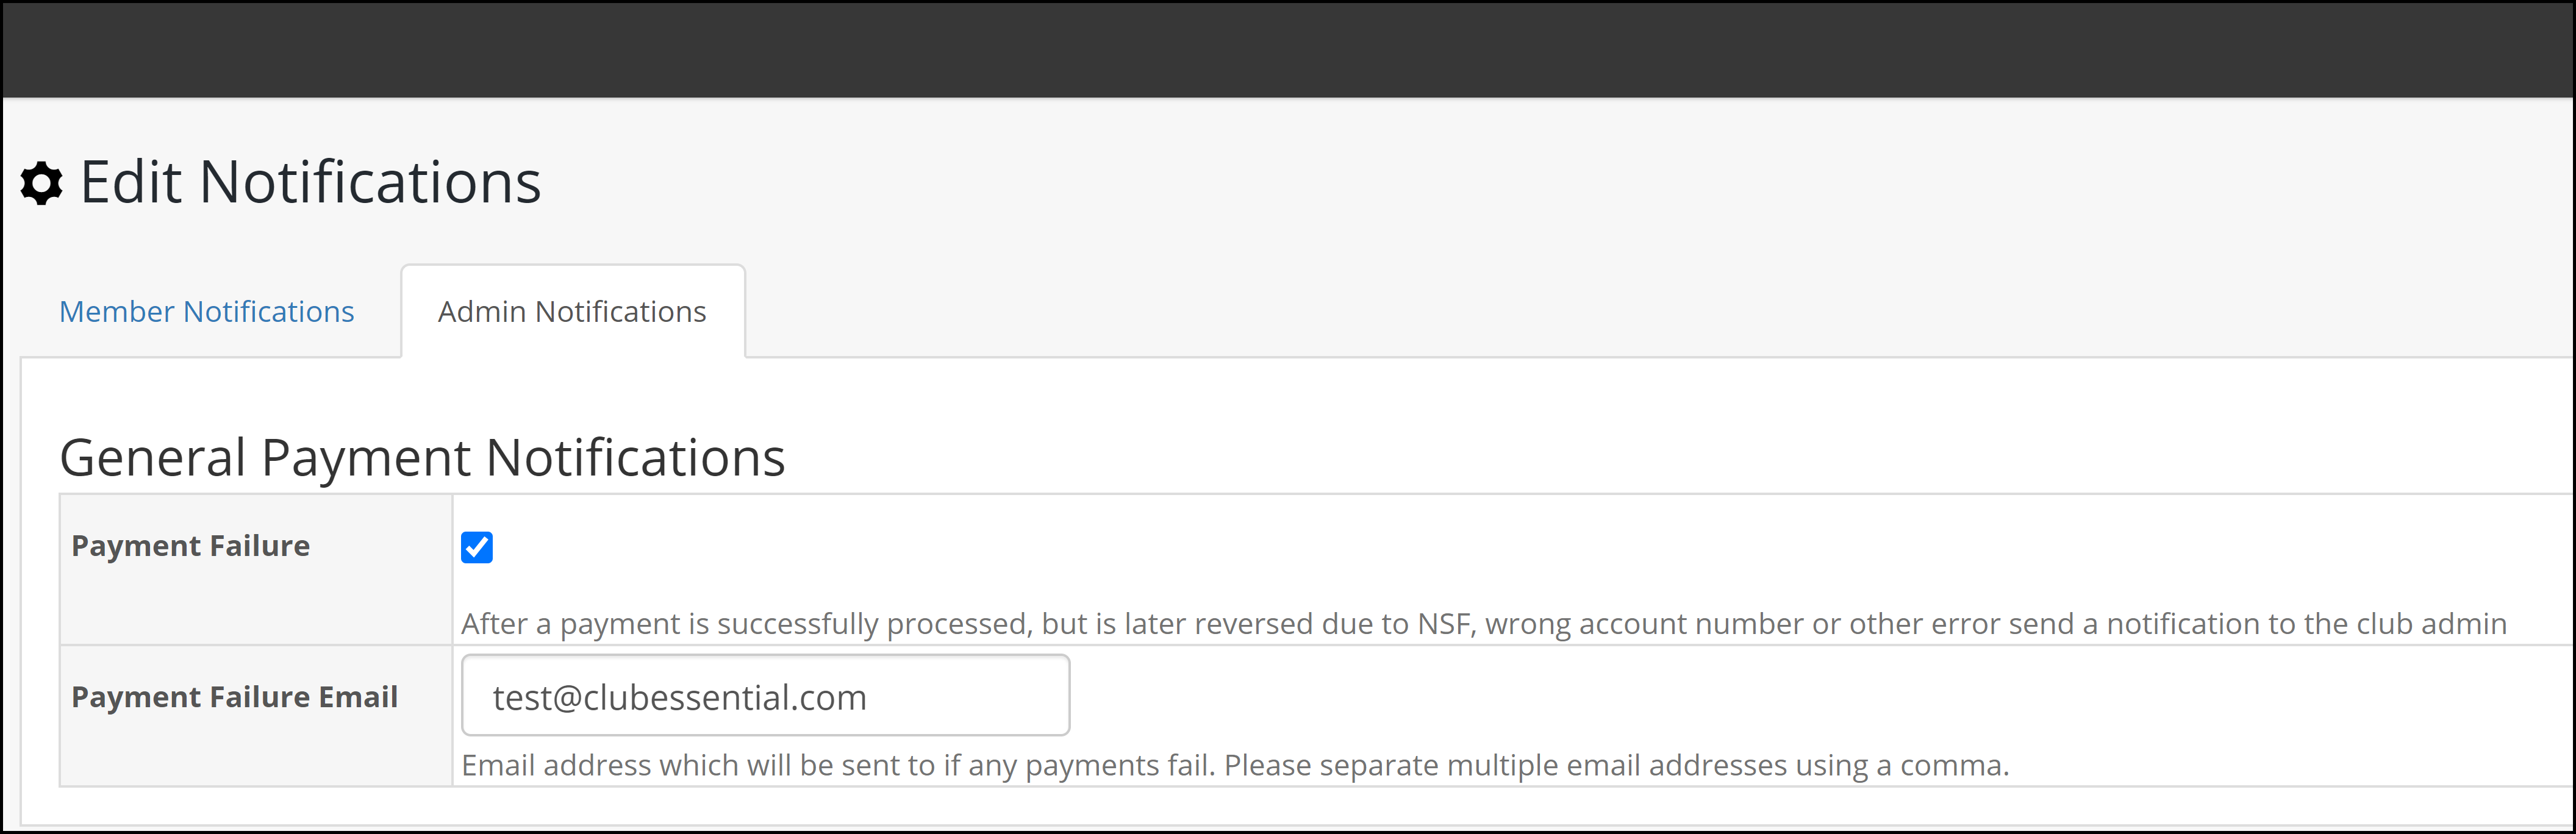
...
Failed Payment Reasons
When a payment fails for one of the reasons listed below, PayCloud will send a notification to the Member & Club Staff telling them which problems their enrolled accounts ran into so that they can fix the enrollment before submitting another payment.
The following errors should be accounted for:
- R01 - Insufficient funds
- R03 - No Account/Unable to Locate Account
- R04 - Invalid account number
- Invalid Routing Number
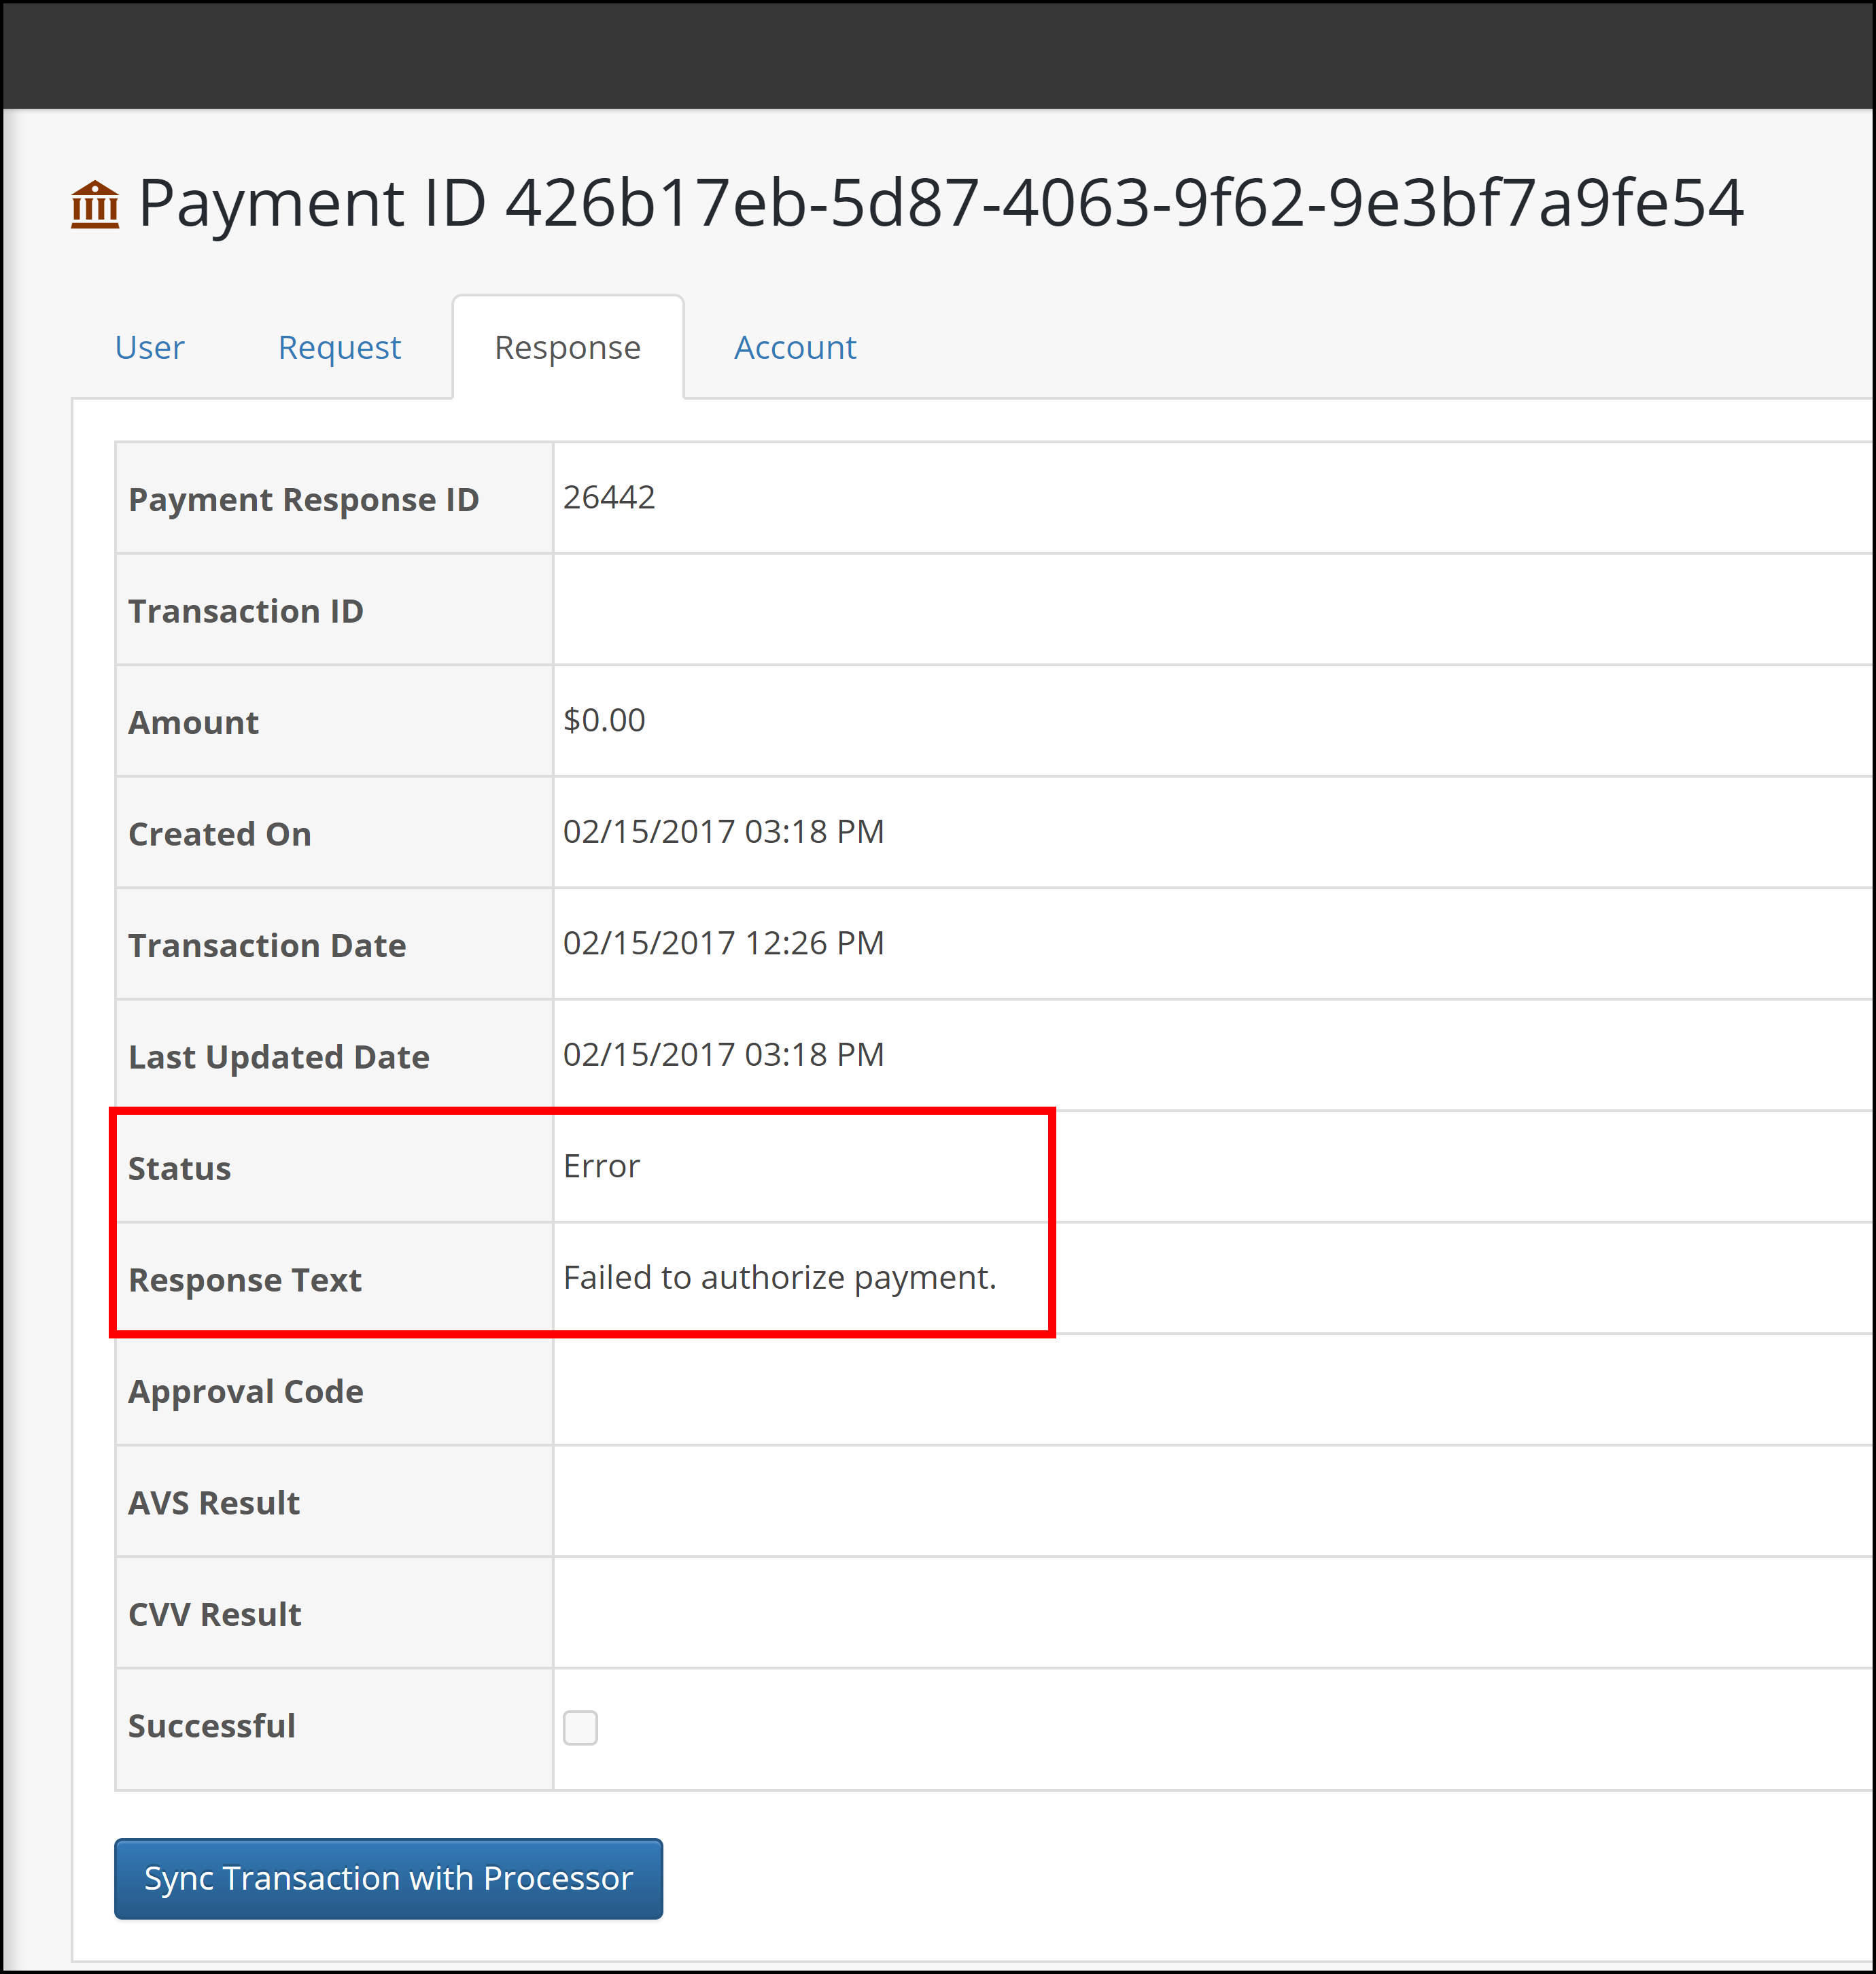
into so that they can fix the enrollment before submitting another payment. Return Reasons for failed payments can also be viewed by Clubessential Support & Club Staff from the Payment History Report → Edit → Response → Response Text.
Manage your System
...
Please Note: Use the Staff Member’s email address when creating a Username. The email address should be unique and therefore will not be be duplicated by another user.
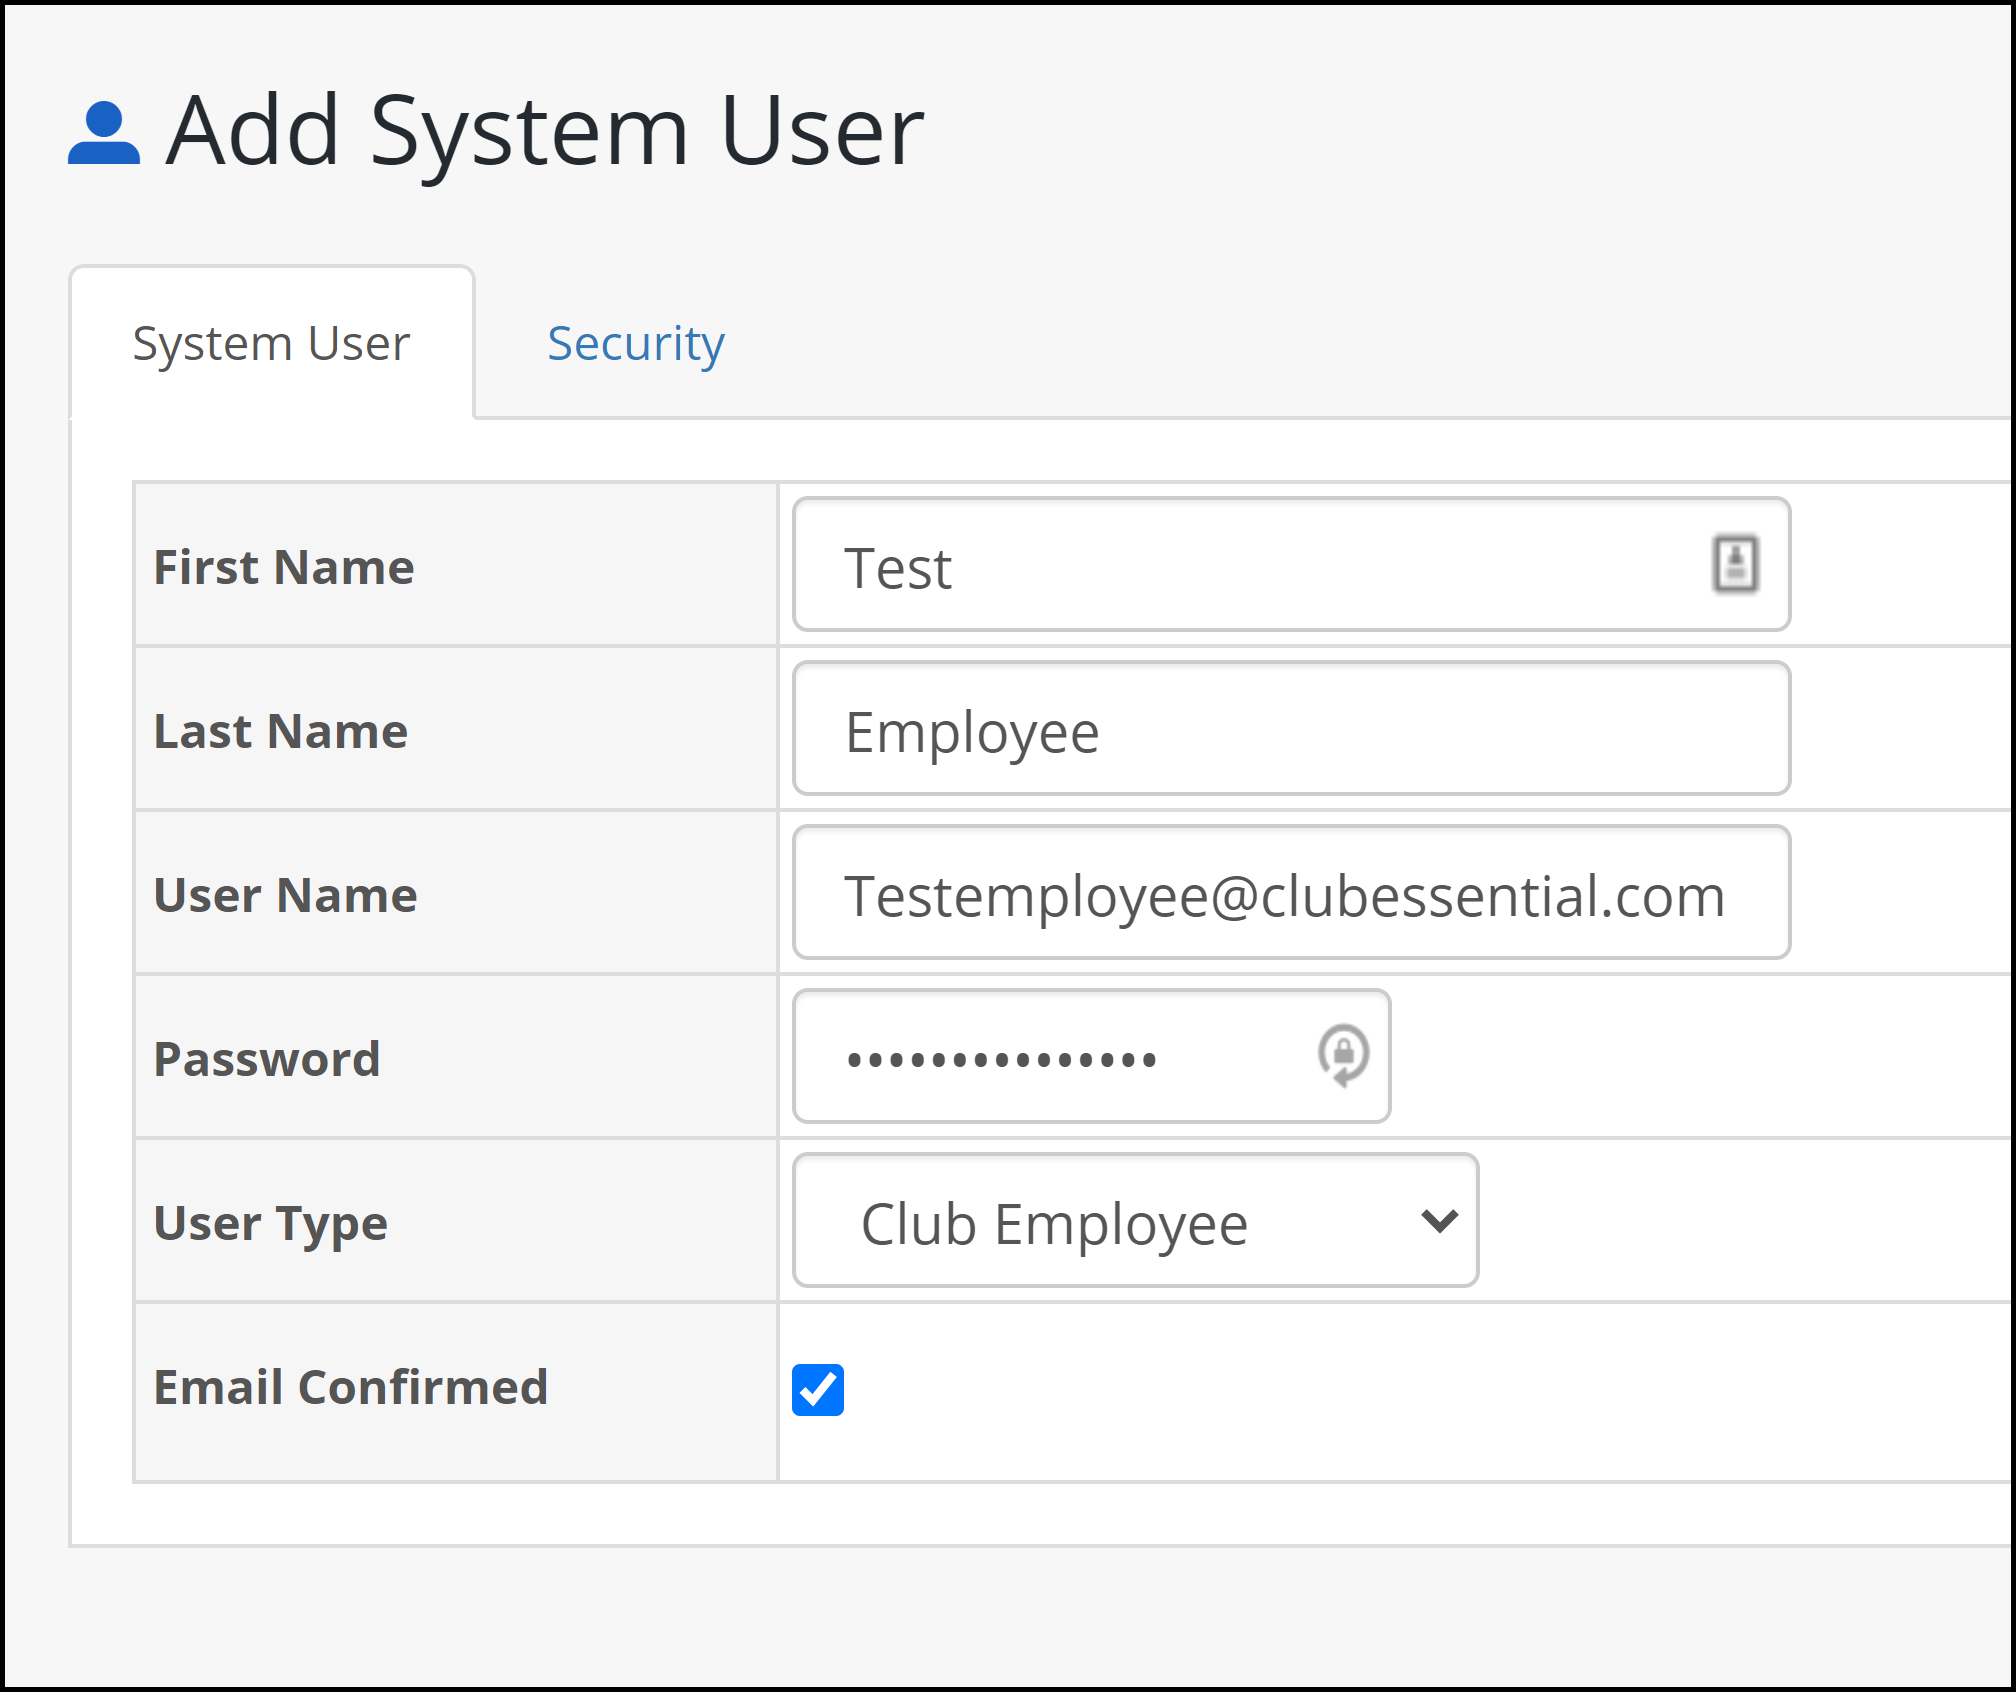

Please Note: Password must be longer than six digits, needs one uppercase character, and one numeric character.
Reports
Payment History
This report contains the payments made by Members using the PayCloud system. The report can easily be filtered (using the predefined filters) and/or customized (using the date range feature) to quickly display the data desired. Easily view payments from Today, the Past Week, Past Month. Also, for Clubs with Autopay enabled, easily view the payments based on status Successful or Unsuccessful.
...
The Private Content section contains a couple of areas relevant to Clubs utilizing the PayCloud online payment and statement features. While these areas are typically addressed/populated during implementation, it is important to note where/how these items can be modified as needed.

Statements
Enter any additional statement data (customized messages) to include in your Club’s online statements. Header, footer, contact info, and/or past due notices (30, 60, or 90 days past due) must be populated on this tab (they do not flow from Office) to be viewable by Members in the PayCloud system.
...
When ready to Post, go to 1. Membership, 2. Approve Payment Batches, select the batches, and post.


NOTE: In 3. select the batches, and 4. post.
The club can also double click on a batch in the grid to view the details. 5. to post from this tab.
Please Note: In the event a payment is rejected by the Processor (which can take up to (3) days), it is important to use the Merchant Reporting available from the Processor to identify the adjustment that must be manually input into the Office batch(es) for rejections. These do NOT automatically flow through to the Office system. However, if using CE payments it will. More information about the failure of a payment made through CE Payments can be found here.
Deleting a Batch/Transaction
To delete a rejected transaction, while in Approve Payment Batches, expand the batch with the rejection, highlight and right-click on the row/transaction (rejection) to delete, and select Delete.

Users can also delete Batches that have not yet run, in PayCloud, as seen below.

...
- Navigate back to the Clubessential Cloud Endpoint Editor and click on the Sync Tab.
- Use the Magnifying glass to open the Member Lookup Window.
- Use the Search field to find the member.
- Double Click the member in the Grid.
- From the drop down, select which item to sync (Statements, Credit Books, Gift Cards, and Vouchers).
- Click Sync.
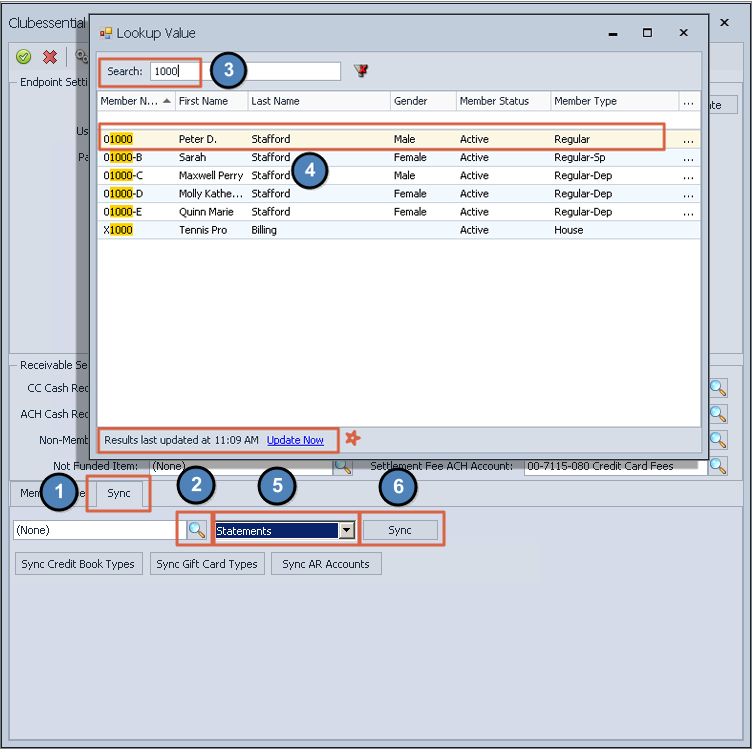
- A confirmation window will appear, "The sync has completed successfully. Check the Log for details." Click OK to close and return to the editor.

...
A: Use the blackout feature to prevent Members from making/scheduling payments on a certain day. Click here for more info.
Q: How do I change the landing page my Members see when they first log-in to Paycloud?
...