| Table of Contents | ||||||||||
|---|---|---|---|---|---|---|---|---|---|---|
|
...
| Widget Connector | ||||||
|---|---|---|---|---|---|---|
|
Content
...
| Table of Contents | ||||||
|---|---|---|---|---|---|---|
|
Accessing the Tool
Table of Contents
| Table of Contents | ||||||
|---|---|---|---|---|---|---|
|
Use Case(s)
Images are an extremely important part of your website. Through imagery, we can bring the website to life, tell a story, and evoke emotion. It is easy to enhance your site design, or to emphasize your message by placing quality photography throughout the website. There are also practical uses for images, such as showcasing upcoming events and to show photos from past events.
Video
This video provides an overview of how to use the Image Explorer.
Note: Sections of the video have been referenced below with corresponding times in the video for ease of access
...
...

...
...
...
...
...

...
...

...
...
...
...

...
...

...
...
...
...

...


...
...
...
...
...

...
...
...

...
...

Width

Height
...
...
...
...
...
...
...
...
...
...
...

...


Placing Images on a Page
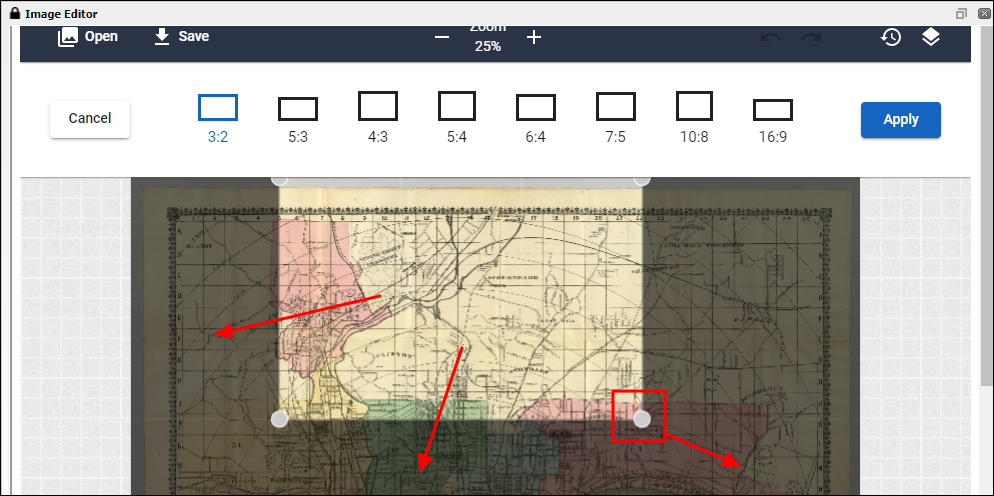
Images may be placed on page, by using the click to edits throughout the website. This will open the Editor.
First, navigate to the page you wish to add the photo and open the click to edit in the desired area where you would like to add the image. Note, this may be in a content area, sidebar marketing area, or a banner image.

Once the Editor is launched, images can be added in two ways.
Choose Insert > Image:

Or, click the Image Explorer icon from the Quick Tab Toolbar.
![]()
Either option will launch the Image Explorer interface.

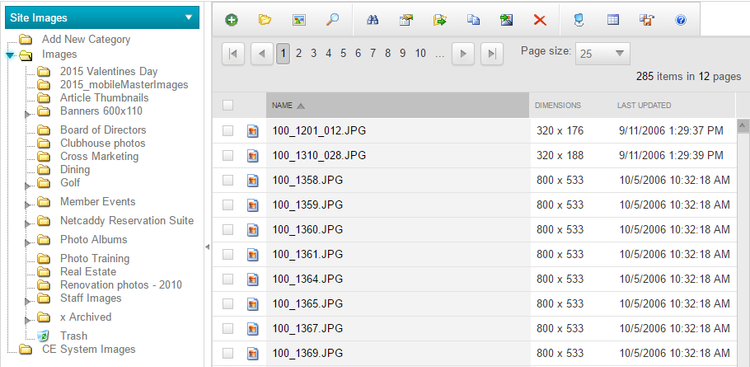
Choose the folder in which the image is placed and click the image.

Images can be inserted in two ways, by double clicking on the image or using the Image Icon in the Image Explorer Toolbar
- Double click the image to insert.
- Click the Image Icon in the Toolbar.

Once the image has been added, click Save.

Styling Images
Images can be styled alongside page content in several ways. Adding imagery enhances the site design and helps to reinforce the website’s message, however, if imagery is not styled properly on a page it may not be as effective.
Image Styling can be applied by using image Properties.
First, open the click to edit of the page the image is on that needs Image Styling.

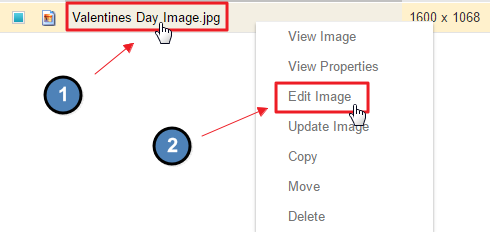
Right Click on the image and choose Properties.

From the Properties, styling such as text alignment and padding can be added to the image.

Text Alignment: this allows for text to be wrapped around the image. Choose the text orientation by clicking the dropdown on Image Alignment.

Padding: this allows space to be added between the image and the text. By adding padding, the readability of the content on the page is increased.
Add a desired pixel amount to either the top, bottom, right, or left box to add padding to the top, bottom, right, or left of the image.
- Pixel Amount: standard pixel amounts are typically 5, 10, or 15 px.

Click OK once finished to apply the styling.
Save image and content on the page.

Note: Padding now displays in the saved page.

Photo Albums
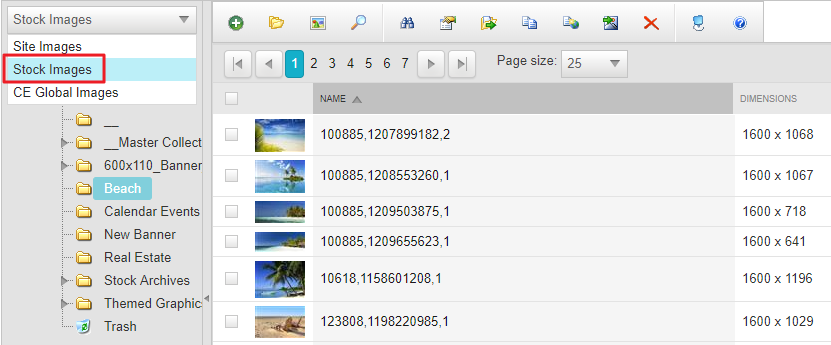
Most websites use the Photo Album plugin, which allows for various types of slideshow imagery. Clubessential can help assist to set up Photo Albums on pages, along with determining the right style. Managing Photo Albums are simple, by using the folders within the Image Explorer.
Managing Images in Albums
Before the Photo Album can be managed, we first must know what folder is assigned to the album.
First, navigate to the Photo Album and then click on the Photo Album Properties icon.

Click Categories, which will pull up the Image Explorer Folder Structure.

Scroll to find the folder that has a check mark next to its name. This is the Folder that the Photo Album is assigned to. Note: multiple folders may be assigned to a Photo Album.

To manage a Photo Album, navigate to the Image Explorer.
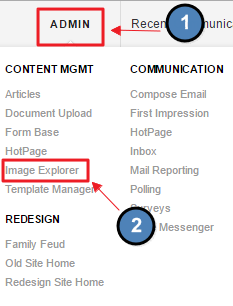
Admins: Hover over Admin bar in the left hand corner of the screen, select Image Explorer.
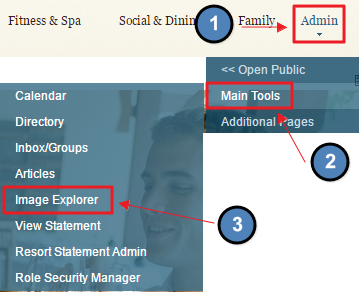
Editors: Hover over Admin in the main navigation, select Main Tools, and then Image Explorer.

Navigate to the folder in which the Photo Album is tied to.

From here, images can be added, moved, or removed.
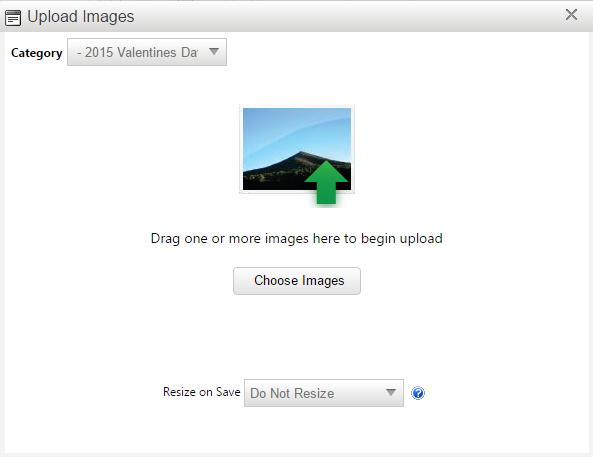
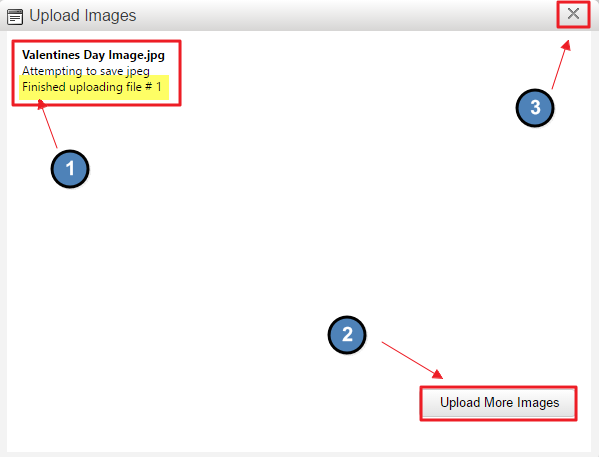
To Add: click the green plus button sign.

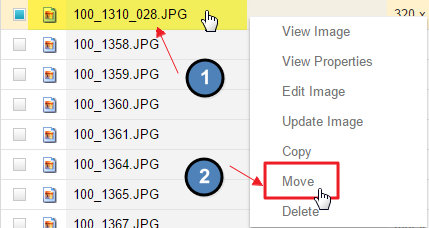
To Move: right click on the image and click move.

To Remove: click on the image in the folder and click the red X in the toolbar.

Adding Text and Hyperlinks to Photos
Depending on the type of Photo Album, there may be text and hyperlinks associated with the imagery. This is mostly the case on Member Home Page Photo Albums.
To edit the information, navigate to the Folder associated with the Photo Album.
Right Click on the image, and choose View Properties.

From here, a name, description, URL, and Additional Info may be added.
Name: this is the title of the image. This will not show up in the Photo Album, but the name will show when one hovers over the image.
Description: typically, this is used for the Title seen by members. It is most common to add the name of the event, or marketing piece here.
URL: place the URL of where the slide should be linked to. Change the name of the link text in Additional Info 2.
Additional Info 1: this is not always used, but if the album has a space for a long description this is where the long description can be added.
Additional Info 2: this is the link text for the URL.

Save once complete for changes to publish to the Photo Album.
FAQs
Q: I am seeing a black box where an image once was, what happened to it?
A: If an image is deleted from the Image Explorer and in use on page, this will cause a black box on the page. It is best to never delete imagery, but rather create an Archived folder where images can be moved to when not in use.
Q: Why is the image I added to the Photo Album not showing up right away?
A: It can take a few minutes for the image to show in the Photo Album. This is due to caching. To refresh the Photo Album, open the Album settings and click save at the bottom of the Album interface. This should refresh the album, so you can see the image right away.
...
Downloadable Guide
...
