| Table of Contents | ||||||||||
|---|---|---|---|---|---|---|---|---|---|---|
|
Overview
Photos and Photo Albums are managed completely through the Image Explorer. This article will review how to upload and manage the Image Explorer, how to crop and resize images, and how to manage Photo Albums. Use Case(s) Images are an extremely important part of your website. Through imagery, we can bring the website to life, tell a story, and evoke emotion. It is easy to enhance your site design, or to emphasize your message by placing quality photography throughout the website. There are also practical uses for images, such as showcasing upcoming events and to show photos from past events. |
Video
This video provides an overview of how to use the Image Explorer.
...
| Total Video (Length) | 11:41 | |||
|---|---|---|---|---|
| Why Images are Important | 0:37 | Editing Images | 4:01 | |
| About the Image Explorer | 1:00 | Adding Images to a Page | 6:03 | |
| Accessing the Image Explorer | 1:19 | Adding Text Around Images | 7:07 | |
| Organizing Folders | 1:45 | Styling Images on a Content Page | 7:20 | |
| Adding Images | 3:00 | Managing Photo Albums | 8:45 |
Content
|
|---|
Accessing the Tool
To access the Image Explorer, follow the steps below depending on your access role.
...
The following Image Explorer Interface screen will launch.
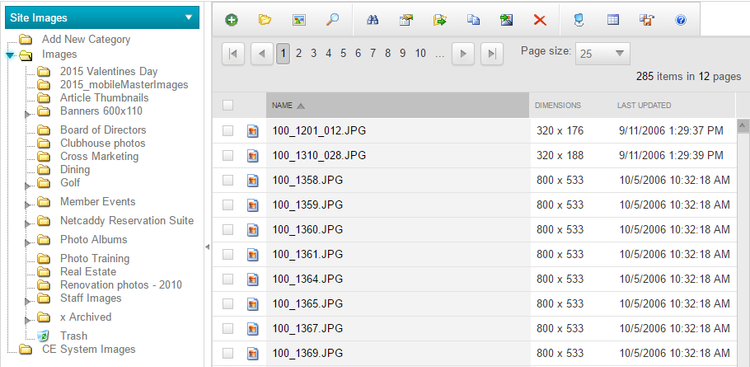
Image Explorer Interface
The Image Explorer is a repository for all images used on the website. It is simply a holding place to organize imagery, and allows for images to be edited.
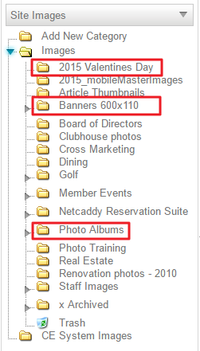
Organizing Images
It is important to organize images, so the images are easy to find. Organizing folders is extremely important when working within Photo Albums, as Photo Albums pull images from an entire folder, or multiple folders. There is never a reason to delete images from the website, as there is no limit to the amount of images stored.
Folders are typically named after year, event, topic, dimension, or Photo Album title.
To add a New Folder, click the Add New Category folder at the top of the folder structure.
...
This will bring up the Folder Structure, where you can click on the desired folder, and then click the Move button to transfer the image.

Uploading Images
To upload a photo, select the category or Folder into which the image will be uploaded.
...
The upload interface will show a ‘completed’ notification, and there is an option to then upload more imagery, or simply ‘X’ out of the interface.

Resizing and Cropping Images
Once images are uploaded to the Image Explorer, they may need to be resized and cropped to meet the appropriate image dimensions used throughout the website. Image dimensions are provided after the website comes out of coding.
...
Enter the desired name and click save.

Placing Images on a Page
Images may be placed on page, by using the click to edits throughout the website. This will open the Axis Editor.
First, navigate to the page you wish to add the photo and open the click to edit in the desired area where you would like to add the image. Note, this may be in a content area, sidebar marketing area, or a banner image.

Once the Axis Editor is launched, images can be added in two ways.
...
Once the image has been added, click Save.

Styling Images
Images can be styled alongside page content in several ways. Adding imagery enhances the site design and helps to reinforce the website’s message, however, if imagery is not styled properly on a page it may not be as effective.
...
Note: Padding now displays in the saved page.

Photo Albums
Most websites use the Photo Album plugin, which allows for various types of slideshow imagery. Clubessential can help assist to set up Photo Albums on pages, along with determining the right style. Managing Photo Albums are simple, by using the folders within the Image Explorer.
Managing Images in Albums
Before the Photo Album can be managed, we first must know what folder is assigned to the album.
...
To Remove: click on the image in the folder and click the red X in the toolbar.

Adding Text and Hyperlinks to Photos
Depending on the type of Photo Album, there may be text and hyperlinks associated with the imagery. This is mostly the case on Member Home Page Photo Albums.
...
Save once complete for changes to publish to the Photo Album.
FAQs
Q: I am seeing a black box where an image once was, what happened to it?
...
A: It can take a few minutes for the image to show in the Photo Album. This is due to caching. To refresh the Photo Album, open the Album settings and click save at the bottom of the Album interface. This should refresh the album, so you can see the image right away.
Best Practices
It is best to keep the Image Explorer as organized as possible so images can easily be found. By creating multiple folders named by year, event title, or image size it can be easy to find where images are located at a glance.
Create an Archive folder in the Image Explorer and move imagery here when not in use. Since there is no limit to the amount of imagery in the Image Explorer, move unwanted images here. If images are deleted from the Image Explorer, they then must be re-uploaded in order to use them on the website. Deleting an image in use will create a black box on the website where the image was located.
Resizing and cropping images ensures that imagery to sized to the proper dimensions for the site design. It is not recommended to resize imagery on the page as this could cause the image to become pixelated.
- Name imagery something descriptive of the image so images are easy to locate within the folders.