...
|
|---|
Manage Timekeeping in the POS
In this section, we will review the proper procedures to follow when Managing Timekeeping in the POS.
...
1) Log in to the POS as normal and select Timekeeping.
.png?version=1&modificationDate=1504607984537&cacheVersion=1&api=v2&width=350)
2) The Manage Timekeeping Module will launch.
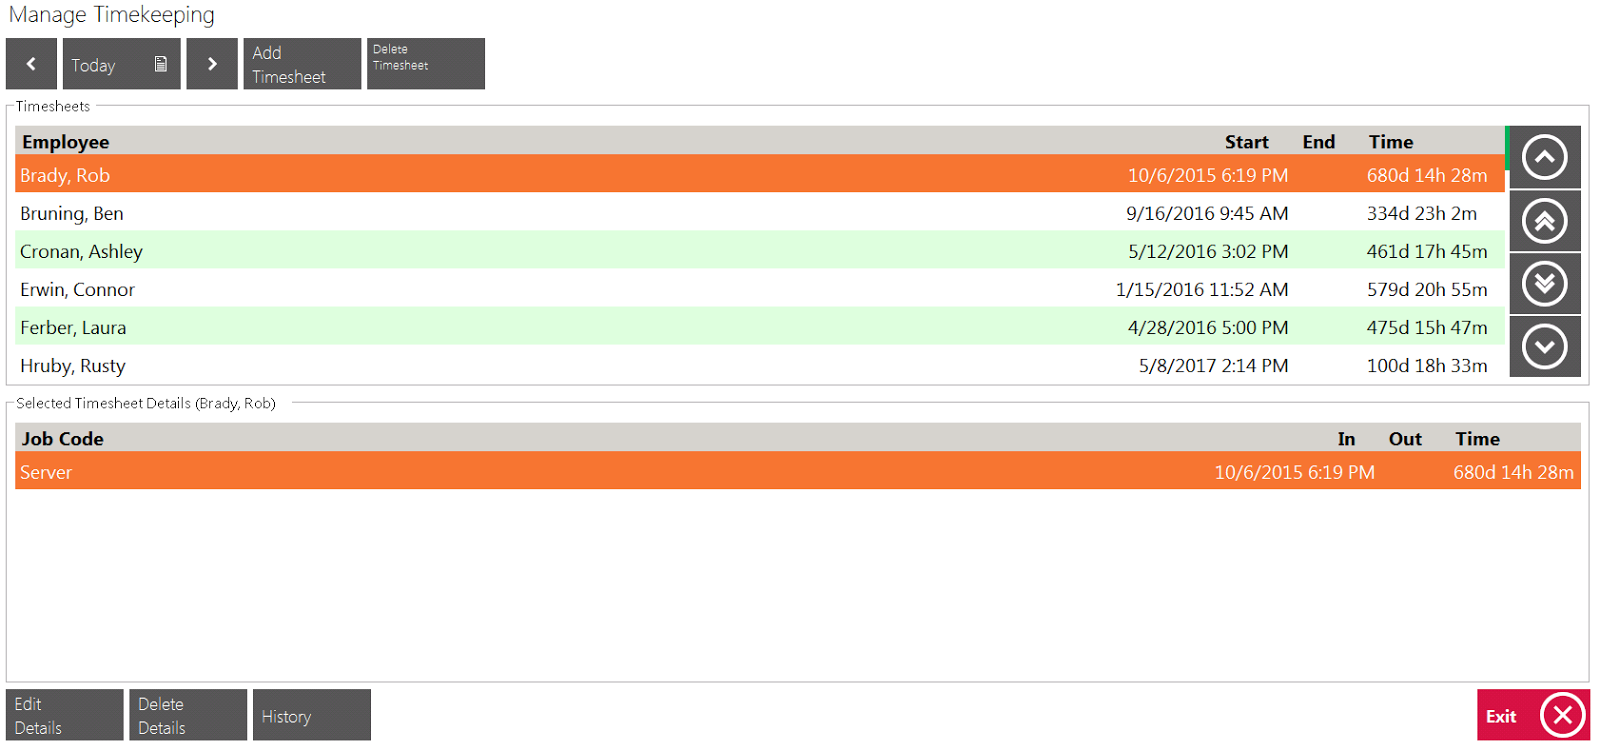
Editing an Existing Timesheet
To edit an existing Timesheet:
1) Use the Date field to select the applicable Date in which the Timesheet occurred.
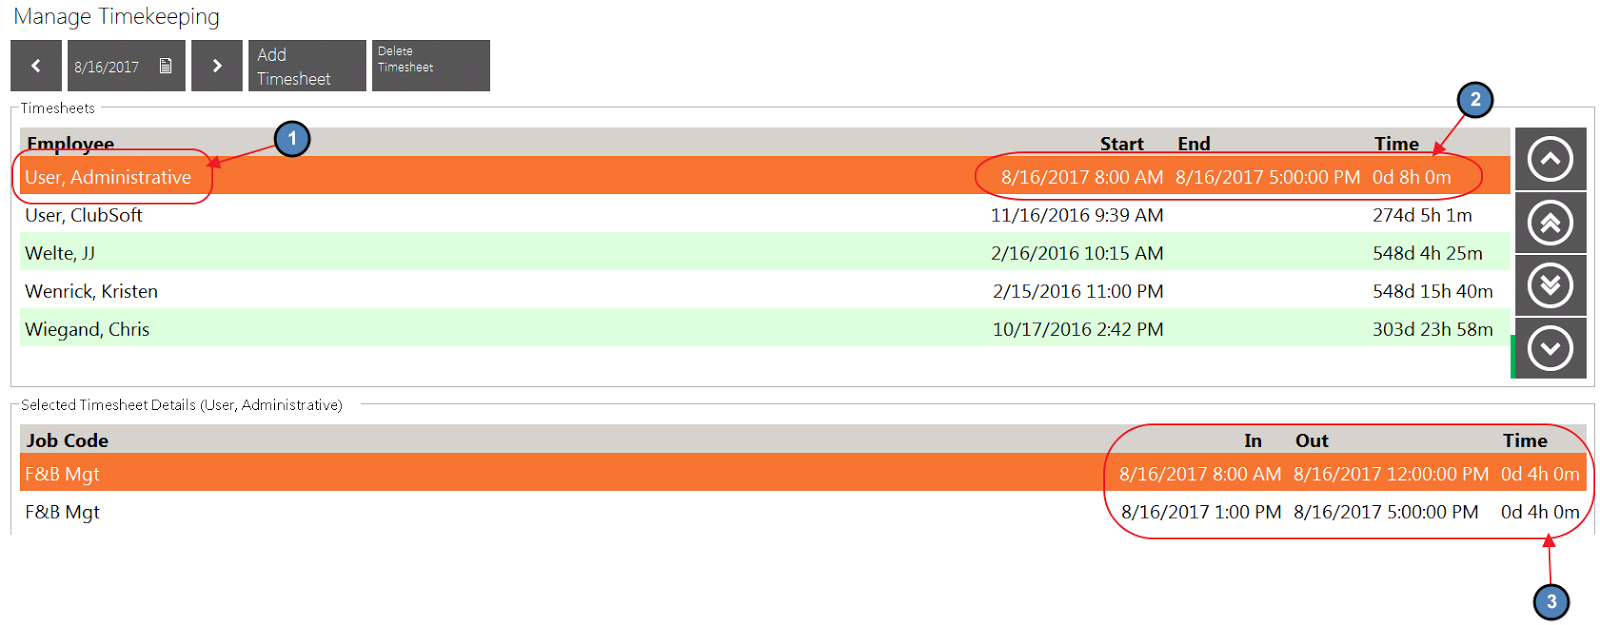
2) Select the applicable Employee from the Grid.
Please Note: The top section of the Grid displays Shift totals (In Hours Worked) for the Employee, while the bottom section displays the Employee’s Timesheets that make up the total of the Shift (For example, the Employee could have two Timesheets for one Shift if the Employee clocked out for Lunch).
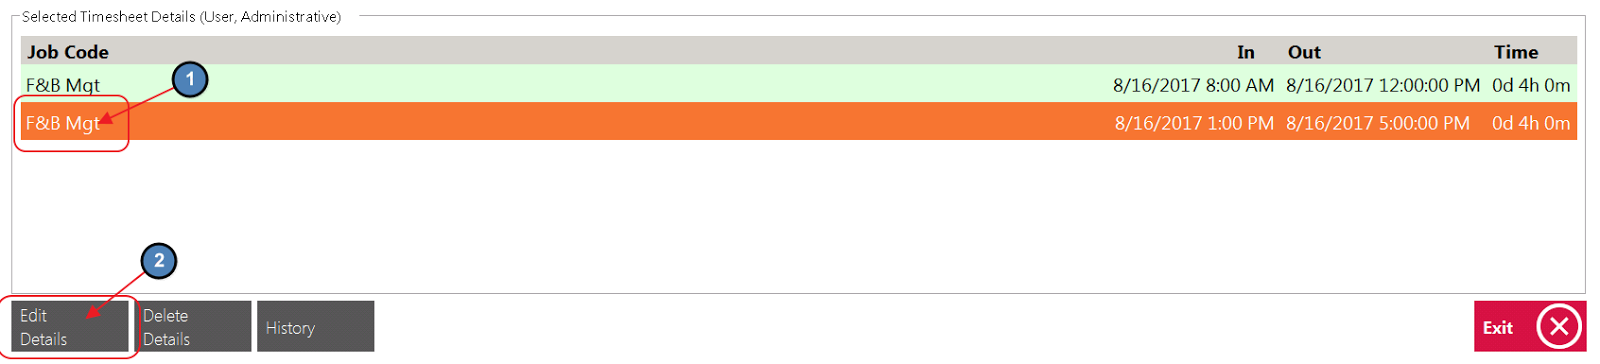
3) Be sure to select the correct Timesheet from the bottom grid labeled Job Code (If there is more than one), and select Edit Details.
...
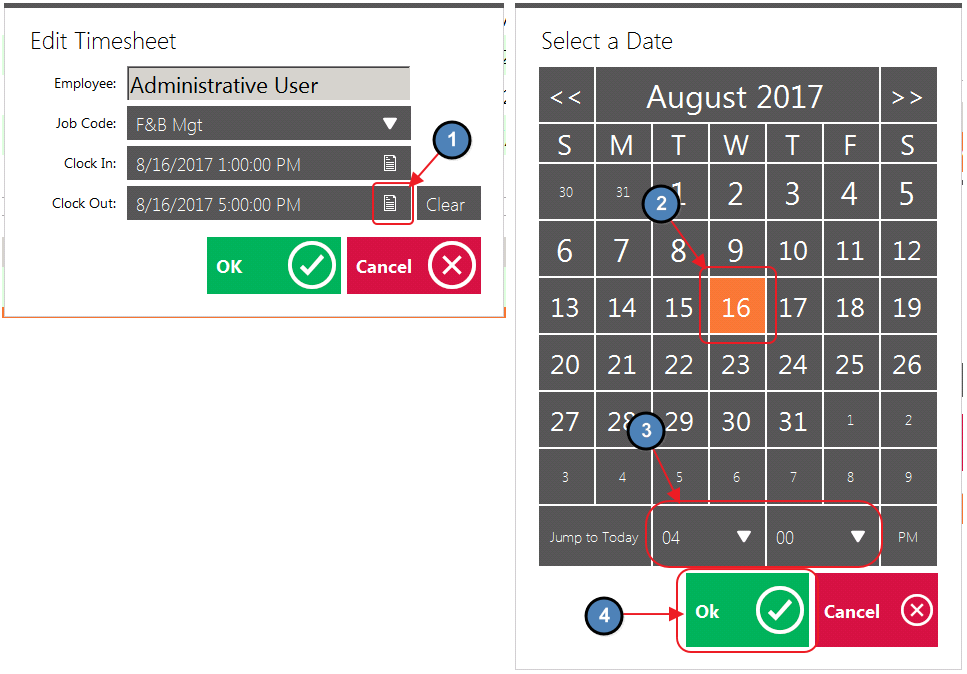
4) Please review available options below:

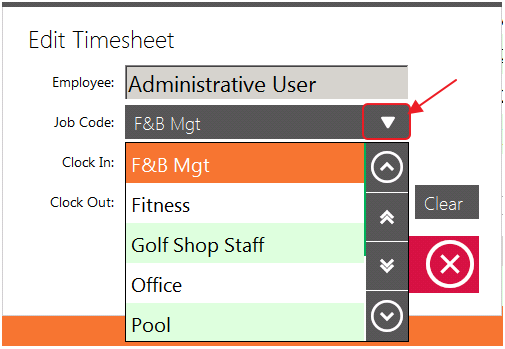
Job Code
The Job Code assigned to a particular Timesheet can edited by selecting the drop-down arrow. The Lookup Value will display all Job Codes assigned to the Employee.
Clock In
The Clock In Date/Time of a particular Timesheet can be edited here. Select the Lookup Value for a more user friendly interface.
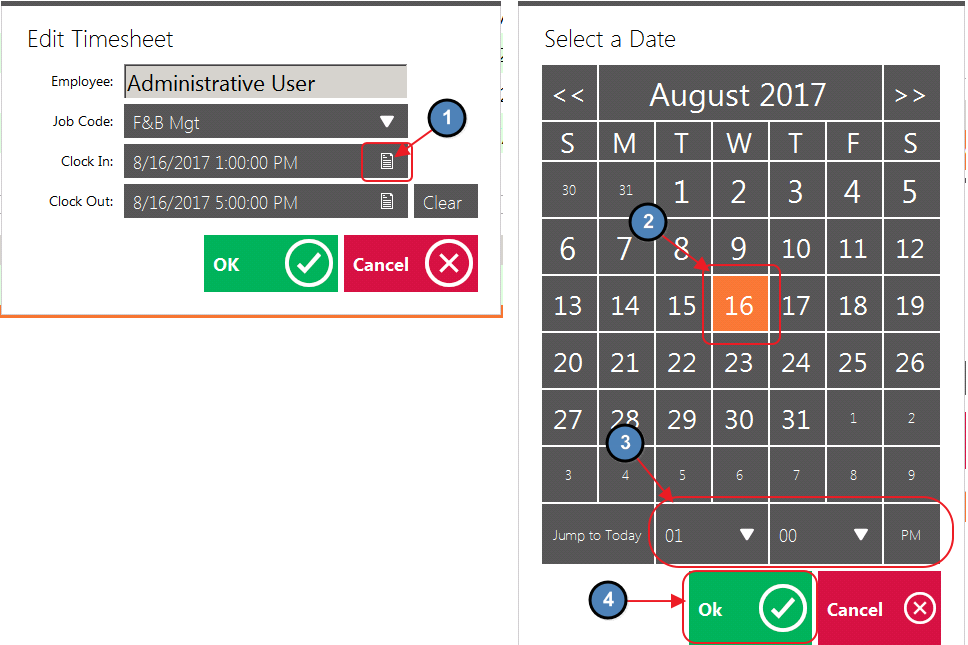
Clock Out
The Clock Out Date/ Time of a particular Timesheet can be edited here. Select the Lookup Value for a more user friendly interface.
Best Practices
Set up buttons for both Rain Check Items (Issue, and Redemption) on the POS main screen for easy access.
...