Overview
In this manual, we will discuss the various functionalities within our Retail POS System. Use Case The Retail POS system is used in Golf Shops, and other areas of the Club (Spa, for instance), where retail goods (or services) are transacted. |
Content
Accessing the Tool
To access the POS,
1) Click on the POS Icon.

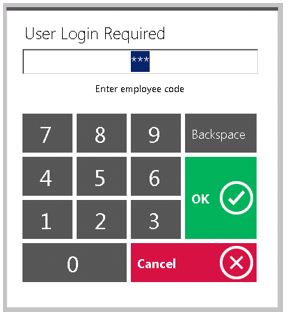
2) A logo will display moving around the screen, click anywhere on the screen to get the user login prompt. Enter your Employee Swipe Id (the number assigned to each user).
If you are using the Office system to track hours, an additional screen will display prompting the user to select a Job Code.

If the user only has one Job Code assigned to their employee profile, it will display “you have successfully logged in”.
Opening a Ticket
In this section we will discuss the necessary procedures to follow when opening a ticket.
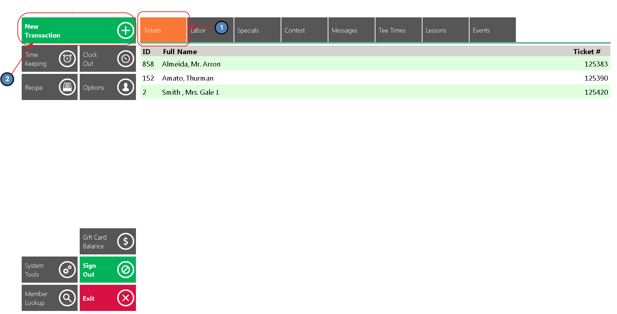
If you have any open tickets they will be displayed on the Tickets Tab: you can touch or mouse click to open the ticket.
To open a new ticket, click on the green New Transaction button.
Notes:
The Tickets screen should be blank before running the End of Shift Report.
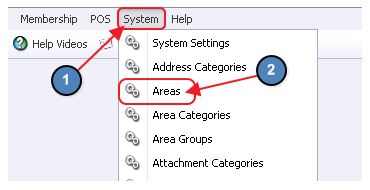
The Tickets display can vary depending on what columns you want to see. Columns can be removed or added in CMA. To do so, please navigate to System across the top toolbar and choose Areas.
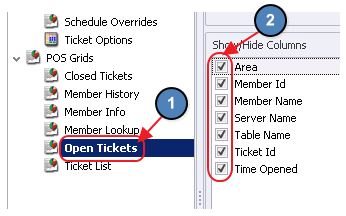
Double click on the Area in question and navigate to the Open Tickets tab on the left pane. Once on the Open Tickets tab, select/unselect the column headers that you would like to see.
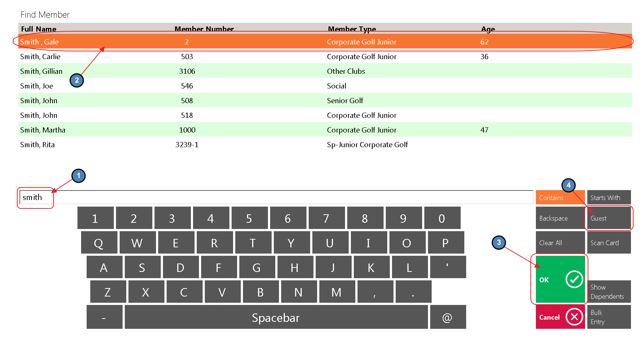
3. Member Lookup - Enter the Member Number or Member Name. If this is not a member, select Guest.
As you are typing the number or name, the screen will display the results. Highlight the member to be assigned to the ticket and hit Enter, or touch the member name, or mouse click on the name to select.
Notes:
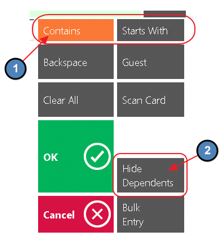
If the Contains button is highlighted, the system will search all name columns displayed on the screen that meets the search criteria including First name, Last name, and Member Type.
Example: if you key in John, the system will display all the names that have John in the first or last name such as John, Johnson, Johnnie, etc, or if you key in the name of the Member Type only those members in that type will display. This is the preferred setting.
If the Starts With button is highlighted, the system will only look at the beginning of how the Name is displayed
Example: if the name is displayed as Aaron, Amy R your search criteria will need be Aaron (not Amy). This is not the preferred setting and often is a support call because a server accidentally hit the Starts With button.
The Hide Dependent button gives user the option to filter out the dependents and spouses from the member display.
- You can sort the screen by each column by touching or clicking the column heading.
Navigating the POS Screen
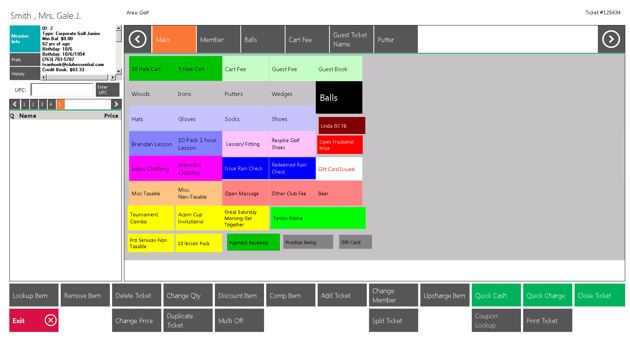
Note: There are important areas to point out on the POS screen.
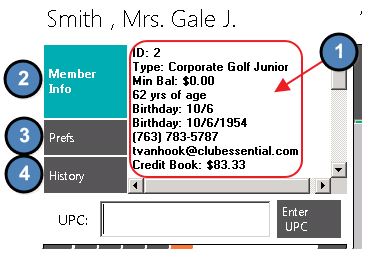
- Top Left Corner – The information viewed here can be customized using the information in the member file. Each sales Area can display different information. There is various member information available for display (this will be discussed in more details in Area setup). If you click on Member Info the system will take you to additional information about the member and family. Prefs is an area you can add information about the member such as favorite clubs, color, etc. History will show closed tickets from current day and previous days.
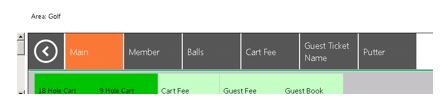
- Top 1st Line – Displays Area and Ticket Number.
- Top 1st Line – Displays Area and Ticket Number.

- Top 2nd Line – User can choose what Item Categories to be listed on the bar for quick access.
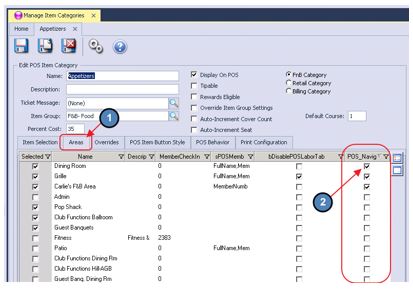
This setting is found in Manage Item Categories. Select the Item Category in Question and Navigate to the Areas tab.
Then, select the POS_Navigation column (last column to the right); next to the Areas to display the category at the top of the POS screen.
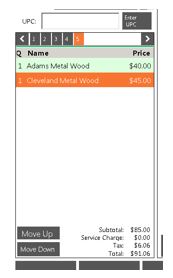
- Left Middle – Is the Ordering Screen; it lists the items that have been rung up.
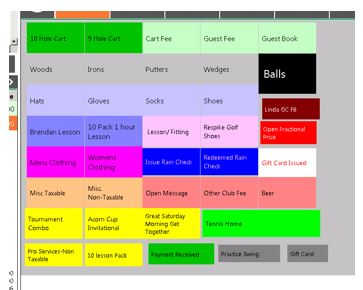
- Middle – The Screen Group Layout is user defined: buttons can be setup to access a single Item, Item Category, Combo, single Modifier, Modifier Group, or another Screen Group.
- Bottom – The buttons across the bottom of the screen are system defined and triggers different functionality; see below for a brief and then more in-depth description of each button.

Best Practices
When setting up areas, ensure the settings in the system, align with the best possible operational flow of your respective Retail area. If settings are not necessary/used, ensure they are disabled to prevent staff from clicking unnecessary buttons.
Use settings to provide opportunities for your staff to enhance the Member experience. Settings such as Member Info, Member Preferences, and Member History can increase your staff’s ability to provide a better level of service to your Members.
FAQs
Q: When settings are changed in the POS, do users need to exit out, and log back into the POS for the changes to take effect?
A: Yes, once changes are made, ensure users exit, and log in to a new POS session to ensure change(s) in settings take effect.
Downloadable Guide