...
Table of Contents
| Table of Contents |
|---|
...
|
...
|
...
|
...
Video
Watch this video to learn how to receive an Inventoried Item in the Clubessential Office product.
Note: Sections of the videos have been referenced below with corresponding times in the video for ease of access
| Total Video (Length) | 4:35 | |||
|---|---|---|---|---|
| Navigation | 0:08 | Item Cost Variance | 3:10 | |
| Create New Receipt | 0:25 | Print/Export Item Receipt Report | 3:36 | |
| Quick Add Item Received | 1:56 | Item Receipt Memos | 4:09 | |
| Allocate Shipping | 2:24 |
Content
...
|
Use Case
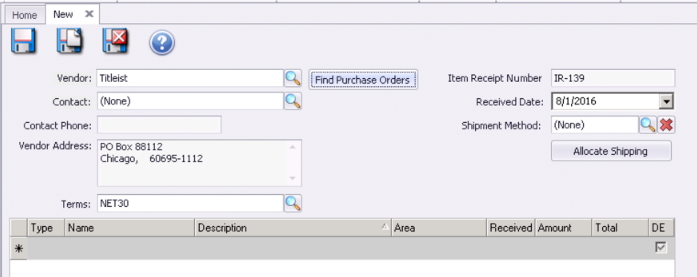
A shipment of (6) new Drivers and (48) sleeves of balls just arrived at the club. To ensure the Inventory records are updated properly, and the Invoice can be processed, the Pro Shop wants to ensure the items are received into Inventory.
...
...
...


...

...
...
...


...
...
...
...

...
...

...
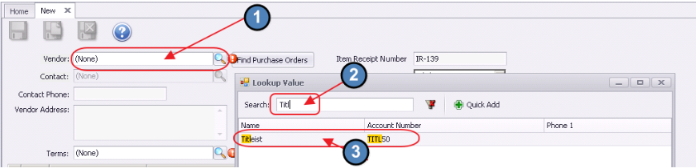
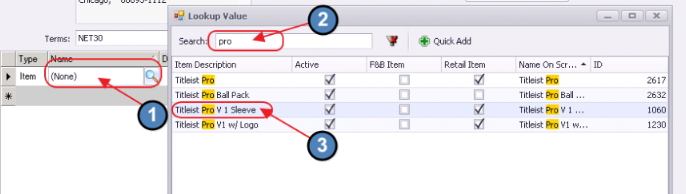
Click, “Quick Add.”

Then, complete Item Set-up as appropriate.

...
...
...
Default Description:

Edited:

...

...

Line will automatically turn yellow if entered amount is outside of the system set variance, and will turn yellow for all new items.

Note: The Cost Variance Percent setting can be adjusted in System Settings.
Select, “System”, “System Settings.”


...
...
...
...
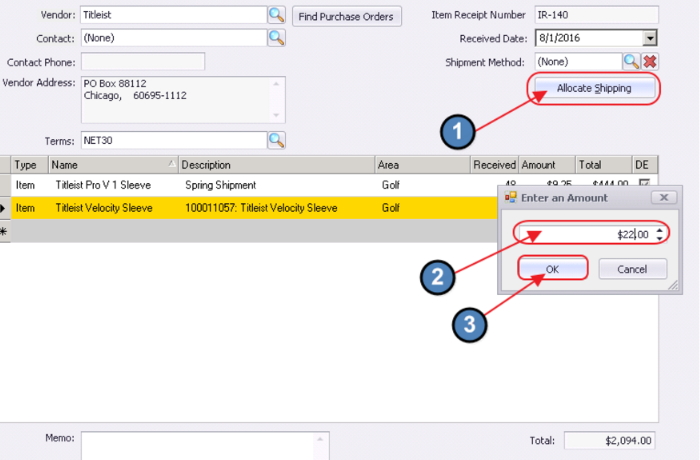
If system cannot divide shipping cost evenly across number of items, warning message will appear. Click, “Yes” to continue.

Adjust quantity of a received item down by one unit. For example, originally, 48 sleeves of ProV1’s were received. Change quantity on original line to 47 by clicking on the Received amount and editing.

After tabbing through the Received amount, Total cost will recalculate based on the revised quantity.

Then, add the Item back at the adjusted cost of the Original Price plus the Shipping Difference ($9.35 + $.14 = $9.49.) Total Quantity of sleeves remains 48, and shipping is fully allocated.

...

...

...
...
...

...

...
...

...
...

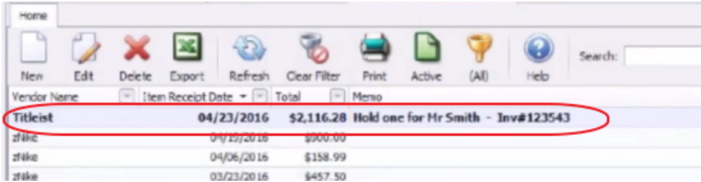
FAQs
...
...
Downloadable Guide
Manage Item Receipts - Written Guide
