...
Table of Contents
| Table of Contents |
|---|
...
|
...
|
...
|
...
|
...
|
...
...
Content
|
|---|
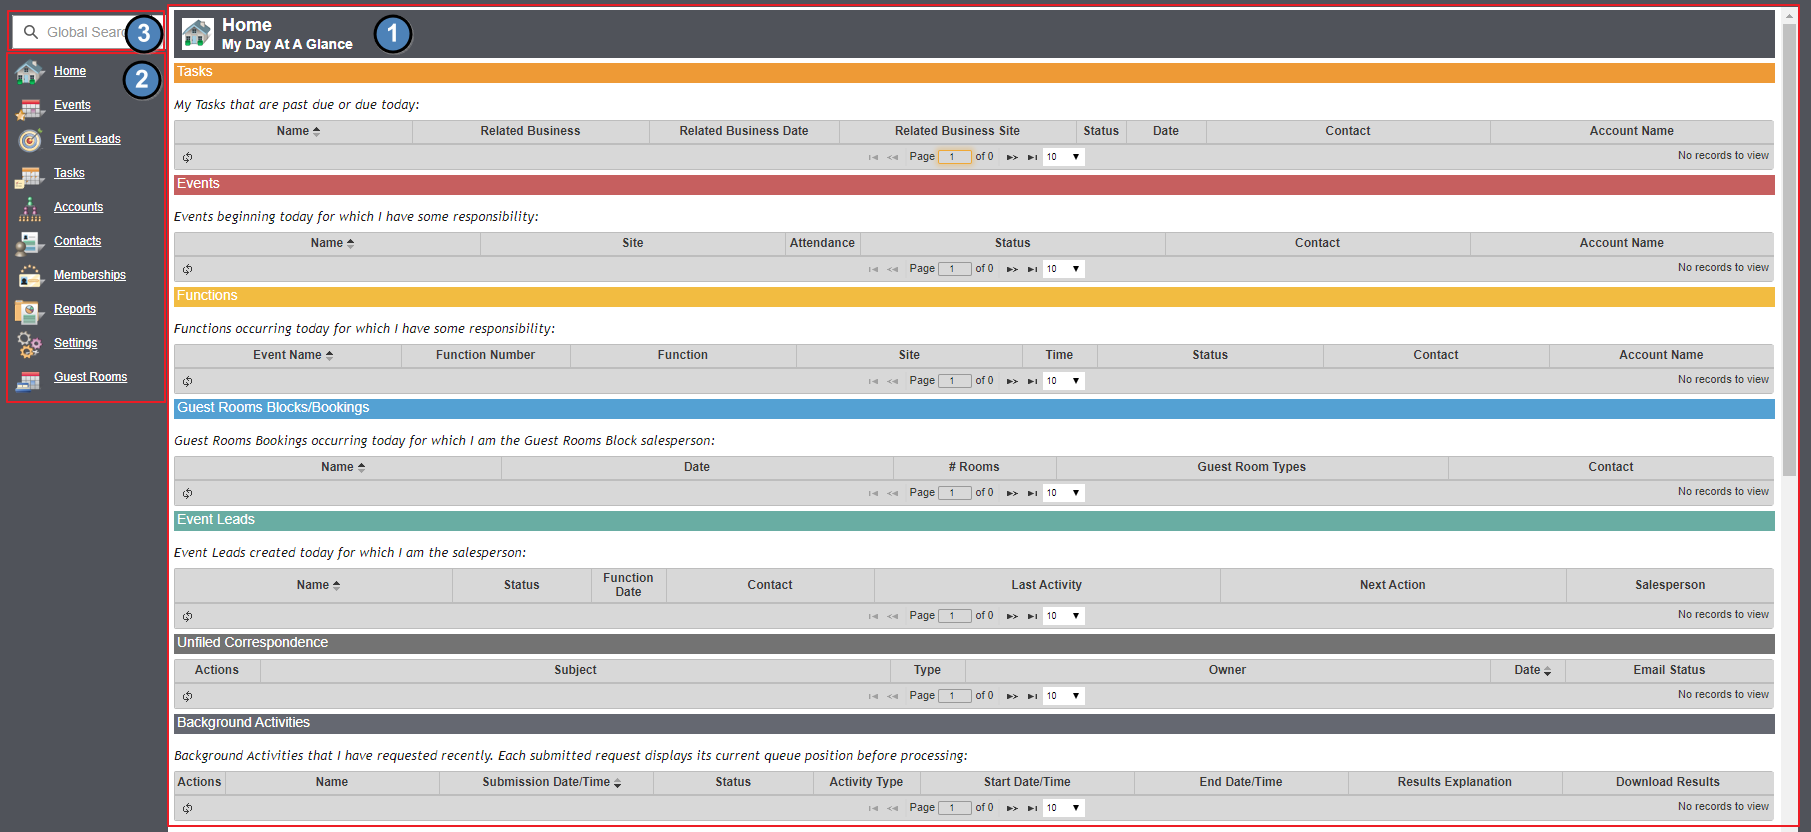
Home Page
Use Case(s)
The Banquets Manager begins every day by reviewing the Home Page, which summarizes the most relevant information (Task, Events, and Leads) pertinent to the current day. They then navigate through the system effortlessly as they follow up on Leads, convert them to Events, and then move through the Event life cycle; skipping steps that may not be appropriate depending on the nature of the Event(s).
...
...
...
...
...
...
Batch Generate Documents
Documents, such as Event Orders, can be Batch Generated from this page by clicking on the Batch Generate Documents button. Filter and select your events and then select a document. Your batch will be sent to the bottom of your home page in the Background Activities section.
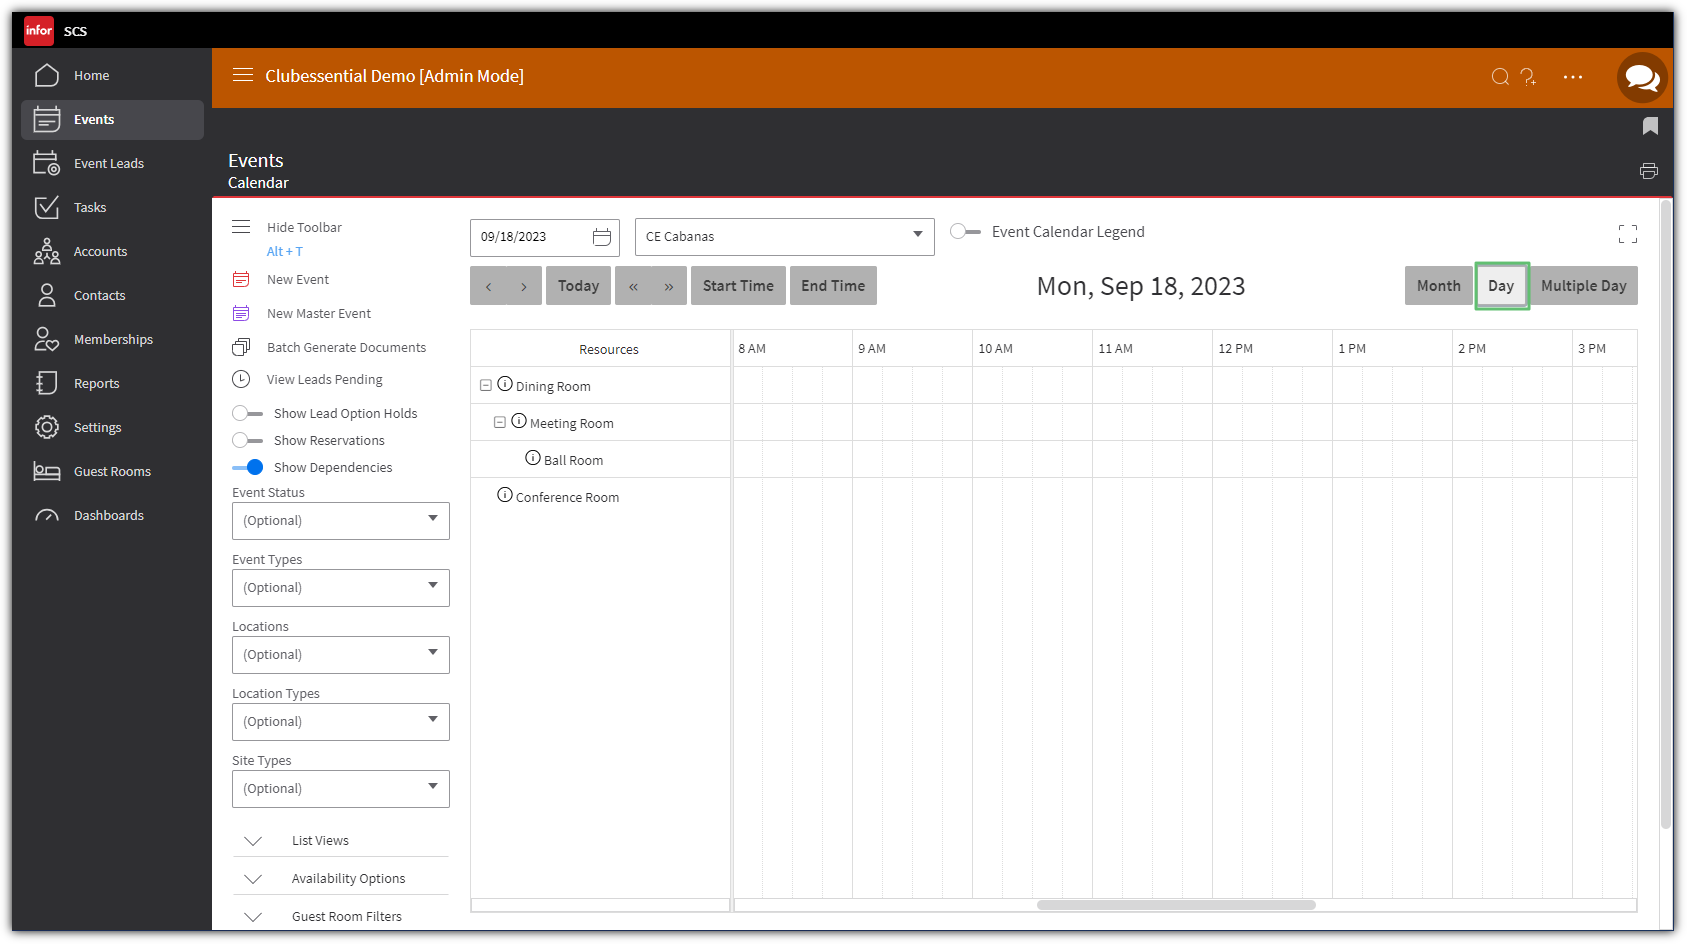
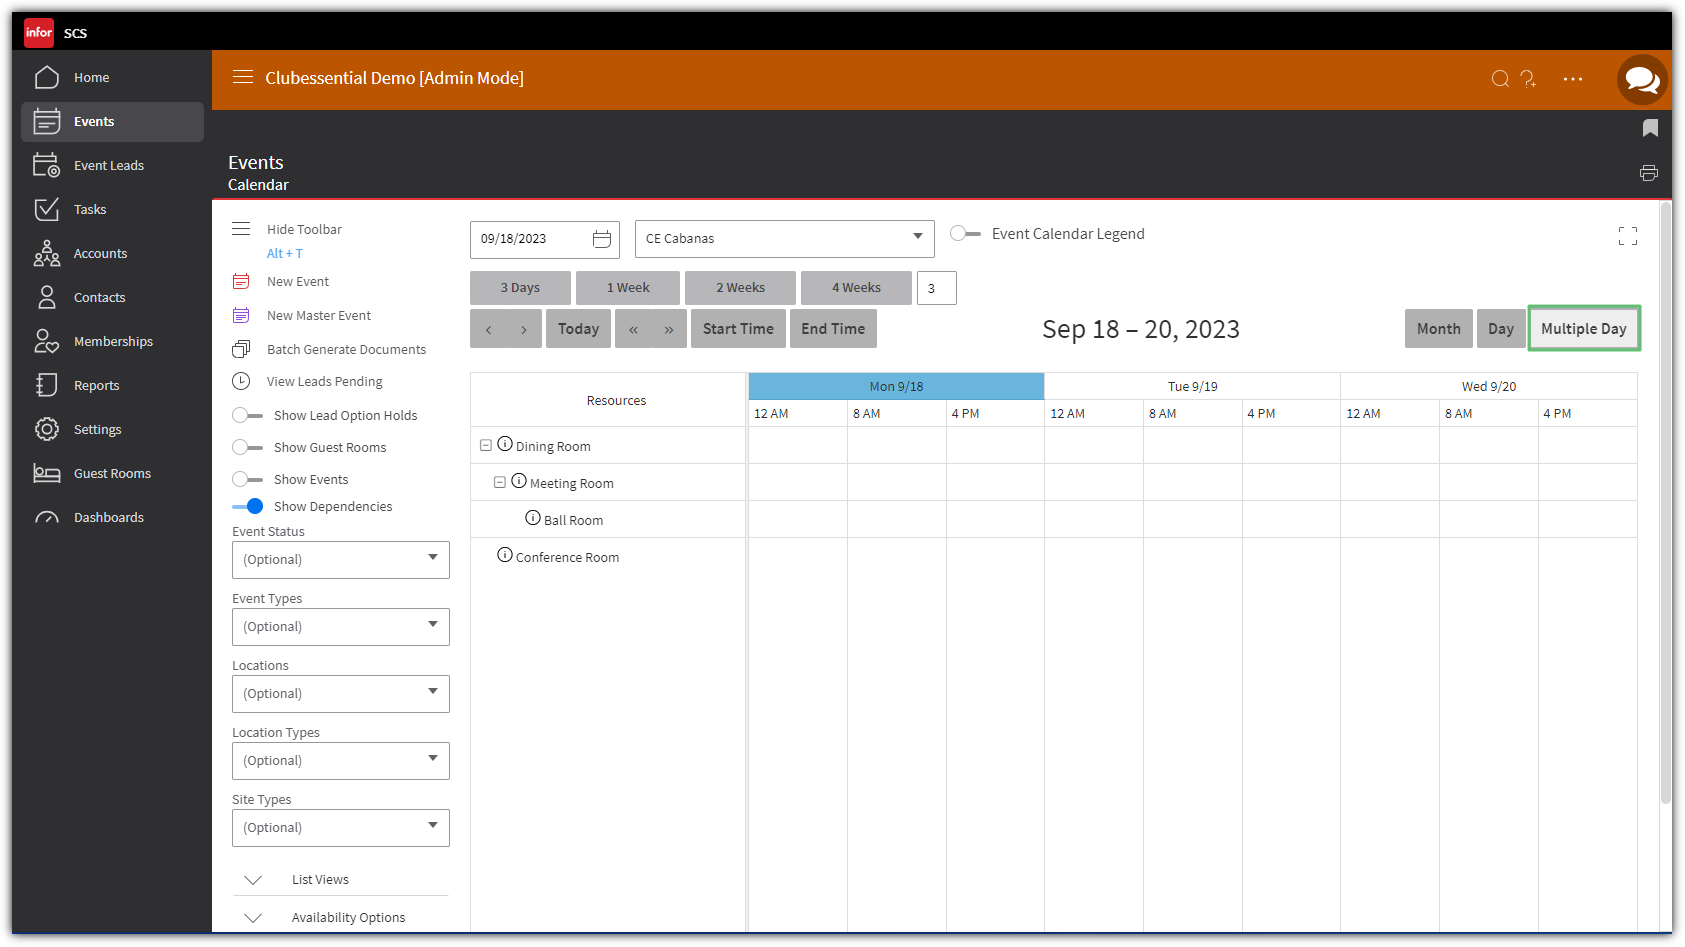
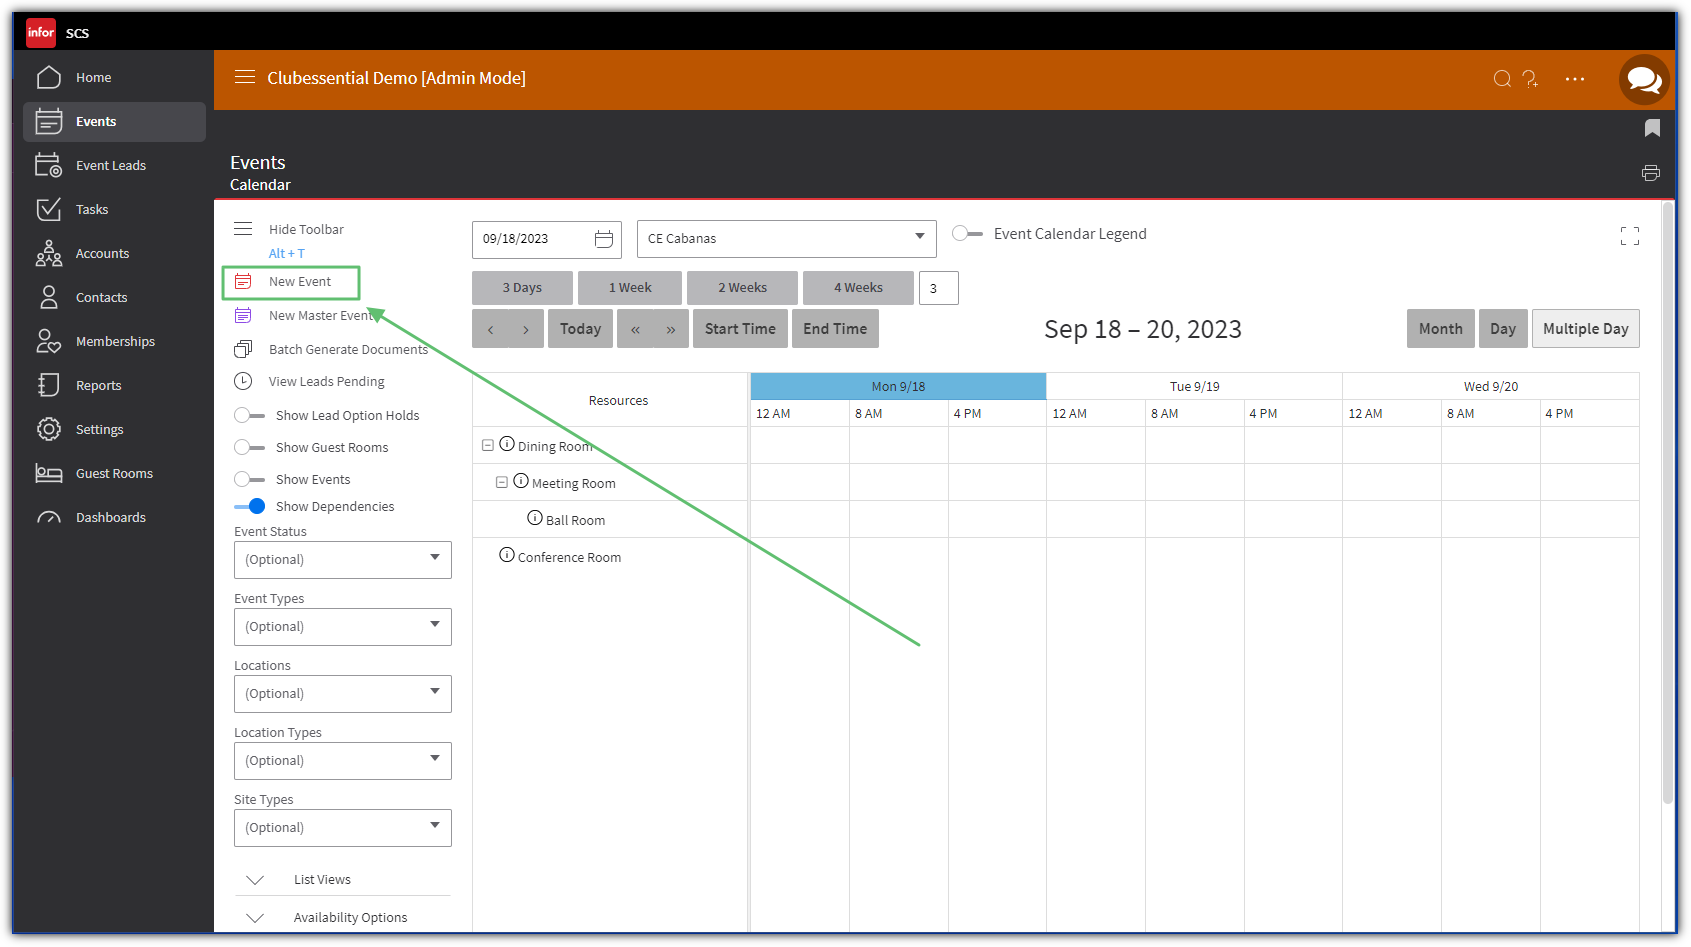
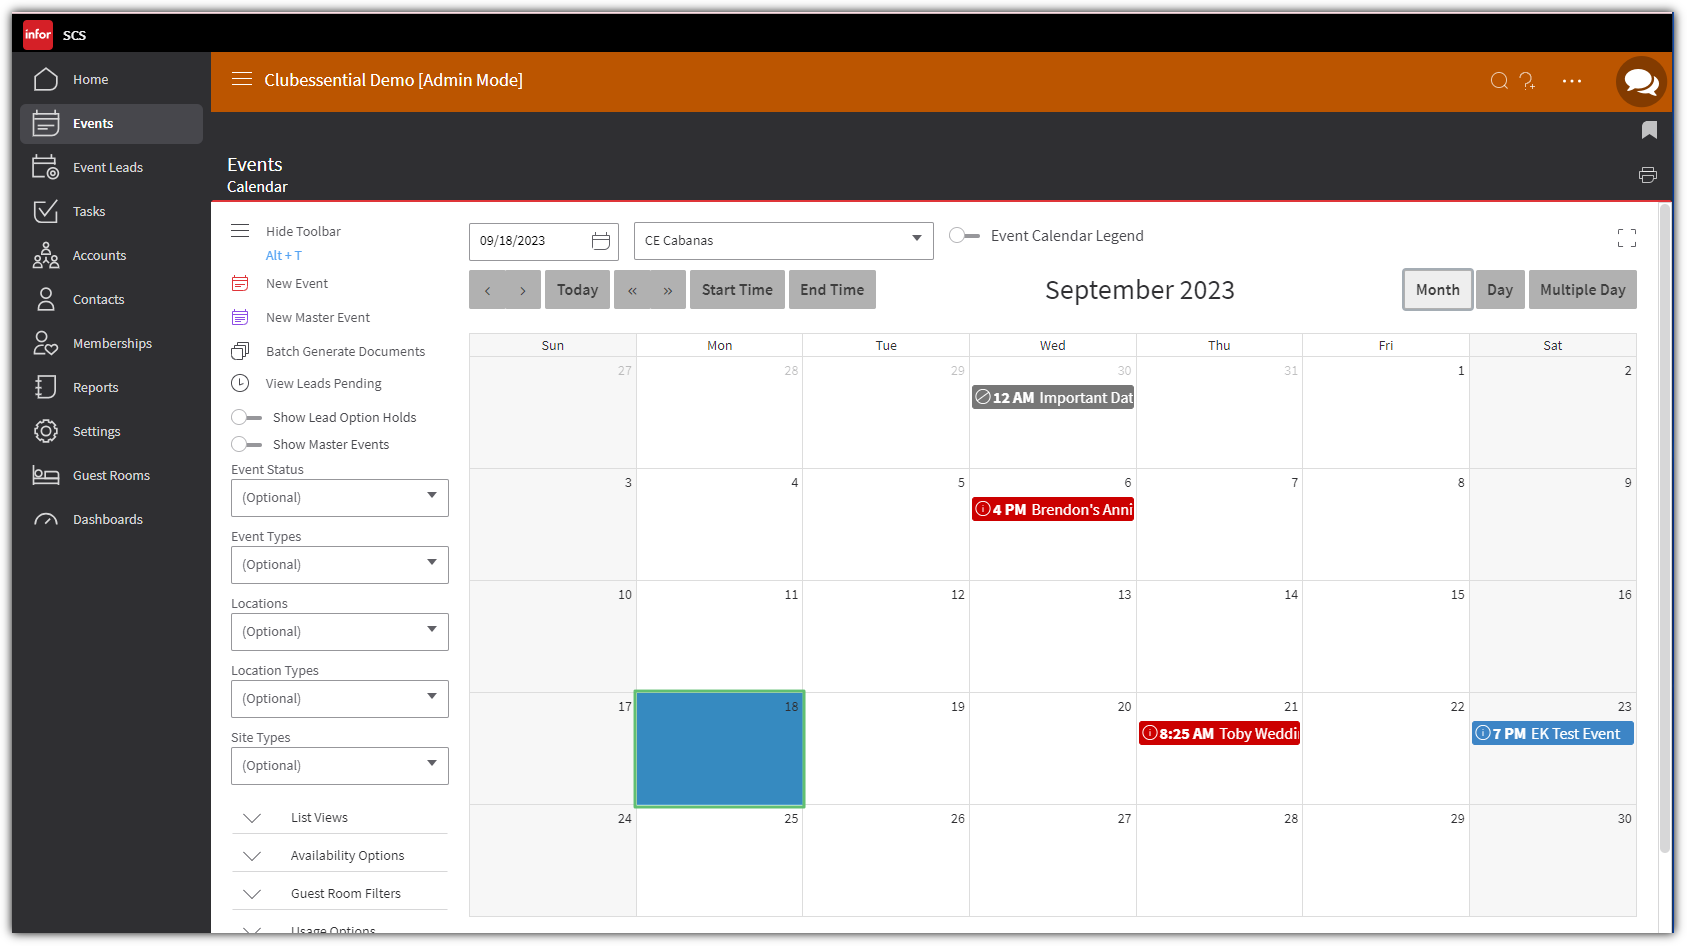
Calendar View
The Week View of the calendar initially displays the current week. The single arrow buttons can be used to move forward or back by week; the double arrows will move to the past year’s corresponding week or the following year’s corresponding week. The color of the event denotes its current Event Status.
...
...
...
...
...
...
...
...
...
...
...
...
...
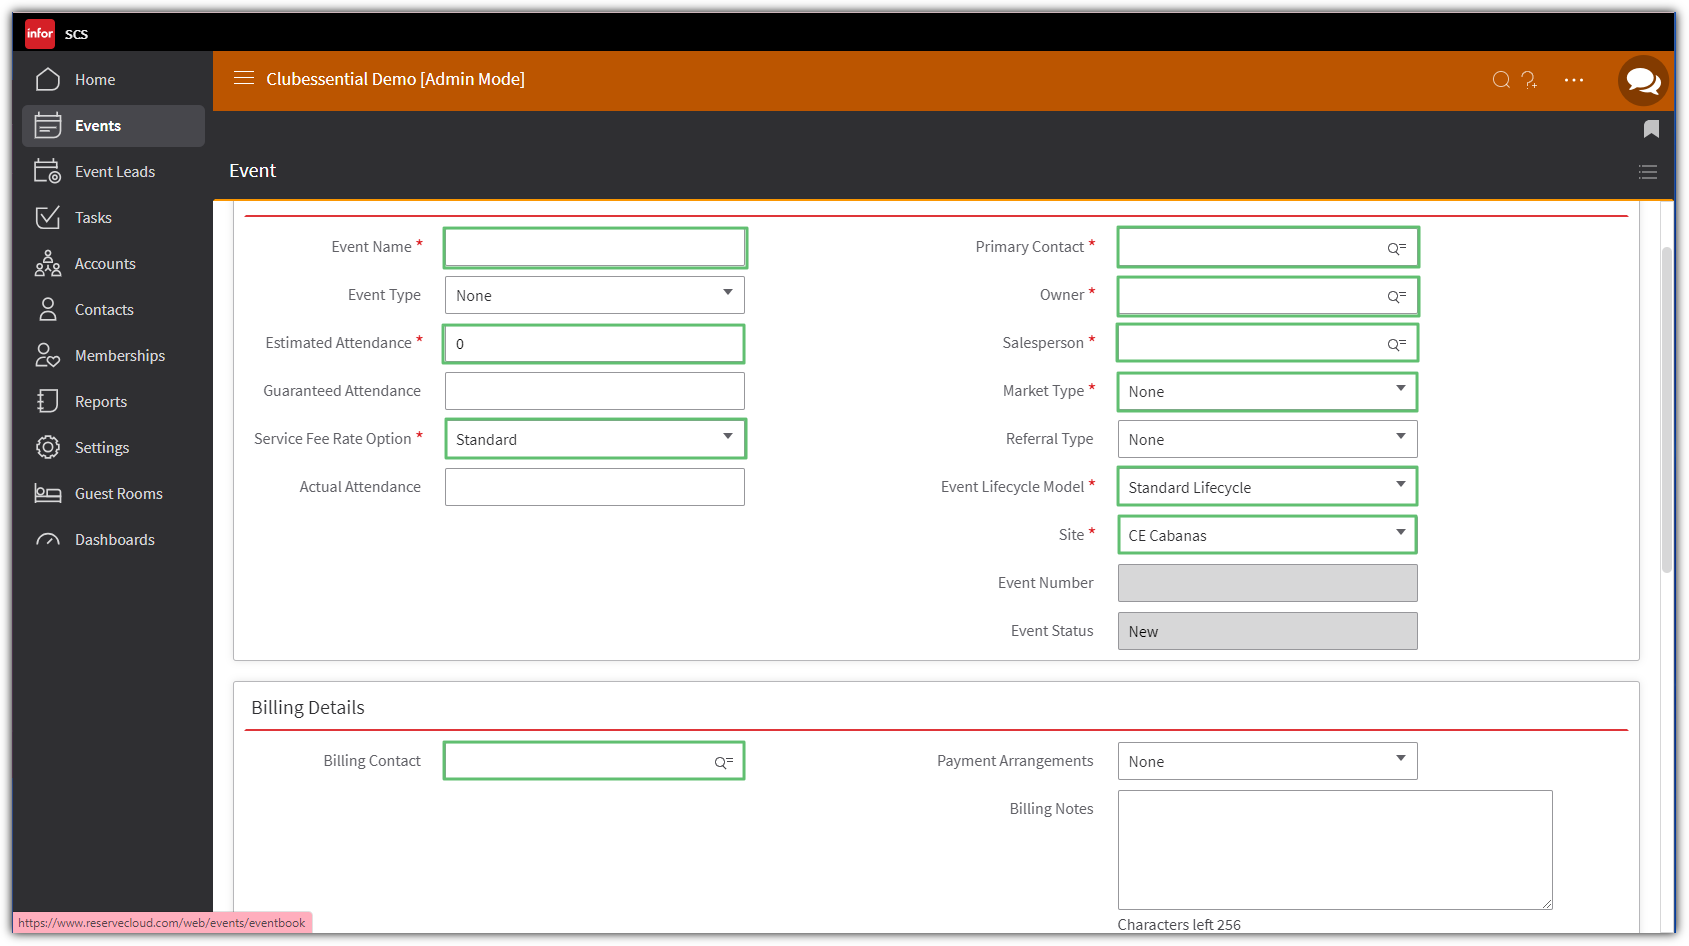
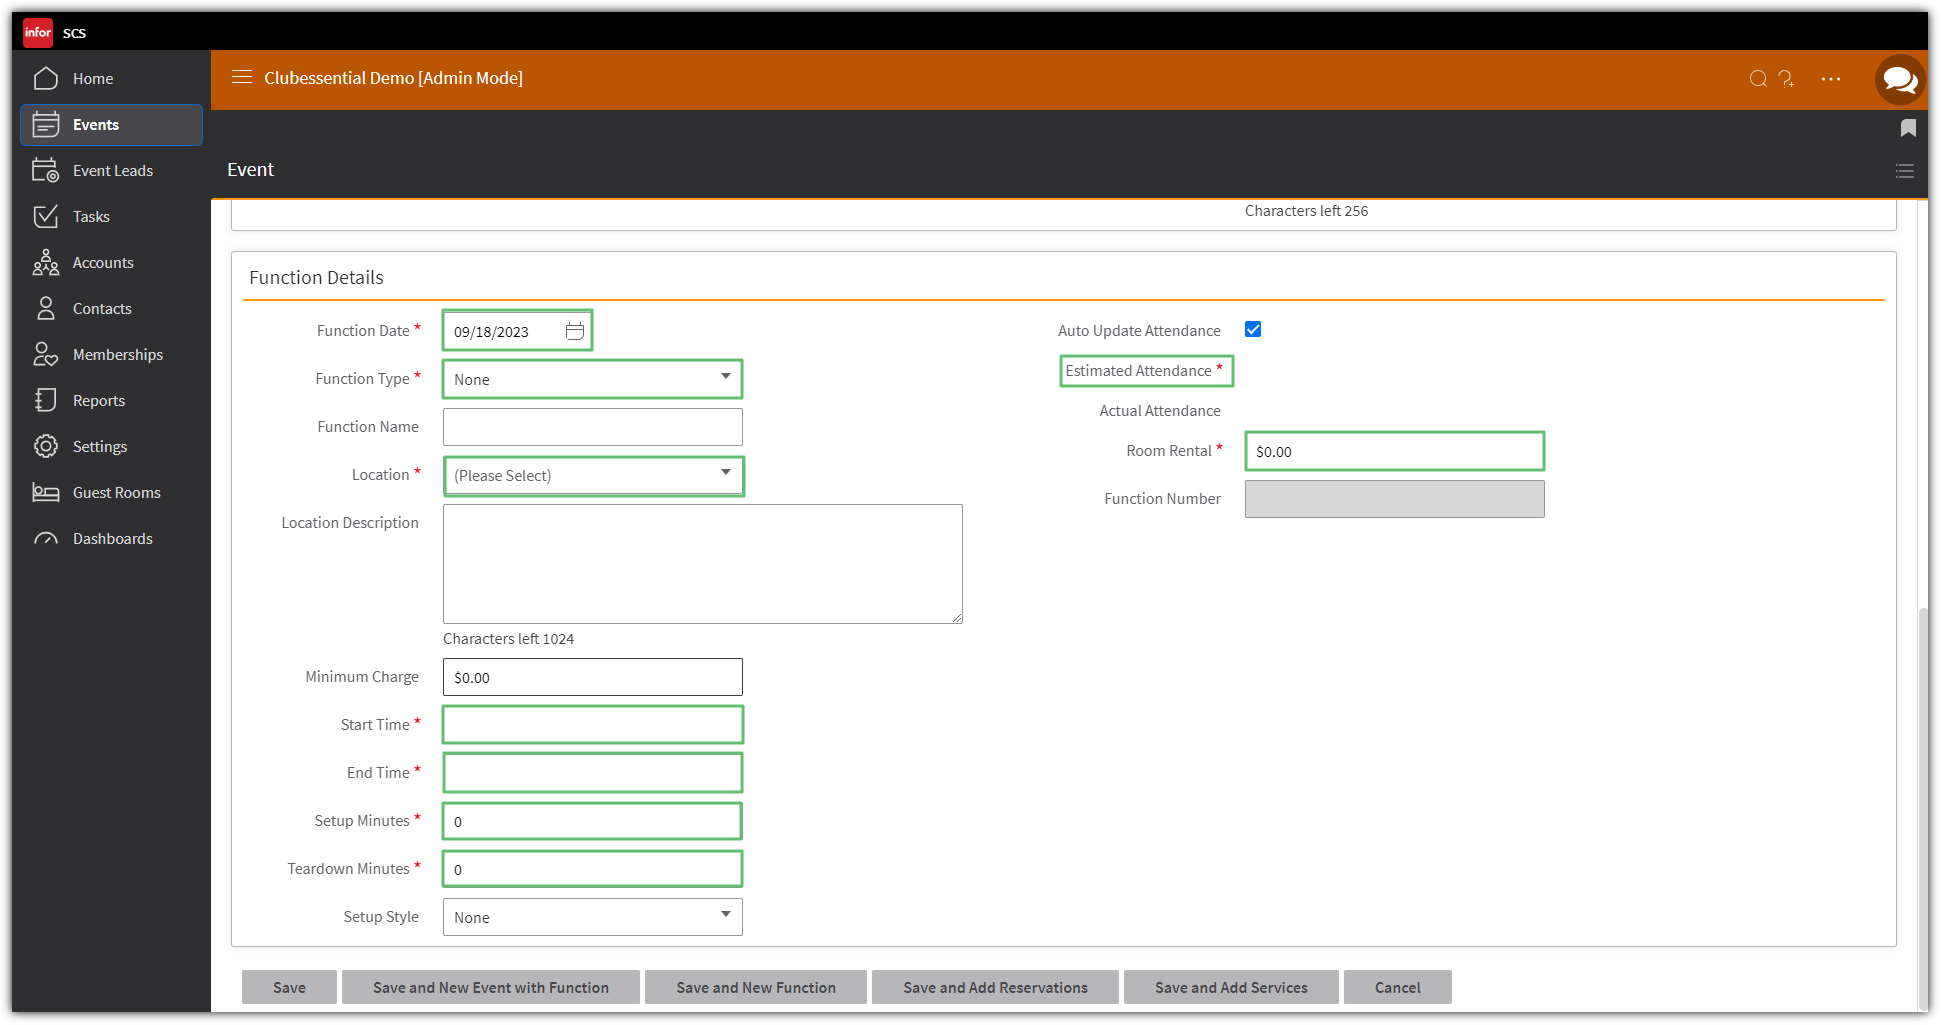
The Event and Function Detail page will auto populate with the information provided. It will contain Date, Site, Start Time, and End Time. The minimum information still required includes Location, Event Name, Event Type and Primary Contact.
...
...
Contacts can be found by clicking on the Contacts icon in the Navigation Bar or by using the global search field. When an event is booked from the contact’s page, the contact is added to the event as the primary contact. All other required fields must be entered.
It is also possible to create a new event from a Contact’s page. This can be done by clicking the “New Event” button located as you scroll down the Contact’s page.
...
...
...
...
...
...
...
...
...
...
...
...
...
...
...
...
...
...
...
...
...
...
...
...
...
...
...
...
...
...
Generating Documents
In order to generate/preview a document from the Event or Function Details screen, scroll down to the Communication History section header. Click on the “Generate Event Document” button.
This will direct to the Generate Documents page. A list of available documents will display. Check the box to select the desired document and then click the “Generate Documents” button.
Your document will be available to view according to the way your browser works.
Send Email
...
FAQs
Q: How do I move an event to a different date or time?
A: When in the calendar view, you can drag and drop the event to the new day. When in the event, you can click on Move Event and follow the provided steps.
Best Practices
Add your contacts in Office and let them sync over to Banquets.
Make sure the owner for the contact says GATEWAY_AGENT, if it doesn’t the information won’t come into Office.
Downloadable Guide
...
