Banquets - Events
- Emily Latham
- Benjamin Hacker
- Danielle Donley (Unlicensed)
Table of Contents
Overview
This user guide will present an overview of the Banquets application as it relates to Navigation and Event Booking. Understanding these concepts is critical to successfully utilizing the Banquets toolset.
Required Permissions
Admin Access
Level 1
Level 2
Level 3
Homepage
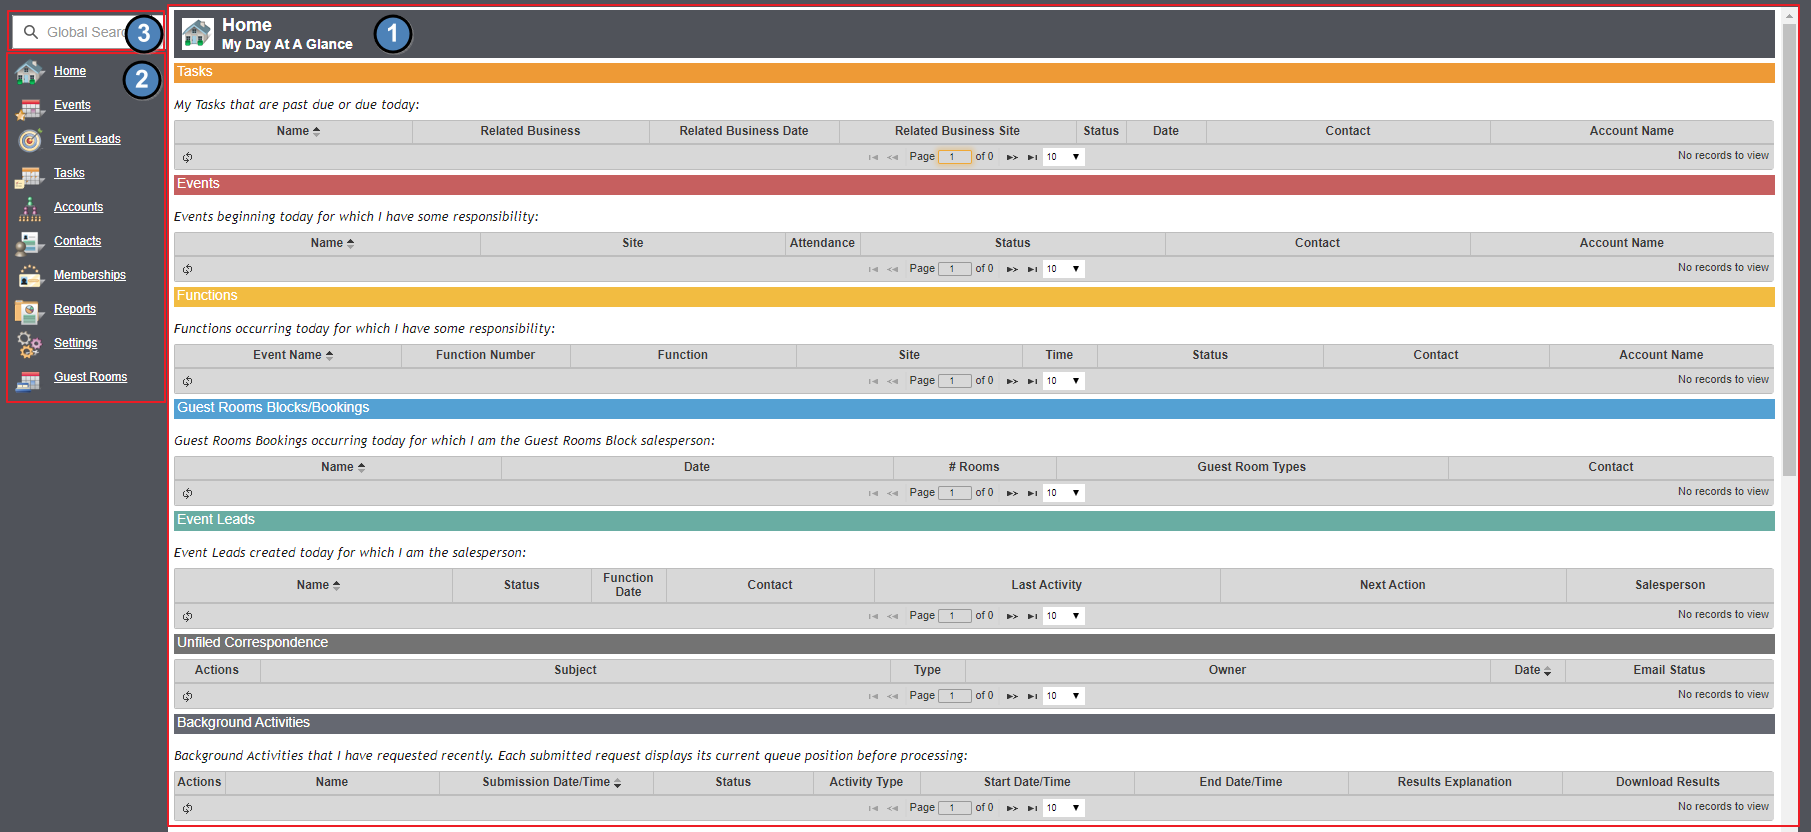
On the Home page, current and past due Tasks are displayed in the application workspace along with any Events occurring that day.
The Navigation Bar is displayed on the left side; it contains configurable Icons that direct to different areas in the software.
The global search field, located at the top of the Navigation Bar, can be used to find items in all areas of the application. Simply type in any string of information and click the Search button. All matching results will be delivered with underlined links to access.
Viewing the Event Calendar
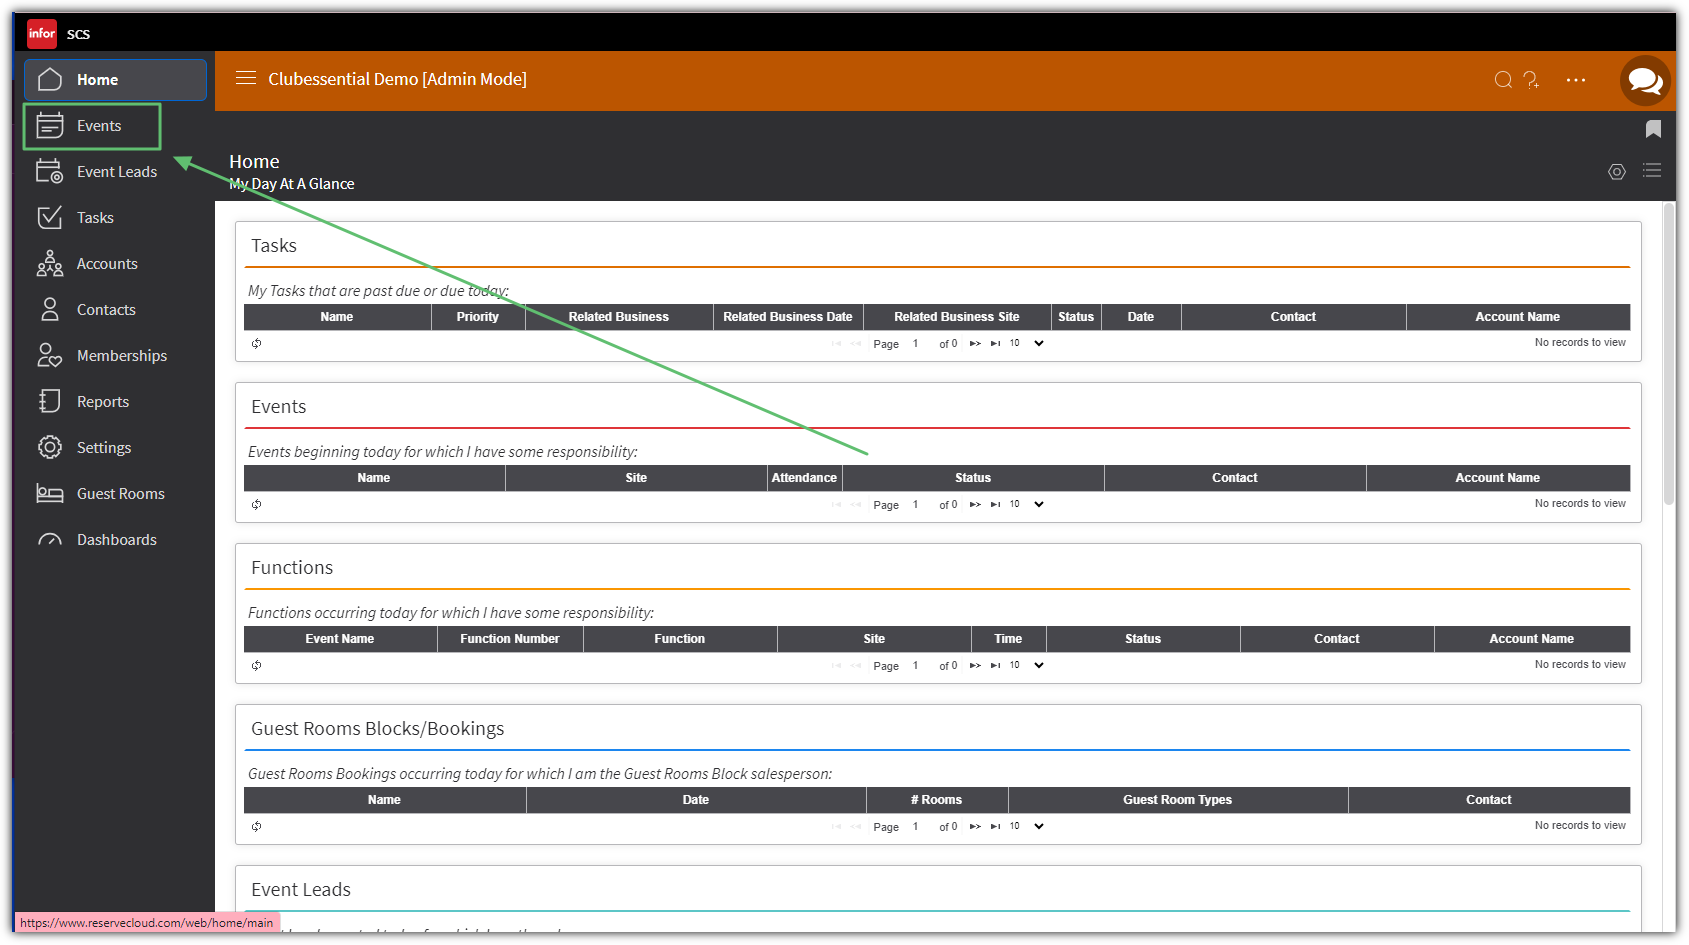
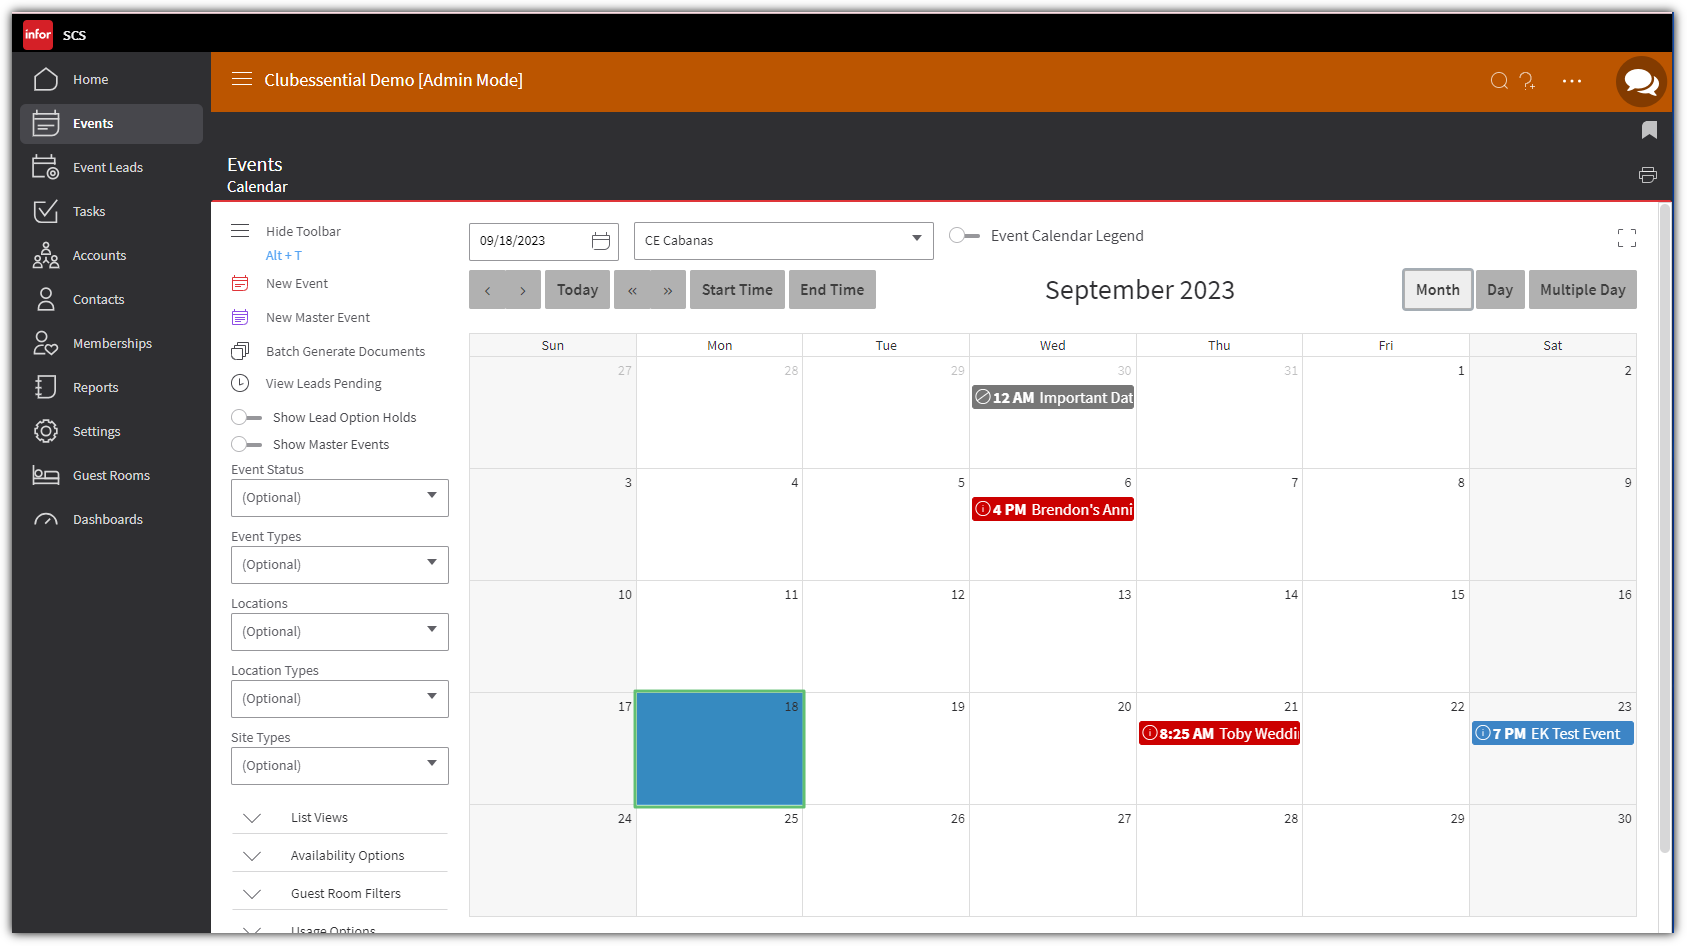
To view the event calendar, click the Events icon in the Navigation Bar. There are 3 separate views of the event calendar: month, day and month multiple day. When first clicking on the Events (calendar) icon, the calendar will default to showing the current month for the user’s primary site. If a different site, view, or month is selected, the Events icon will default to that setting until the user logs out.
Use the arrows in the upper left-hand corner of the calendar to navigate to different dates. The single arrows will move forward or back a month; the double arrows will move forward or back by year.
The color of the Event corresponds to the Event’s current Event Status, or another option is to have the color correspond to the Event Type. In order to access the Event Details page, double click on the desired Event. Or, hover over the Event on the calendar for basic information. The grey bars before and after the event indicate the setup and teardown times.
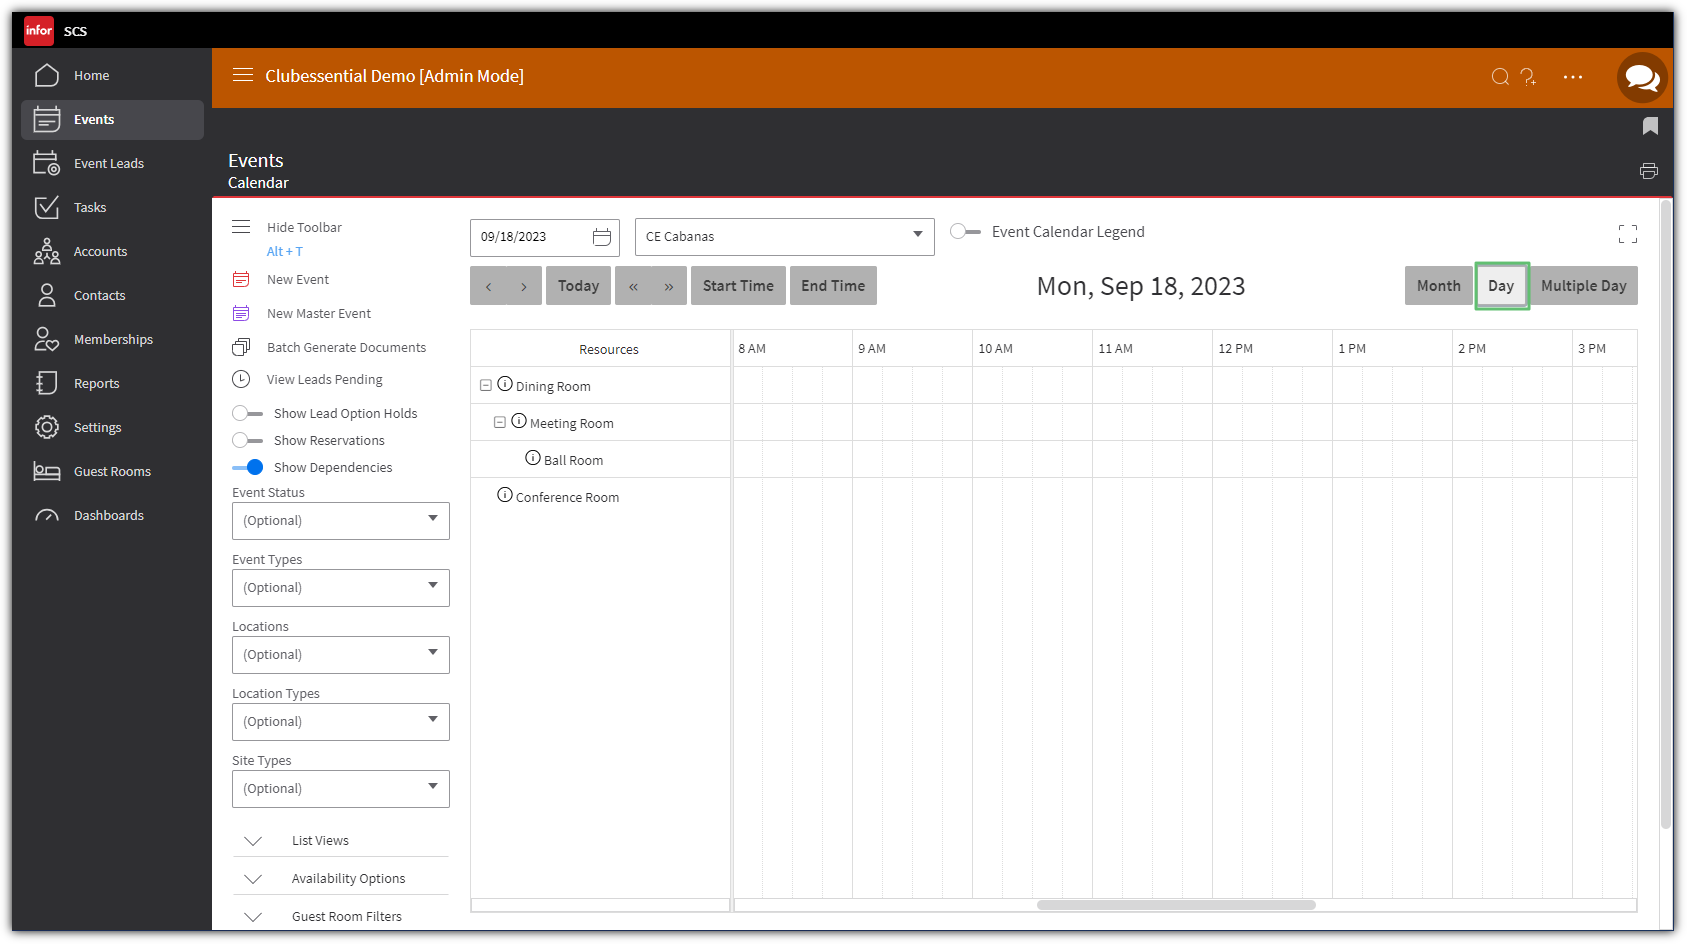
The Day View of the calendar will display the site’s locations along with any events taking place that day. The single arrow buttons can be used to move forward or back by day; the double arrows will move forward or back by year.
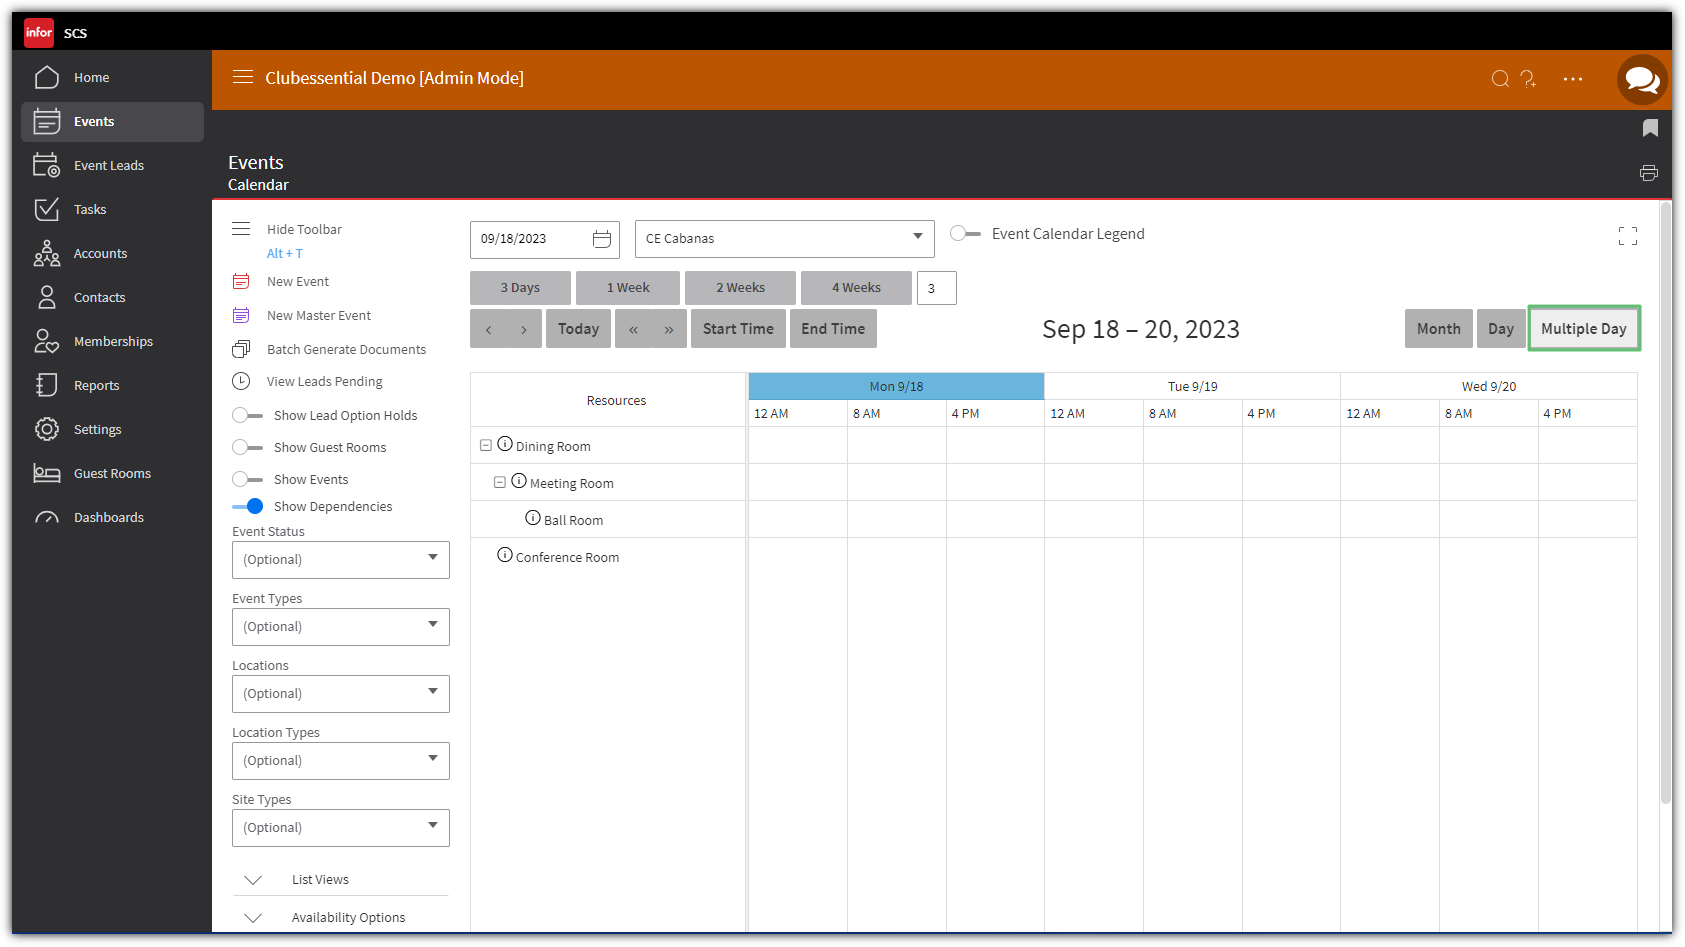
The Multiple Day view of of the Calendar will allow for the user to create an event that spans multiple days. you can set by Resource(Room) and choose the day and time of the event. You can view 3 days, 1 week, 2 weeks or 4 weeks range.
Booking an Event
There are different ways in Banquets to start new events depending on which calendar view has been selected.
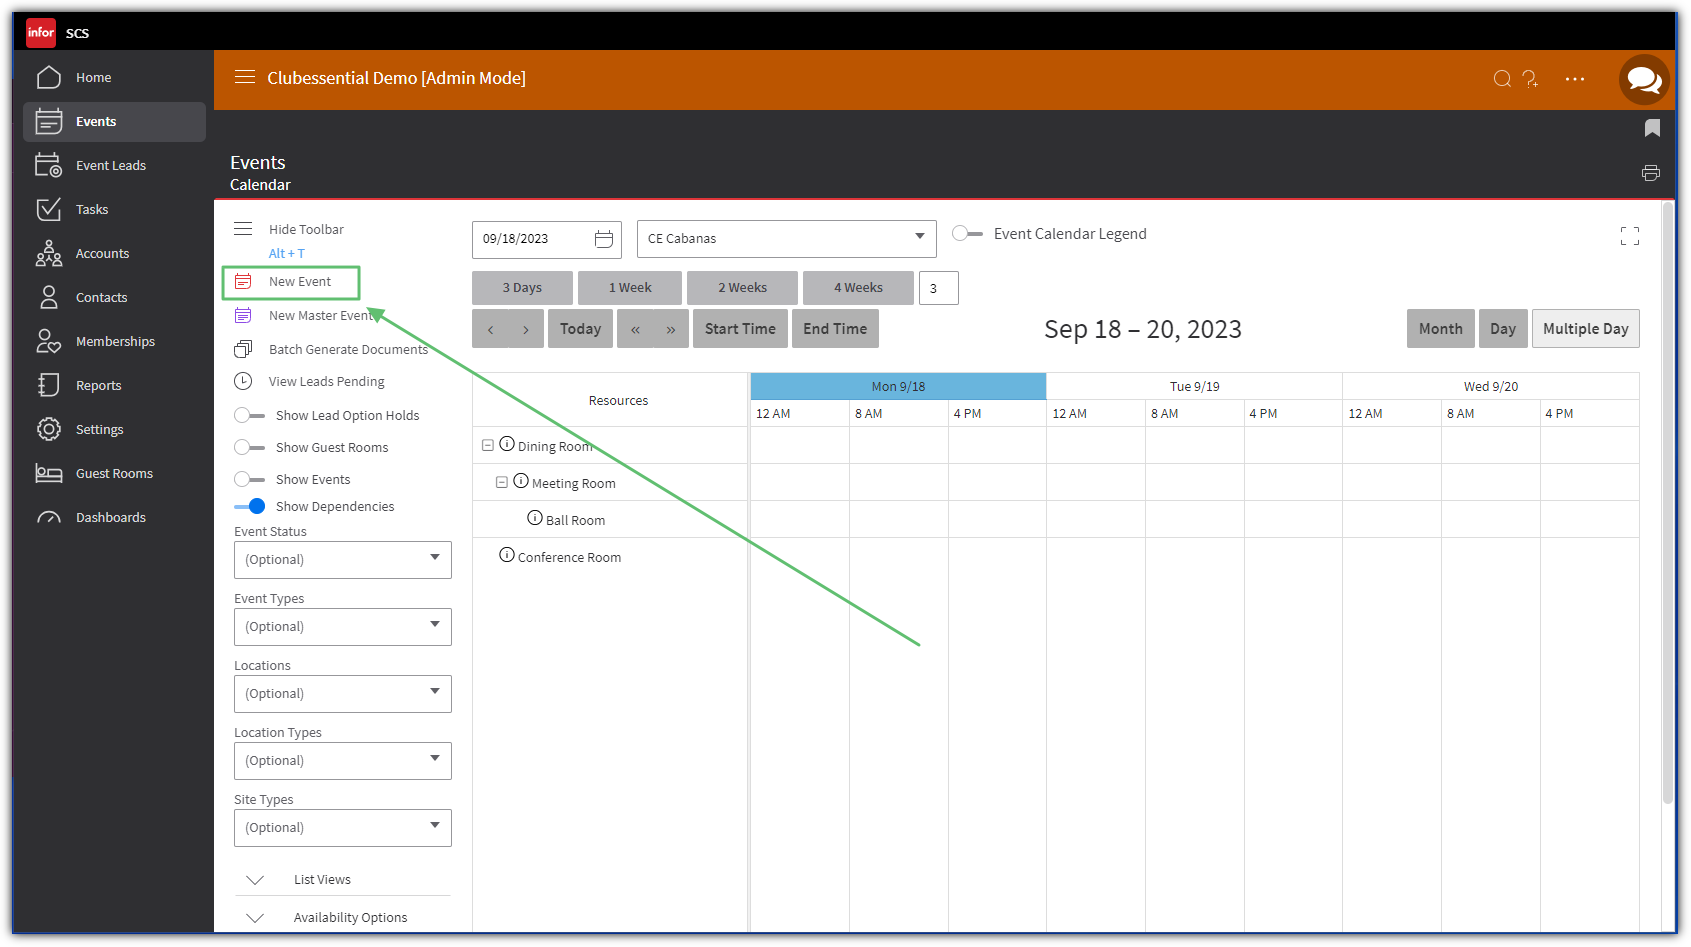
Regardless of the current selected calendar view, a new event can always be started by clicking on the New Event button in the upper left corner of the screen.
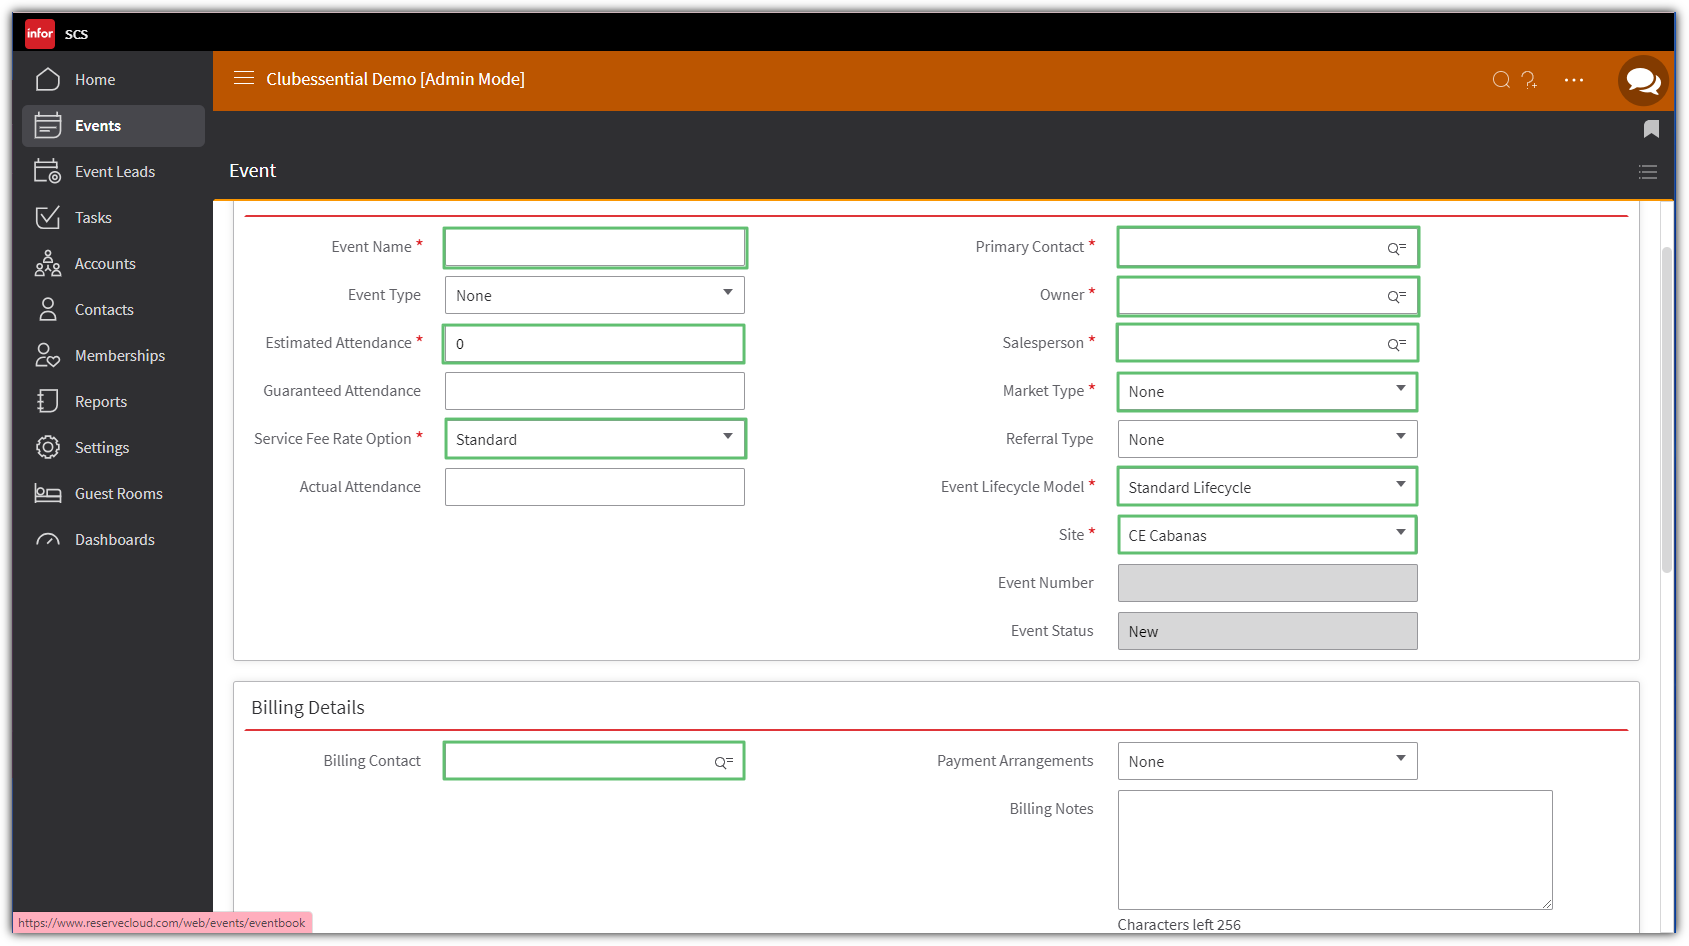
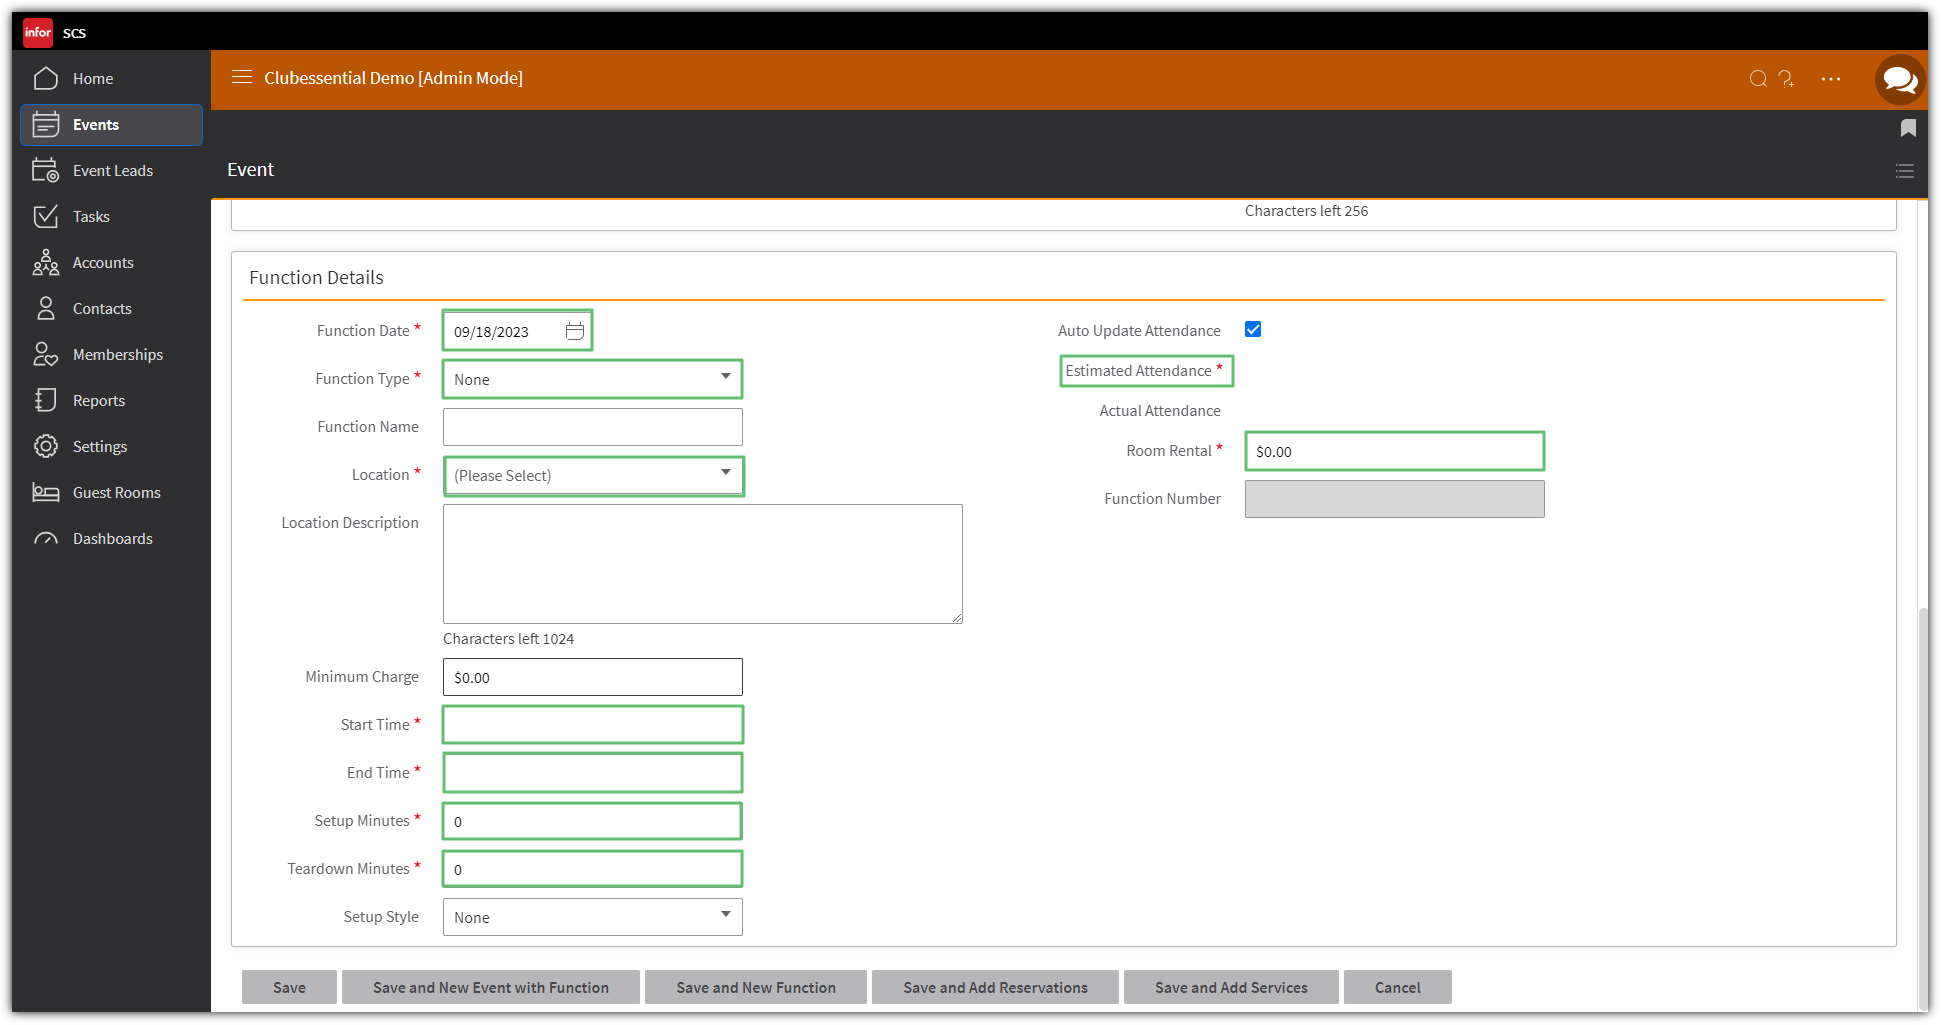
Clicking the New Event button will direct to the Event Details screen. The minimum required information for the Event and Function will need to be entered here which is indicated by the red asterisks.
Note: While not required for ReServe, a Billing Contact synced from CMA is required in order for event data to flow into CMA.
To book an event when using the Day View of the calendar, click and hold in the location at the desired start time. Drag the cursor to highlight the duration of the event and let go of the mouse or trackpad. The Event Details page will populate with the information provided. It will contain Date, Site, Location, Start Time, and End Time. The minimum information will again be indicated with a red vertical bar. If an additional location needs to be added to the event, it can be selected from the Location dropdown under Function Details.
To book an event using the Month View of the calendar, double click on the desired date.
Event Details
Once the new event’s required information has been entered, click the Save button. There are two save buttons located on the screen. There is one in the upper left corner and one in the lower left corner. Clicking the save button will create the event/function and direct to the Event Details page of the event.
Save and New Function button is used only if additional Functions are needed that may be taking place in different locations within your site for a different time frame.
Save and New Event button is used only if you need to book an additional part of this event that will be taking place in a different site within your organization.
Save and Add Reservations is used only if you are utilizing our Reservations module and need to reserve assets.
Adding Services to a Function
Services can be added from the Function Details page. Scroll down to the the yellow Functions section header and Click the Service Menu New link.
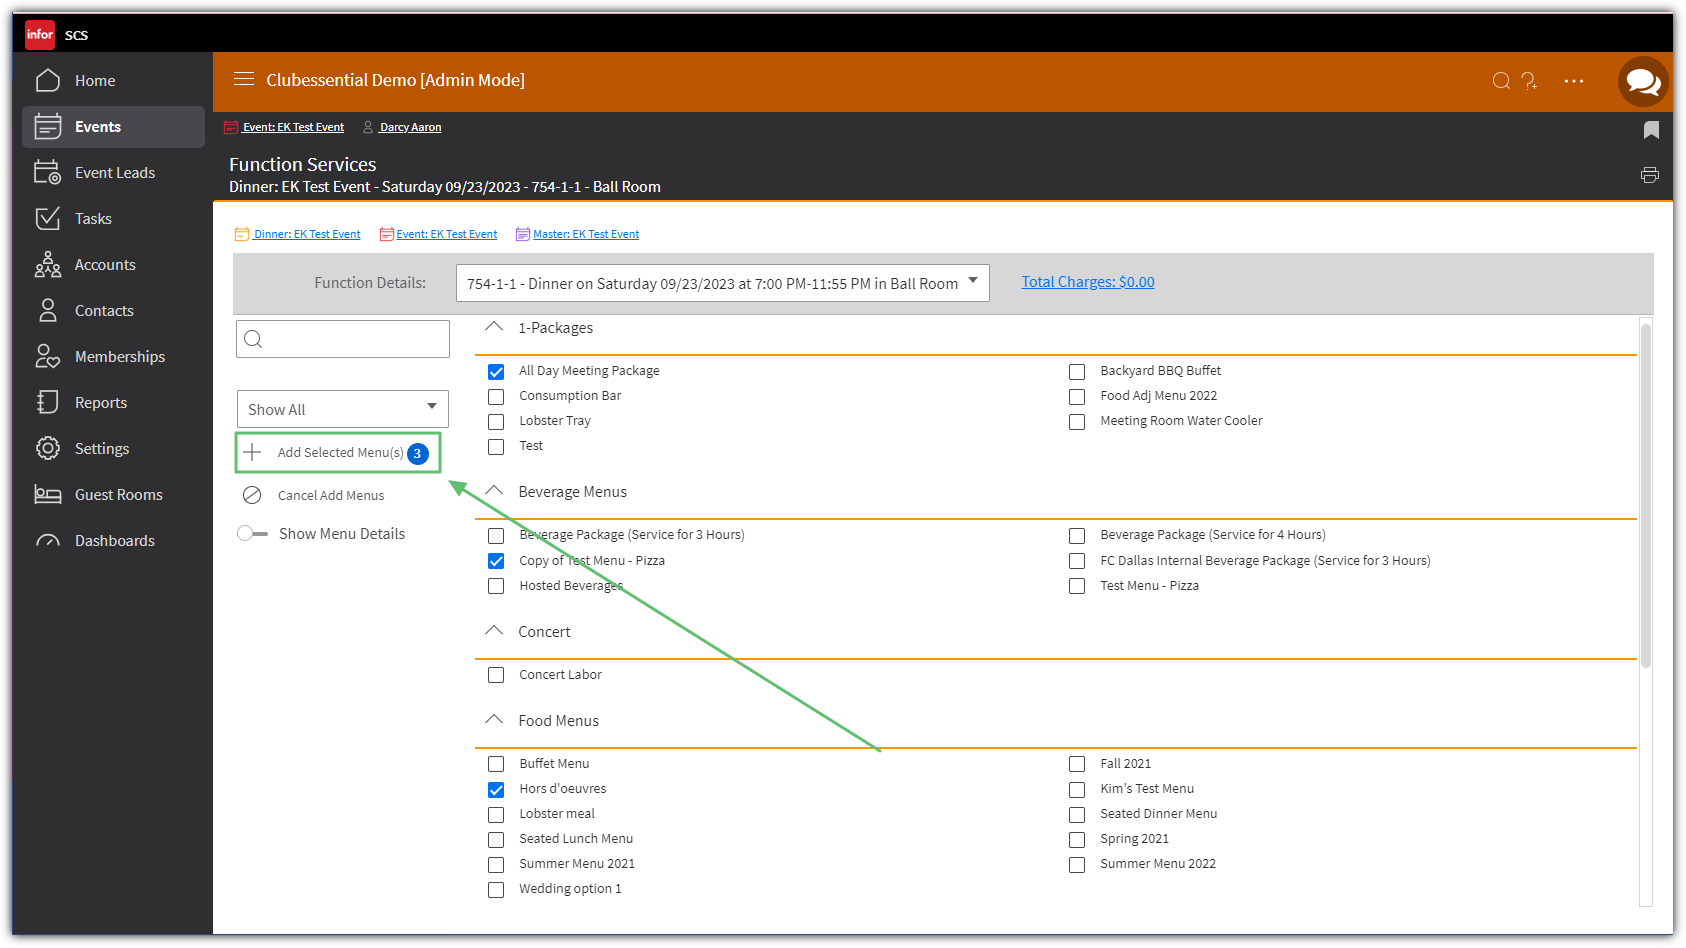
Within the Function Services page, click the Packages/Menus you want to use then select Add Selected Menus.
Check the box to the left of the desired service menu name and check the box. Whether a menu has a package price or a dollar allocation is indicated under the Menu Price column.
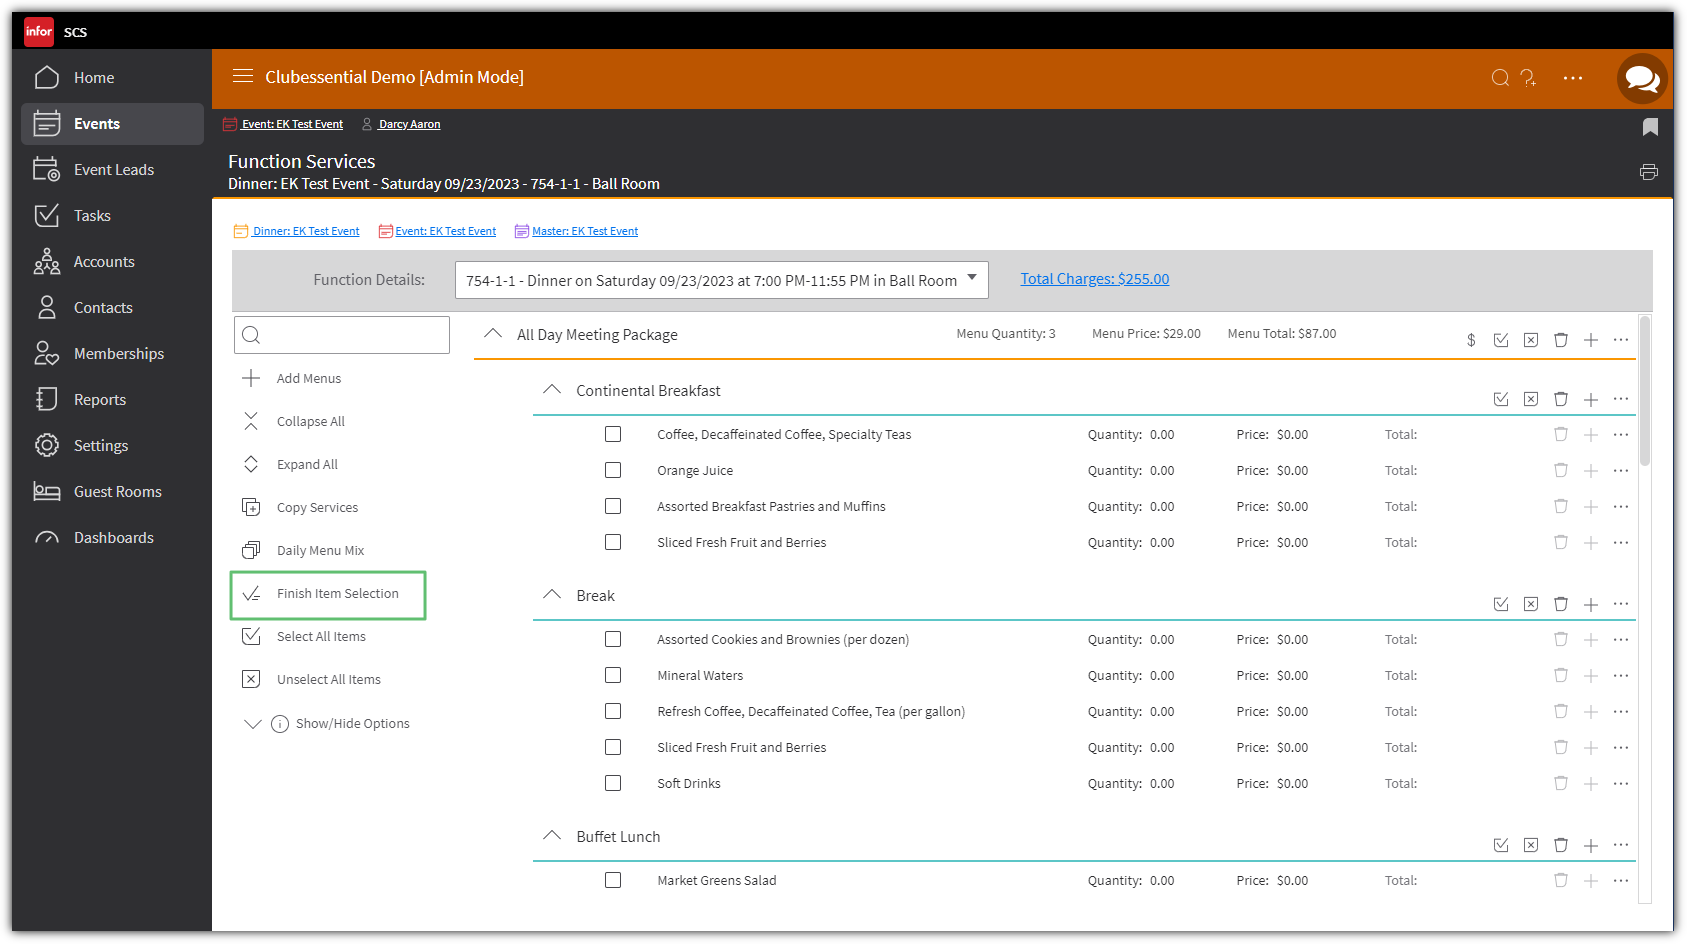
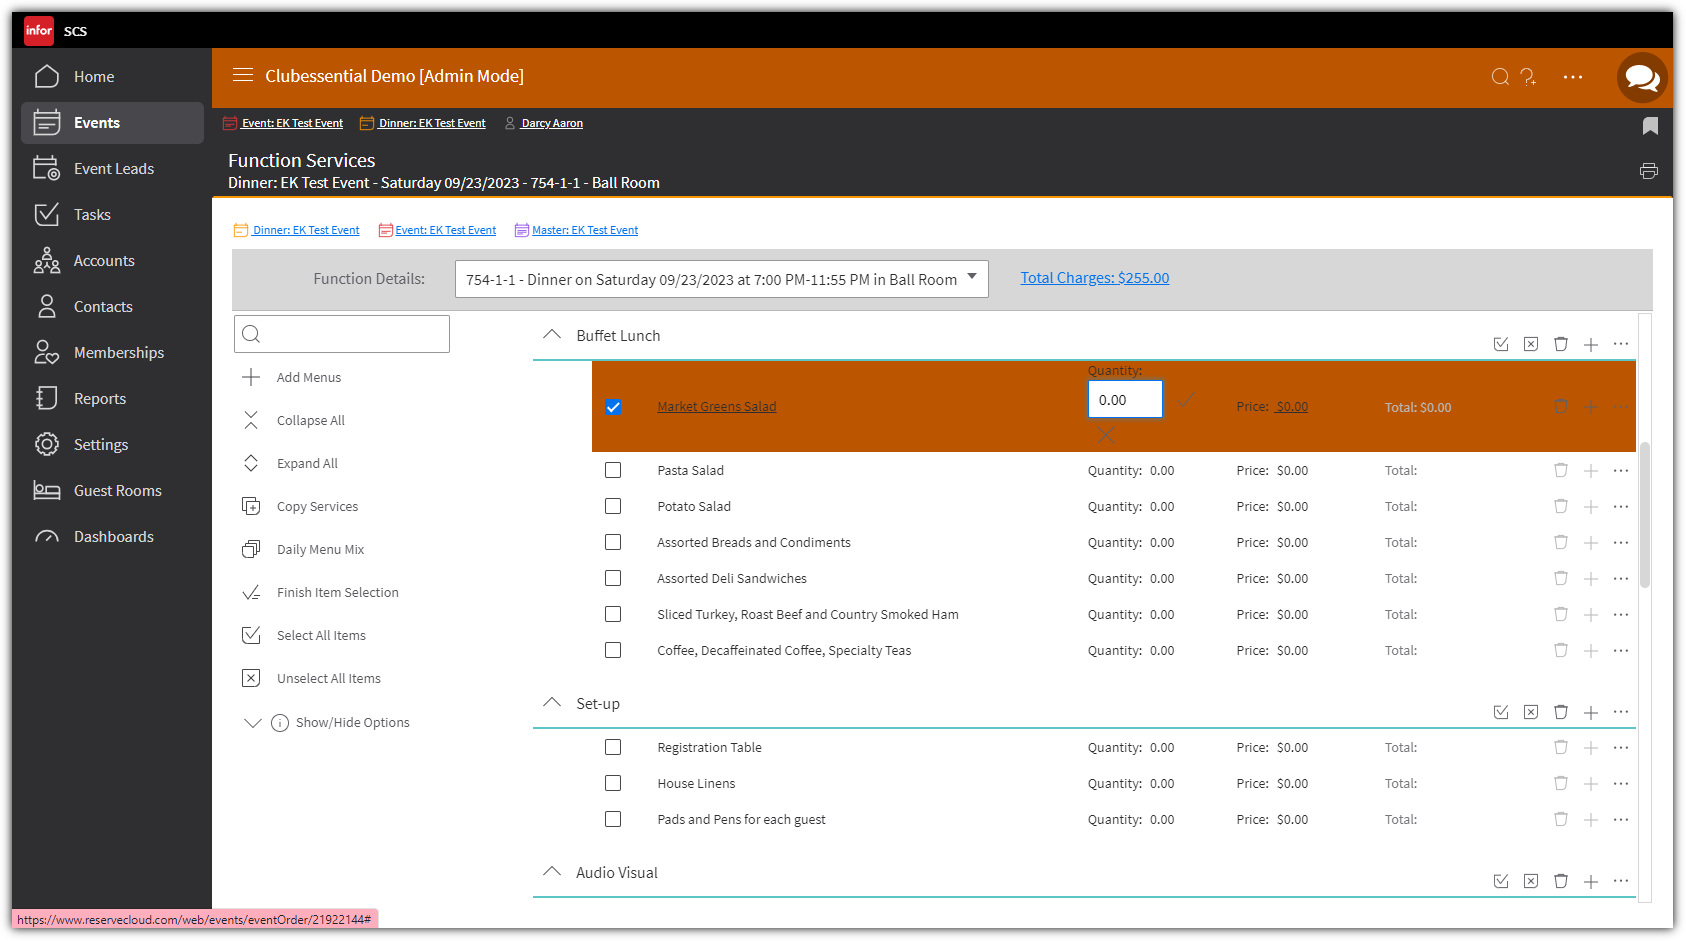
In order to add all items in the service menus, Click the Select All Items button. To add all items under a specific service type, check the top box under the service type header. To add selected items, check the boxes for each desired item. The Finish Item Selection button on the left side of the page will add the items to the event and direct to the Function Services page.
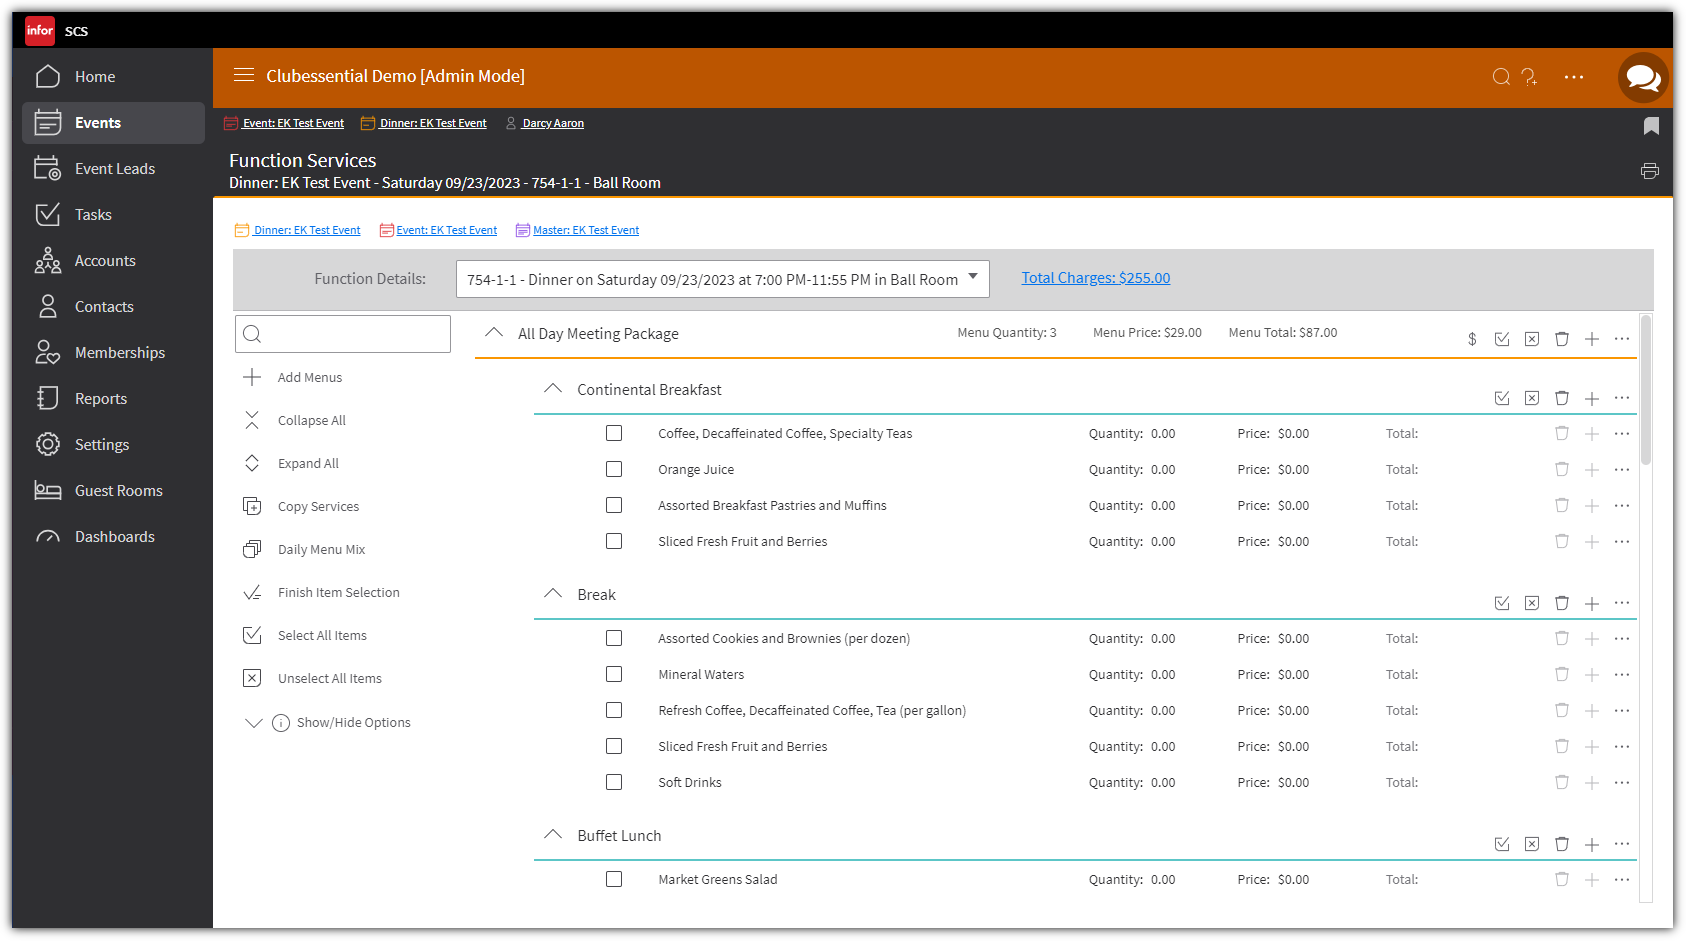
From the Function Services page, items can be added, removed, or reordered. Items that are not part of the Service Menu can be added by using the Add Items from Master List button; custom items can be added by using the Add Custom Items button.
To return to the Event Details screen, click the Event breadcrumb above your title bar.
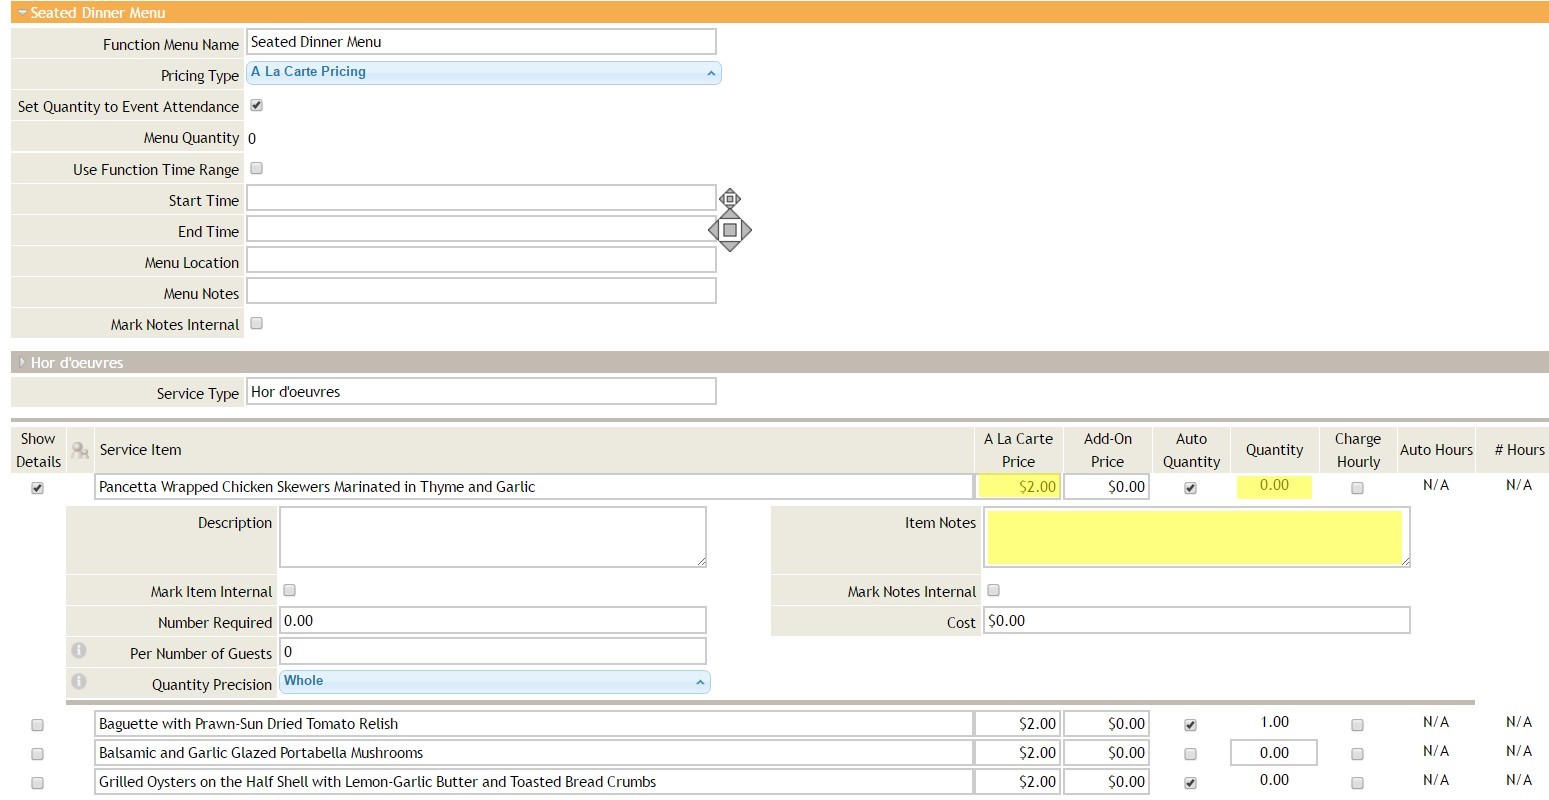
Use the Edit Menu button or link to edit prices, quantities and/or to add notes.
Click the Save button at the top or the bottom when edits are complete.
Additional Resources
Best Practices
Begin the day by reviewing pertinent information on the Home screen, to ensure you have addressed items that need timely attention. Utilize Navigation shortcuts, such as the Breadcrumb trail and the search feature to navigate quickly to desired information. Improve operational efficiencies by tracking leads, setting tasks, following up, and successfully tracking pertinent life cycle steps once the Leads are converted to Events.
FAQs
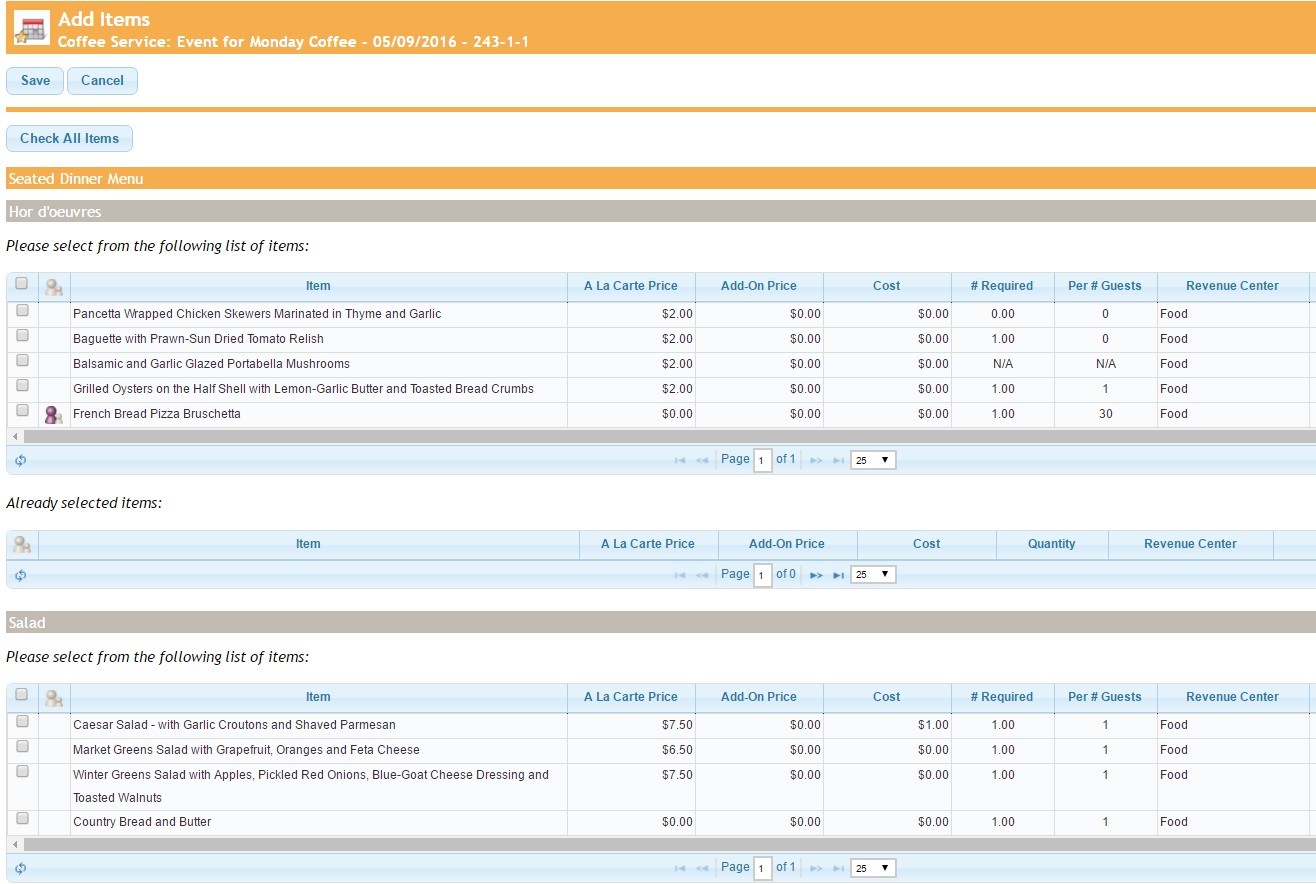
How do I add all items at once in a menu?
In order to add all items in the service menus, click the “Check All Items” button.
