/
Banquets - Event Graphical Indicator
Banquets - Event Graphical Indicator
- Ali Duncan
- Benjamin Hacker
- Kelsie Livingston
Owned by Ali Duncan
Table of Contents
Overview
This guide shows how to enable and configure the Event Graphical Indicator on Events.
Required Permissions
Admin Access
Level 1
Level 2
Accessing the Tool
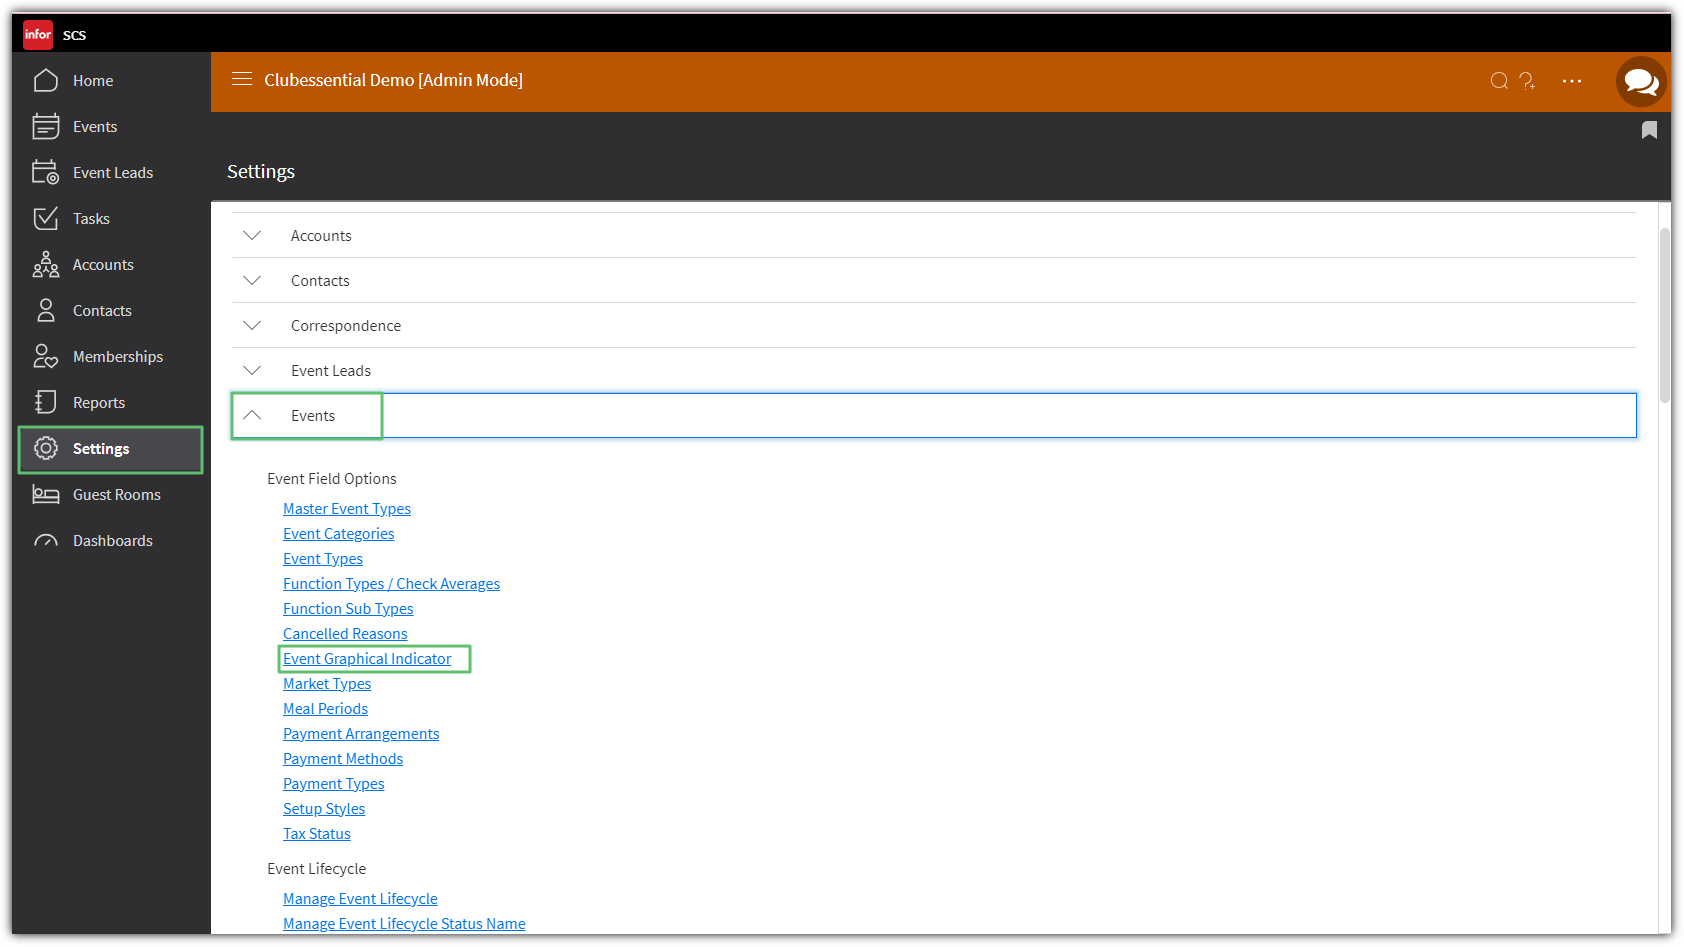
Navigate to Settings, then expand the Events menu, and click Event Graphical Indicator.
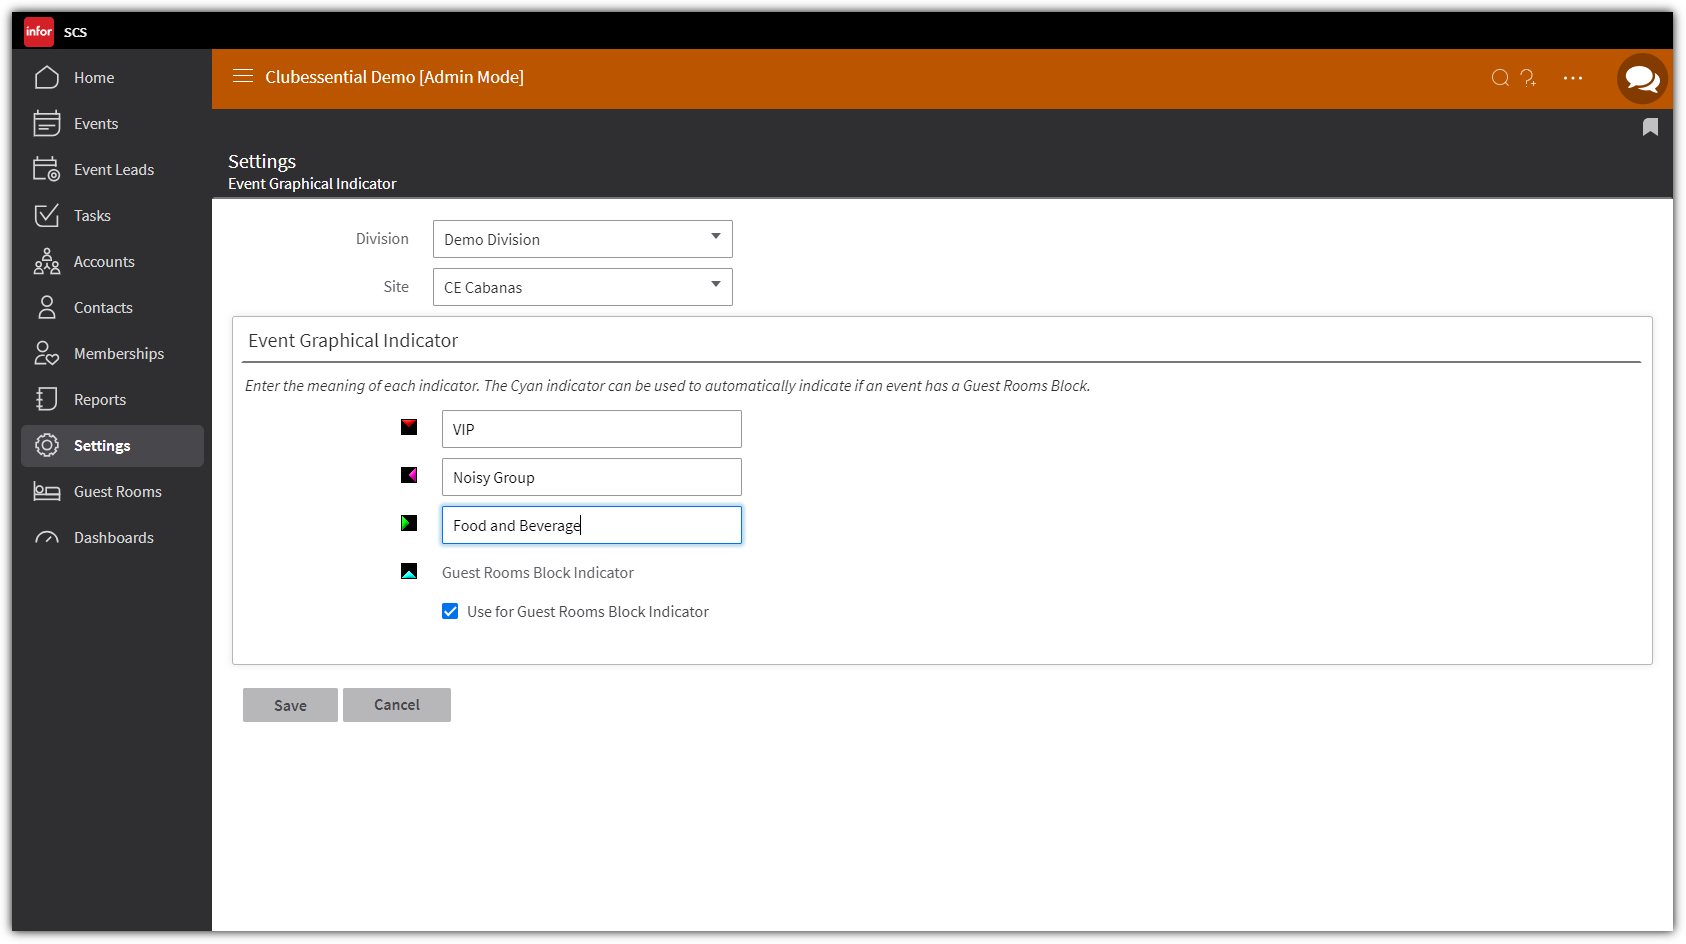
There are four colors available to create a custom indicator that appears on the Event Details. Click Save after the fields have been added.
Example fields could be VIP, Noisy Group, Food and Beverage, or Guest Rooms Block.
Add Graphic Indicator to Event
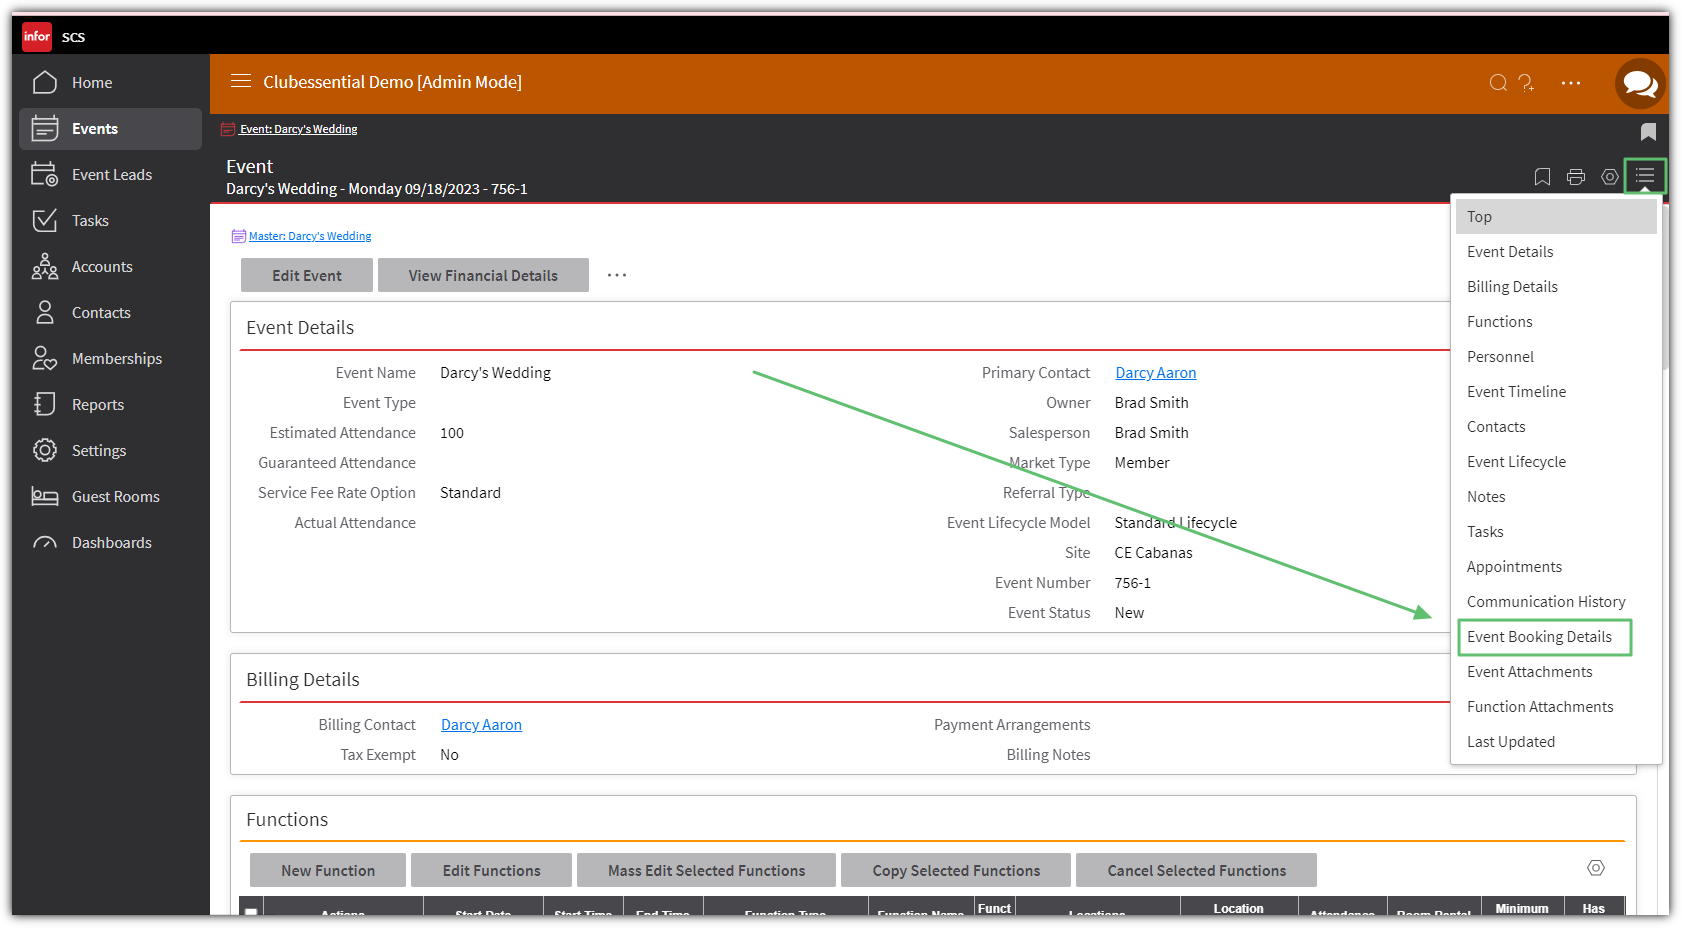
Navigate to the Event, and within the quick nav menu on the right, click Event Booking Details.
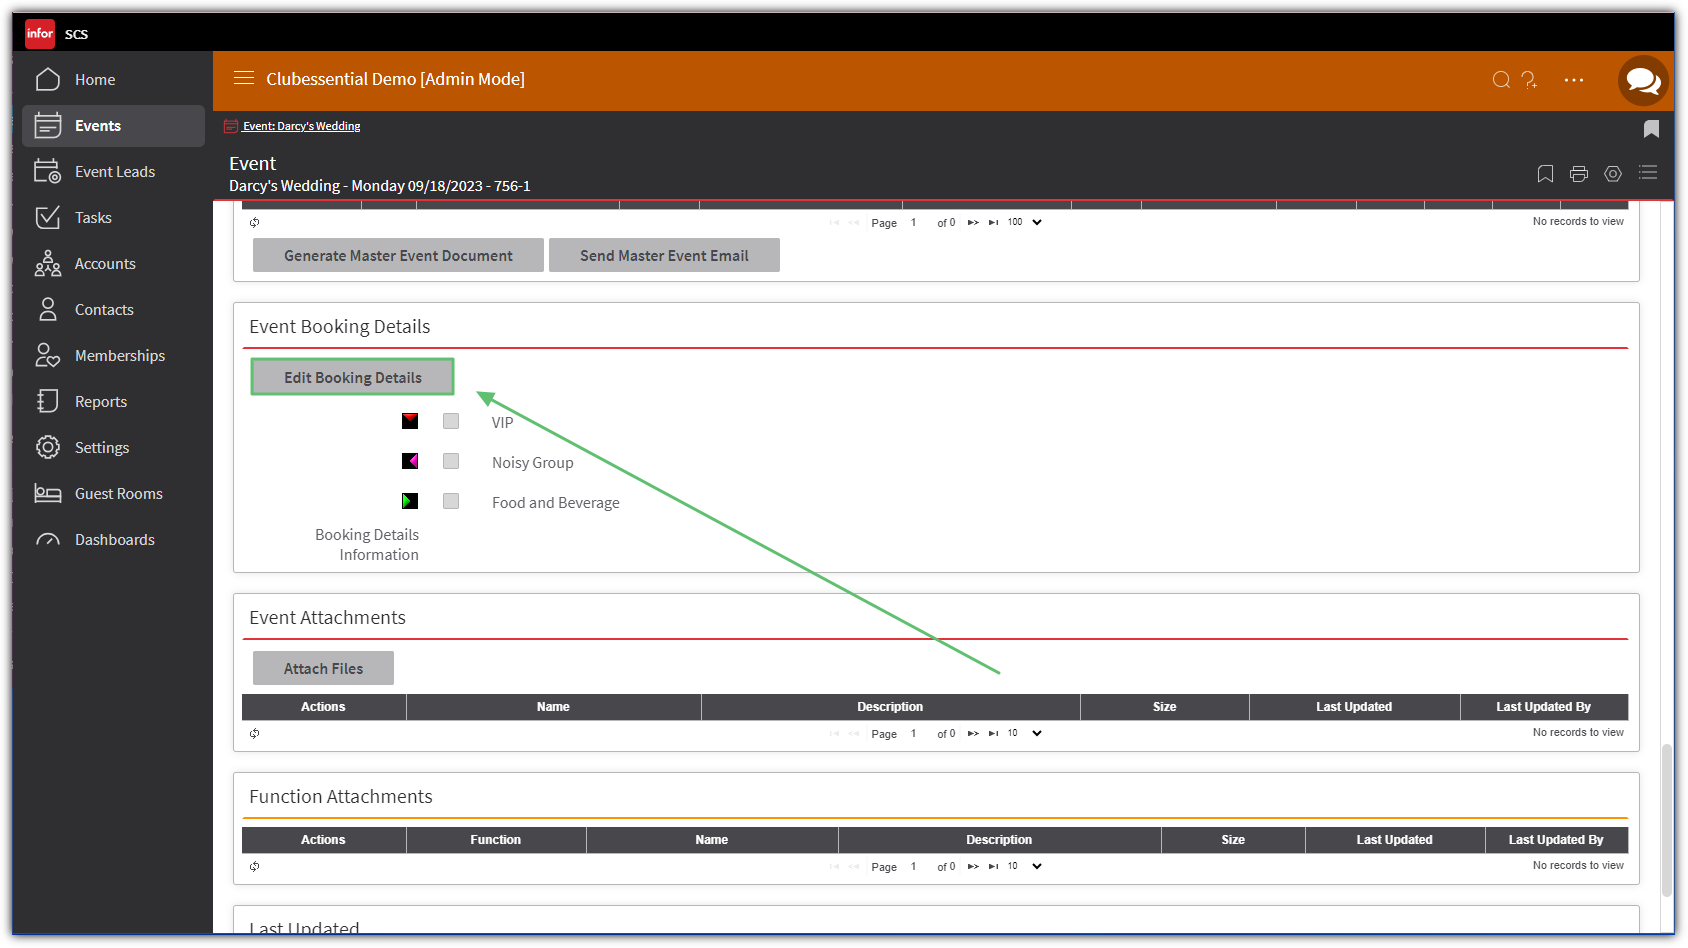
Click Edit Booking Details.
Select the applicable indicator(s) for this specific Event and click Save.
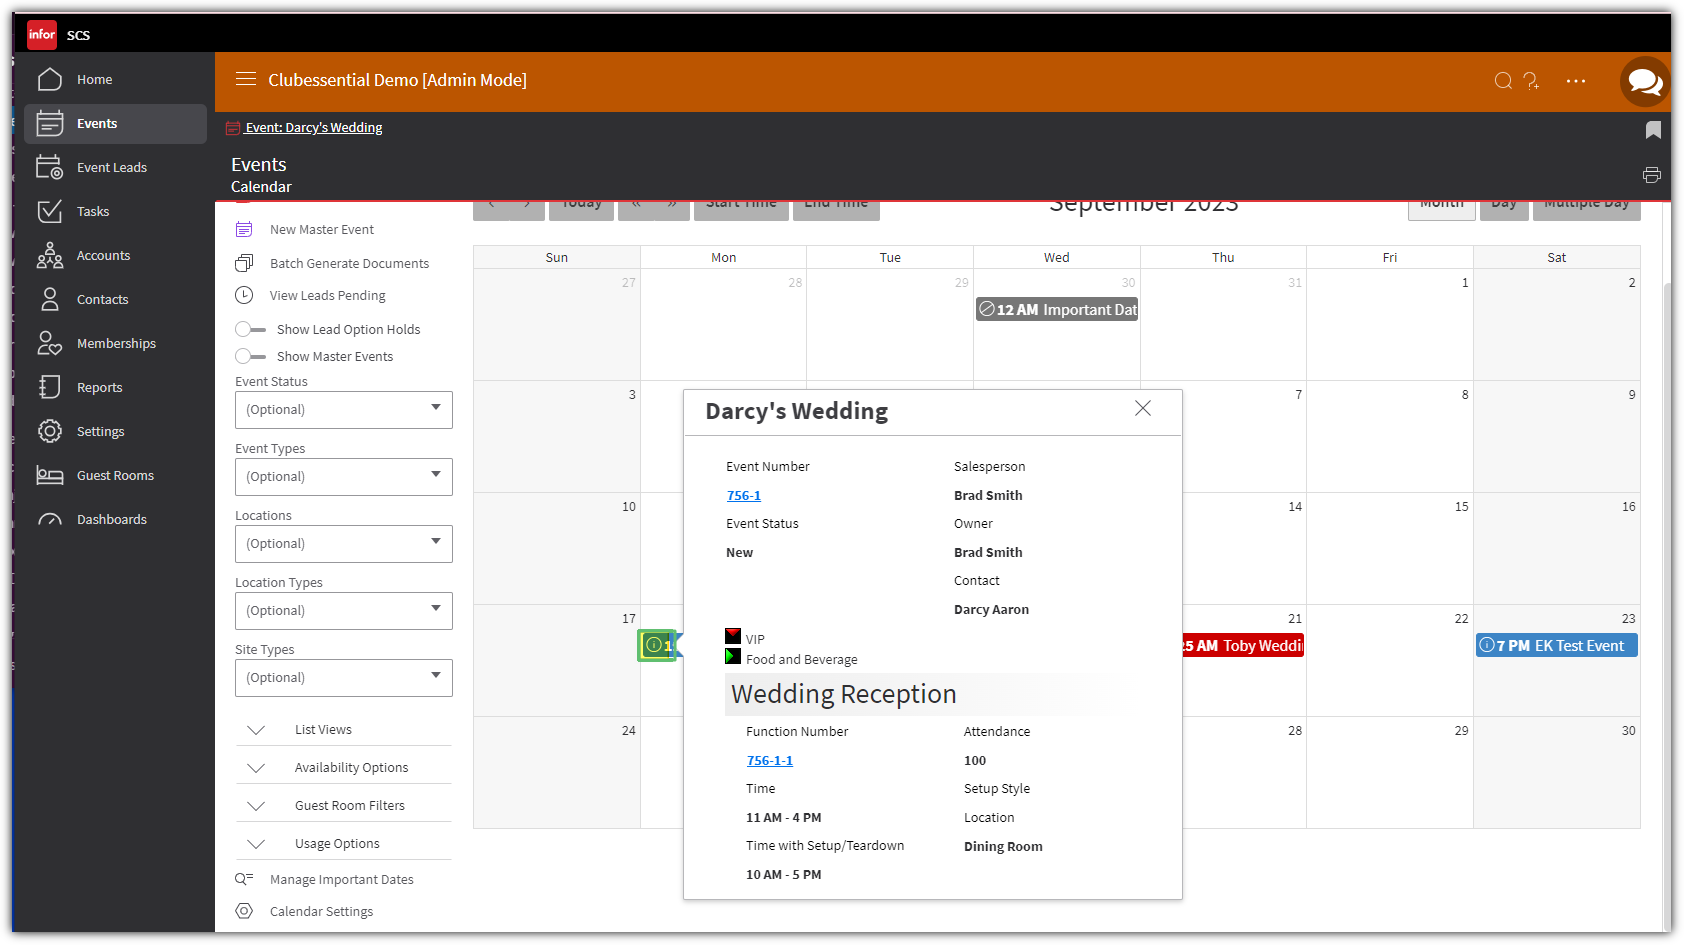
Event Calendar View
When in the Event Calendar, click on the info icon on this Event to see the new graphical indicators.
Best Practices
FAQs

, multiple selections available,
Related content
Banquets - Events
Banquets - Events
Read with this
Banquets - Creating an Event Document
Banquets - Creating an Event Document
Read with this
Banquets - Booking a New Event
Banquets - Booking a New Event
Read with this
Adding an Event
Adding an Event
More like this
Event Manager
Event Manager
More like this
Banquets - E-Signatures
Banquets - E-Signatures
Read with this