Office - Manage Employees - Manage Schedules
- Justin Brown
- Benjamin Hacker
Table of Contents
Overview
The Manage Schedule Module allows users, with the proper permissions, to build and manage weekly Employee Schedules. This coincides with the Interactive Report Employee Schedules to help determine accurate daily coverage.
Required Permissions
Employees Module
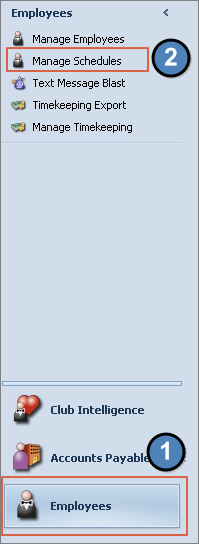
Accessing the Module
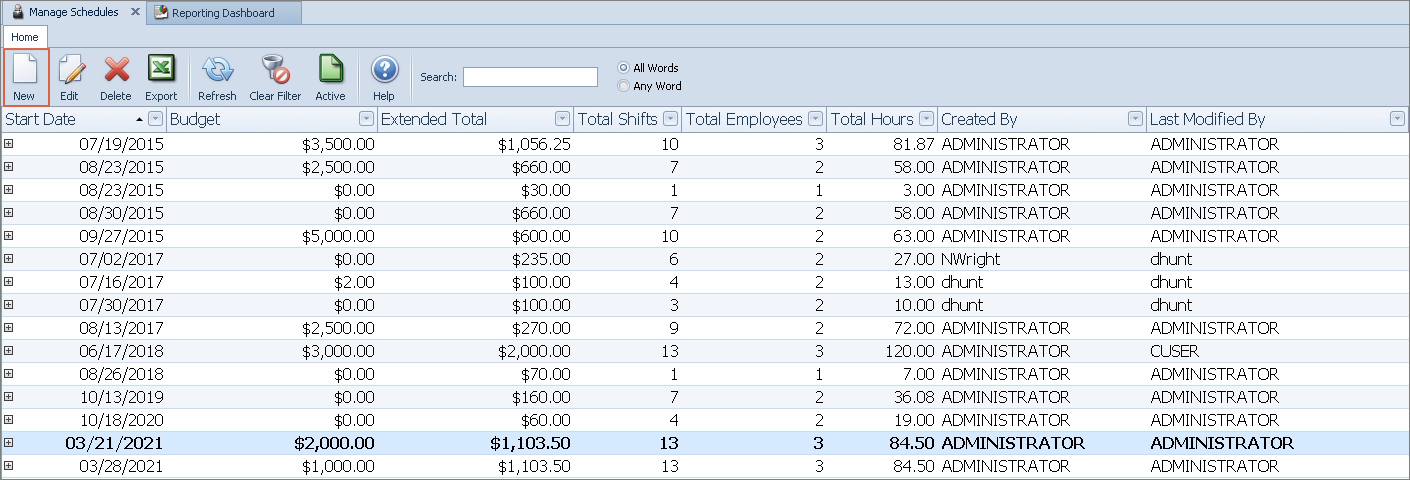
To build an Employee weekly schedule, navigate to the Employee Module then select Manage Schedules. Once in the Manage Schedules Grid, select an existing schedule to edit or create a new one.
Create a Schedule
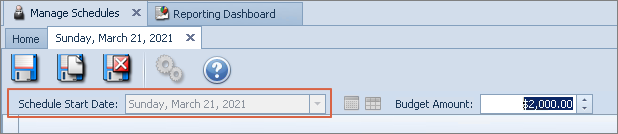
To create a new schedule click the New Icon.
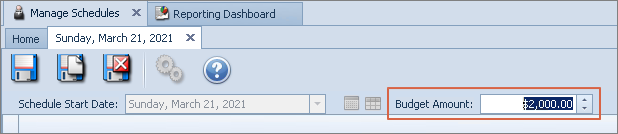
Select a Schedule Start Date.
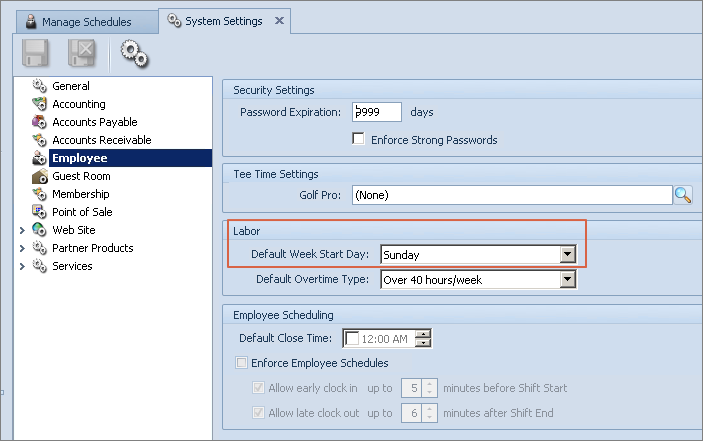
The start date must coincide with the Default Start Date that is set in System Settings within the Employee settings.
Next, enter a Budget Amount.
Now begin entering employees and the shift details.
Shift Detail
Within the Shift Detail, the following fields must be selected to create a New Shift.
Employee - Use the lookup to select the applicable employee.
Area - Select the Area where the employee will clock into.
Job Code - Assigned Job Code used in the Employee profile. The job code determines the employees hourly rate and goes against the budget amount added to the schedule. If the total for the hourly rates is more than the budget, the system will display the budget in red to identify the shift is over the budget. To know more about job codes and editing them please click here.
Hours - Totals the number of hours entered in the start and end fields.
Extended $ - Totals the hourly rate as the start and end times are added to the days of the week.
Daily Start and End - The times for each day of the week. The system will always put the Schedule start date’s day as the first field and will move chronologically to the right.
Once all the employees and shift times are entered, click Save.
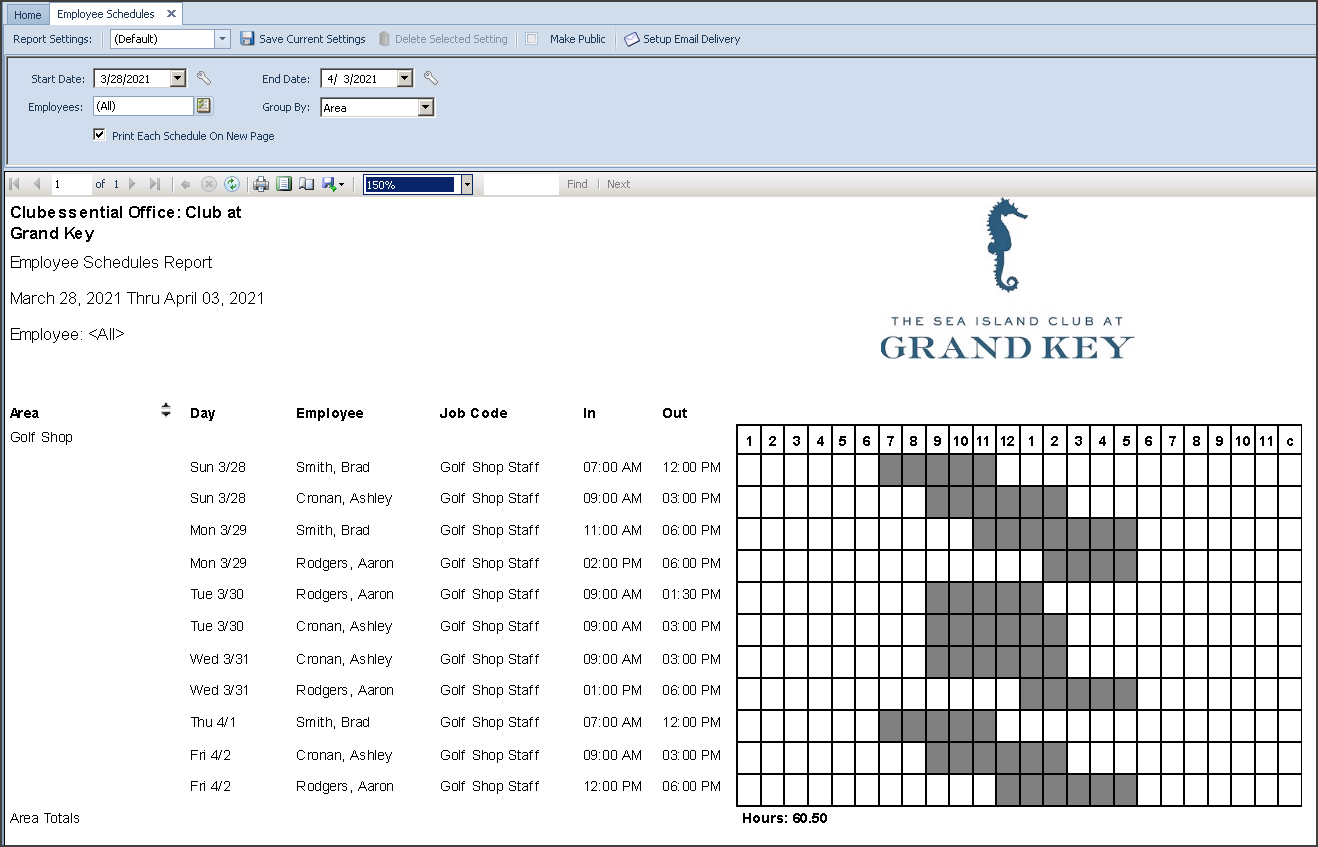
Employee Schedules Report
Once the Schedule is built, the Employee Schedules Report is available to view and/or print. The report provides the date range and blocks the hour range to help determine accurate coverage.
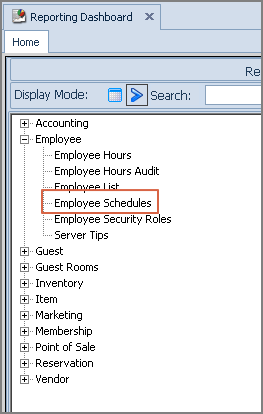
Navigate to the Interactive Reports module and select the Employee Schedules report under Employee.
Within the report, select a start and end date.
If desired, select specific Employees to view.
Then, choose a Group By method either Employee, Area, or Job Code.
Lastly, run the report.
Best Practices
FAQs
Q: Can I stop the employees from clocking in early or clocking out late?
A: Yes. You can restrict the employee’s ability to clock in early using Enforce Employee Schedule in System>System Settings> Employees. You will need to ensure that schedules are being utilized and can restrict by X number of minutes for both clocking in early and clocking out late.
