Customize a Day's Opening Time Using a Special Event
Table of Contents
Overview
This article will provide instructions on how to Customize a Day's Opening Time Using Special Events. Special Events are typically going to be for taking Event Requests not actual reservations but this will not be a standard Special Event setup. This tutorial aims to have times appear no different from normal scheduled times except for the fact that they are opening further out or closer to one specific day.
Required Permissions
Tee Times Admin
Accessing the Tool
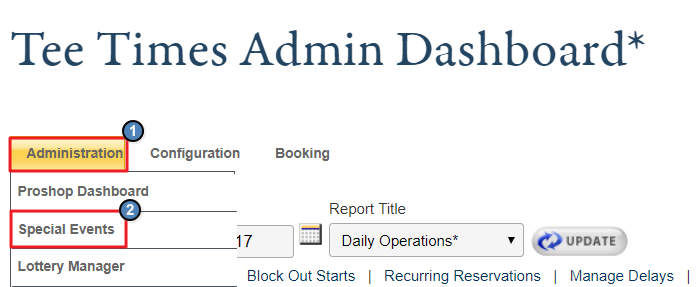
To get started, access the Tee Times Admin Dashboard. Hover over Administration and click on Special Events.
The Special Events tool will list all events that fall within the Start Date and End Date fields. It will default to the current day in the Start Date and the End Date will default to 6 months out.
To view events in the past, simply set back the Start Date so that your event falls within the time range.
If you have multiple courses, you may use the Select Course filter.
There is a listing of buttons on the right hand side. They perform the following actions...
Add an event: Create a brand new event.
Edit an event: Modify the selected event.
Add registrations to the event: Create a reservation for the selected event.
View registrants of events: View a list of all the reservations for the event.
Assign starts for the event: If the “Proshop will assign starting times for participants?” setting is checked for your event, you will want to use this tool to confirm the event requests.
To select an event you will need to click on its name in the listing, this will darken the line of the event
Configuring your Special Event
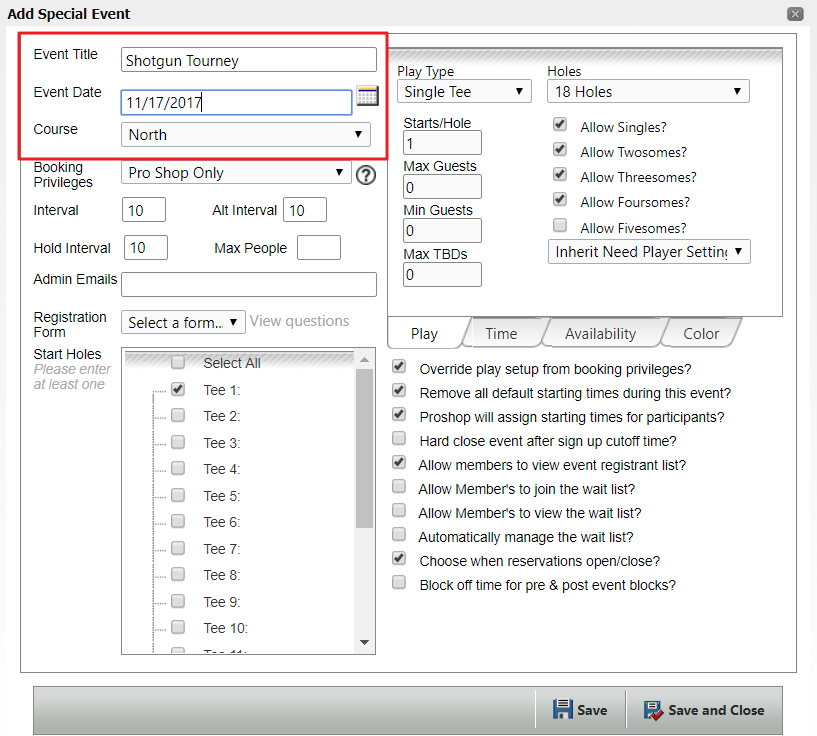
Start out by creating a new Special Event. Click the Add Event button.
If you would like to, enter the Event Title. Keep in mind the title will display in each time so typically it is left blank. Select the proper day in the Event Date field. You will need to choose a Course (if applicable).
You will need to set the Booking Privileges for this event. Select Member Booking or whatever your standard Booking Privileges may be.
Unchecking settings
Here is where your event will deviate from the standard setup of most Special Events. You will be unchecking a few area of your event.
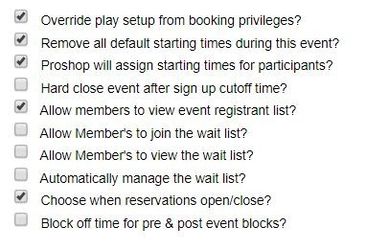
Uncheck:
Override play setup from booking privileges?: This will remove the Play tab. You are unchecking it to ensure you aren't overriding the Guest/TBD limitations set up on the back end.
Proshop will assign starting times for participants?: This will ensure members can book directly onto times, like any normal day of booking. If you have a Lottery template selected in Booking Privileges please ensure this is still unchecked.
Allow members to view event registrant list?: This will automatically be unchecked after unchecking Proshop will assign starting times.
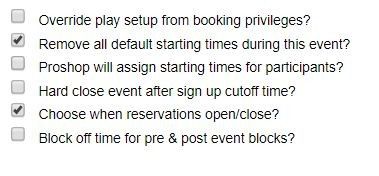
The settings should look like this afterwards. The only thing you need are these two settings:
Remove all default starting times during this event?: This will ensure times aren't duplicated.
Choose when reservations open/close?: This will give us the Availability tab where you can customize the Opening Time and the Closing Time.
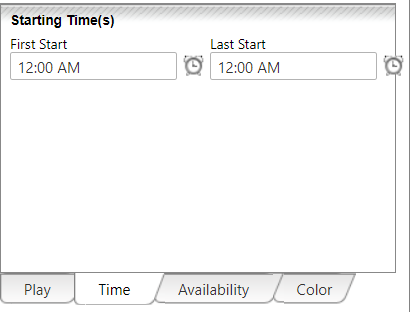
You should already have the Time tab selected. You can typically set the First Start to the first time of the day and the Last Start to the last bookable time.
You can click on the clock icons to choose a time. Only 30 minute intervals will display there but you are also free to type out a more specific time in the First and Last Start fields. If you type out a time please note that it will read it as military time if no AM or PM is listed.
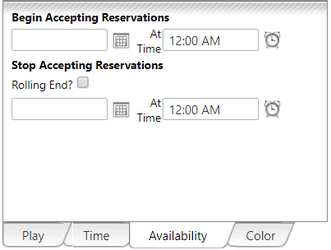
You can now move to the Availability tab. Here you can define the time frame for when the event will begin accepting reservations and when reservations will close down.
You will use the calendar icon to determine the day that the reservations will begin and using the clock icon to choose the exact time the event will open on the day selected.
Follow the same for when reservations will end, or click Rolling End to set the reservations to close a number of hours prior to each individual time.
Save to Finish
The final step is to click Save.
If you have pre-existing reservations or a block already on this day it may give you a warning message. In this case it should be fine to click through that message as long as the times that the reservations are currently on will still exist after placing your event here.
Best Practices
FAQs
