CRM - Query Builder
- Joshua Morrison
- Emily Carlson
- Kelsie Livingston
Table of Contents
- 1 Overview
- 2 Required Permissions
- 3 Accessing the Tool:
- 4 Query Builder - Sections and Resources:
- 4.1 Properties:
- 4.2 Security:
- 4.3 Query Builder:
- 4.3.1 Resource Bank:
- 4.3.2 Query:
- 5 Best Practices
- 6 FAQs
Overview
Your Clubessential CRM is capable of holding a large amount of data pertaining to your Club’s interactions with your customers. Using the Query Builder and Report Builder, you are able to generate reports that can make it easier to draw insights from your data, and which are easily exportable to bring to presentations to your various stakeholders.
Required Permissions
CRM Admin
Accessing the Tool:
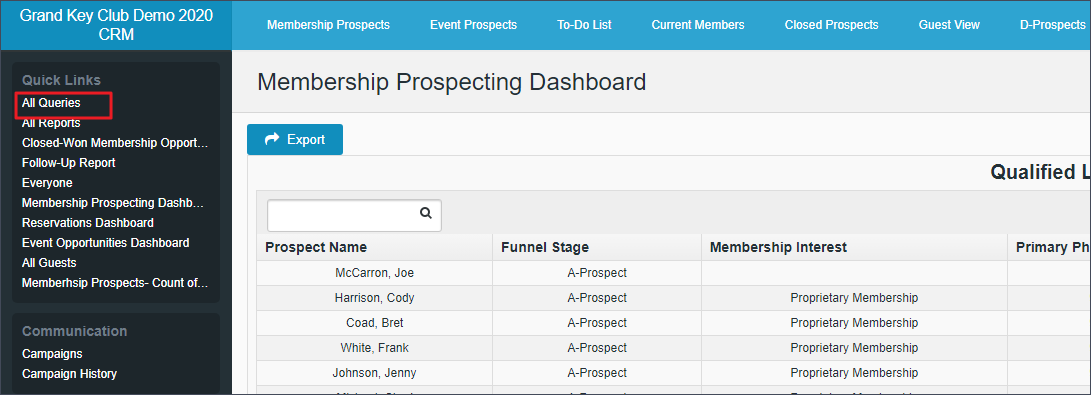
From the CRM Dashboard, click All Queries from within the Quick Links side bar:
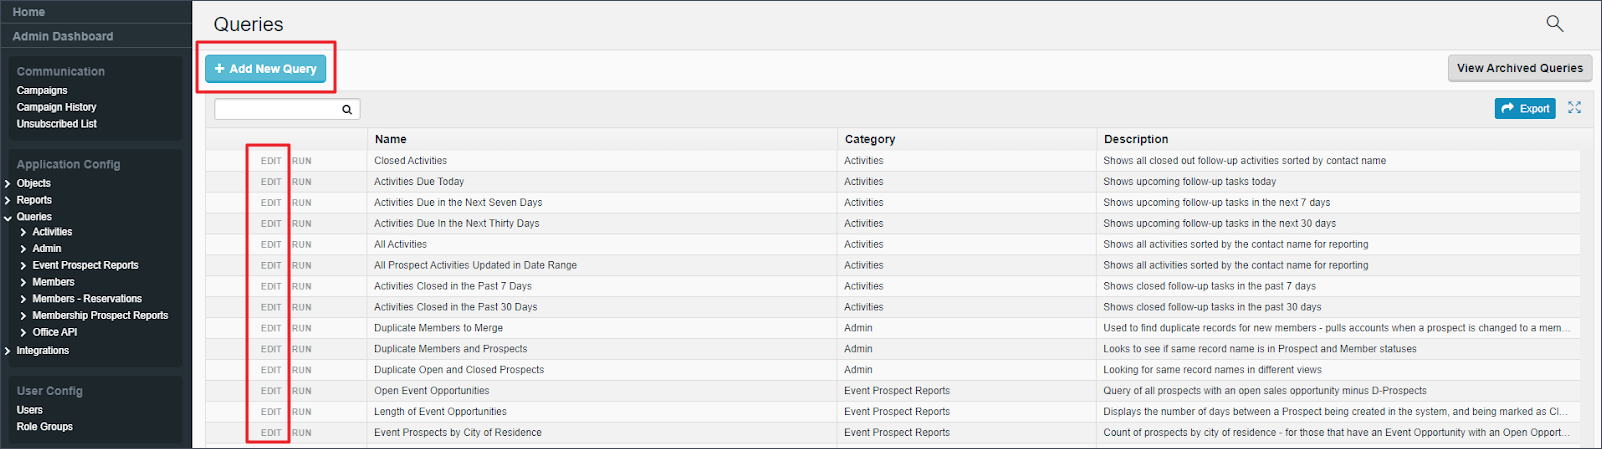
From the Query screen, click either Add New Query at the top of the page, or click Edit next to a query you’d like to make adjustments to. In this walkthrough, we’ll be building a brand new query.
Query Builder - Sections and Resources:
Properties:
In this section is where the properties of the query are defined, used to identify and categorize the query for easy access when it needs to be run.
Name: Give your query a name. Typically, you should choose something descriptive that will make it easy for you to know what this query is about at a glance.
Category: Optionally, give your query a category. Queries will be grouped together by category on the Query screen, so utilizing this field can help with organizing your list of queries.
Description: Optionally, write in a short, plain text description, describing the purpose of this query. This description appears on the Query screen, so can be useful in elaborating on the differences between queries that have similar names, but slightly different purposes.
Maximum Number of Results: Optionally, define a number at which to stop returning results. To return all results from the data set defined by your query, leave this field blank. In most queries, this is left blank.
Security:
Optionally define which role group(s) have access to be able to view and/or edit this query. Note that only CRM Users with an access level of User are impacted by role groups - Editors, Administrators, and Object Administrators will always be able to run and edit all queries, as well as create new ones. In most organizations, all users have equal access to data in the CRM, so this section is used less frequently.
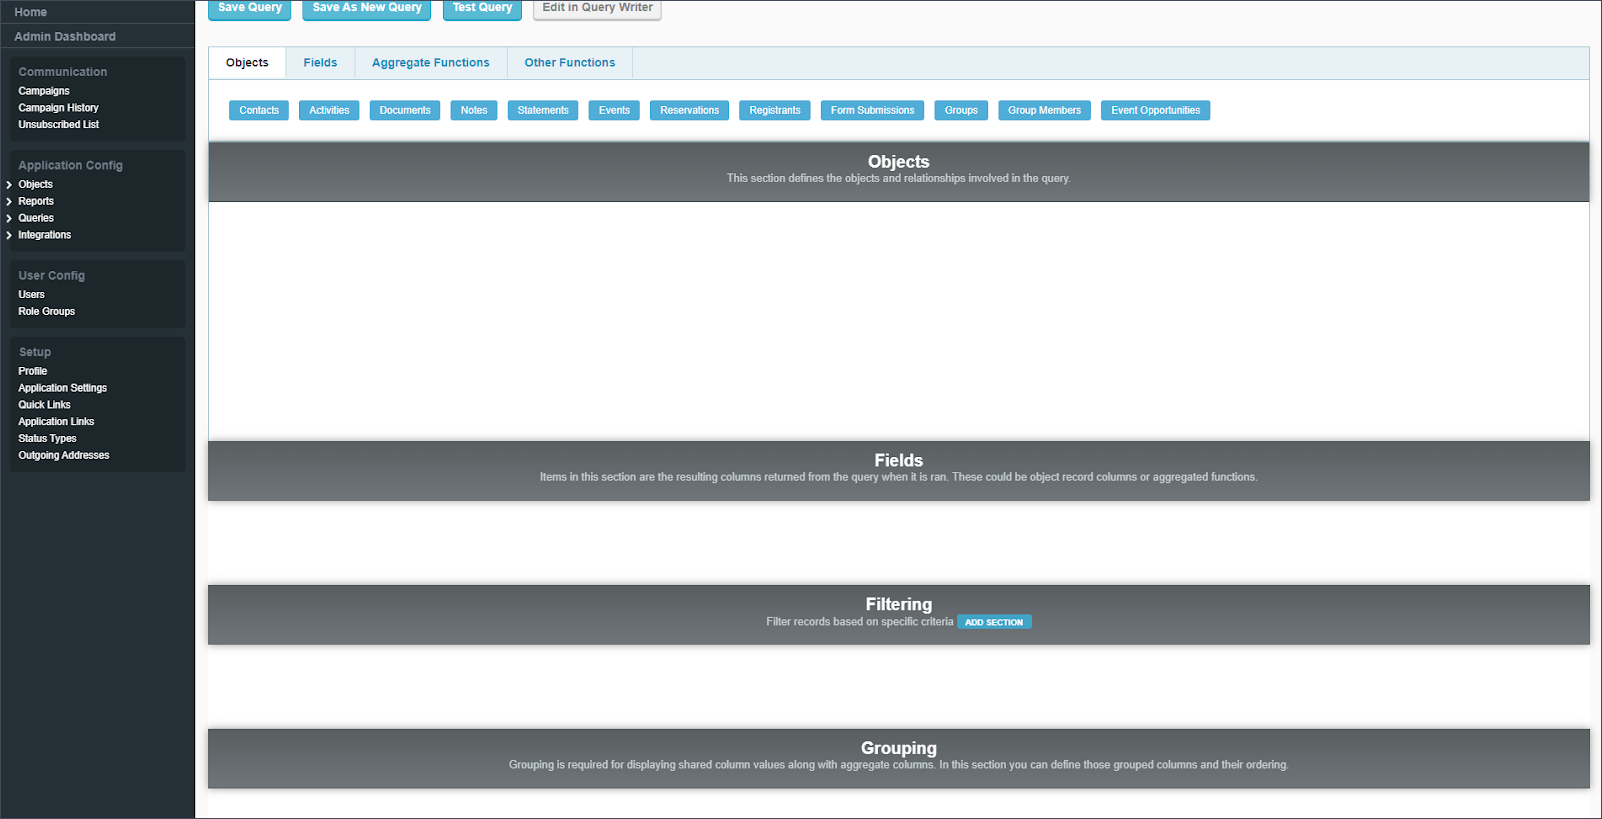
Query Builder:
This section is where the query is built. This section is broken down into two sections, both of which are further broken down into additional sections. The top section is the Resource Bank, and the bottom section is the Query. Above both of these sections are four buttons:
Save Query: This will save the query and any changes made to it
Save As New Query: This will create a new query with the exact parameters as the current query. This can allow you to use an existing query as a template to create a new, similar query without having to start again from scratch.
Test Query: Once the query is created and saved, this button will run the query, and display the results in a popup window. This is essentially the same as clicking Run Query from the main query list, but accessible within the query builder for easy testing.
Edit in Query Writer: This will change the Query Builder to the Query Writer, which will allow you to write queries in pseudo-SQL code instead of the visual editor.
Resource Bank:
The Resource Bank contains the various resources (Objects, Fields, Aggregate Functions, and Other Functions) that you can click and drag down into the Query section to build your query. The Objects and Fields sections contain resources based on the configuration of your specific CRM build, while the Aggregate Functions and Other Functions sections contain a set list of generic functions applicable across all CRM builds.
Objects: This tab displays the Objects configured in your instance of CRM. Objects represent the sections of data within a CRM, or more specifically, the tables of data in the database. Objects are the top level of organization of the data structure of CRM, and contain all the various fields that you’ll store data in, and report on. The specific Objects you’ll see may vary slightly, as these can be custom configured per CRM build, however most builds will have a similar set of standard Objects, similar to what is shown in the image above.
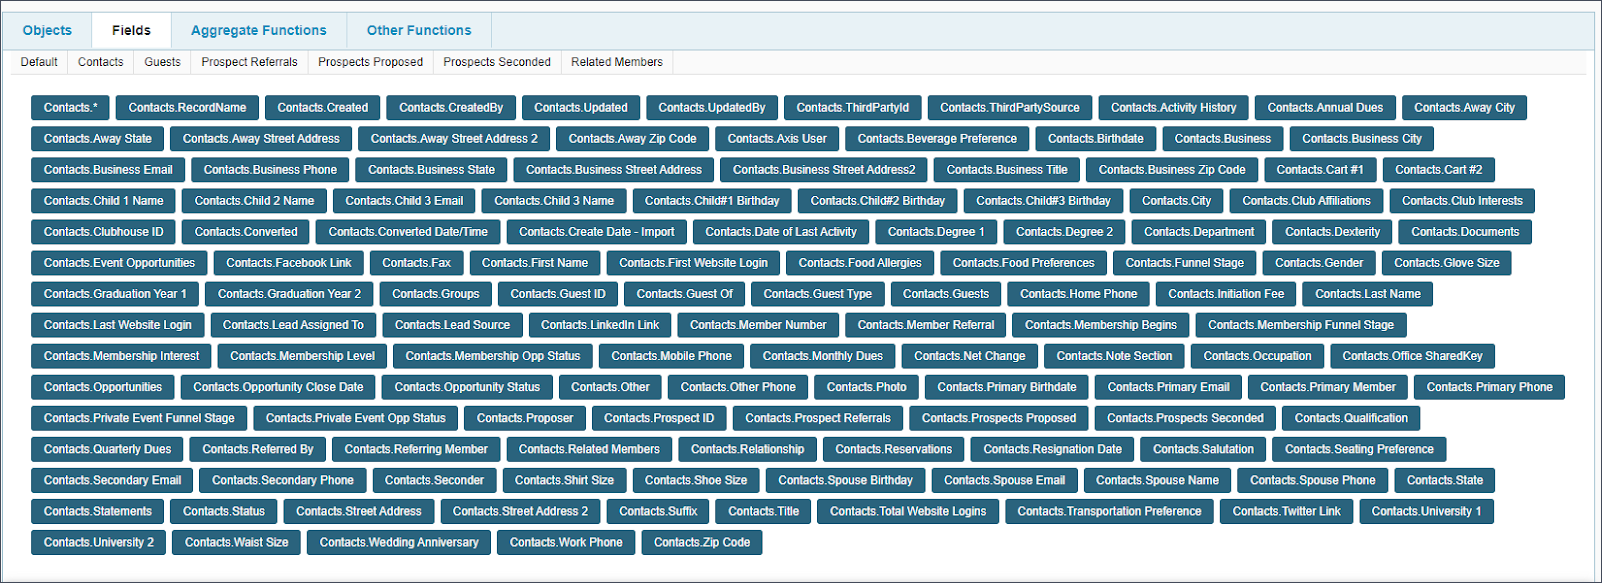
Fields: When you first open this tab, you’ll need to select which Object to display the fields of. Once you’ve selected an Object, all the fields within that Object will display. Aside from a few system fields which are listed first, the fields are listed in alphabetical order.
Aggregate Functions/Other Functions: These are functions you can insert to perform certain actions in your query. The most commonly used aggregate functions are Count(value), Sum(value), and Average(value), which will perform these mathematical functions against the data in your query, while most commonly used other functions are Today(), and Datediff() to determine the difference between two dates. More information about the various functions can be found at this external link: W3Schools.com
Query:
In this section, you will drag and drop resources from the Resource Bank into the various subsections of your query to configure how the query will display and function.
Objects: In this section, you will define which Object(s) you are pulling data from for this query. To choose an Object to select from, you will click on an Object from the Objects tab of the Resource Bank above, and drag it into the Object section of the query. Dragging more than one object will draw a relationship between the two, if one is defined via a parent-child relationship in the Object settings.
As it correlates to a query in SQL, this section represents the FROM clause. Also of note, all relationships between objects are considered inner joins, meaning that in order to appear in the results of the query, a record will have to be present or related to an existing record in ALL objects selected in this section.
Fields: In this section, you will define which fields and functions will display when you run your query. Similar to Objects, to add a field to the query structure, you will click on the field or function from the Fields (or functions) tab of the Resource Bank above, and drag it into the Field section of the query. You can also rearrange the order of the selected fields by clicking and dragging them within the section.
As it correlates to a query in SQL, this section represents the SELECT clause.
Filtering: In this section, you will define which records will be selected and displayed in the query. To do this, you will select one or more fields from the resource bank to run checks against, dragging and dropping them into the Filtering section on the query similar to the Objects and Fields above.
As it correlates to a query in SQL, this section represents the WHERE clause.
Grouping: In this section, you will define the field(s) around which you will group your data. You will only need to use this for queries which utilize aggregate functions - if your query does not use these, you may skip this section. For queries containing aggregate functions, such as COUNT() or SUM(), you will need to have all non-aggregated fields in this Grouping section. See example query #2 below for a more detailed description of how this works.
As it correlates to a query in SQL, this section represents the GROUP BY clause.
Ordering: In this section, you can optionally define a field or fields against which to order the results of your query. You may order by a standard field, such as First Name or Last Name, or by an aggregate function.
As it correlates to a query in SQL, this section represents the ORDER BY clause.
Best Practices
FAQs