CRM - Creating/Editing Fields
- Emily Latham
- Joshua Morrison
- Kelsie Livingston
Table of Contents
Overview
As an administrative CRM User, you have access to almost all of the editable settings within your CRM. This includes creating new fields, adjusting the fields visible in a given View/Layout, and editing the values within an existing picklist field, among many other permissions.
Required Permissions
CRM Admin
Accessing the Tool
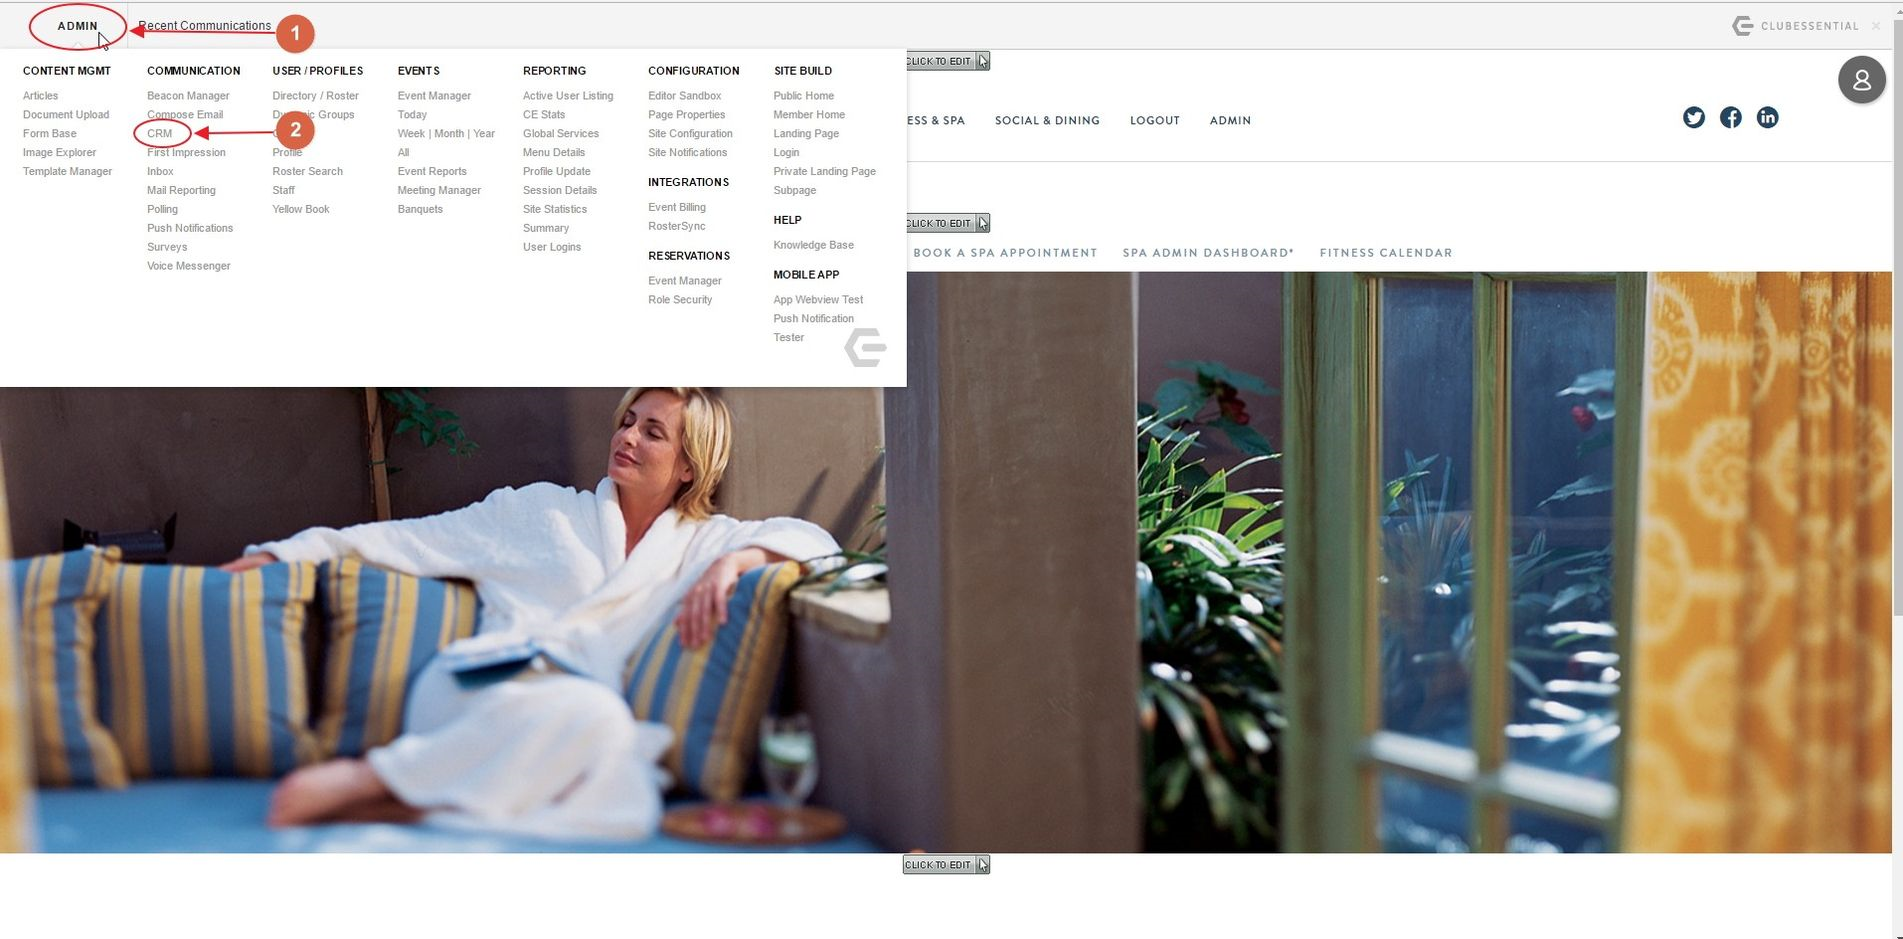
To access your CRM, sign in to your member website as an Administrator. Then, hover over the Admin toolbar in the top, left-hand corner of the page. The CRM link should appear in either the Communication or Content Management section, sometimes titled CRM & Data Warehouse.
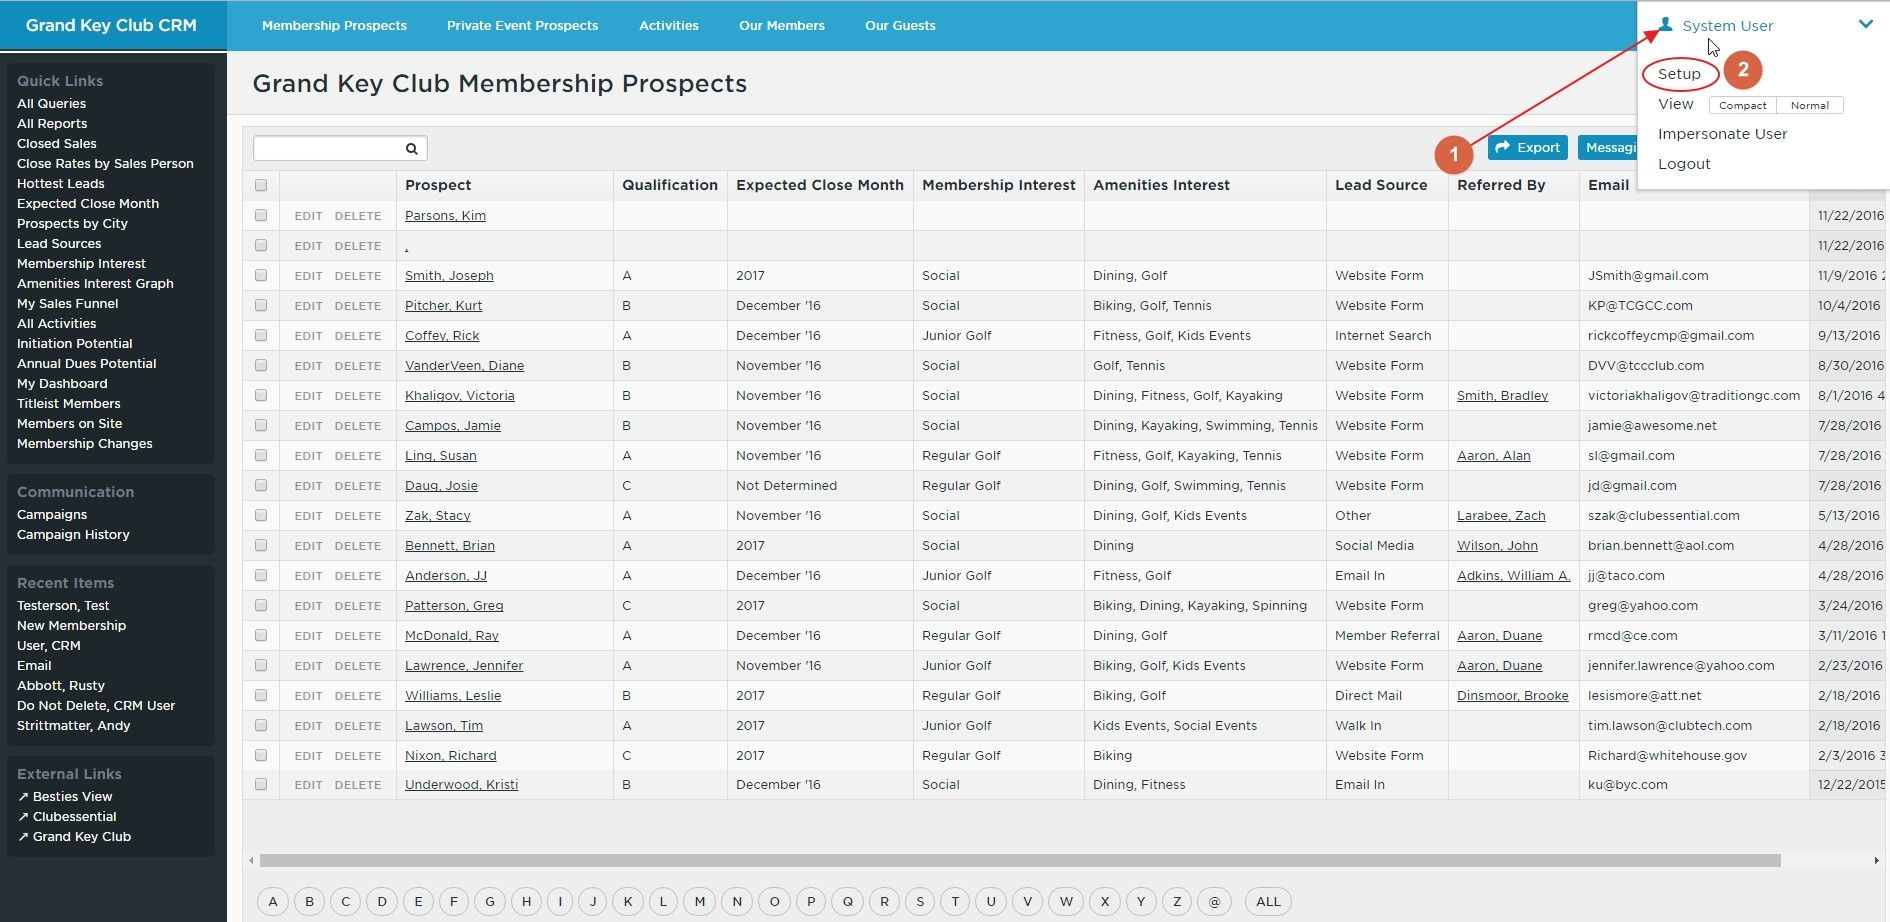
The information covered in this section is mostly found in the Admin Dashboard of the CRM. To access this, while on the main CRM Dashboard, hover over your name in the top, right-hand corner of the CRM, and click the Setup option.
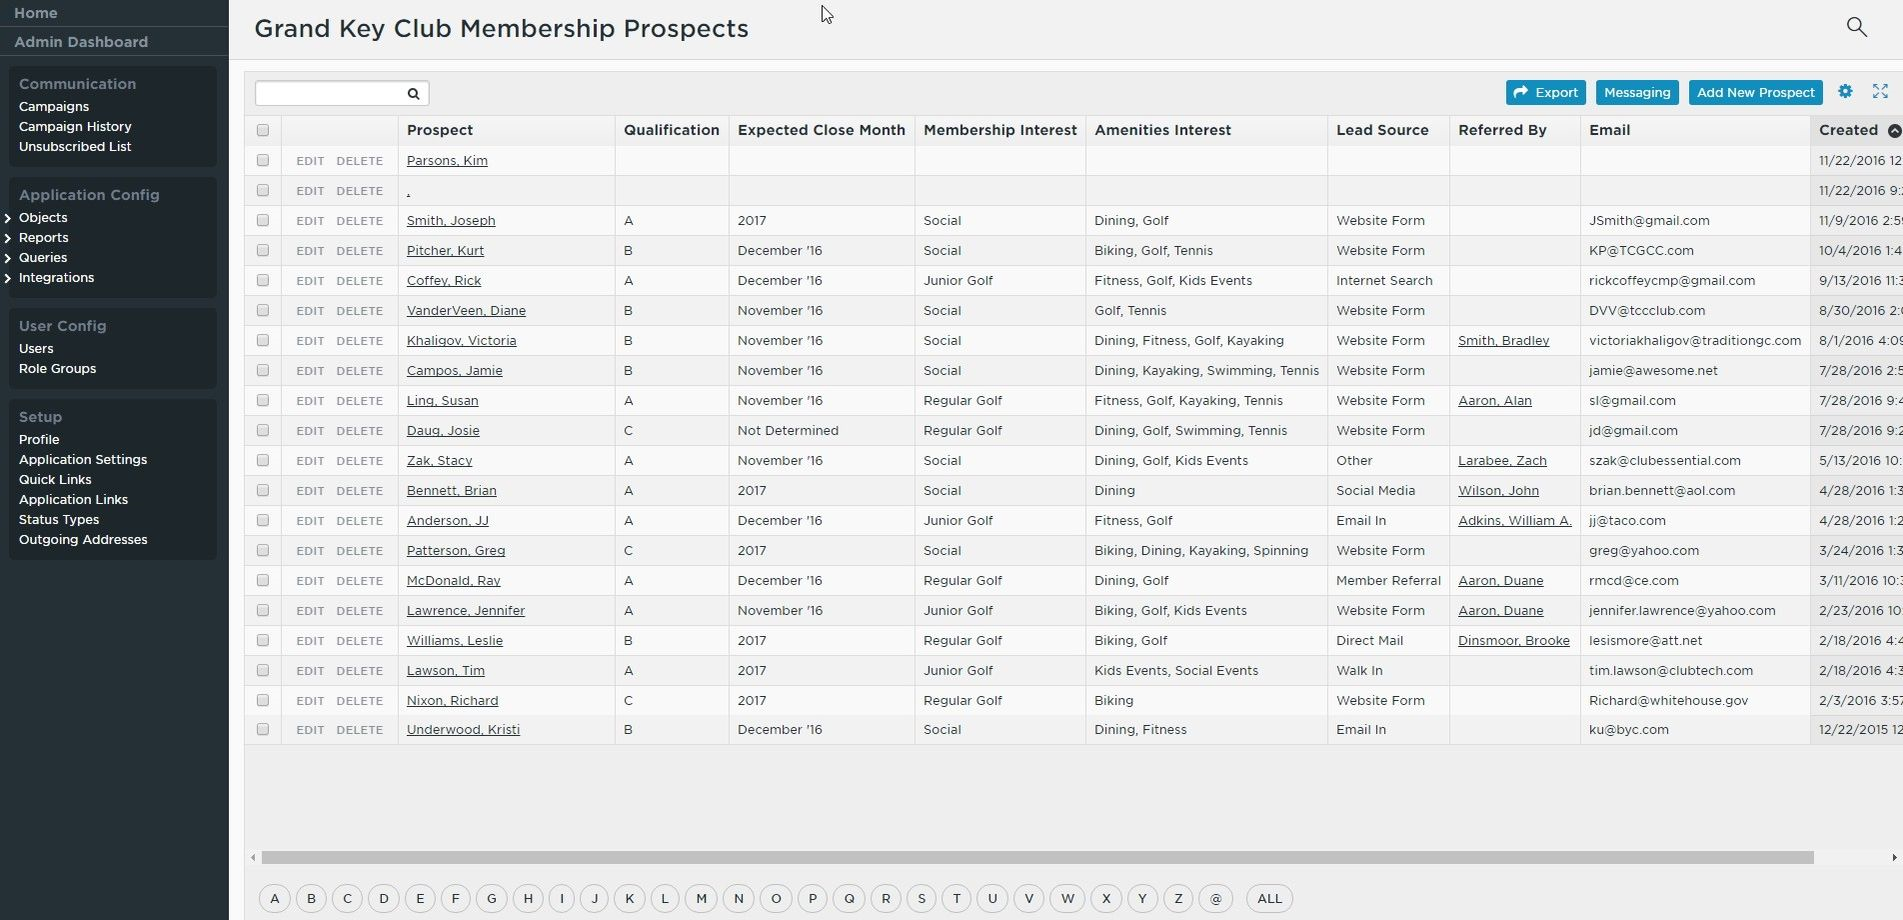
From here, you will see the CRM Admin Dashboard, which looks similar to the CRM Home Dashboard, but with a different sidebar on the left, and no Application Links at the top.
Adding/Editing Fields
Your CRM should already include many different fields, containing a variety of different types of data. However, often you may need to begin storing a new piece of data that does not already have a corresponding field in the CRM, or you may need to edit the list of values available to choose from in a Picklist field.
Adding a New Field
To begin, you’ll need to first decide what Object your new field will reside in. The most commonly used Object in CRM is Contacts Object. All fields in the Contacts Object should be used to directly describe a person, whether they are a Member, Prospective Member, Guest, or other.
To create your field, you’ll first need to access the Admin Dashboard. To do this, first start at your CRM home screen, then hover the mouse over your name in the top right corner, and click the Setup option.
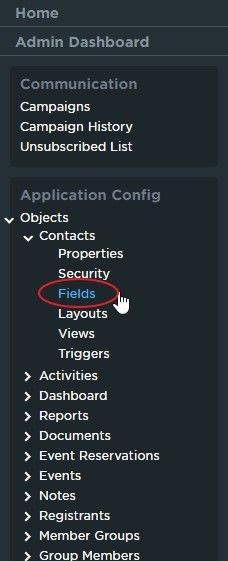
To add your new field from here, you’ll first need to open your Contacts Object for editing. From the left-hand sidebar, click on Options to expand the list and display all of the Objects present in your CRM. Contacts should almost always be the first Object listed. Click Contacts to expand the list further, and then click Fields to view the list of existing Fields for the Contacts Object.
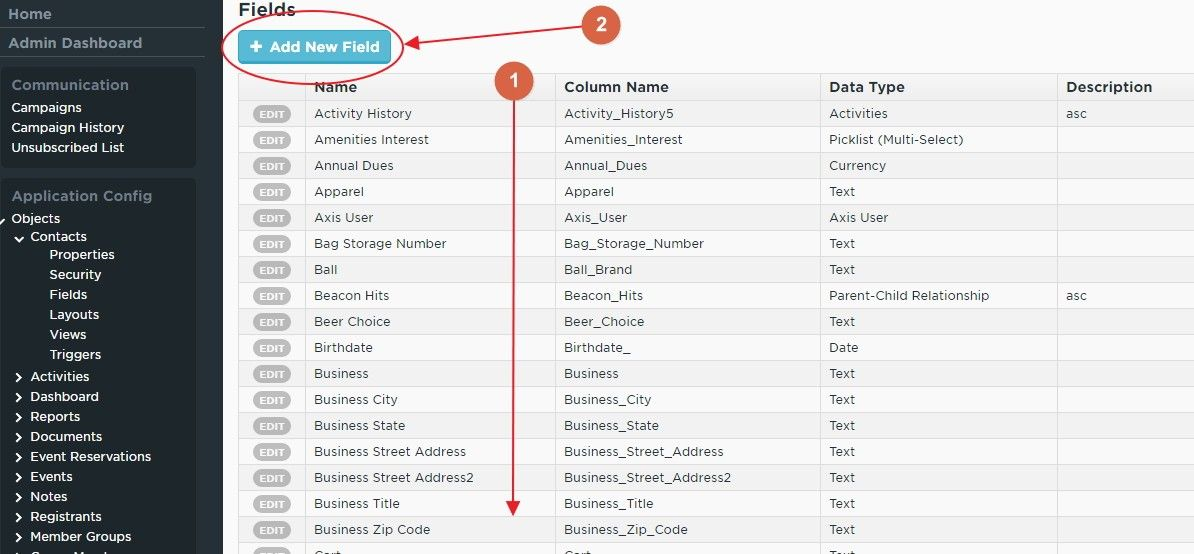
Before adding in your new field, scroll through this list to see if it already exists. If it does, then you can skip ahead to either Editing a Layout or Editing a View to add this field where needed. If it does not already exist, then navigate to the top of the list of fields, and click on the blue button titled + Add New Field. Once you click on the + Add New Field button, you should see a list of blank field properties:
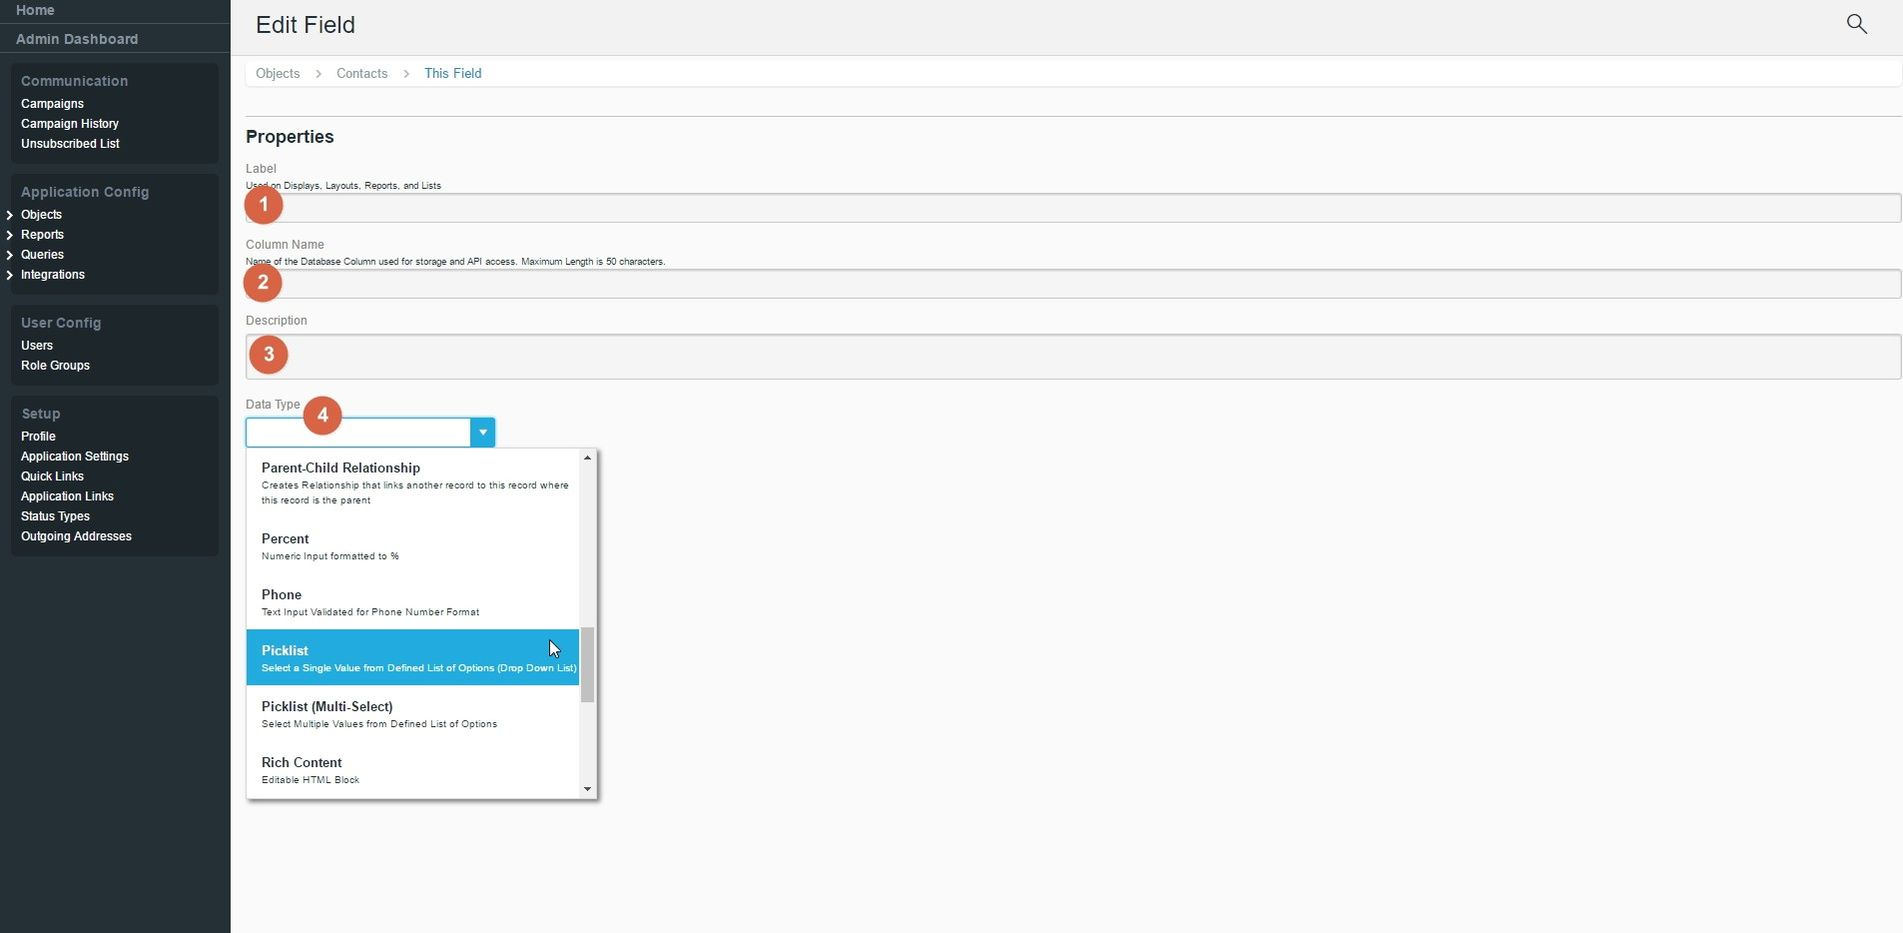
Label: This is the field name, as it will display across the CRM. When choosing a name, be descriptive, but concise. Ex: Application Date
Column Name: This is the database name of the field you are creating. This should automatically generate once you click out of the Label field. In most cases, it is best to leave this as the default value.
Description: An optional field that allows you to enter a longer description of the field you are creating. This will only be seen in the full list of fields for the corresponding Object. Typically, if your Label is descriptive enough, this can be left blank.
Data Type: Choose the type of data that will be accepted in this field. There are many options, but the most commonly used are:
Checkbox: Sets this field as a checkbox, which can either be checked (true) or unchecked (false).
Currency: Sets this field as a number, formatted for currency. Useful for tracking different revenue streams, and automatically appends the $ sign and decimal when entering data.
Date: Sets this field as a date, with no time value. Brings up a datepicker when entering data.
Date/Time: Sets this field as a date with the time appended. Brings up a datepicker with time selector when entering data.
Email: Sets this field as a text box with forced formatting for email addresses. Fields of this data type can be used as targets for Campaigns, or can be used to directly send emails from a View/Layout.
Number: Sets this field as a number, and allows you to configure the allowable size of number (in digits) and number of decimal places allowed.
Picklist: Sets up a dropdown list of options to choose from, of which only one option can be selected.
Picklist (Multi-Select): Sets up a list of checkboxes, representing options, from which multiple values can be selected.
Text: A standard text box, with no formatting applied. Useful for displaying short pieces of basic information, such as names, addresses, phone numbers, etc. Allows you to set the maximum number of characters that can be entered, and whether or not all values in this field must be unique across the entire Object.
Text Area: A larger text box, with no formatting applied. Allows you to set the maximum number of characters that can be entered.
For our example, we’ll choose the Picklist option, which will allow us to choose from a list of options (that will be populated now) when filling in this data on Member records later on. Once you select Picklist from the Data Type drop-down, the screen will reload and some new options will appear below.
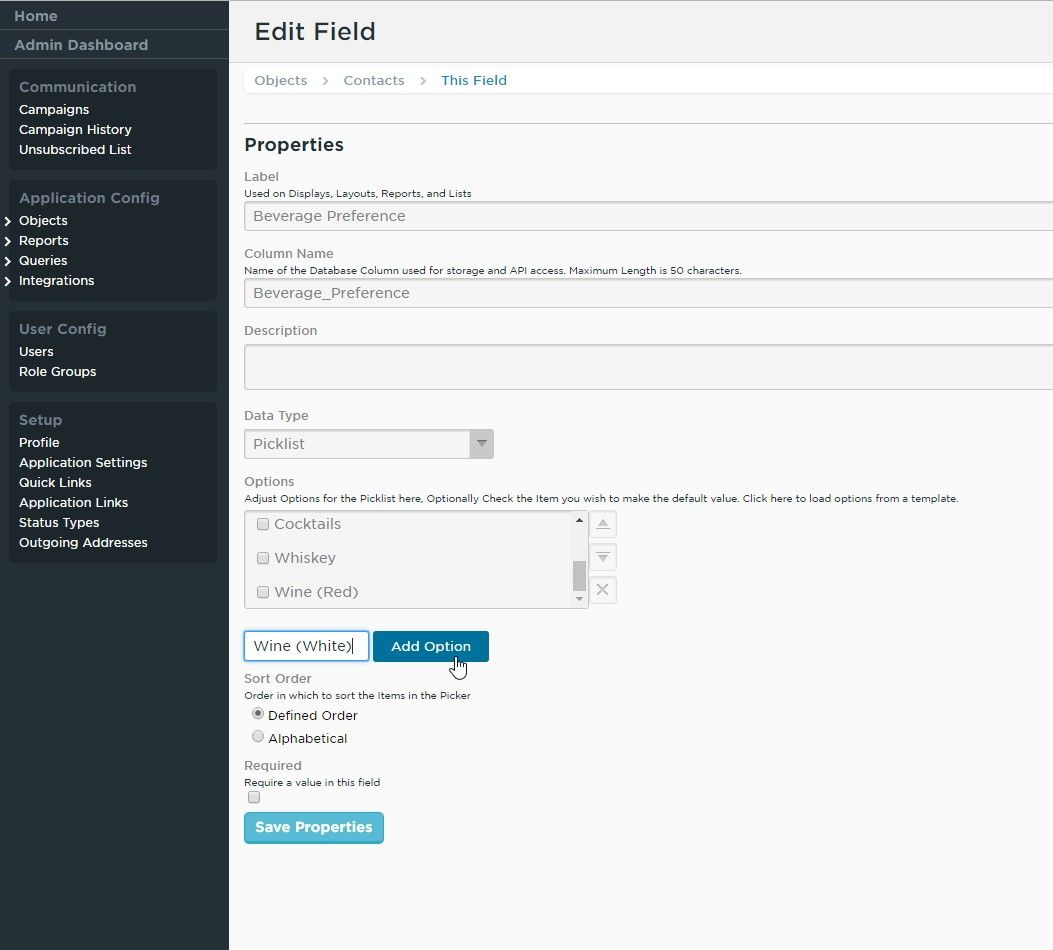
To begin, the list of drop-down options to choose from will be blank, so we will need to populate those options. To do this, click inside the text box next to the blue button titled Add Option and type the name of the option that you would like to add. Once complete, click the Add Option button, and your option will appear in the box above. Repeat this process as needed until all the necessary options have been added. You can reorder the list by clicking on an option, and then using the Up or Down Arrow buttons to the right of the options box to move that option up or down in the list. You can remove options by clicking on the option to remove, and clicking on the “X” icon just under the Up/Down Arrows.
There are two more Field settings available before the Save button. Choose whether to sort the options in the order they appear in the listing you just created (default), or to sort all the options alphabetically, regardless of how they were entered.
Finally, choose whether this field should be required. If the field is marked as required, any record that is created or edited in this Object will not save until a value is entered for this field. It is recommended to only use this for fields that would appear to all types of records within this Object (in our example, the Contacts Object). Therefore, making the Member Number field required would not be recommended, as all Prospects, Guests, Realtors, etc. do not have a Member Number, and you would not be able to save a new Prospect (or similar) record until a Member Number was entered. However, the Primary Email Field may be good to set as required, if you are certain that you will be able to fill this in for each contact that you enter.
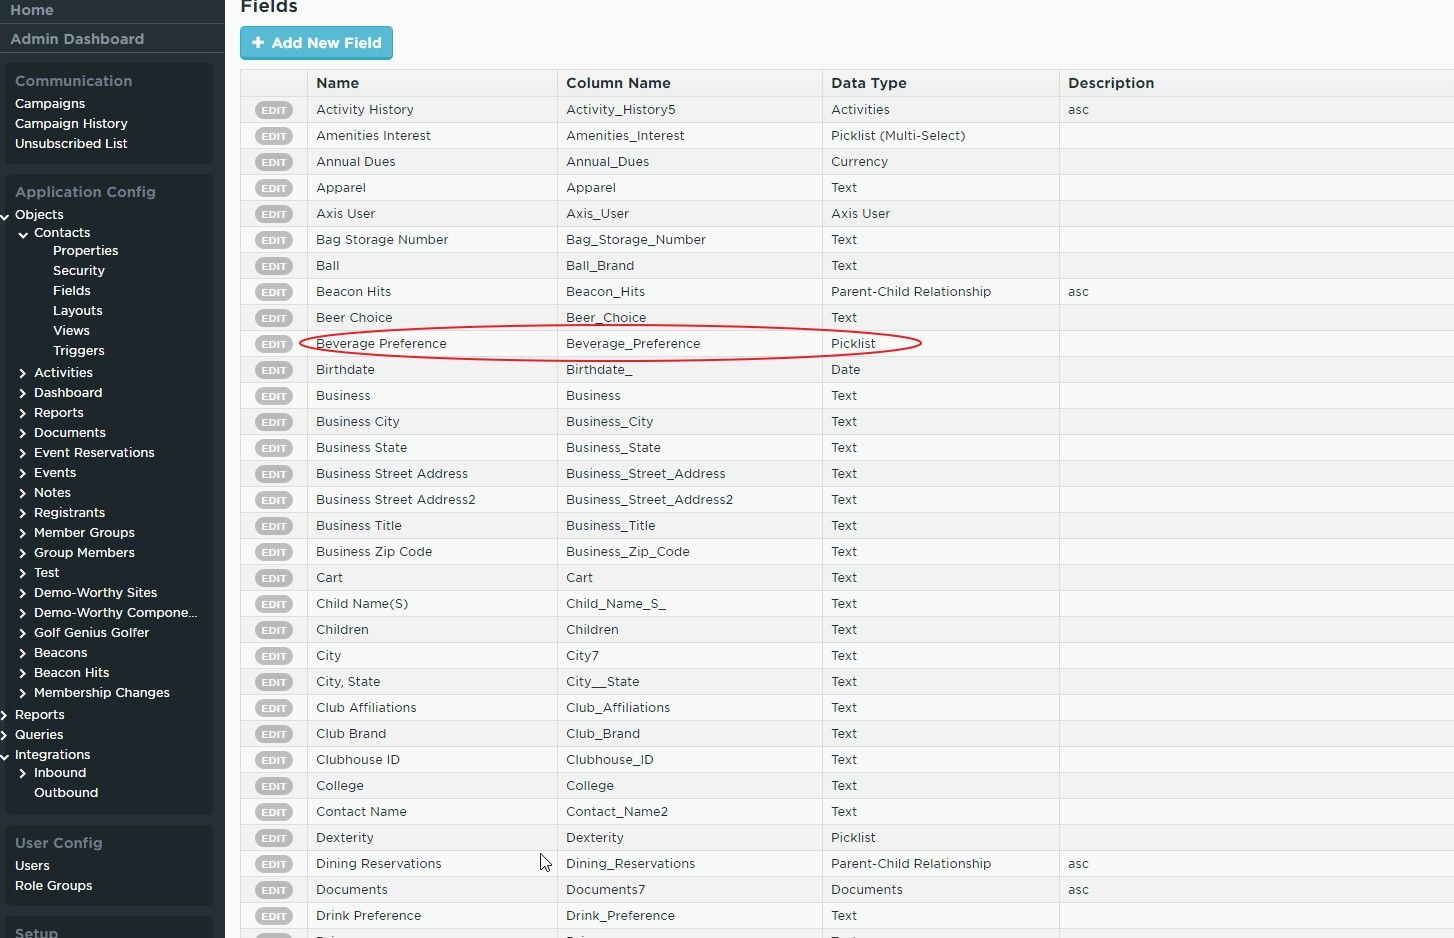
Once you have completed the steps above, click the blue button at the bottom of the page titled Save Properties, and your field will be created.
Additional Resources
Best Practices
Be as descriptive as possible with field titles to make data entry easier in the future. Typically, if a piece of data can be described using multiple fields instead of just one, it should be, to allow for more granular reporting. For example, instead of one address field, we have 5 - Street Address 1, Street Address 2, City, State, Zip Code.
FAQs
Why can't I access the Object settings? I'm receiving an error 'Invalid Permissions to View This Page"?
Only Object Administrators have access to edit settings within an Object. If you are receiving this message, your account may not be set as an Object Administrator. Please note that CRM pricing is based on a per admin user basis, so adding additional Object Administrator accounts may incur additional fees. Contact your Account Manager to discuss this further.
