Office - General Ledger - Budgets - Budget Management
- Stacy Zak
- Benjamin Hacker
- Kelsie Livingston
Table of Contents
- 1 Overview
- 2 Required Permissions
- 3 Navigation
- 4 Create Periods to Populate
- 5 Populate Budget Data
- 5.1 Import File
- 5.2 Import Wizard
- 5.3 Direct Data Entry
- 5.4 More Options
- 5.4.1 Copy Data
- 5.4.2 Set Specific Value
- 5.4.3 Delete Budget Data
- 6 Best Practices
- 7 FAQs
Overview
The Budget Management Tool enables Clubs to populate their Budget Ledgers for current/future periods.
Required Permissions
General Ledger
Add/Edit/Delete Budget
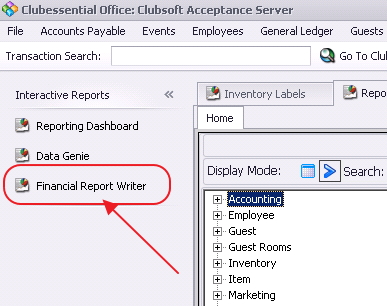
Navigation
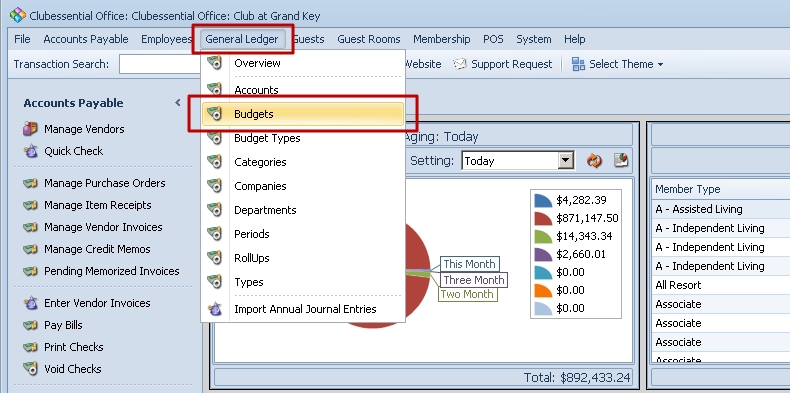
To access the Budget Management tool,
Click the General Ledger option from the top menu.
Select Budgets from the drop-down list of options.
Create Periods to Populate
Before entering or importing budget data, first create Ledger Periods to populate.
Click on the green + button.
Enter the year to create the periods.
Click OK to continue.
Confirm creation of Ledger Periods for designated time period. Once Periods have been created, the Budget can be populated.
This is done by closing out the budget tool and checking to make sure the periods were created. When launching back into the budget, your new budget year will populate.
Populate Budget Data
Import File
The Import File must contain 15 columns made up as follows:
(1) Account Number
(1) Dept Number
(12) Fiscal Periods
(1) Year
Use the following screenshot to help define the spreadsheet column titles. Avoid altering.
There must be a space between the period and the period number. Use “period 1”, rather than “period1”
Next, populate the Account, Dept, Activity, and Year in the template.
Notes:
Exclude commas from the number format; Enter 10000.00 rather than 10,000.00
Every field must be filled in; any periods that do not have budget amounts to import, fill with 0.00. If there is a blank field you will receive an error when you import the budget.
The Account and Department columns must match the system.
Include leading zeros in Accounts or Department code (such as Dept 05)
The Account must be associated with the particular Department in the system.
Both revenues and expenses should be entered as POSITIVE amounts unless they are contra-revenue or contra-expense accounts (these should be entered as negative amounts -#,###.00 (such as -1,000.00).
Save the import file will as a .CSV file.
Import Wizard
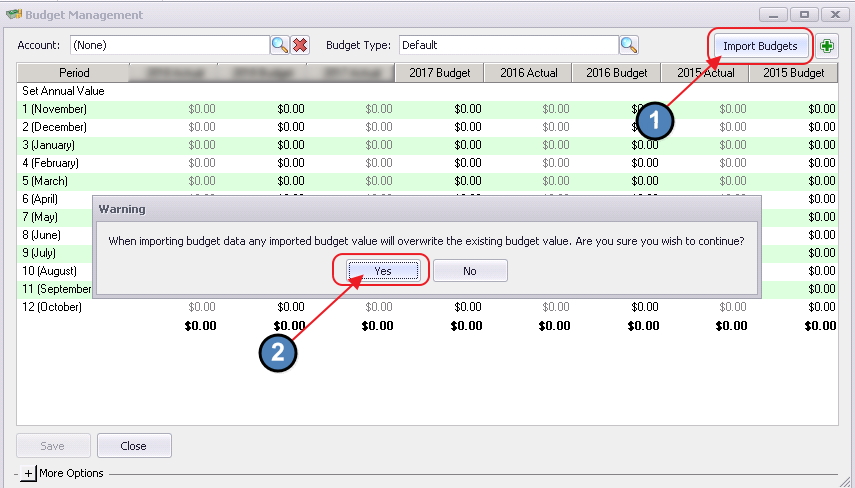
To import the data contained in the .csv file created above, within the Budget Management tool, click Import Budgets.
Warning message will appear, confirming the import will overwrite existing data (only for the accounts in the import).
Click Yes to continue the import process.
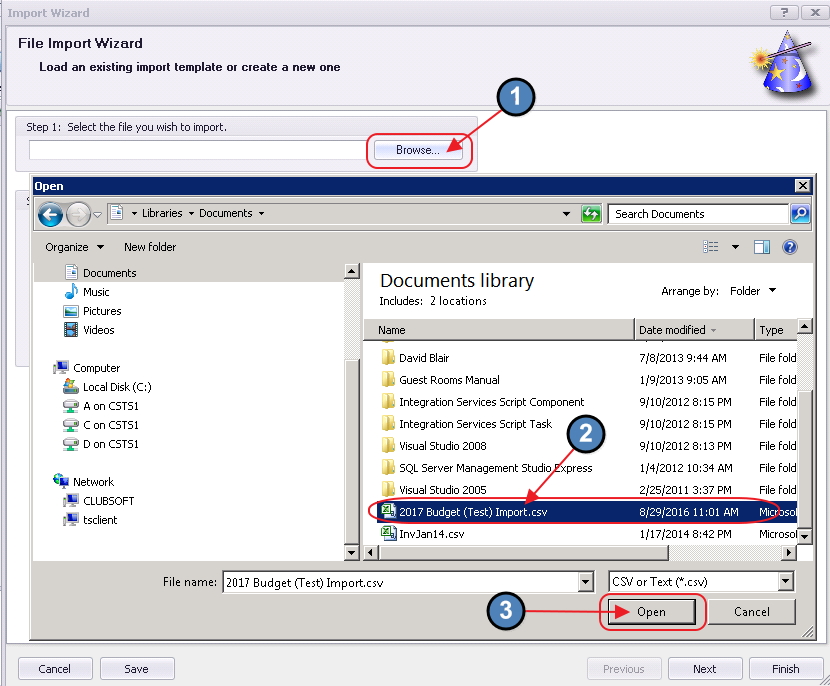
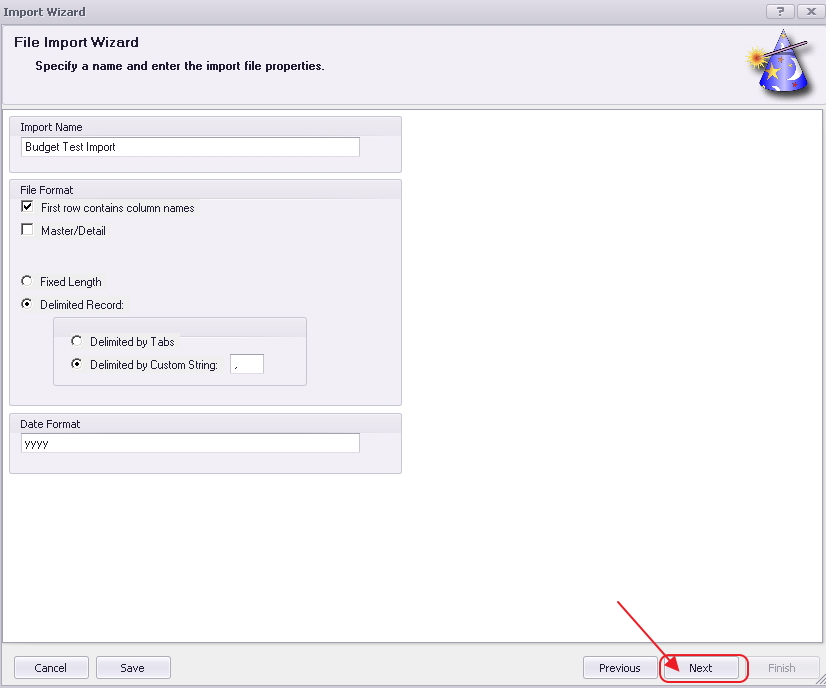
The Import Wizard will launch.
Browse to find the .csv import file, select it, and click Open.
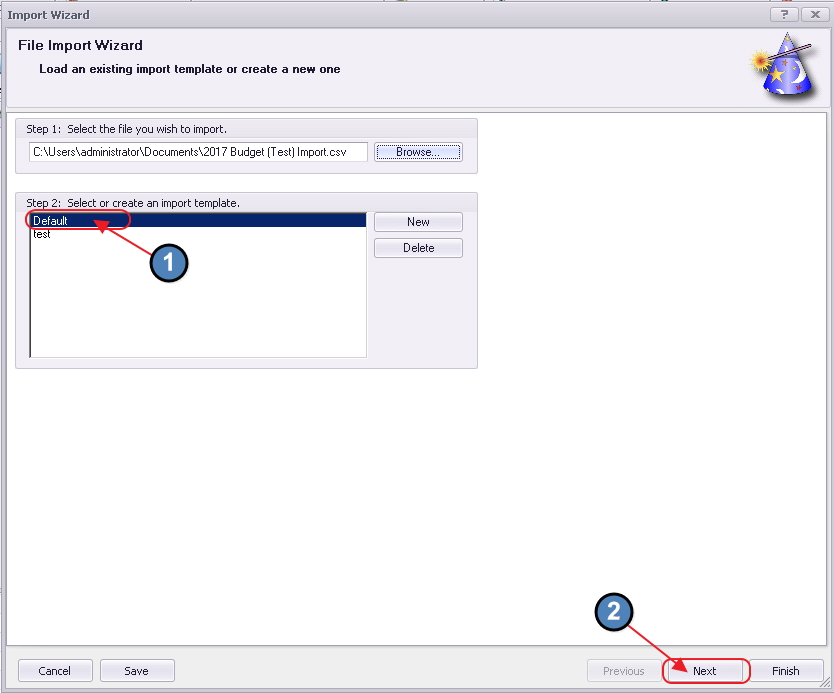
Select the Default Budget Template.
Important!! Re-highlight the template (even if already highlighted) to select it, and click Next.
Click Next to proceed through the next screen.
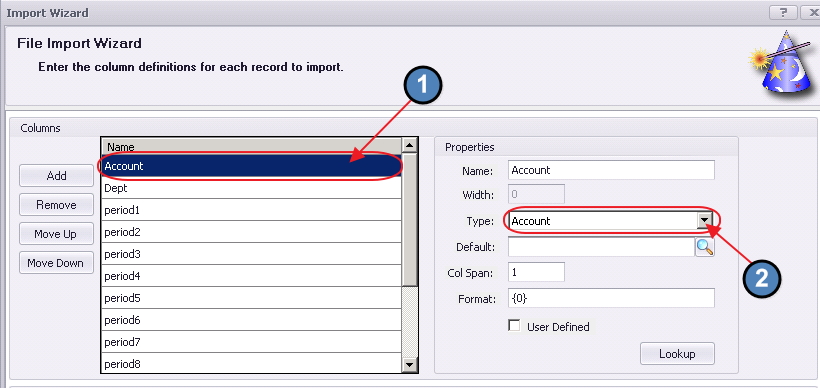
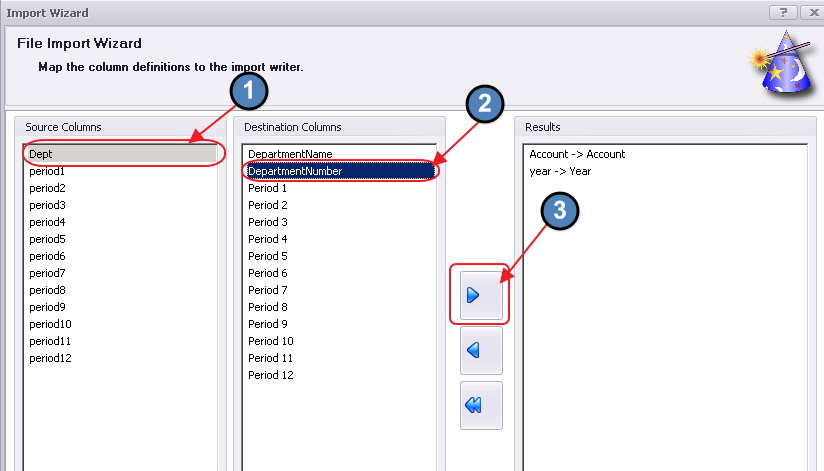
In the next screen, ensure the settings are as follows:
Highlight Account on the left side of the screen, and ensure Type reflects Account.
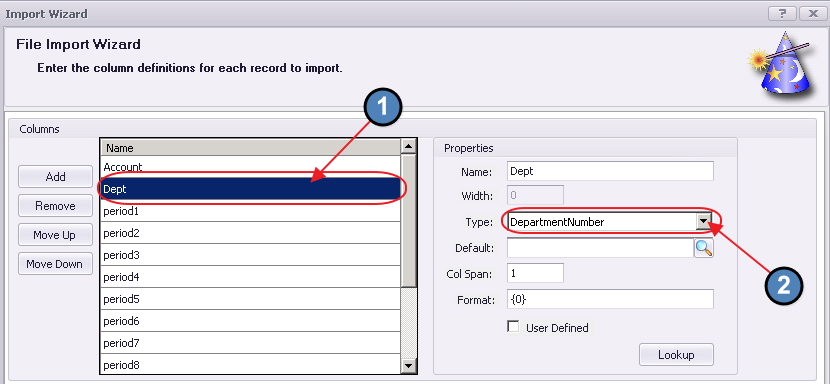
Highlight Dept on the left side of the screen, and ensure Type reflects DepartmentNumber.
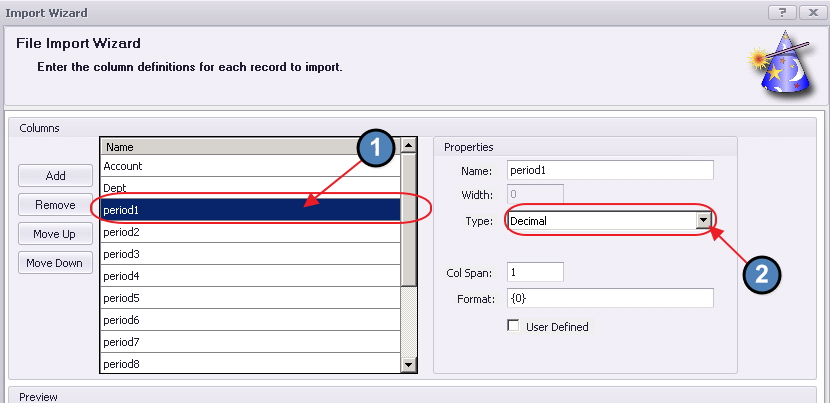
Highlight period1 on the left side of the screen, and ensure Type reflects Decimal.
Then, repeat for period2 - period12.
Finally, highlight year on the left side of the screen, and ensure Type reflects Integer.
Click Next to continue.
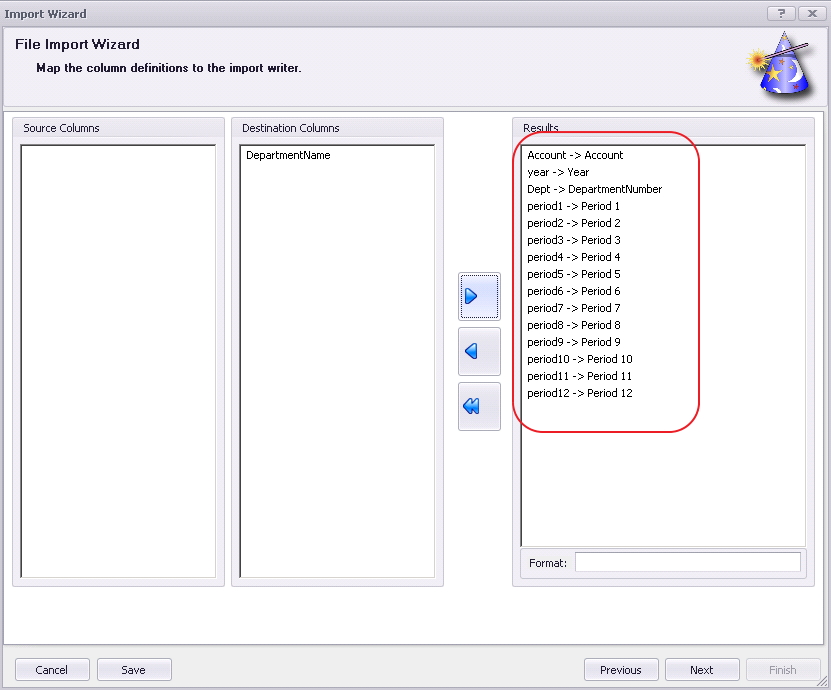
In the next screen, if file was understood, Source and Destination Columns should be mapped appropriately and appear in the Results column.
In the event mapping needs performed, select field from source column, select corresponding field from destination column, and click the right arrow to add the mapping.
Continue until all source columns have been mapped appropriately.
Click Next to continue.
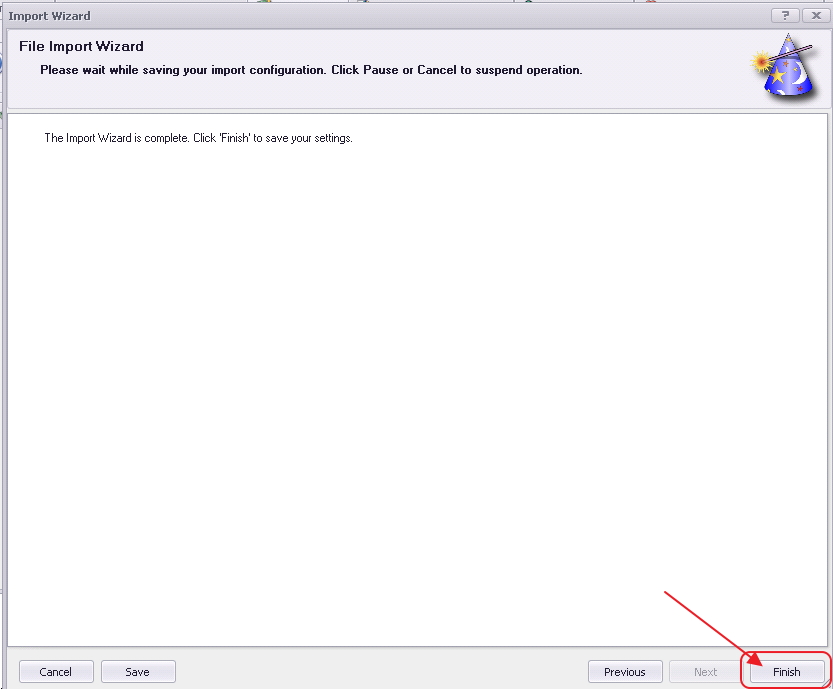
Once import is complete, this screen will appear. Click Finish to return to main Budget Management screen.
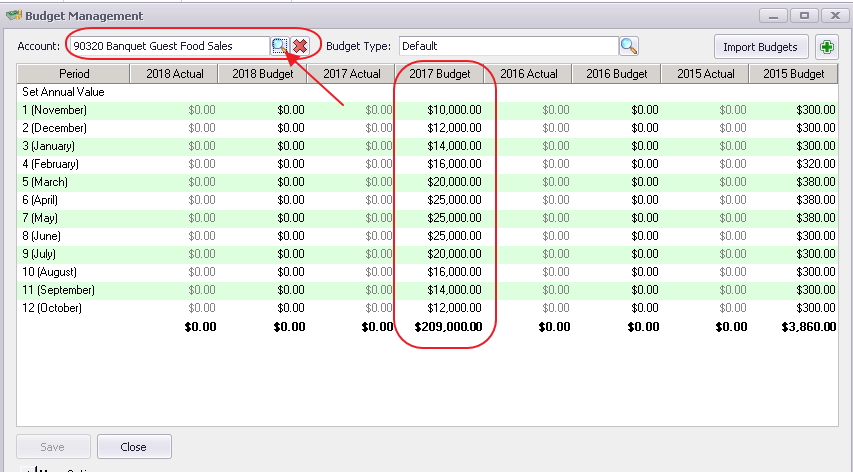
Amounts have been imported, and are now available for reporting.Within the Budget Management tool, an account may be selected, and imported amounts will display in respective Budget column. Amounts will also be available for display in the Interactive Reports, Financial Report Writer tool.
Direct Data Entry
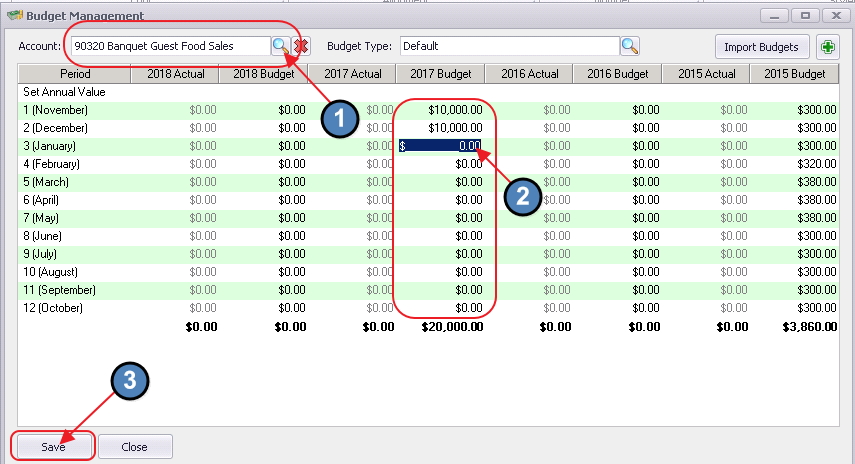
In addition to utilizing the Data Import Wizard, numbers may be entered directly into the Budget Management tool to populate the Budget.
To enter numbers directly, select an Account, and type directly into the Budget field for the appropriate period. Click Save when finished.
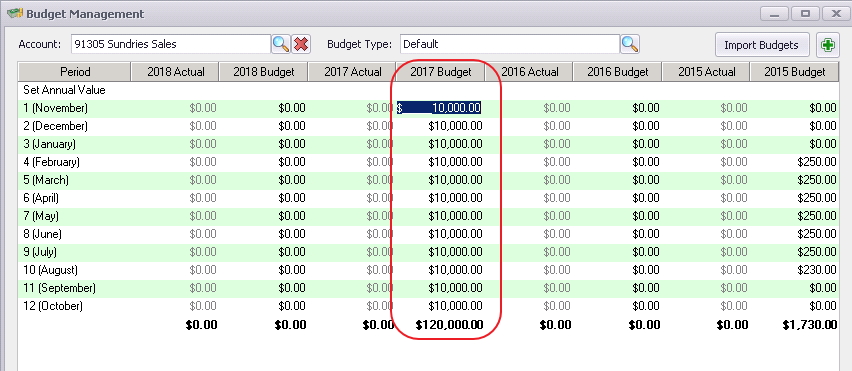
Alternatively, for fixed period amounts, enter the total Annual budget amount in the top Set Annual Value line to have the system distribute the amount equally across the 12 budgeted periods.
Entering $120,000 results in monthly budgeted amounts of $10,000/month.
Click in another cell to see results populate.
More Options
In addition to utilizing the Budget Import, or direct data entry, more options to populate the budget appear below. Click the + to expand and view.
Copy Data
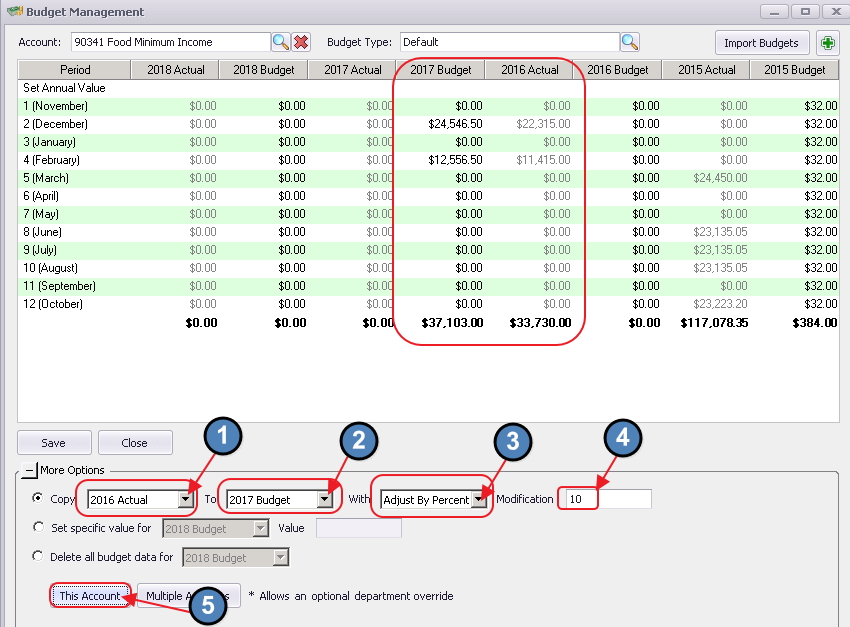
To base a budget on another budget or actuals, select the Copy option, and then fill in parameters to fit needs.
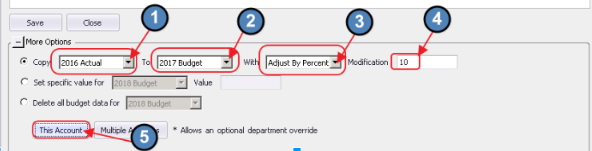
For example, to populate 2017 Budget numbers based on 2016 Actuals + 10%, set parameter, and click This Account to see results.
Or, to populate 2017 Budget numbers based on 2016 Actuals + a fixed dollar amount, set parameters, and click This Account to see results.
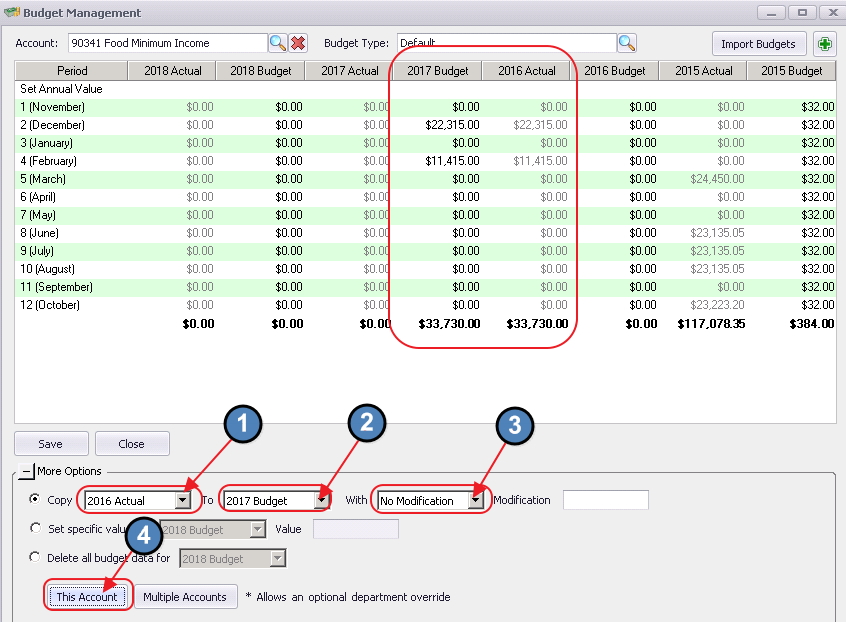
To populate 2017 Budget numbers based on 2016 Actuals without any adjustment, set parameters to the following, and click This Account or Multiple Accounts to see results. The Multiple Accounts option is available to impact more than just the selected account and should be viewed as all accounts.
Set Specific Value
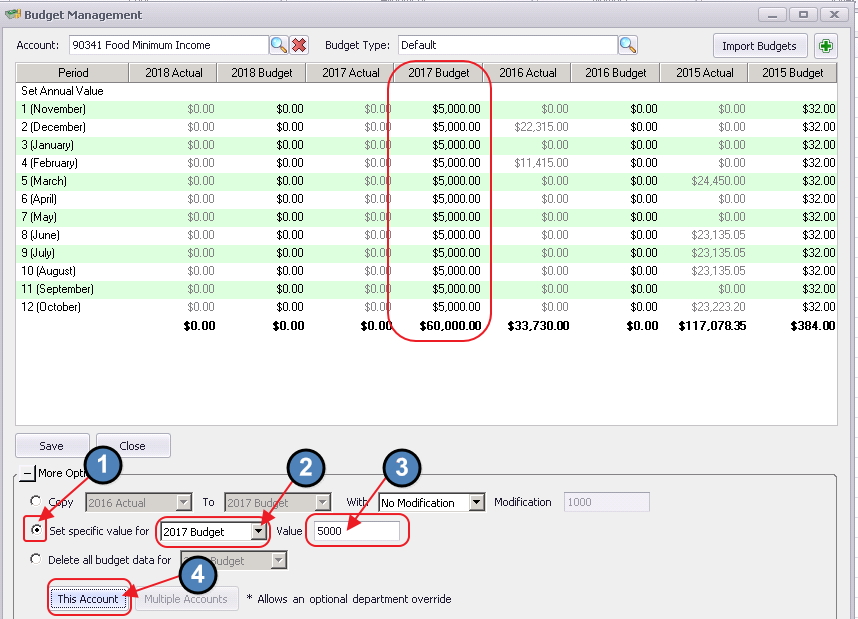
To populate Budget numbers based on a specific value, click on the Set Specific Value radio button, choose Budget, and specify value to populate.
Note that Multiple Accounts feature is not available with this option.
Delete Budget Data
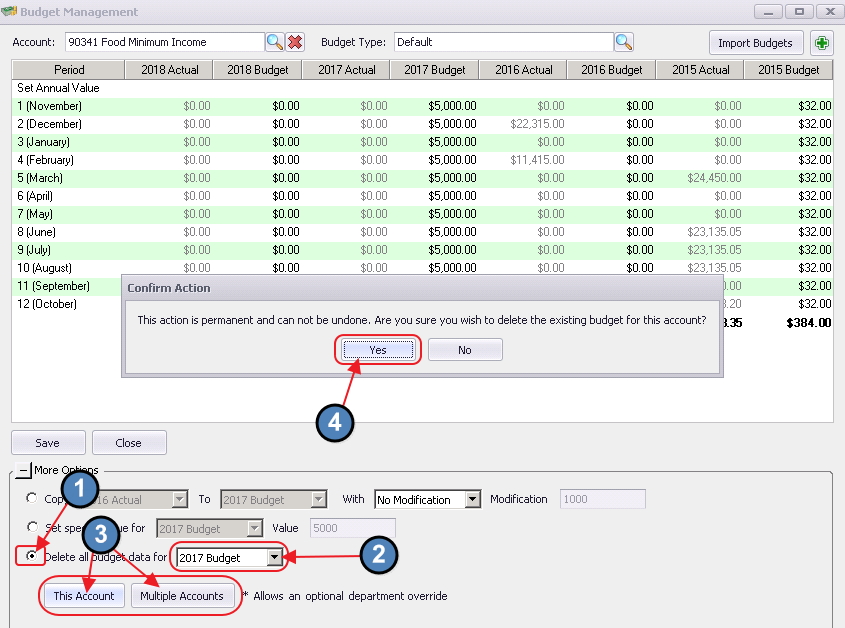
To assist with Data Entry, if improper balances were loaded, utilize the Delete all budget data function to clear out previously populated balances for one or multiple accounts.
Click Yes to confirm deletion.
Populated balances will bet set to zero.
Best Practices
To cut down on data entry time, use toolsets such as the Budget Import Wizard, or the tools found in the More Options section.
After creating the new Budget Year and Periods, close the budget tool and re-launch in order for the new Budget Year to populate within the budget tool.
FAQs
Q: How do I base next year’s Budget on a % of current year actuals?
A: Expand the More Options section, select the Copy option, and define the parameters to fit your needs.
Q: Do I need to post Budget Numbers?
A: Once saved, Budget Numbers flow directly into the Budget Ledger, and do not require an additional posting.
Q: What do I do when I receive an error saying my data is incompatible during the Import process?
A: An error such as the following would indicate that the Account specified is not active for the designated department. Either activate the desired Department for that Account in the Account setup, or modify the Import spreadsheet to reflect an Active department.
