Office - Manage Item Categories - Create an Item Category
Table of Contents
Overview
An Item Category is a fundamental component of the Office system. A Category represents a collection of Items, and is a subset of a Group. An Item can only belong to one Category and one Group. An unlimited number of Items may exist in a Category, and an unlimited number of Categories may exist in a Group. A Category fits into one of (3) areas: (1) Food and Beverage, (2) Retail, or (3) Billing. Item Categories have a Child Relationship to Groups, and a Parent Relationship to Items. Therefore, a Group must first exist before an Item Category can become a Member of it. And, an Item Category must exist before an Item can be added to it.
Required Permissions
Add/Edit/Delete Item Categories
Accessing the Tool
To add a New Item Category within the Clubessential Office Product:
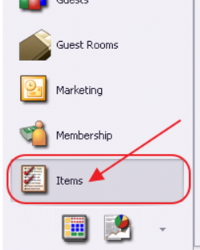
Click on “Items”
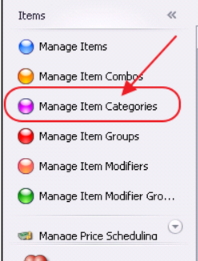
Click on “Manage Item Categories”
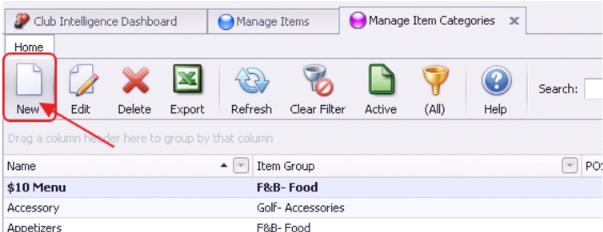
Then, click, “New.” Edit POS Item Category screen will launch.
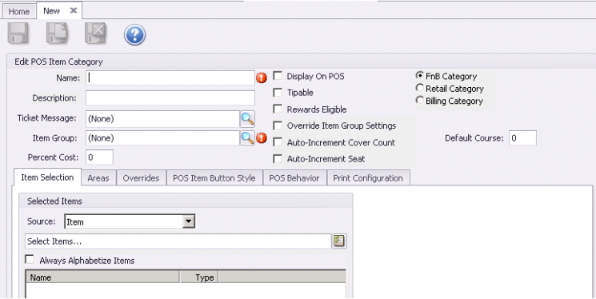
To set up a Category, general fields must be defined and settings must be made and saved for the record to exist.
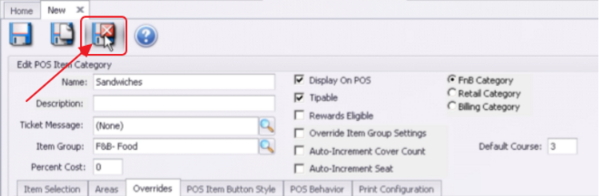
General Category Fields
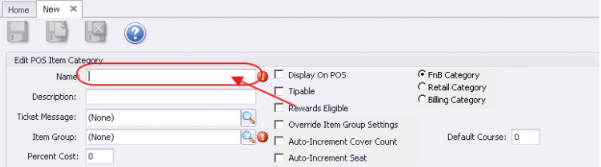
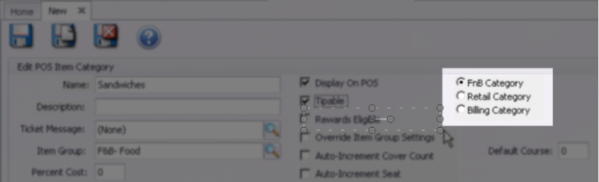
In the top of the Item Category form, the general fields for the Category must be defined.
First, the “Name” field for the Category must be entered.
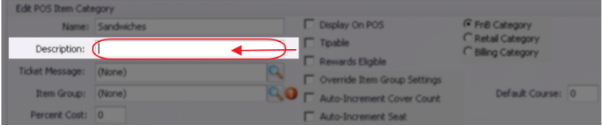
“Description” field may be populated if desired (for internal viewing only).
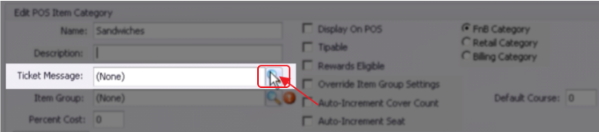
The “Ticket Message” field can be utilized to add a message to the receipt when the Item is ordered. For example, Ticket message could be added to Wine Category to cross-market an upcoming Wine Tasting Event at a Club. Ticket messages can also be established at the Item level.
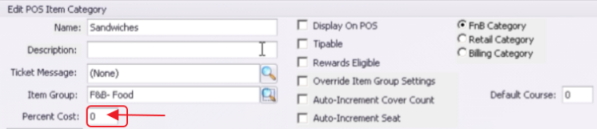
The “Percent Cost” field may be populated with a theoretical cost percentage for this Category.
For example, if costs in this category were estimated at 35%, 35 could be populated into the Percent Cost field. Gross Margin results could then be reviewed for Items within this Category (via the Interaction Reports, Inventory, Gross Margin report). If an Item has a cost dollar populated at the Item level, the Item level cost will override the Category cost percent.
General Category Settings
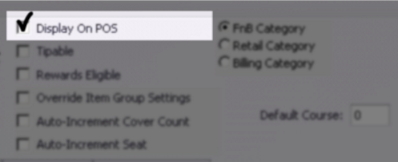
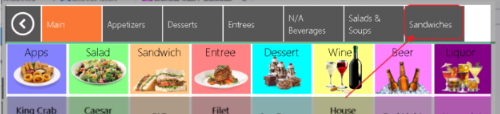
The “Display on POS” option (when checked), indicates that this Category will show up at the Point of Sale. If the Category is marked as Display on POS, buttons can be configured to show the Category at the POS (Classic POS only).
If G/L Overrides are needed at the Category level, the “Override Item Group Settings” option should be selected.
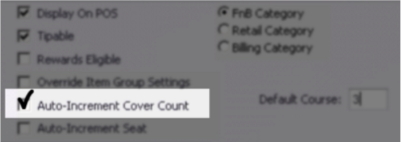
When the “Auto Increment Cover” option is checked, every time the Item is ordered, the System will automatically add another Cover count to the order. Note: this is also an Option at the Item level, and applies only to Food and Beverage POS.
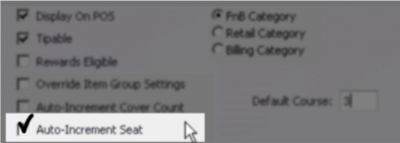
When the “Auto Increment Seat” option is checked, every time the Item is ordered, the System will automatically navigate to the next seat. Note: this is also an Option at the Item level, and applies only to Food and Beverage POS.
In this section, the Category is designated into one of the following:
FnB Category: Food and Beverage Categories
Retail Category: Merchandise, Greens Fees, Court Fees
Billing Category: Dues, Late Fees
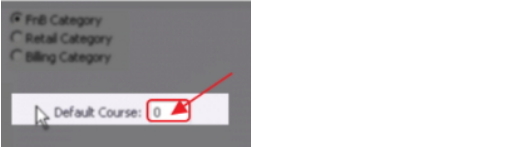
If FnB Items are entered by course, enter the default course for which the Category should be assigned. This can be overridden at the Item level. Click Here to find out the location of that option.
Additional Settings
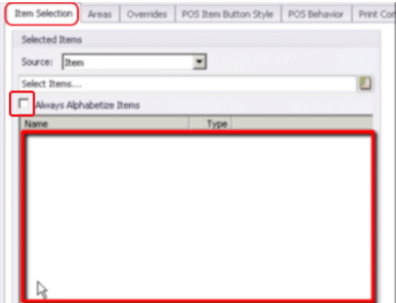
Item Selection - Items within the Category will display on the "Item Selection" tab. This section allows for organization of Items within the POS screen. The “Always Alphabetize Items” button keeps the list alphabetized when new items are added to the item selection.
Areas - The “Areas” tab contains the areas of the Club. Once an area is checked, the Items within the Category may be sold in that area.
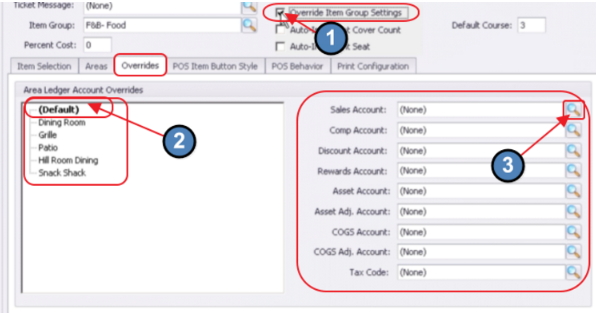
Overrides - Once the “Override Item Group Settings” option is checked, the Account fields will open for editing on the Overrides tab. The Accounts may be designated differently at a default Category level, or at the Area level(s) within the Category. The Account Lookup feature may be used to assist in Account selection. If one or more accounts are defined differently at the Category level, the Category level will override the Item’s Group settings, and Items within the Category will follow the Category override designations. Override options are also available at the Item level.
If the override option is not selected and/or the account section is left blank, the system will default the Category G/L distribution to accounts defined at the Category’s Group levels.
POS Item Button Style - The “POS Item Button Style” tab contains options relating to the POS screen designs. Edits to the Button Color, Font, Size, etc can be managed from this tab.
POS Category Buttons will display based on settings. Items within the Categories, will inherit the Category button styles (unless overridden at the Item level.)
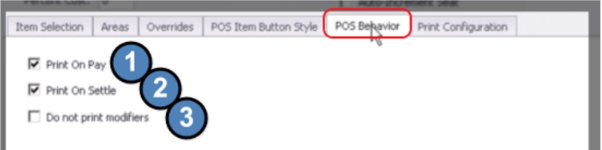
POS Behavior - The “POS Behavior” tab holds (3) options pertaining to printing behaviors.
The “Print On Pay” option tells the system to print Items from this Category on the Pay Receipt; the check the Server presents to the Member(s)/Guest(s) prior to the Member/Guest designating which form of payment will be used, and prior to additional gratuities being added.
The “Print On Settle” option tells the system to print Items from this Category on the Settle Receipts; the Receipt the Server prints to close the sale, after Member/Guest has designated form of payment and added additional gratuities.
The “Do not print modifiers” tells the system to exclude printing Modifiers (like Cooking Temperatures, or Toppings) on the Check.
Print Configuration - The “Print Configuration” tab holds instructions for printing, and specifies which prep printer this Category’s Items will print to once ordered from the POS. Note: Any instructions set at the Item level will override those established at the Category level.
Save and Close
Once Category Fields and Settings have been designated, click, “Save and Close,” to complete the addition of the new Category.
Best Practices
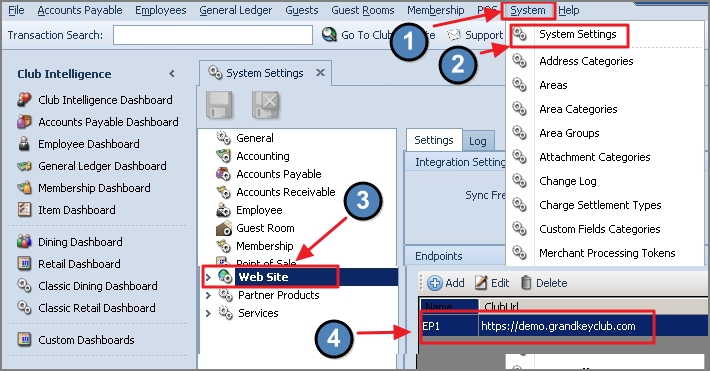
Items used on the Website need to have their Category set to sync to the website. This can be set in CMA by accessing System>System Settings>Website>Double Click URL to the Right>Categories. Select the Lookup to add the category to the list. Save and Close. The next auto sync will pick up the category and the items can then be used.
FAQs
Q: Can an Item Category belong to more than one Group?
A: A Category can belong to only one Group. You can, however, have an unlimited number of Categories in a Group.
