Office - Manage Vendors
- Stacy Zak
- Benjamin Hacker
- Danielle Donley (Unlicensed)
Table of Contents
- 1 Overview
- 2 Required Permissions
- 3 Accessing the Tool
- 3.1 Adding a New Vendor
- 3.1.1 Vendor Setup Tab
- 3.1.1.1 Other Options:
- 3.1.1.2 1099 Tab
- 3.1.1.3 Departments Tab
- 3.1.2 Communication Tabs
- 3.1.2.1 Physical Address Tab
- 3.1.2.2 Email Address Tab
- 3.1.2.3 Phone Tab
- 3.1.2.4 Contact Tab
- 3.1.3 Financial Tabs
- 3.1.3.1 AP Activity Tab
- 3.1.3.2 Purchase Orders
- 3.1.4 Other Tabs
- 3.1.4.1 Custom Fields Tab
- 3.1.4.2 Notes Tab
- 3.1.1 Vendor Setup Tab
- 3.2 Editing Vendors
- 3.3 Deleting Vendors
- 3.1 Adding a New Vendor
- 4 Best Practices
- 5 FAQs
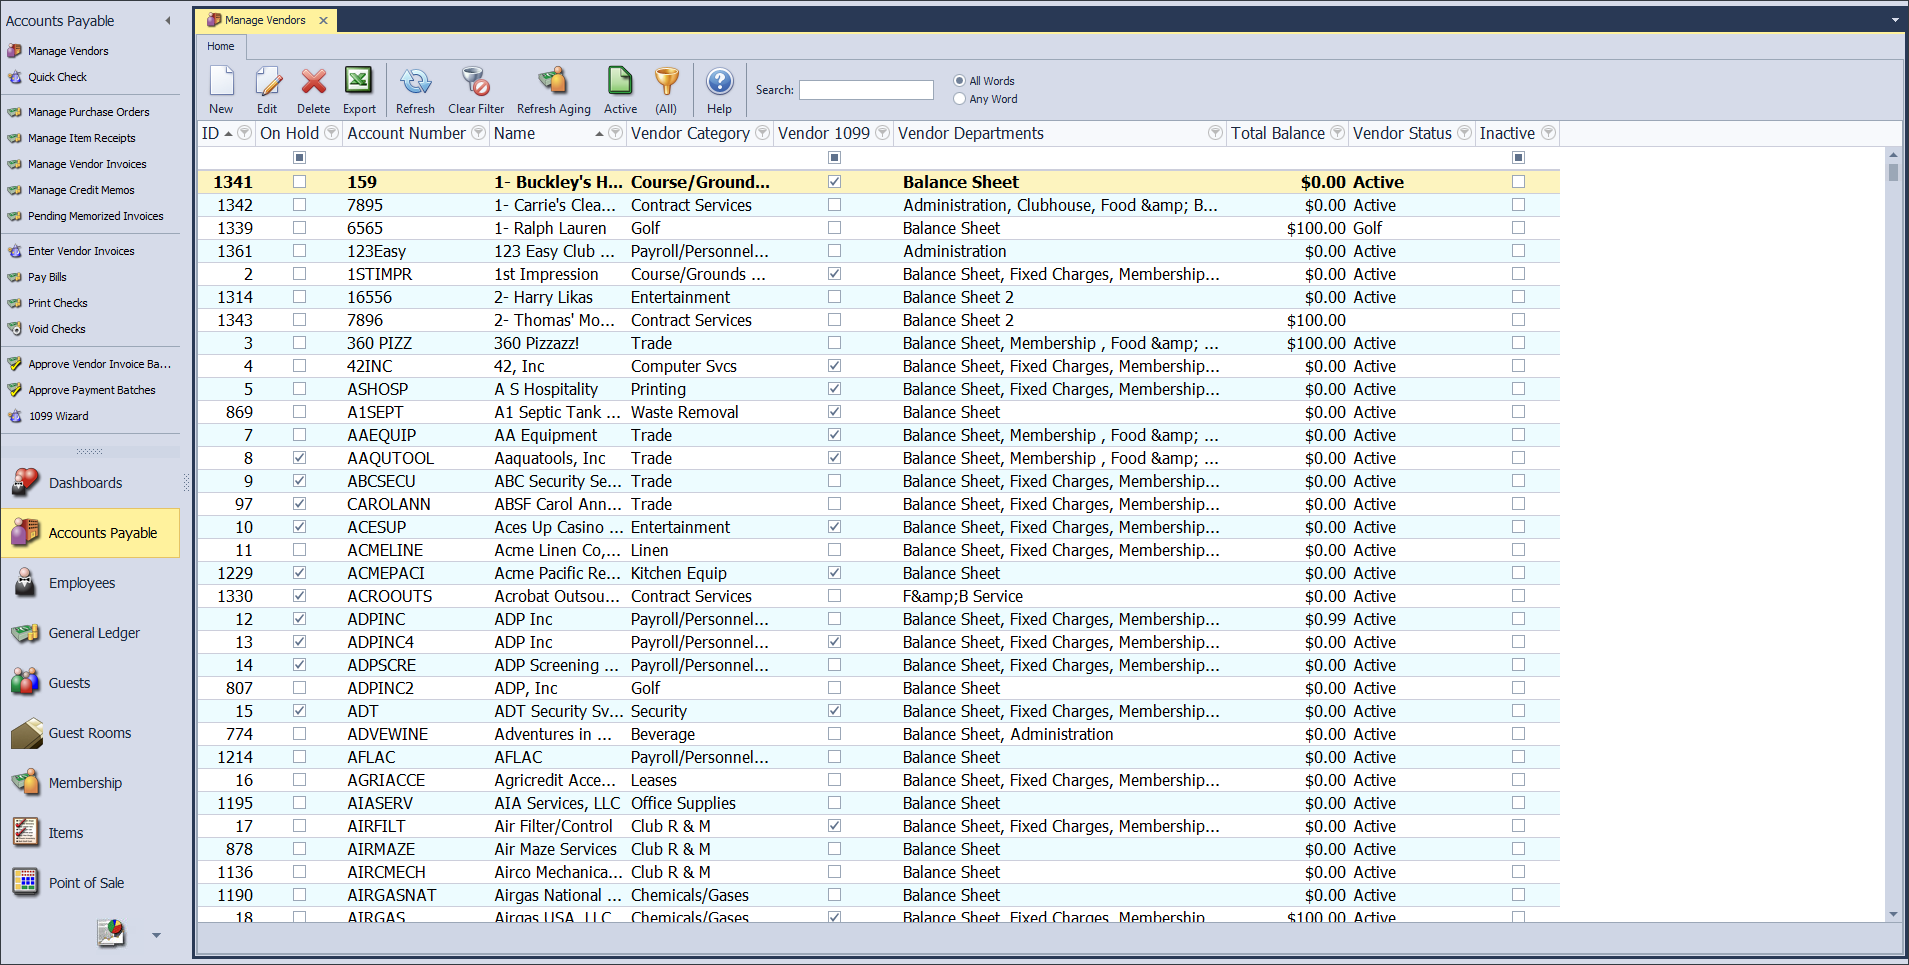
Overview
The Manage Vendors section includes adding and editing Vendors, as well as, the Manage Vendor Grid.
Required Permissions
Accounts Payable
Add/Edit/Delete Vendor
Departmental Rights
Accessing the Tool
The Manage Vendors screen loads by default when Accounts Payable is selected on the User Menu.
To access the Manage Vendors tool from another menu in Accounts Payable,
Click on Manage Vendors.
The Manage Vendors screen will load, and can be customized and filtered like all grids in the system.
Adding a New Vendor
To add a New Vendor:
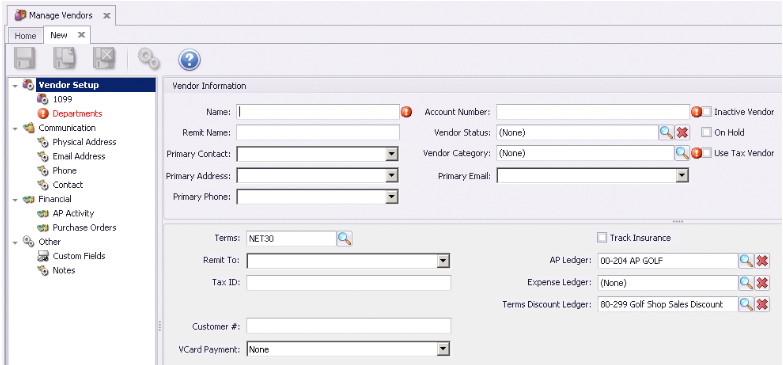
Click the New icon on the Manage Vendors Screen.
The Vendor Setup screen will launch.
Vendor Setup Tab
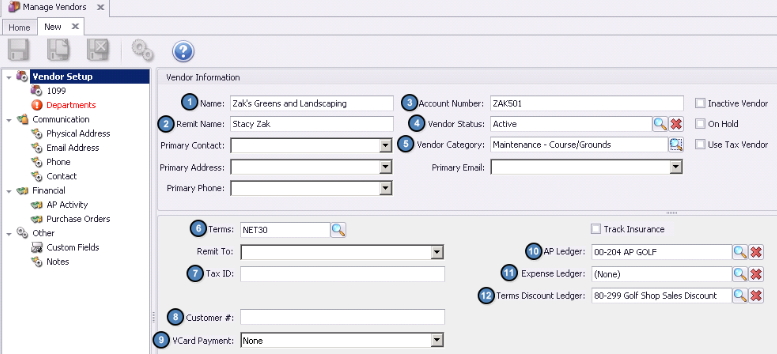
Name (Required) – Vendor Name
Remit Name – Name that should print on the checks if not Vendor Name.
Account Number (Required) – Unique identifying id for vendor, field accepts alpha and numeric characters.
Vendor Status – Used for reporting purposes to categorize the Vendors.
Vendor Category (Required) – Used for reporting purposes to categorize the Vendors.
Terms (Required): Designate Vendor Payment Terms. Default will auto-populate, however, override may be made here.
Tax ID: Vendor’s Government issued Tax ID # used when generating 1099’s.
Customer #: For Vendors who are also Clients, populate this number for cross-referencing.
VCard Payment: Only applicable when Edenred integration is utilized.
AP Ledger - By default, the AP Ledger set as the default AP Account in System Settings will populate in this field. However, the AP Ledger can be overridden per Vendor here, if applicable.
Expense Ledger - Select the default Expense Ledger for the Vendor when applicable. Population of this field is used as a best practice to help quicken the Invoice Entry Process.
Note: The Expense Ledger can be overridden from this G/L setting during the invoice entry process.
Terms Discount Ledger - By default, the Terms Discount Ledger set as the default Terms Discount Account in System Settings will populate in this field. However, the Terms Discount Ledger can be overridden per Vendor here, if applicable.
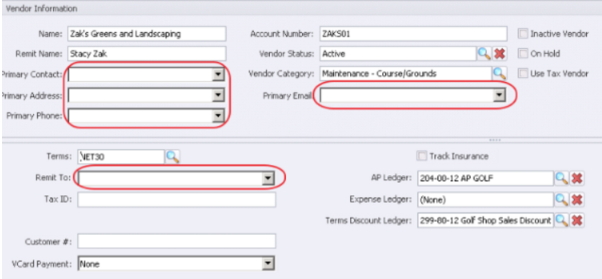
Note: The following fields will be available for population based on data populated in other tabs.
Primary Contact/Address/Phone/Email – Used to store employee contact information for the Vendor.
Remit To: Used when the vendor address is not the address the check should be mailed to.
Other Options:
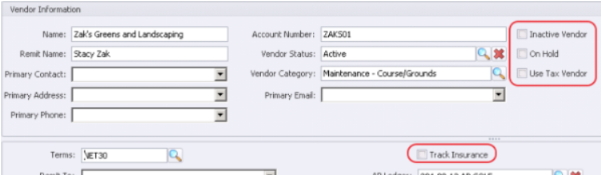
Inactive Vendor – When selected, the Vendor will not display when creating Vendor Invoices.
On Hold - When selected, payments will not be able to be made to the Vendor.
Use Tax Vendor - When selected, the Vendor is designated as a Vendor subject to Sales and Use Tax.
Track Insurance - When selected, the Insurance Tab will activate, and Insurance Certificates for the Vendor can be stored in the system.
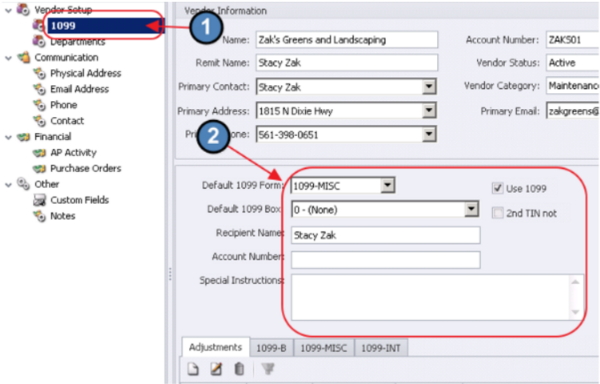
1099 Tab
The 1099 tab is used to designate if a vendor should receive a 1099, and to store 1099 information if relevant.
Use 1099 – check to specify that the Vendor receives a 1099. The default 1099 form and default 1099 box fields will become available.
2nd TIN not - check to specify that the Vendor is subject to the “two notices in three year rule”
Default 1099 Form – Select from the list of 1099 form types.
Default 1099 Box – select the box it should print in on the 1099 form.
Recipient Name – Used if different than the Remit Name or Name.
Account Number – Used when sending more than one 1099 to a Vendor to designate account.
Special Instructions – Notes field for additional information.
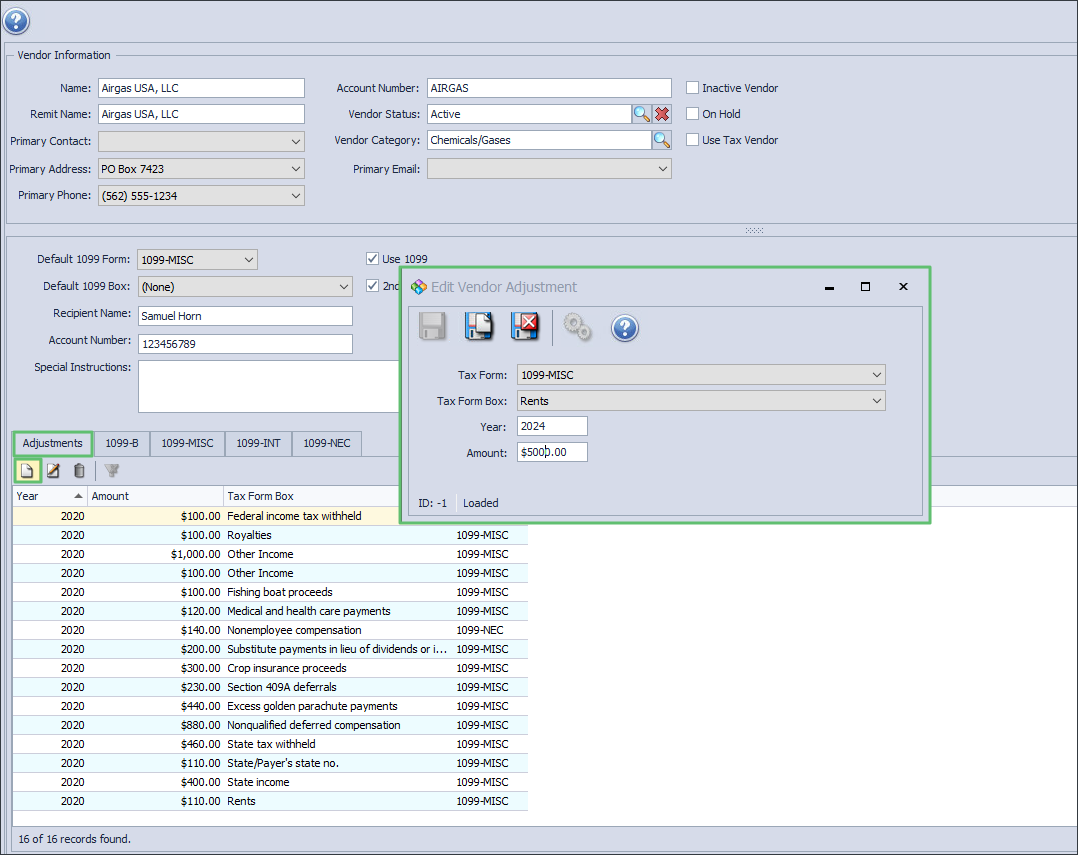
Adjustments Tab – used to adjust vendor 1099 amount, positive adjustments will increase 1099 amount and negative amount will decrease it.
To add a 1099 tax adjustment, click the New icon on the Adjustments Tab. Then, complete the Edit Vendor Adjustment form, and click Save and Close.
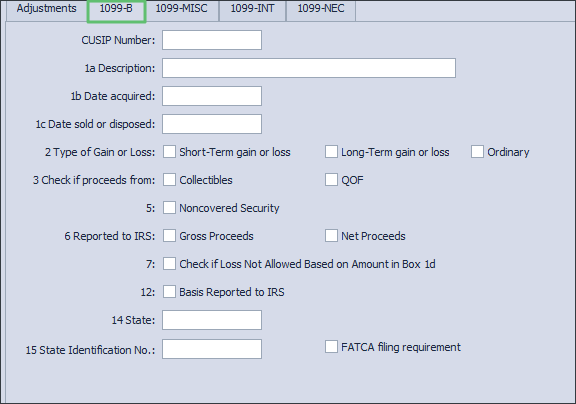
1099-B Tab - when selecting Default Form 1099-B complete this tab.
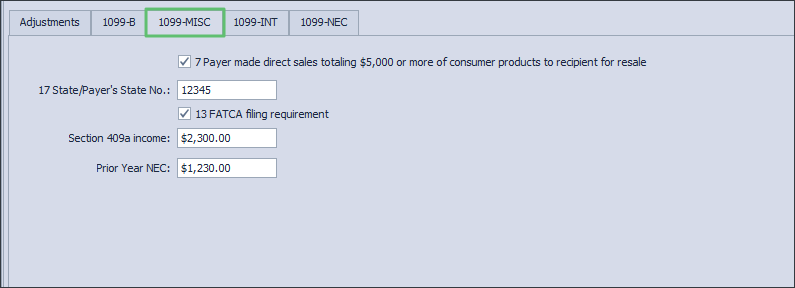
1099-MISC Tab – when selecting Default Form 1099-MISC complete this tab.
1099-INT Tab – when selecting Default Form 1099-INT complete this tab.
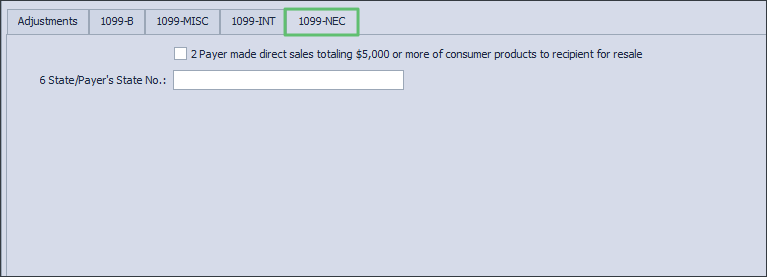
1099-NEC Tab - when selecting Default Form 1099-NEC complete this tab.
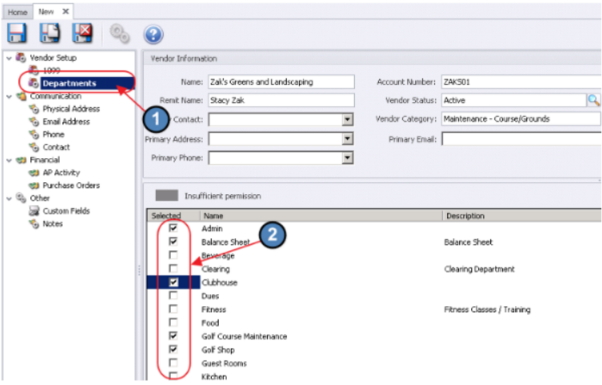
Departments Tab
This information is used for security purposes; only users with matching departmental rights will be able to view this vendor. Employees that create Item Receipts and Items, will need to have matching departmental rights on any vendor that they use.
Make sure to check all appropriate departments.
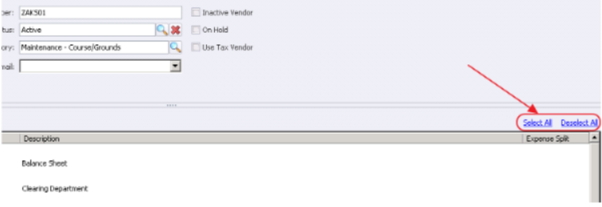
Note: the Select All, and Deselect All buttons exist at the top-right of the grid to assist with mass selection or de-selection.
This tab is also used to set default percentages per department when the expenses are almost always split in the same way. Using the expense ledger set on the account tab, when an invoice is created for this vendor the amount of the invoice will be split automatically to the different departments.
Click in the Expense Split column for the selected Department
Type percentage without the percent sign (e.g. 50% would be entered as 50).
Note: The system will not check your math. Be sure all splits add up to 100. Failure to do so will cause invoice lines to not split properly.
Communication Tabs
This set of tabs houses the Main Contact information for the Vendor.
Physical Address Tab
The physical address contact information is stored on this tab. To add a new address,
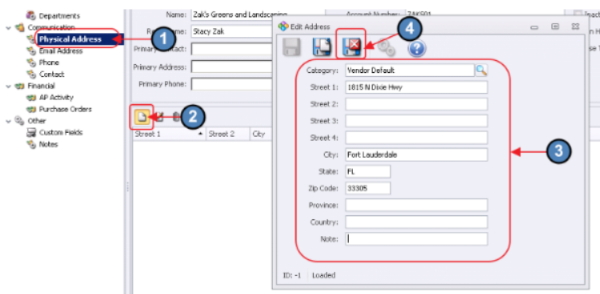
Click the New icon on the Physical Address tab.
Complete the Edit Address form.
Click Save and Close.
Email Address Tab
The email contact information is stored on this tab. To add a new email address,
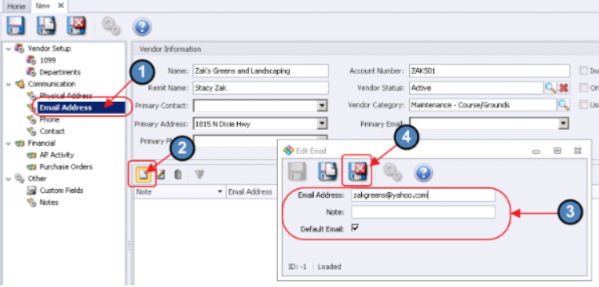
Click the New icon on the Email Address tab.
Complete the Edit Email form.
Click Save and Close.
Phone Tab
The phone contact information is stored on this tab. To add a new phone number,
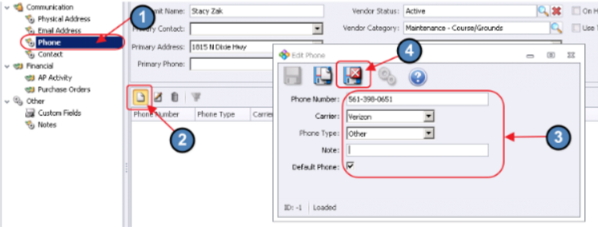
Click the New icon on the Phone tab.
Complete the Edit Phone form.
Click Save and Close.
Note that entering the Carrier information is necessary only if SMS messaging will be implemented.
Contact Tab
The individual contact information is stored on this tab. To add a new contact,
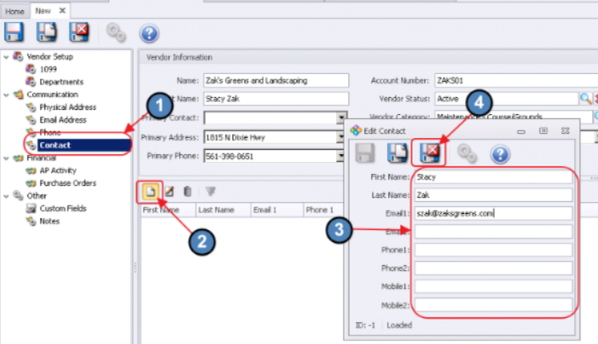
Click the New icon on the Contact tab.
Complete the Edit Contact form.
Click Save and Close.
Financial Tabs
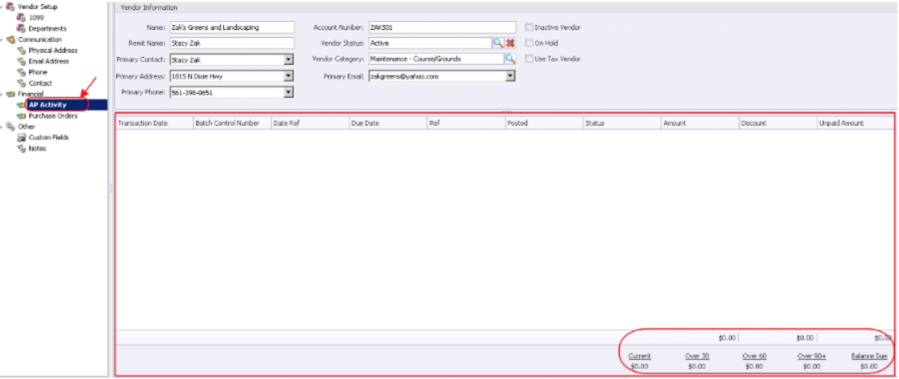
AP Activity Tab
The AP Activity tab provides a quick reference for viewing transactions for this Vendor as well as the A/P Aging details for this Vendor.
Every line of activity contains the following :
Transaction Date – Batch date, date used to post to the general ledger
Batch Control – Batch number in which the item is included
Date Ref – actual date of the item
Due Date – Date the invoices are due based on the invoice entry
Ref – invoice number, credit member number or check number
Posted – flag to show if the item is posted or not
Status - designates line was Paid (P), Received (R), blank (neither), or Custom status
Amount – amount of the item
Discount – on invoice, discount amount taken when invoice was paid
Unpaid Amount – on invoices amount left to be paid.
To view an activity double click on it.
Invoices – will display details of the invoice. The label across the top will tell if the invoice has been paid or not.
The tax form box override link can be used to change the 1099 box the item is set to. View batch posting link can be used to view the batch report.
Checks – Will display the Payment Batch report
Voided Checks – will display the General Journal batch report.
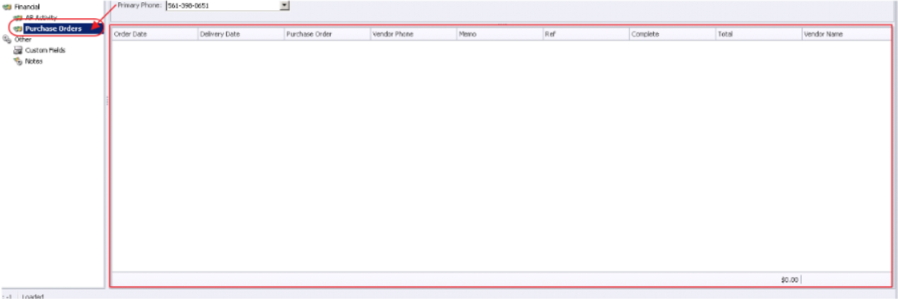
Purchase Orders
Similarly, the Purchase Orders tab provides a quick reference for viewing purchase order details for this Vendor.
Every line of activity contains the following:
Order date – Date the items were ordered from Vendor
Delivery Date – estimated delivery date of items
Purchase Order– Number used to identify the Purchase Order
Vendor Phone – Phone as entered on Purchase Order
Memo – Data entered in Memo field on Purchase Order
Ref – Data entered in Ref field on Purchase Order
Complete – Flag to show if all items have been received
Total – total amount of Purchase Order
Vendor Name – Vendor name as entered on Purchase Order
To view a purchase order, double click on it.
Other Tabs
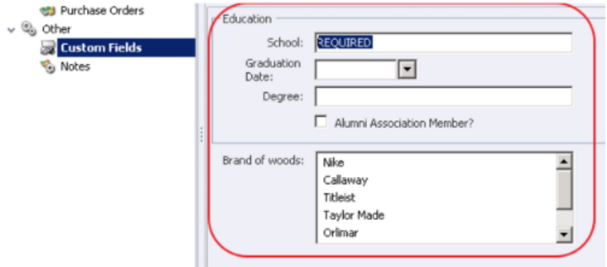
Custom Fields Tab
The Custom Fields tab displays all available Vendor Custom Fields for storing additional information. Custom fields will vary based on club preferences.
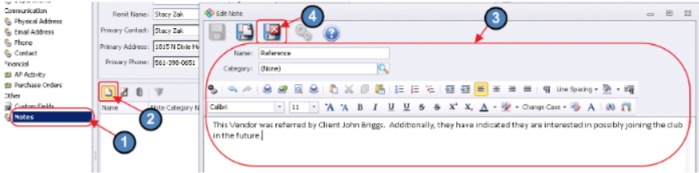
Notes Tab
The Notes tab serves as a repository for notes pertaining to the Vendor. To add a new note,
Click the New icon on the Notes tab.
Complete the Edit Note form.
Click Save and Close.
Editing Vendors
To Edit an existing Vendor’s setup,
Search for the Vendor and select them on the manage vendor grid.
Click the Edit button within the Manage Vendors tools.
After edits have been made, click Save and Close.
Deleting Vendors
Within the Manage Vendors tool, delete an existing Vendor (created in error) by:
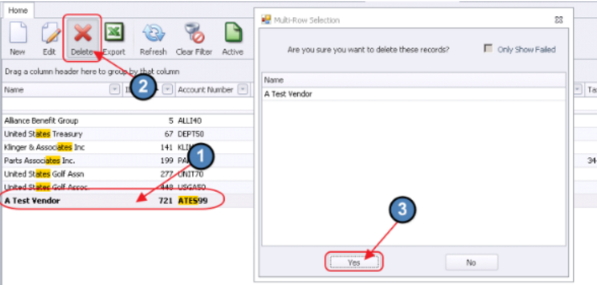
Selecting the Vendor and clicking the Delete button. Confirm deletion by clicking Yes.
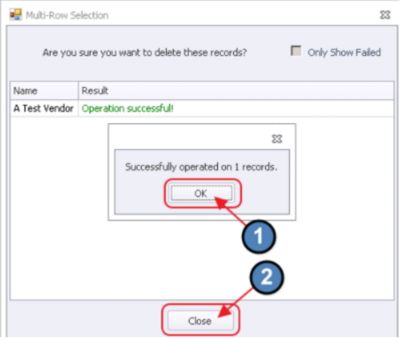
It is highly recommended to Inactivate rather than delete Vendors (unless the Vendor has no activity, or has had no activity for a significant period of time.)
Click OK to acknowledge success, and Close to return to main Manage Vendors screen.
Best Practices
Add default Expense Ledger to Vendors when applicable. This will help quicken the Invoice Entry Process.
Establish a naming convention for assigning Vendor Account Numbers to help improve Accounts Payable efficiencies in entering and researching Vendor items.
Periodically, the Vendor Master file should be reviewed by Management, and Vendors no longer utilized should be inactivated (and depending on period of inactivity, deleted from the master files) to improve financial controls.
For expenses consistently split between departments, utilize the Expense Split feature in the Departments tab of the Vendor Setup to automate expense allocation to the appropriate areas.
FAQs
Q. How many fields do I have to fill out to create a Vendor?
A. The Vendor Name, Account Number (Vendor Number), Vendor Category, Terms, and the Department(s) authorized for the Vendor are the required fields to create a Vendor.
Q. How can I see the Insurance Tab to track our Vendor Certificates of Insurance?
A. The Insurance tab is only visible when the Track Insurance option has been selected in the main Vendor Setup screen. Once this is checked, records to track certificates of insurance can be added to the Vendor file.
