Mobile App - Push Notifications
- Kelsie Livingston
- Emily Carlson
Table of Contents
Overview
Push notifications open a new channel of communication where you can quickly send notifications, promotions, and other information to members that have the mobile app with push notifications enabled.
Required Permissions
Administrator
Accessing the Tool
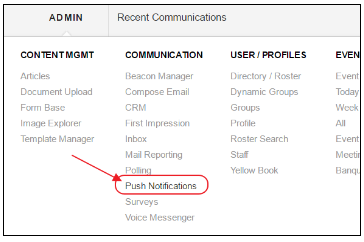
Clubs can send notifications using the Push Notifications tool found in the Admin Toolbar.
Using Push Notifications
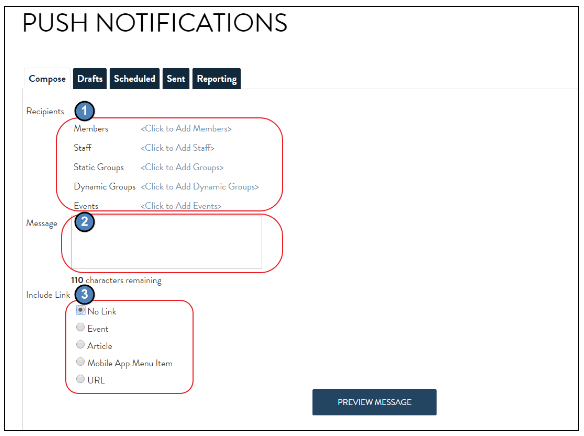
To send a push notification, define the following:
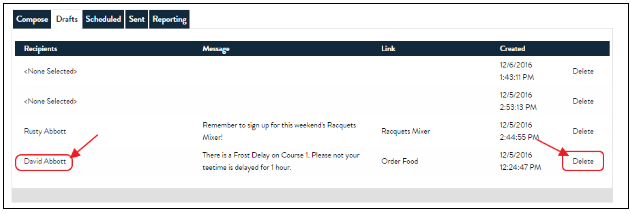
Recipients: Recipients may include a specific Member(s), Staff, Static or Dynamic Groups, and/or a specific Event’s attendees.
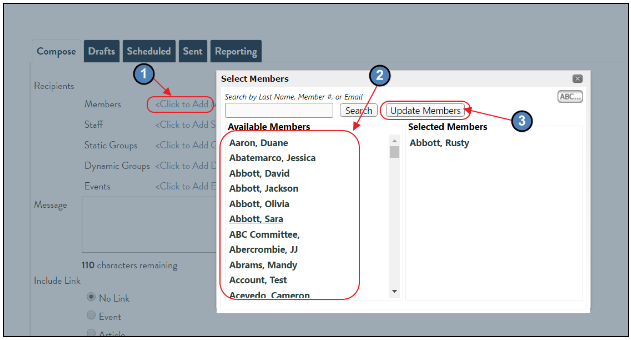
To define the recipients, click on the desired link, select recipients (by clicking on the list on the left), and click Update to finish making selection.
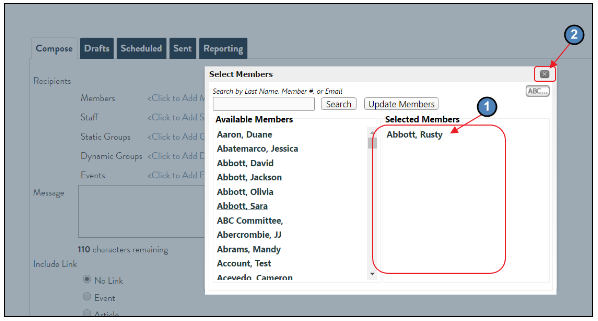
To deselect, click on the Selection in the Selected Members column to return the selection to the Available Members column. To exit without saving changes, click the X in the upper right-hand corner.
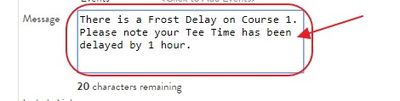
Message: define Message to send using 110 characters or less.
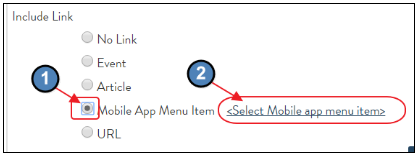
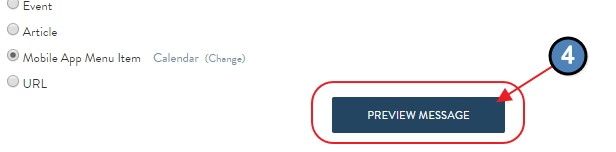
Links: If desired, define a link to include with the message. The link may go to the Club Calendar, Article, Directory, etc, or another designated URL. To include, select the desired radio button, and select desired link. Note: Including a link is not required.
When complete, click the Preview Message button to review message prior to it being sent.
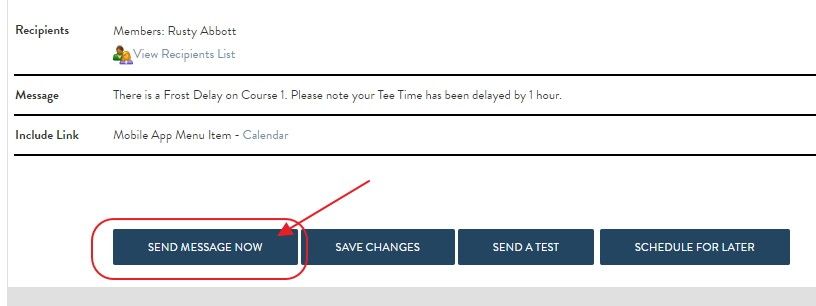
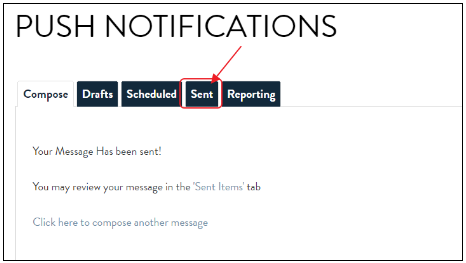
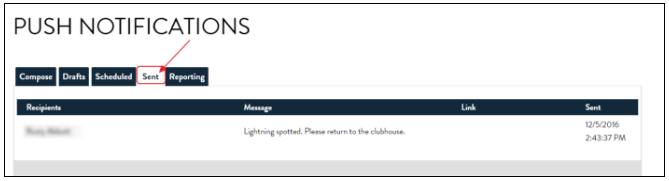
After previewing, click Send Message Now to send. A confirmation message will appear, and message now appears on the Sent tab.
Other options for editing the current message, saving the current message (without sending), sending a test, and/or scheduling the message to be sent at a later time also exist on the Preview Message screen.
Edit: Use when edits need to be made to the current message prior to sending.
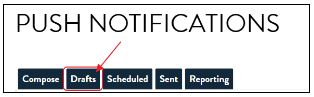
Save Changes: Use when drafting a message, but not sending, and not scheduling for later send. Once saved, message will appear on the Drafts tab. To re-open a draft message for further editing, click on the Recipients link. Or, to discard a draft, click Delete.
Send A Test: Use when you would like to send a test message to an Admin/Member/Staff, prior to sending out the message to all designated recipients. You will be prompted to select a recipient to receive the test.
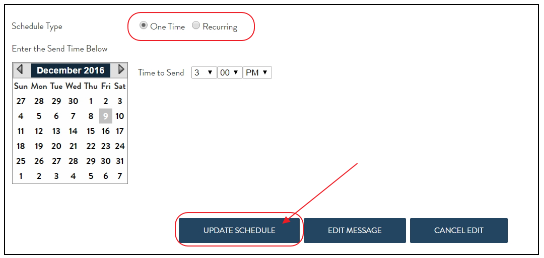
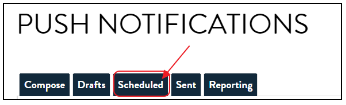
Schedule for Later: Use when you have a fixed date and time in the future you would like to schedule the message to be sent. Could be set to send One Time, or Recurring to all Recipients selected. Click Updated Schedule to save. Once scheduled, message will appear on the Scheduled tab.
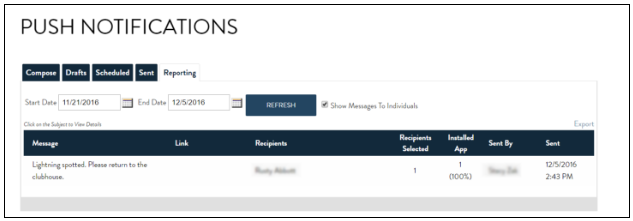
The Reporting tab contains available data regarding the messages that were sent.
Best Practices
Implement Beacons to encourage full usage of the App capabilities, including automatic notifications to Members for managing pace of play, and helping your Management team know who is on-site, and where they are located at any given time.
Use care when sending Push Notifications to ensure the frequency is appropriate. Members deeming notifications are too frequent may opt to turn off their push notifications.
FAQs
