Notifications
- Joshua Morrison
- Emily Carlson
- Kim Saunders
Table of Contents
Overview
Used to setup custom notifications sent to members/guests with service reservations.
Required Permissions
Professional Service Admin
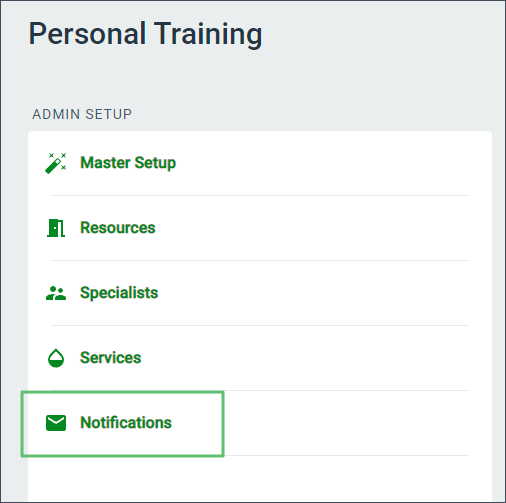
Notifications
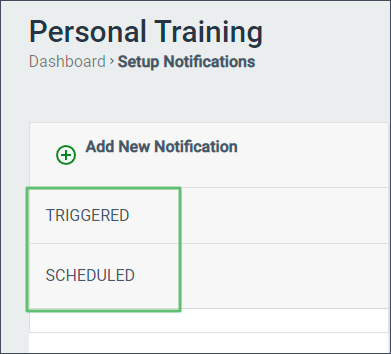
The Notifications tab is used to set up custom notifications to be sent to members/guests that have reservations, which can be sent on a scheduled basis or triggered to be sent based on an action taken in the system. Notifications can be set up as emails or text messages/app push notifications and are categorized in the left hand side of the screen by the following categories:
Triggered: The notification is sent when a service/lesson is booked, canceled, or updated
Scheduled: The notification is sent on a specific schedule, which can be one time only or on a recurring basis.
To create a new notification:
Click + Add New Notification button.
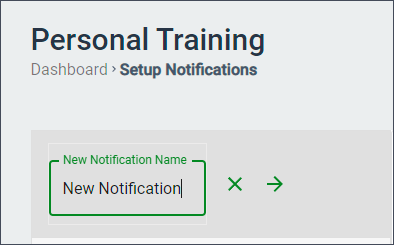
Click into the New Notification Name box and enter the name of the notification.
Select the arrow icon to begin configuring the notification in the right hand of the screen.
To edit an existing notification:
Click on the notification in the left hand column.
The notification will open in the main screen where changes can be made.
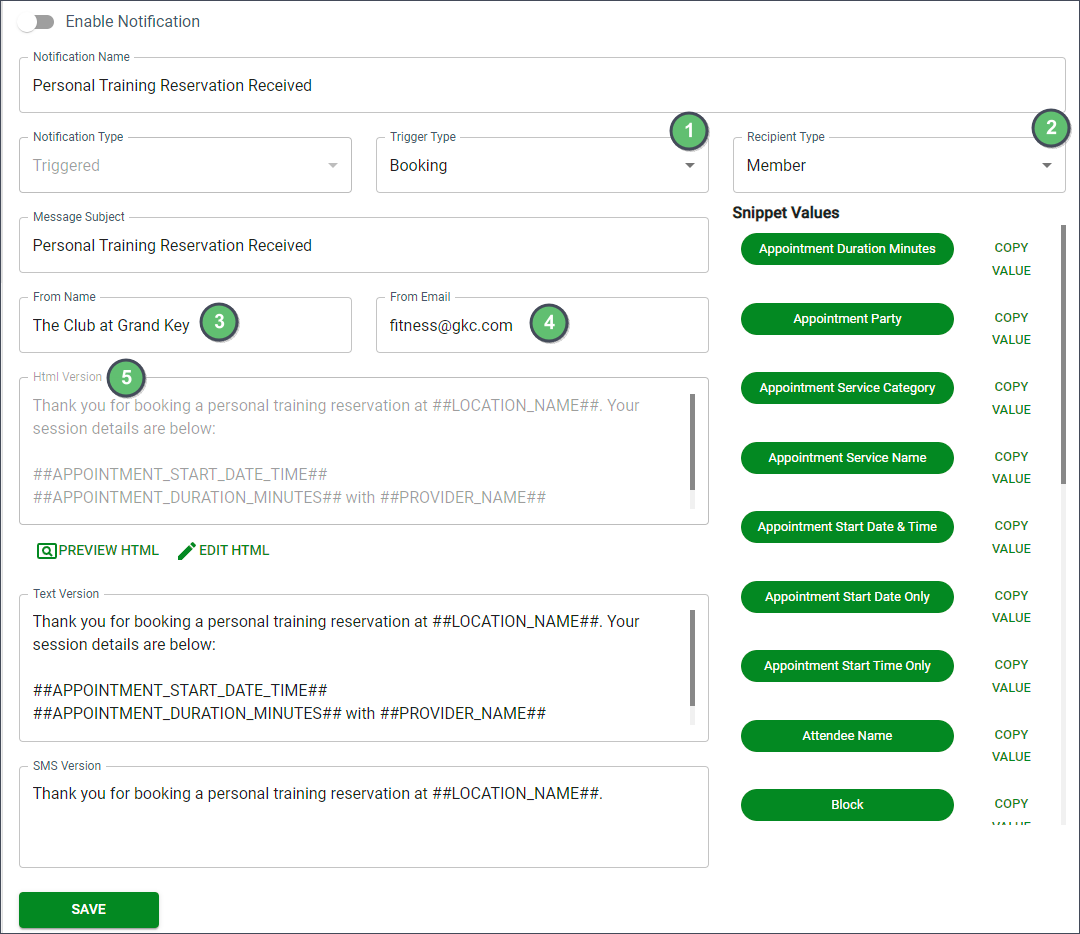
Components of a Triggered Notification
Enable Notification: Controls enabling the notification. Toggle the button on to enable the notification to be sent per the action configured to trigger it. Toggle it off to disable the notification from being sent.
Notification Name: The notification name entered in the New Notification Name box and can be adjusted as necessary. This will not be visible to members.
Notification Type: The type of notification (Triggered).
Trigger Type: The type of action that will trigger the notification. Options include:
Booking: sent when an appointment is made
Cancellation: sent when an appointment is canceled
Update: sent when changes are made to the existing appointment
Recipient Type: The recipient group of the notification. Options include:
Member: a member that has a service appointment
Guest: a guest that has a booking whose email address you have on file
Admin: all professional service administrators
Specialist: the specialist for whom the appointment is scheduled with
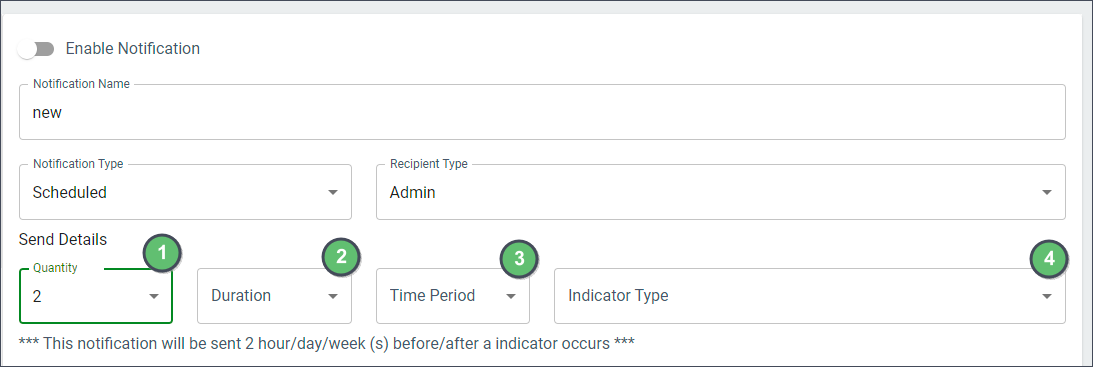
Components of a Scheduled Notification
Enable Notification: Controls enabling the notification. Toggle the button on to enable the notification to be sent per the configured schedule. Toggle it off to disable the notification from being sent altogether.
Notification Name: The notification name entered in the New Notification Name box and can be adjusted as necessary. This will not be visible to members.
Notification Type: The type of notification (Scheduled).
Recipient Type: The recipient group of the notification. Options include:
Member: all members that have or have had an appointment
Guest: all guests that have or have had a service appointment whose email addresses you have on file
Admin: all professional service administrators
Specialist: the specialist for whom the appointment is/was scheduled with
Custom: allows the recipient group to be customized by selecting all types (Members, Specialist, and Guests) or a combination of types. Also requires that a scheduled start date and scheduled end date be defined. Notifications will only be sent during this scheduled time.
Quantity: Used to define when the notification will be sent. Options include:
Immediately - will send the notification immediately after a Scheduled Appointment occurs. When using Immediately, the duration, time period, and indicator type are not specified since they are not applicable since the notification will be sent out immediately.
Numeric Value - The elapsed time that will be used in conjunction with the duration, time period and indicator type for sending the notification. (Examples: 2 Days Before a Scheduled appointment; 1 Month Before a Member Birthday; 2 Hours After a Scheduled Booking).
Duration: The unit of measure that will be used in conjunction with the Quantity and Time Period to send the notification. Options include:
Days
Hours
Weeks
Months
Years
Time Period: The time period in relation to the Indicator Type (scheduled appointment or member birthday) that will be used in conjunction with the Quantity and Duration to send the notification. Options include:
Before: Use if the notification is to be sent before the event
After: Use if the notification is to be sent after the event
Indicator Type: The type of event that will prompt the notification to be sent. Options include:
Scheduled Appointment
Member Birthday
*** Sentence: Clarifies when the notification will be sent per the parameters configured.
Shared components of Triggered and Scheduled Notifications
Message Subject: Subject line of the email or text message. This will be seen by the member, guest, admin, or specialist.
From Name: Name of the club or specialist sending the notification
From Email: Email address of the sender
Enter the message to be sent in the appropriate section(s):
HTML: Used for sending an email formatted using a rich-text editor.
Select Edit HTML and type email
Adding Snippets - Use the Copy Value button next to a specific snippet and then paste into the html field to use appointment specific snippets that will populate the reservation-specific information pertinent to the recipient.
Select Preview HTML to view a preview of the message
Text Version: Used for sending an email with plain text formatting. When this option is used, no styling options are available. The email message will appear exactly as it is typed.
Type message within the Text Version Field
SMS Version: Used for sending a SMS Text Message or a push notification via the Club mobile app to a mobile phone.
Type text message/push notification within SMS Version field.
Maximum length is 160 characters.
After adding or modifying a notification, click Save at the bottom of the screen to save the changes.
Note: The Save button changes from gray to green color when any changes are made to the notification. This serves as an indication that changes were made and need to be saved.
To delete a notification:
Click the Delete button in the bottom right hand corner of the screen.
Best Practices
FAQs
The Save button changes from gray to green color when any changes are made to a notification. This serves as an indication that changes were made and need to be saved.
