Full Suite - Sync Groups from Office to Website
- Stacy Zak
- Benjamin Hacker
- Danielle Donley (Unlicensed)
Table of Contents
Overview
The Unified Platform allows Clubs to manage their Member Groups seamlessly across the (back) Office and Axis-Website, ensuring Club Administration has the tools they need for managing and communicating to Groups, and Members can easily join Groups that are relevant to them.
Required Permissions
Office Administrator
Website Administrator
Create a Group
All Groups that will be shared between the Office and the Axis-Website need to be created in Office to effectively sync with the Website.
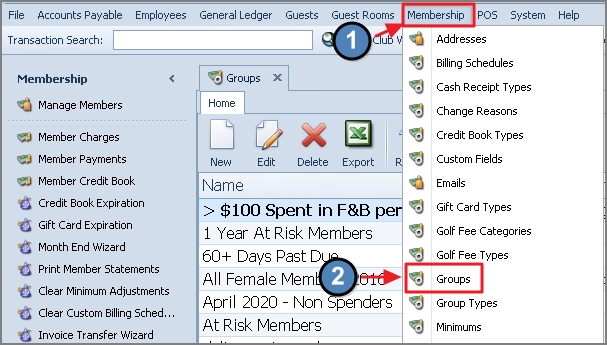
Login to CMA (Clubessential Management Application).
Navigate to Membership.
From the sub-navigation options, select Groups.
Click the New icon.
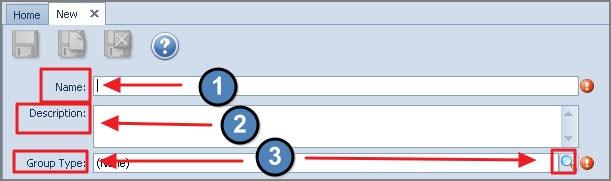
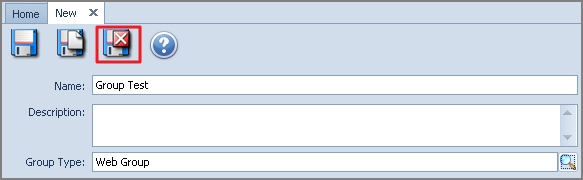
Name
Description (optional)
Group Type:
Static - Fixed group of Members assigned by the Administrator. Members do not have the option to add themselves or opt-in to this group.
Static - Opt-In - Fixed group of Members but also allows additional members to join or opt-in to this group.
Dynamic - Variable set of Members, based on the parameters associated with the group. Administrators set the parameters, and the system automatically assigns membership based on the parameters. Depending on the parameters set, the Membership of a Dynamic Group may change as criterion is met or not met.
Static Group
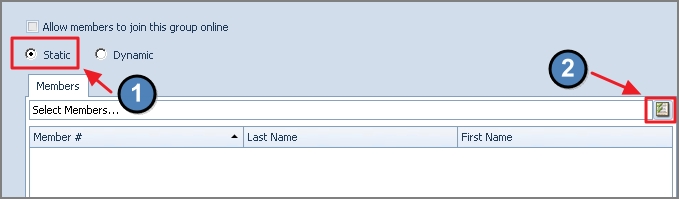
Select the Static radial button.
Click the Lookup icon to access the Member Selection screen.
Place a check mark next to the Member's Name.
Click Select.
Static Opt-In Group
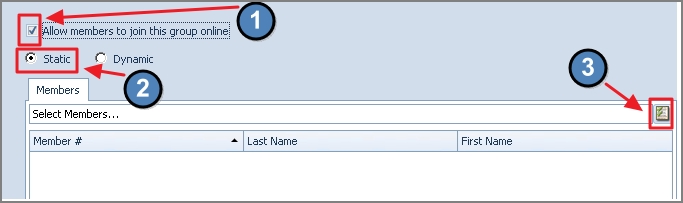
Select the box to Allow members to join this group online.
Select the Static radial button.
Optionally: Place a check mark next to the Member's Name.
Click Select.
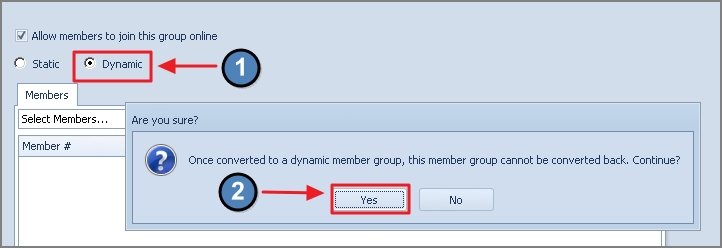
Dynamic Group
Confirm Dynamic Group setup by clicking Yes to the message, “Once converted to a dynamic member group, this member group cannot be converted back, Continue?”
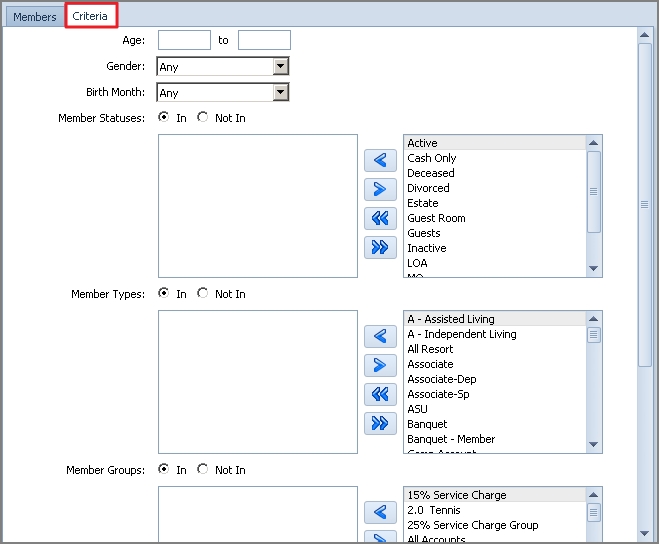
Click on the Criteria tab to specify parameters/criteria of the group.
Age
Gender
Birth Month
Member Status
Member Type
Member Groups
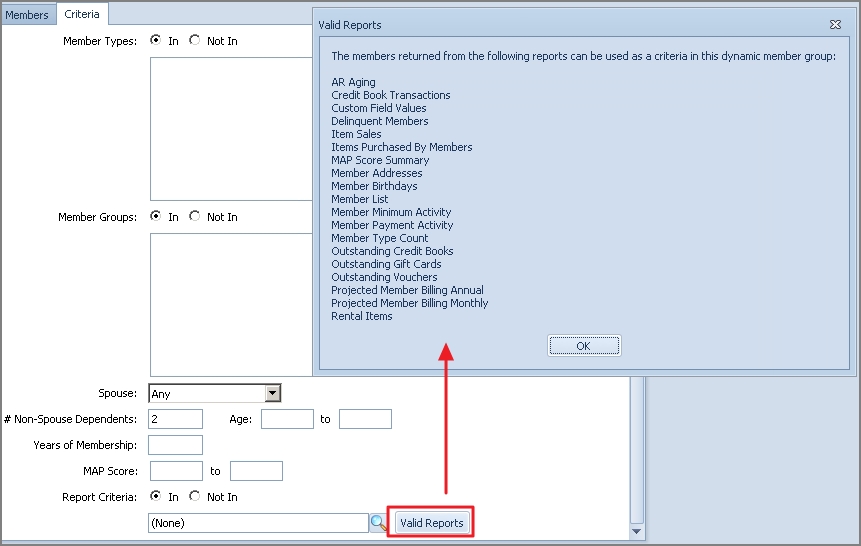
Spouse
#Non-Spouse Dependents and their respective age ranges *
Years of Membership
Report Criteria (the Valid Reports option will display which reports can be utilized to define Membership)
Click Save and Close.
*Non-Spouse Dependents - This is referring to the children associated with the Primary Member. The result of using this filter will only include the name of the Primary member who has children and does not include the name of the Spouse.
Enter the number of child/dependents to be included in the search results
Enter 1 or higher
IE. When entering ‘2', the system will include any primary member that has 2 or more children. If the number entered is '5’, the system will look for any primary members with 5 or more childrenIt is not required to enter actual age ranges. The Age filter should only be applied if the club tracks the Date of Birth for every Dependent record
Enable Groups Sync
Once Groups have been established in Office, they will need to be set to Sync to the Website.
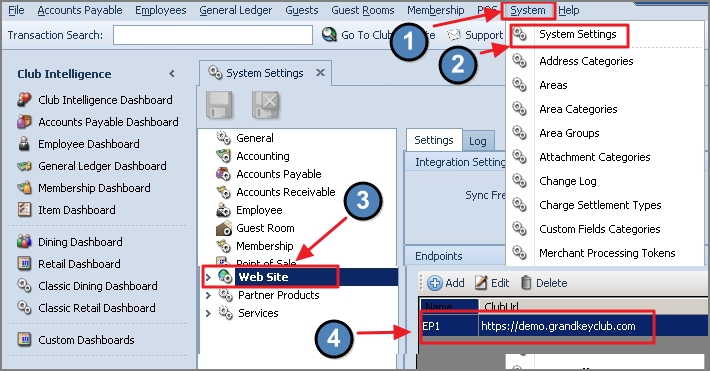
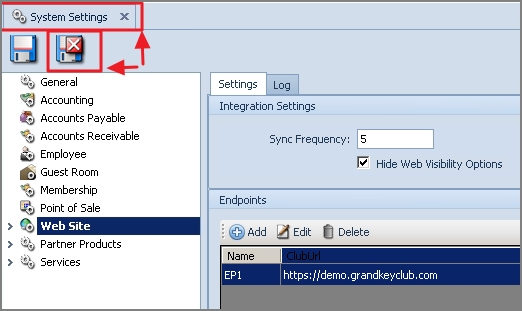
Navigate to System in the top navigation.
Click System Settings.
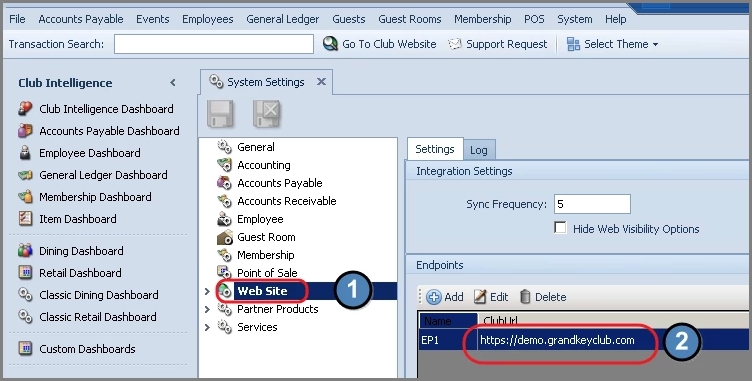
Click Web Site.
Double-click the Club url link (highlighted in blue)-This will open a new window.
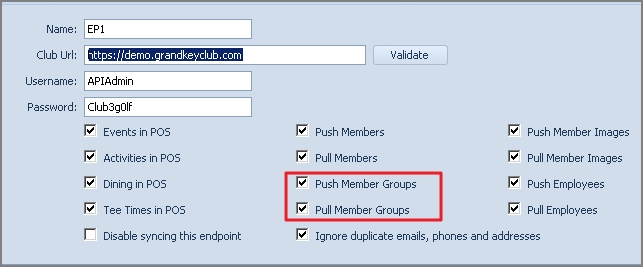
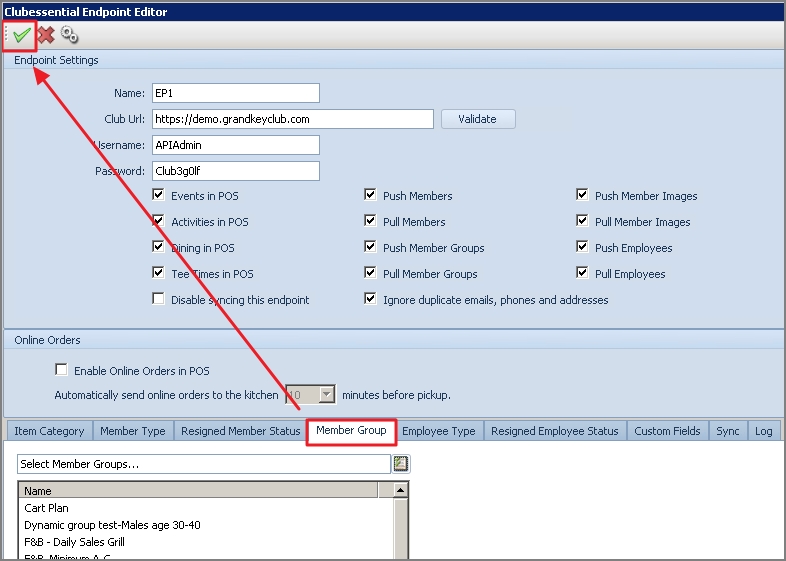
In the Endpoint Editor, ensure the boxes are checked for Push Member Groups and Pull Member Groups.
Add Group to the Sync List
Navigate to the Member Group tab.
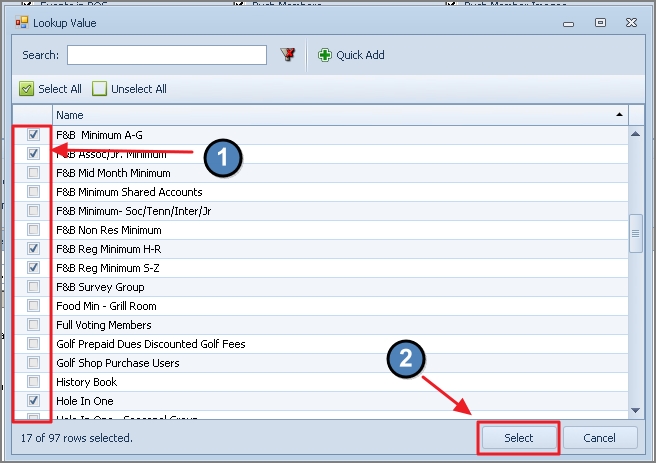
Click the Group selection icon.
Designate which Groups to Sync and click Select. (A check mark next to the Group indicates the Group will be synced).
Once selected, the Group will display on the Member Group tab.
Accept Changes (Green Checkmark) in the upper left corner of the screen.
Save and Close on the System Settings Screen to save changes.
Run a Manual Sync
Navigate to System in the top navigation.
Click System Settings.
Click Web Site.
Double-click the Club url link (highlighted in blue)-This will open a new window.
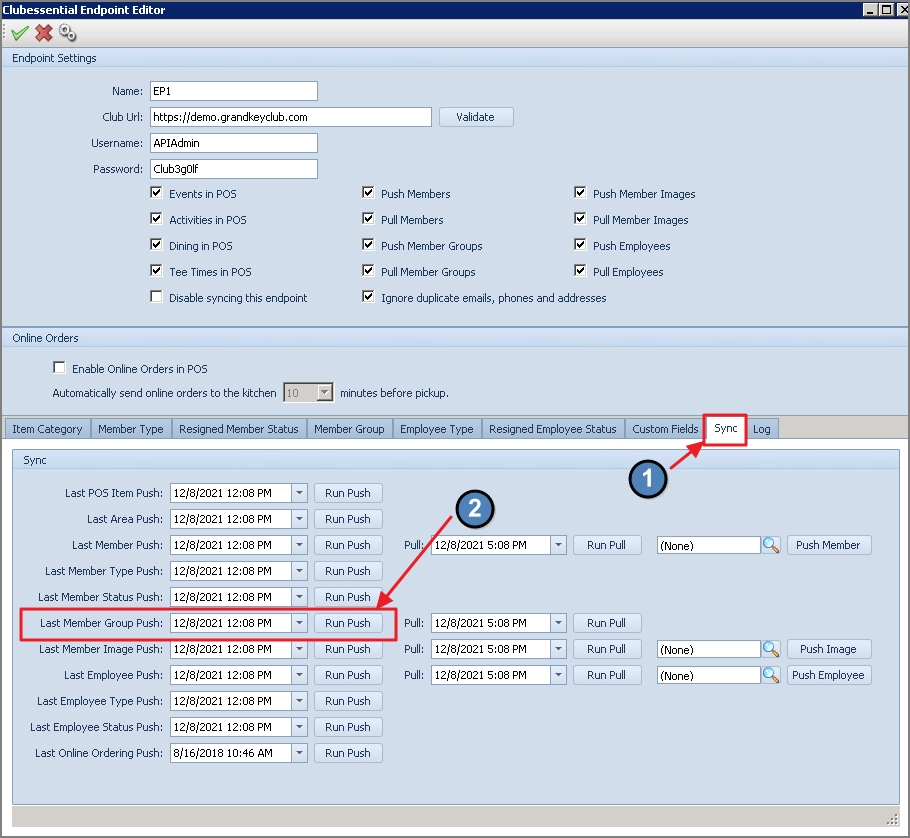
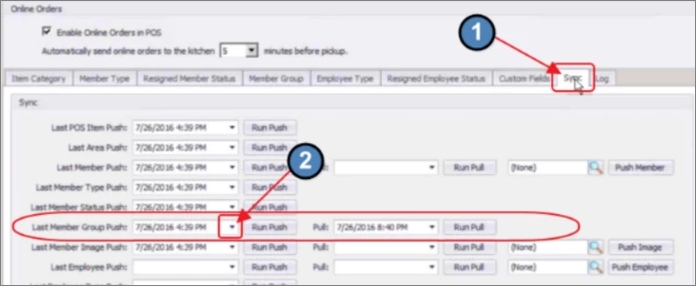
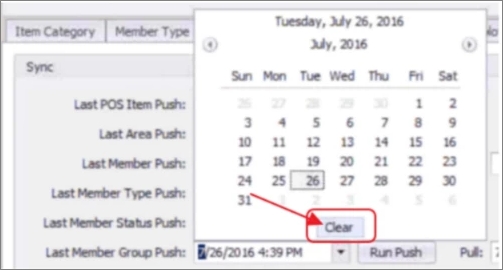
In the Endpoint Editor, click the Sync tab. The times of the latest Member Group Push (from Office to the Website), and Pull (from Website to Office), will be listed.
Click the arrow next to the time stamp to launch a Calendar with the Clear option. (Note: Same process could be done for Pull Option)
Click Clear to empty the date and time field.
Click Run Push.
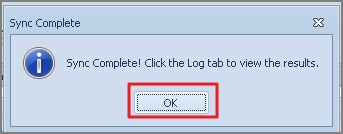
A Confirmation message will appear upon Sync completion. Click OK to continue.
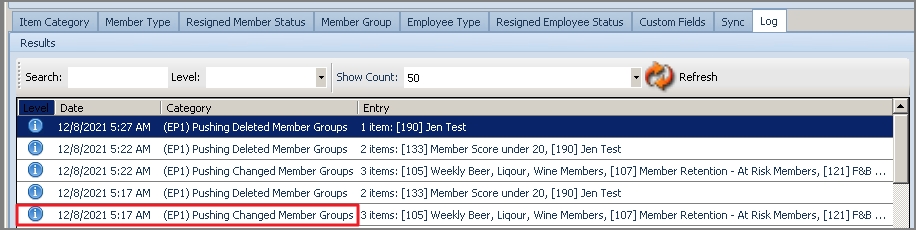
Click Log Tab to review the results of the Sync. Double-click the line in the detailed grid for more information on the Sync.
Related Resources
Best Practices
Create and Administer all Shared Groups in Office to ensure proper syncing with the Axis-Website.
Important Note: The only information that will sync from the Website back to Office, are changes to a Static/opt-in group. All other Group data will be push only from Office to the Website.
FAQs
Why aren’t the changes I made to a Group on the Website showing up in Office?
Other than Membership Adds of Static Opt-In Groups, all Groups must be created and administered from Office to ensure all changes sync appropriately with the Axis-Website
How often do groups sync?
The sync runs every 5-15 minutes. As changes are made in Office to Static or Static-Opt-In Groups, those will push over in the given timeframe. Dynamic groups updates once daily in Office and will push to the web once daily, unless manually changed.
