Full Suite - Calendar Events Integration
- Stacy Zak
- Benjamin Hacker
- Joshua Morrison
Table of Contents
Overview
The Unified Platform allows Clubs to manage their Events seamlessly across the (back) Office, Axis-Website, and POS application; ensuring Administration, Members, and the Dining Room have the tools they need to set up, register, and manage the Club’s events.
Required Permissions
Website Admin
Office Admin
Office/CMA
To effectively create an Event that integrates throughout the Unified platform, begin in Office with the Items needed for the event. An item must exist for every price level associated with an Event.
Configure Event Items
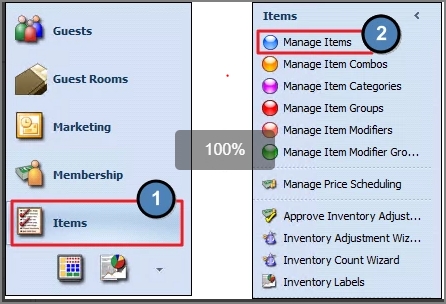
On the left hand menu, click Items.
Click Manage Items.
Within the search bar, enter the associated event item name.
Ensure all event Items exist. If they do not, set them up.
Configure Item Category
Next, navigate to the appropriate category to review/edit setup and ensure category is set up properly to sync with Axis Website product.
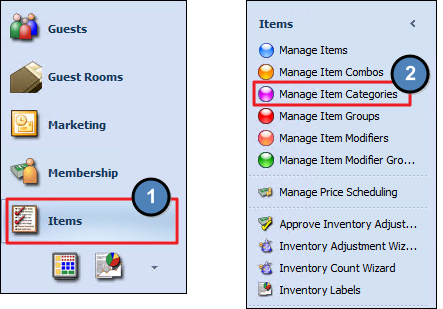
On the left hand menu, click Items.
Click Manage Item Categories.
Within the search, enter then name of the event’s Item Category.
Example: Club EventDouble click to Open.
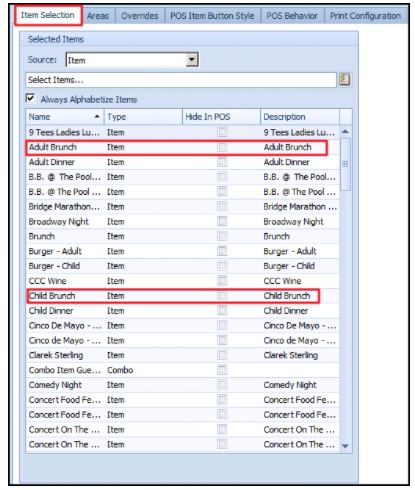
The Event Items will appear in listing on the Item Selection tab.
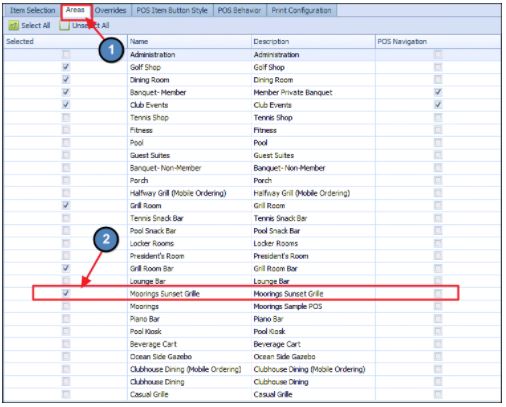
Click on the Areas tab to ensure the Area of the event is selected.
Click Save and Close.
Sync Data to Axis-Website
Now it’s time to sync the Event data (associated Event Items and related Pricing) to the Axis Website product
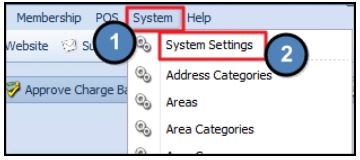
Click the System drop down, then System Settings.
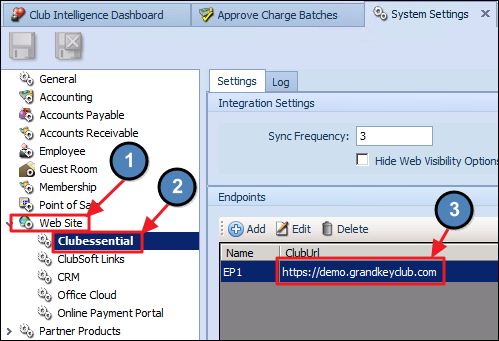
Expand the arrow next to Website, click Clubessential, and then double-click the Club Url as shown below to launch the Endpoint Editor.
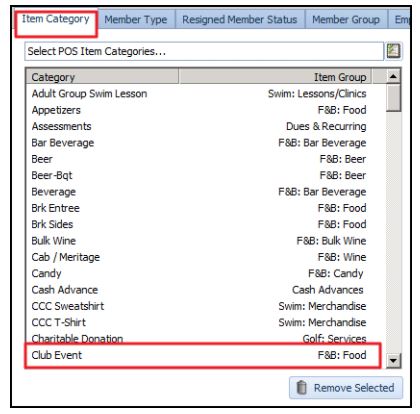
On the Item Category tab, ensure the Category attached to the Event is set to sync. If it is in the listing on the Item Category tab, it is already set to sync to the Axis-Website product.
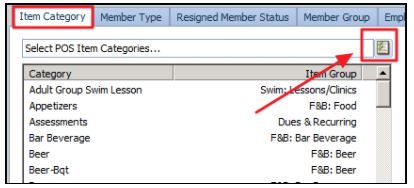
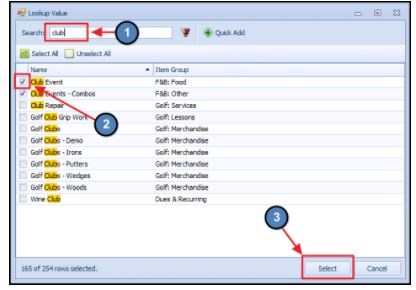
To add a Category, click the category button on the right.
Find the Category by performing a search, select the category, and click Select.
Click the green checkmark to Accept Changes.
Click Save and Close within the System Settings.
Axis-Website
Once the Office tasks have been done to ensure Items, Pricing, and Categories are properly set, proceed to the Axis-Website product to enable the event billing linked to these items.
Enable Billing on Event
Navigate to the club calendar through the website menu or through the Admin toolbar.
Click Add Event.
Follow normal process for adding a club event. Click here for step by step instructions.
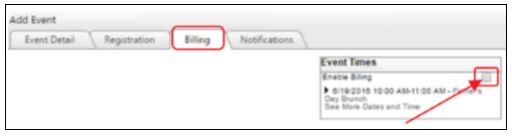
Navigate to the Billing tab of the event.
Click Enable Billing to open Items that are available for linking to the Event.
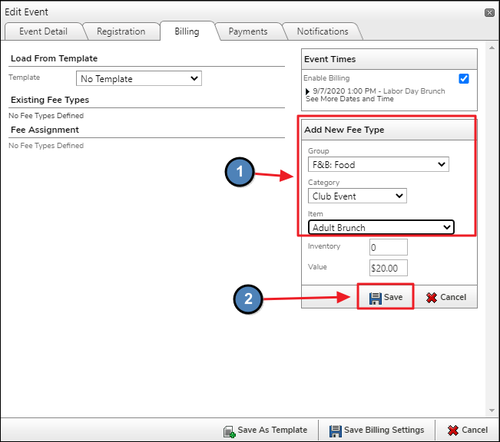
Under Add New Fee Type, select appropriate Group, Category, and Item, and then click Save.
Existing Fee Types will now show the item name.
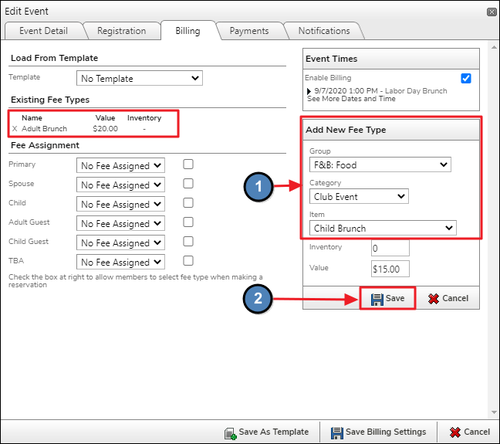
Repeat the above steps for additional fee types.
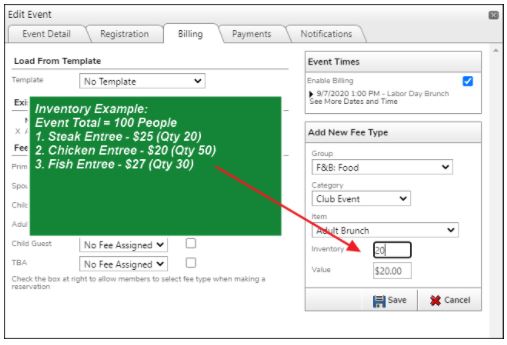
Use the Inventory option to designate a specific number of registration (or sales) for that Item. Once the Inventory runs out, the item no longer appears on the registration for Member selection.
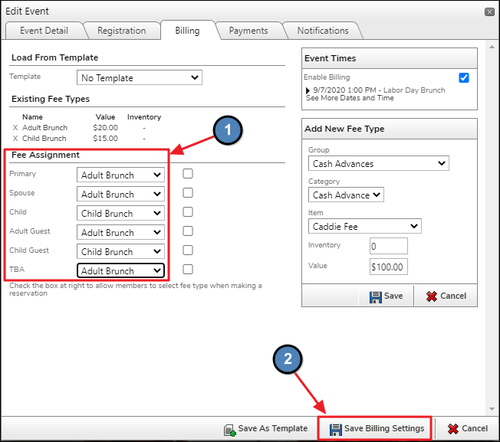
Under Fee Assignment, select the appropriate fee structure by member type.
Click Save Billing Settings.
Click Save and Close to close the Event.
Additional Resources
Best Practices
When price changes need to be made to an Event, make all Price Changes to the Items within Office. The price changes will then flow to the Axis-Website.
FAQs
We have identified items to sync, but they are not appearing in the Billing tab of the website. What’s the next step?
Ensure the Item Category for the Items you have set up for the Event are set to Sync by going to System Settings within the back Office, clicking on the Club Url endpoint, and verifying the Categories set to sync include the one attached to the Event.
When I pull a ticket in from the registration no items display on the ticket. When I look at the calendar event there are items attached to each relationship in the billing tab. Why are these members not seeing those items?
If the event was built and opened for registration before the items were added in the billing tab and a member registers, the system has no items to add to that registration. You can go to event manager and add those items to the registration. It is very important to add the items to the event before registration opens up to prevent this issue.
What does the checkbox next to each relationship mean?
If the club has more than one fee available on an event, (i.e. kids camp has a one, two, three, four, or five day option and items with different charges for each) checking that box will allow the member to select which item they wish. Note: To help ensure correct items are selected by members enter the highest priced item on each relationship when building the event.
