Office - Config - Area Layout
- Benjamin Hacker
Table of Contents
Overview
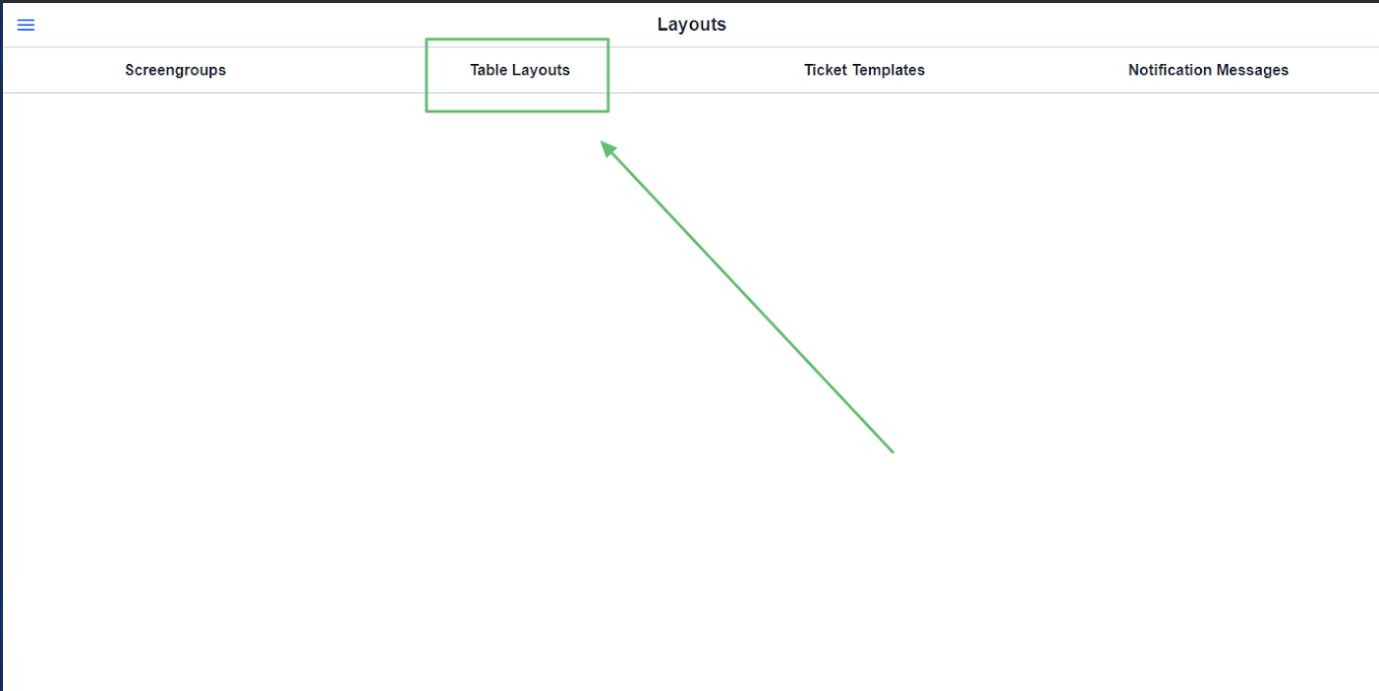
Table Layouts allows you to customize the table selection for the Mobile Point of Sale so that the Host/ess and Servers can quickly identify where a member is sitting based on the physical layout of the dining area
Required Permissions
Add/Edit/Delete Area Layout
Add/Edit/Delete Area
Accessing the Tool
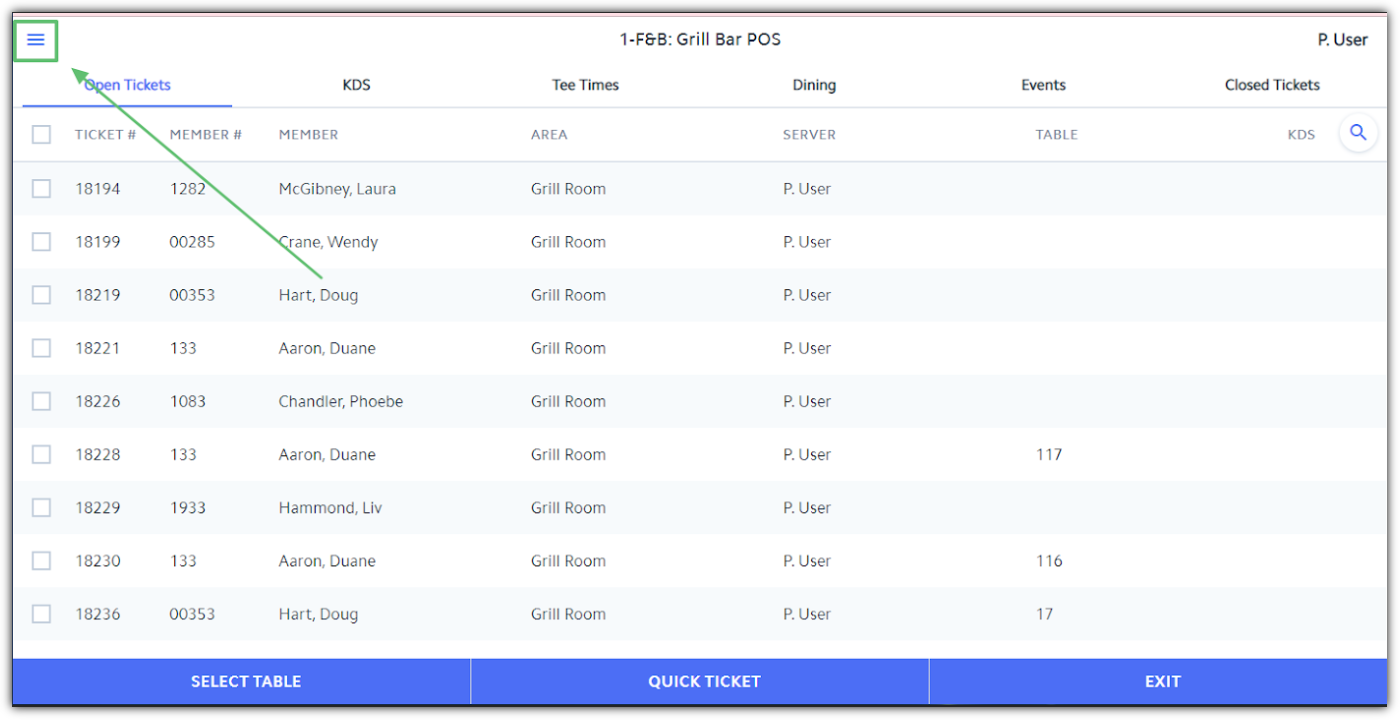
Launch into your Mobile Point of Sale, enter your Pin.
Select the Flyout Menu
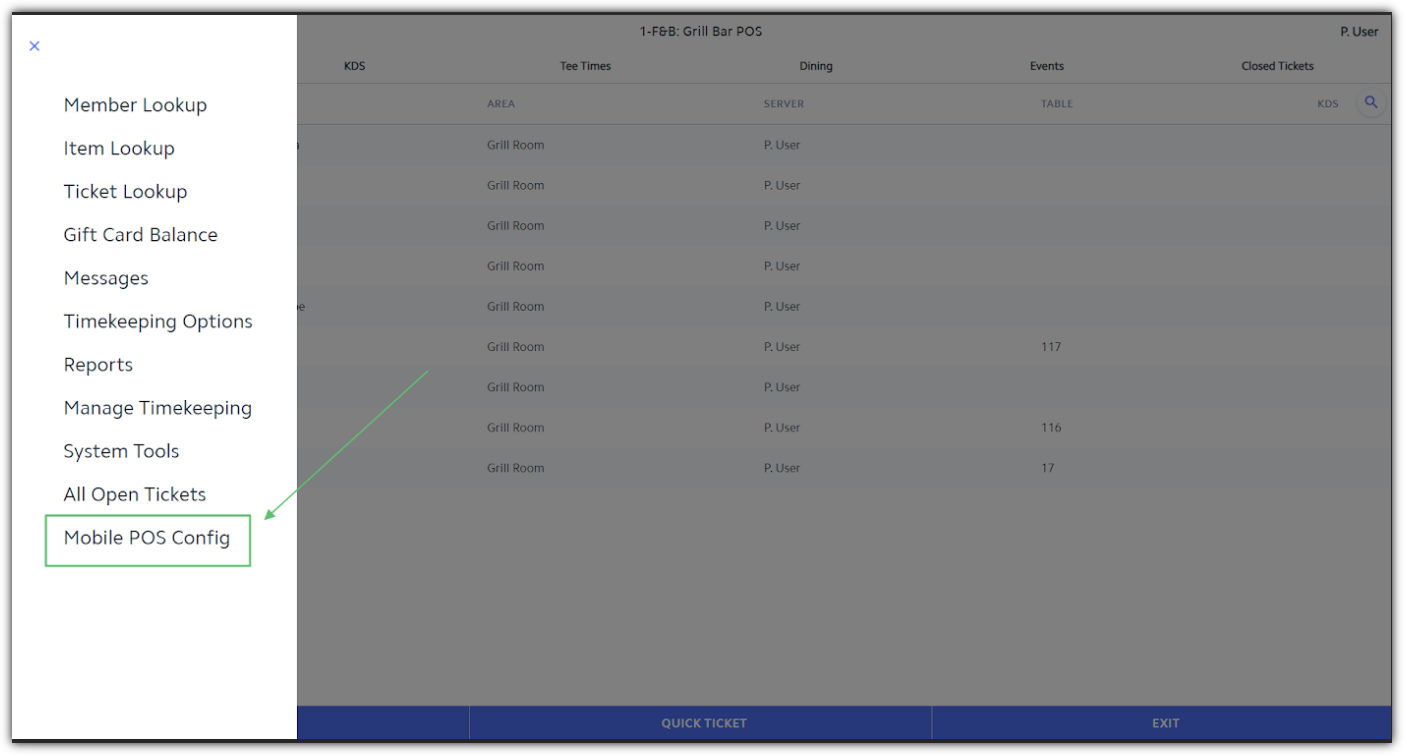
Choose Mobile POS Config.
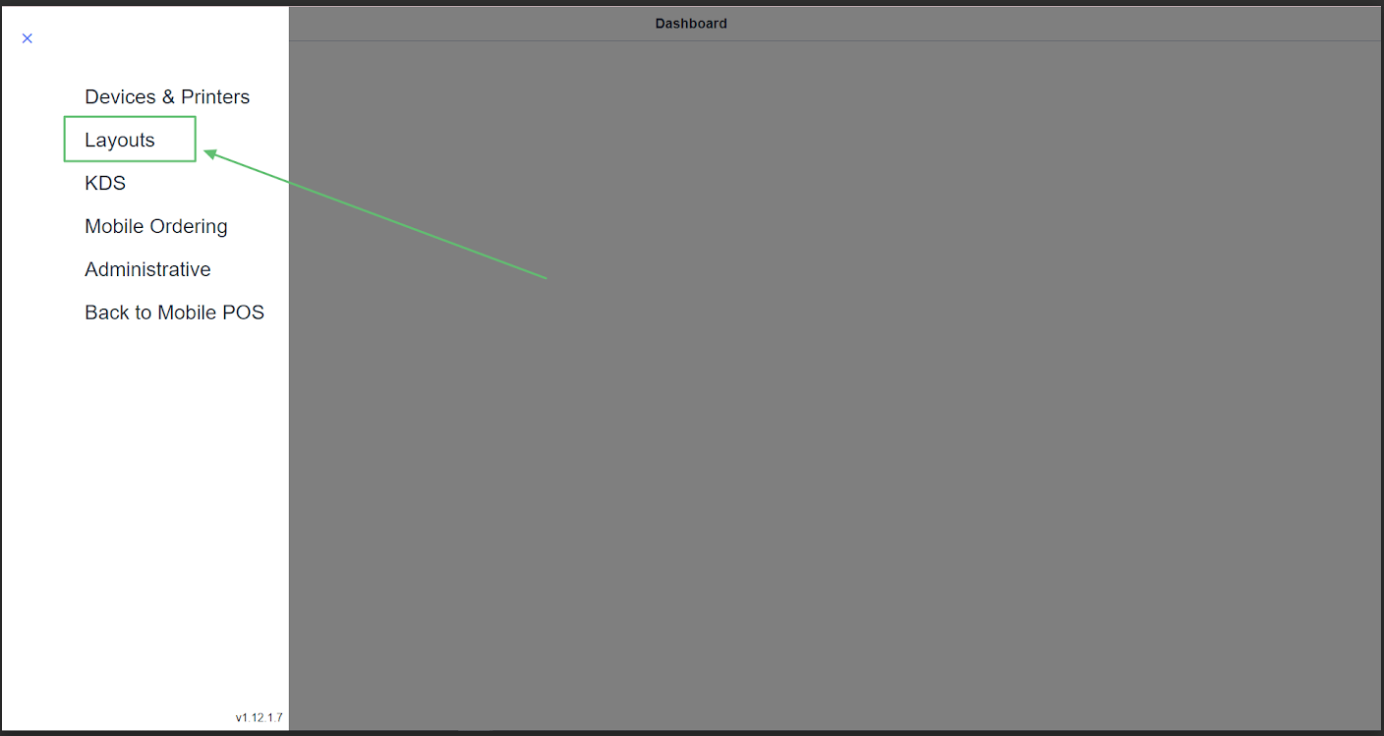
Choose the Layouts option.
Creating Area Layout
Select the New Layout Icon.
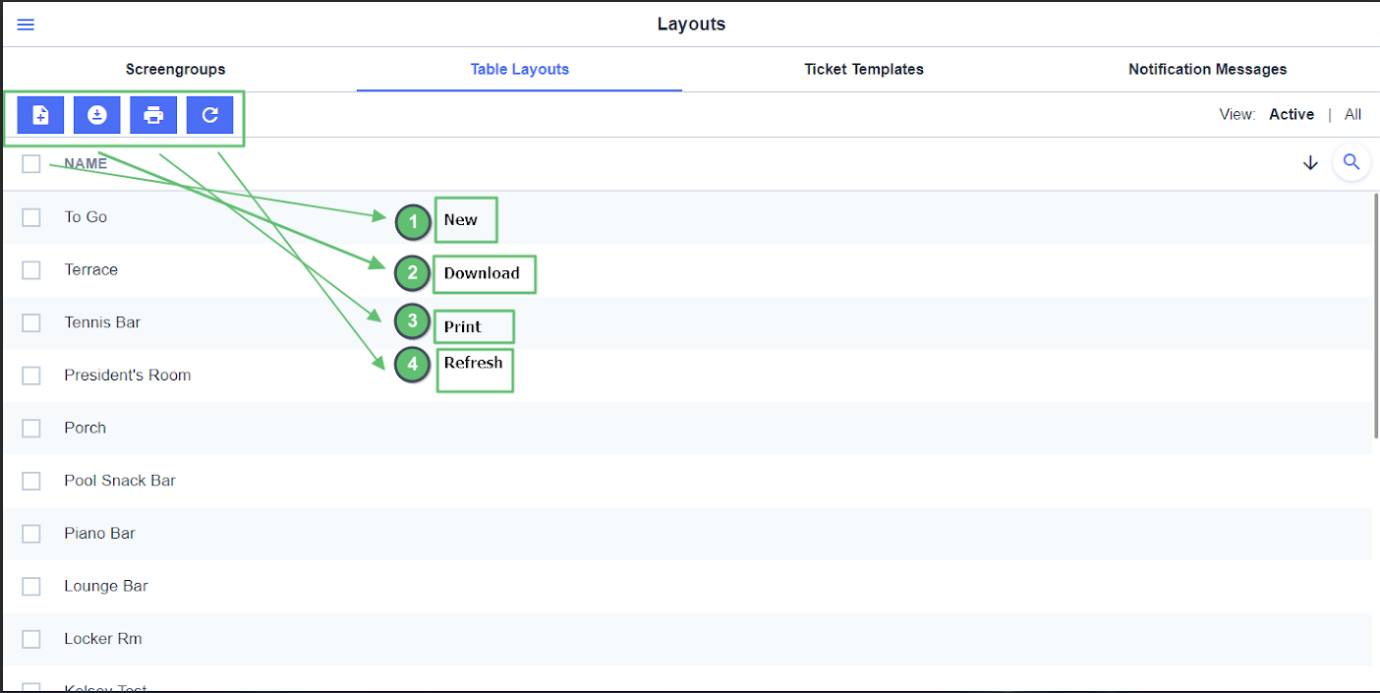
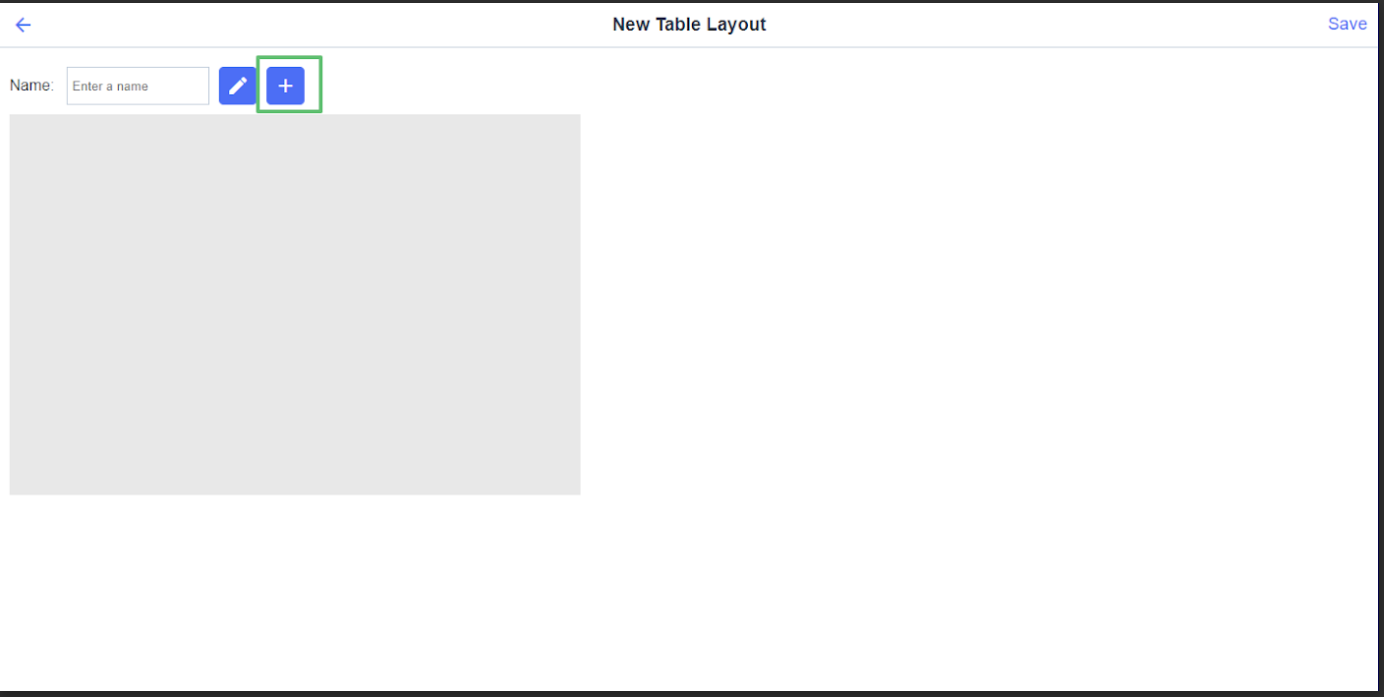
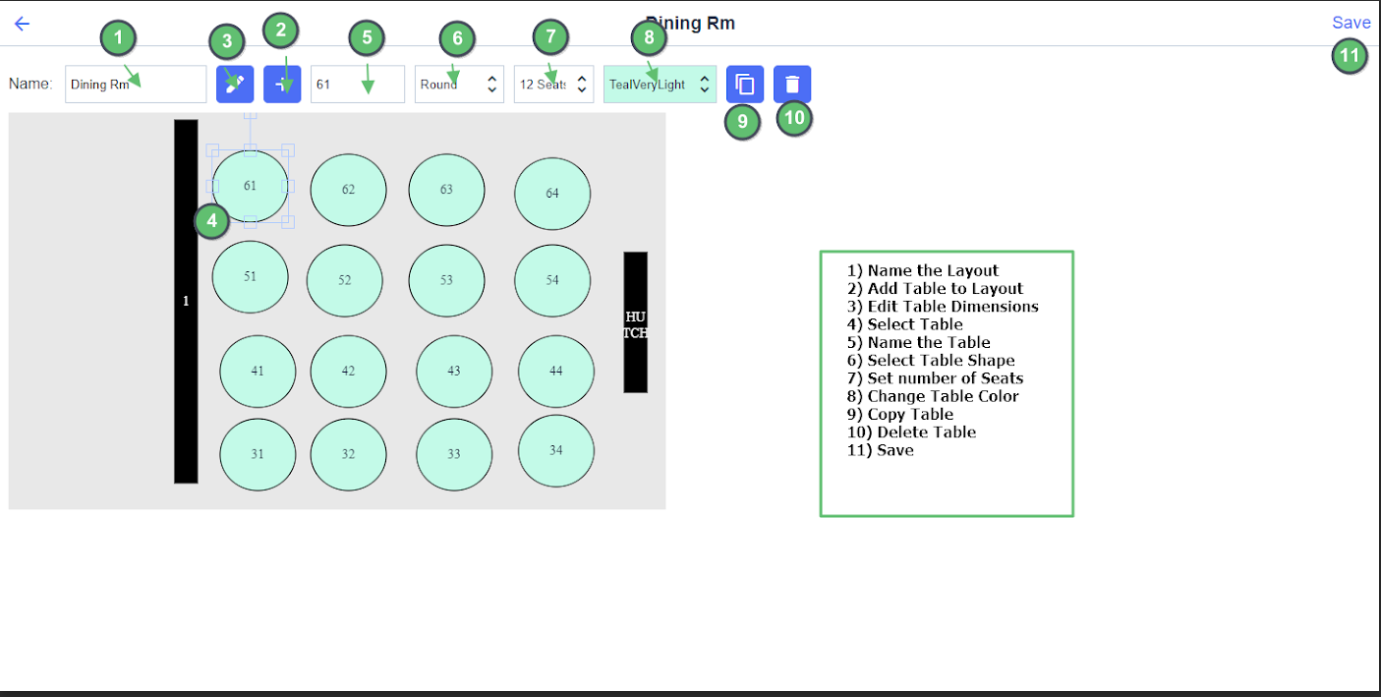
Enter the Layout’s Name.
Select the Plus (+) Icon to start adding tables.
Edit tables Dimensions by pressing the Pencil Icon
Once your first table is added, you will click on the newly added table to start customizing and editing the table.
You can give the table a Name
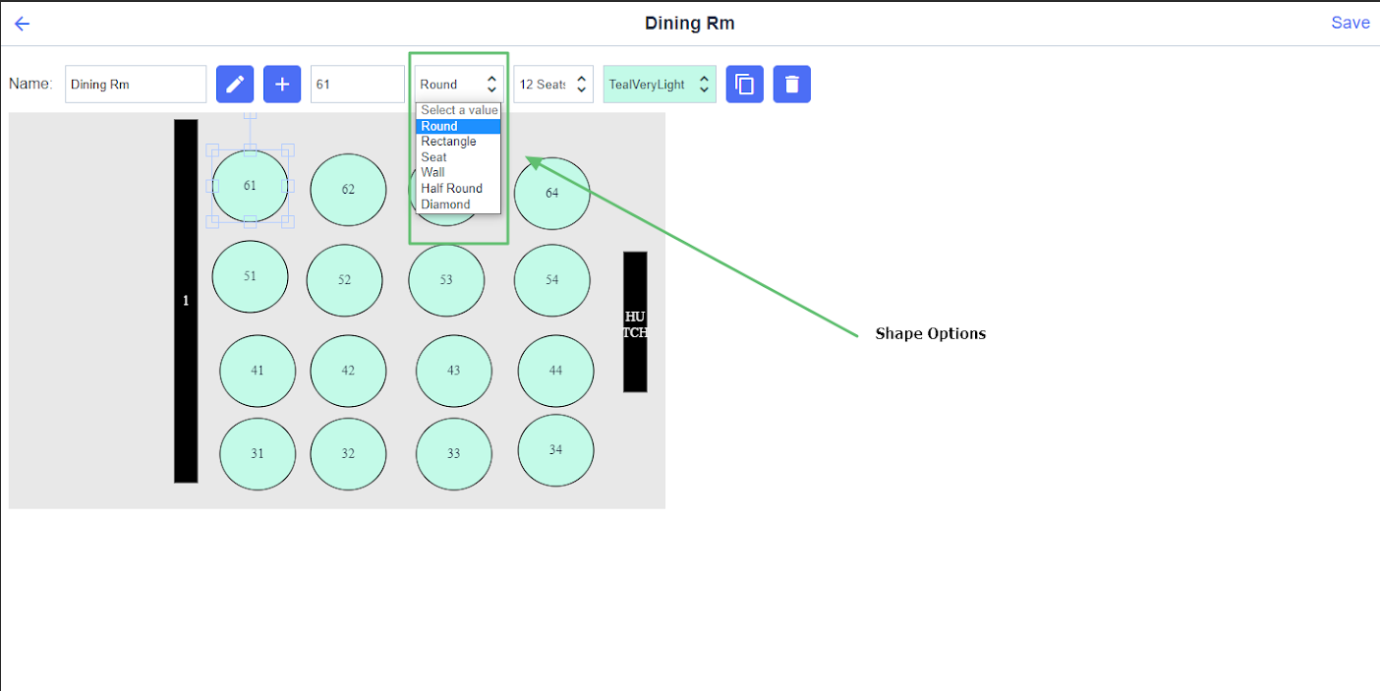
Change it's format Shape (options are Round, Rectangle, Seat, Wall, Half Round, or Diamond).
You can set how many Seats that you wish to have set for the table, up to 20.
You can also set the Color.
Copy Table settings
Delete Table
Save
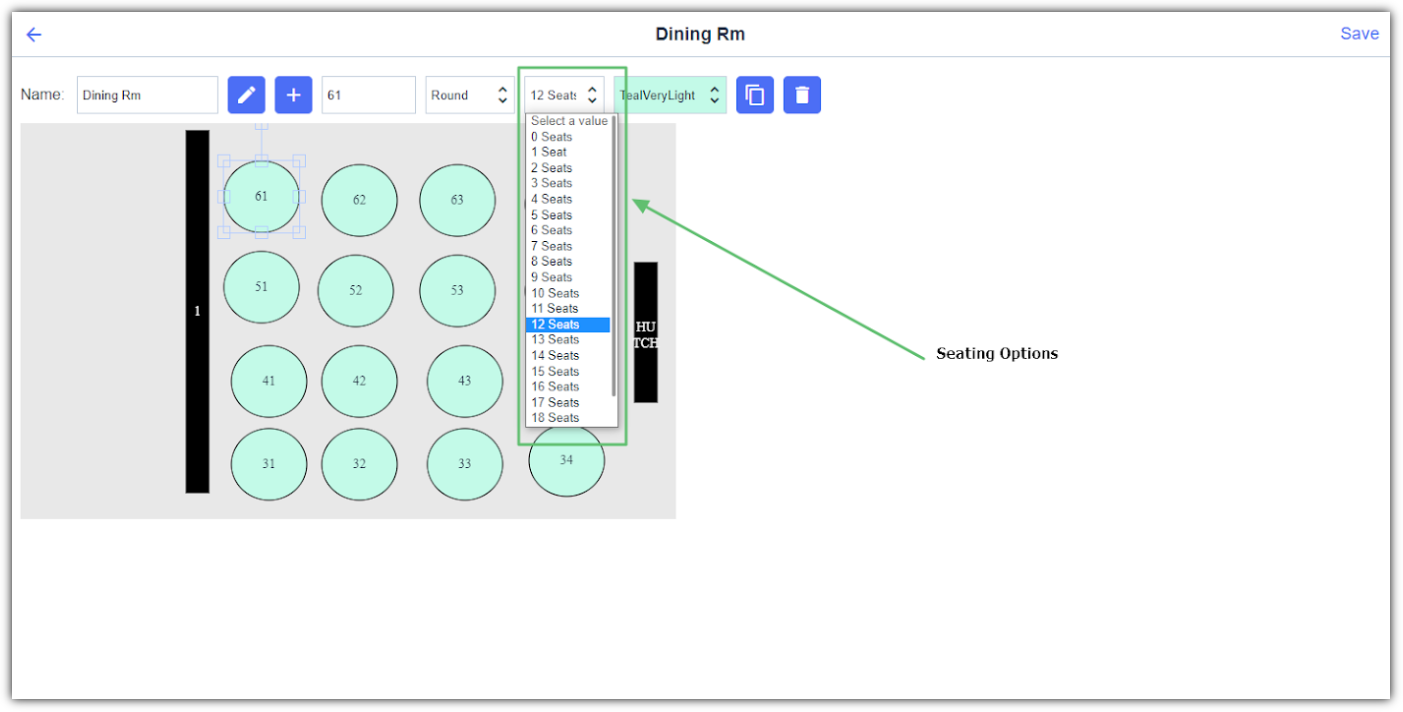
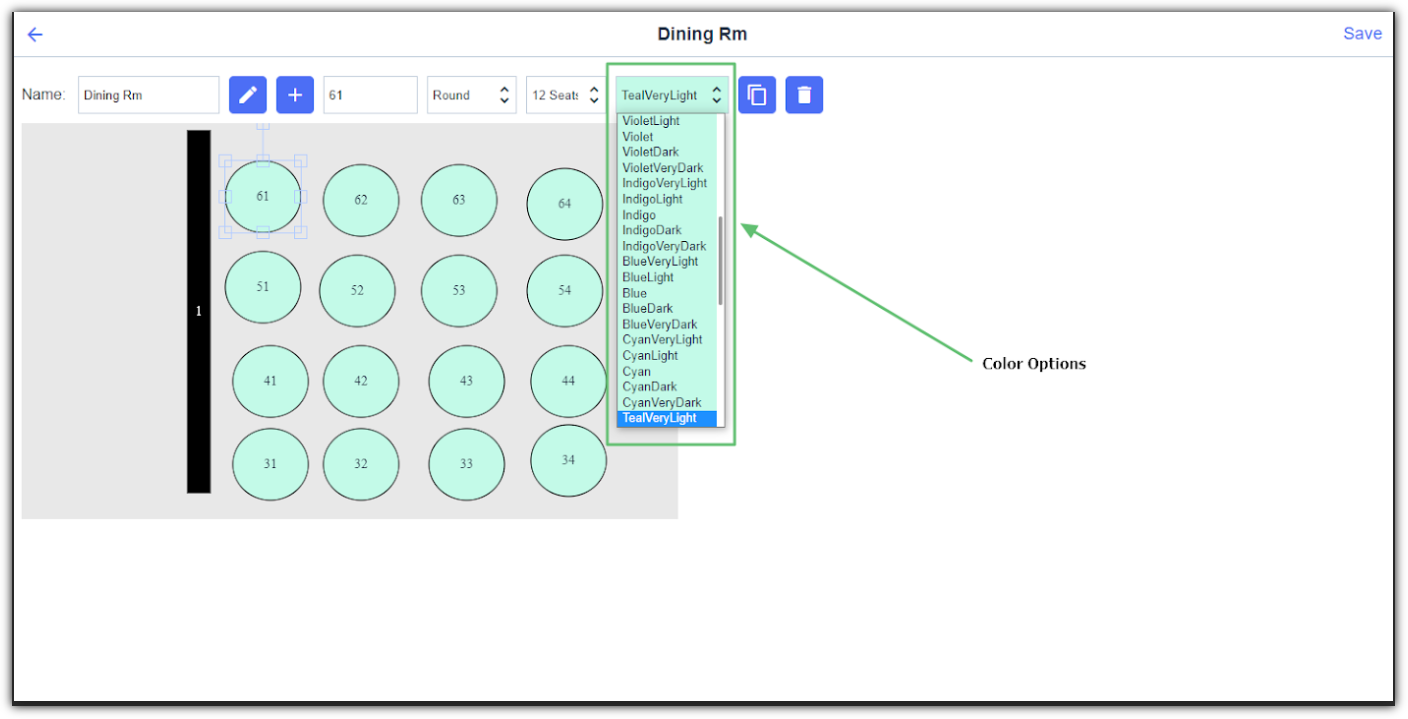
Sizing options for the table are controlled on the table added itself, you can make it larger or smaller, you can rotate by selecting the blue square at the top of the table and rotating your mouse.
If you have many of the same table type or shape, you can click the Copy Table button. Doing this will place a new table slightly off center from your first table and then you can move the table to the position you wish to use.
Note: If you do not copy and have not moved the first added table, hitting the new table button will place the second table directly behind the start position of the first table, simply click on the table to drag and move it to be able to start editing the newly added table. (show image of this)
Deleting a table
Select the table you wish to delete, and press the Trash Can icon.
Once you have finished adding tables and seats to your layout, you can Save.
Delete or edit a Layout
To delete or edit an Area Layout:
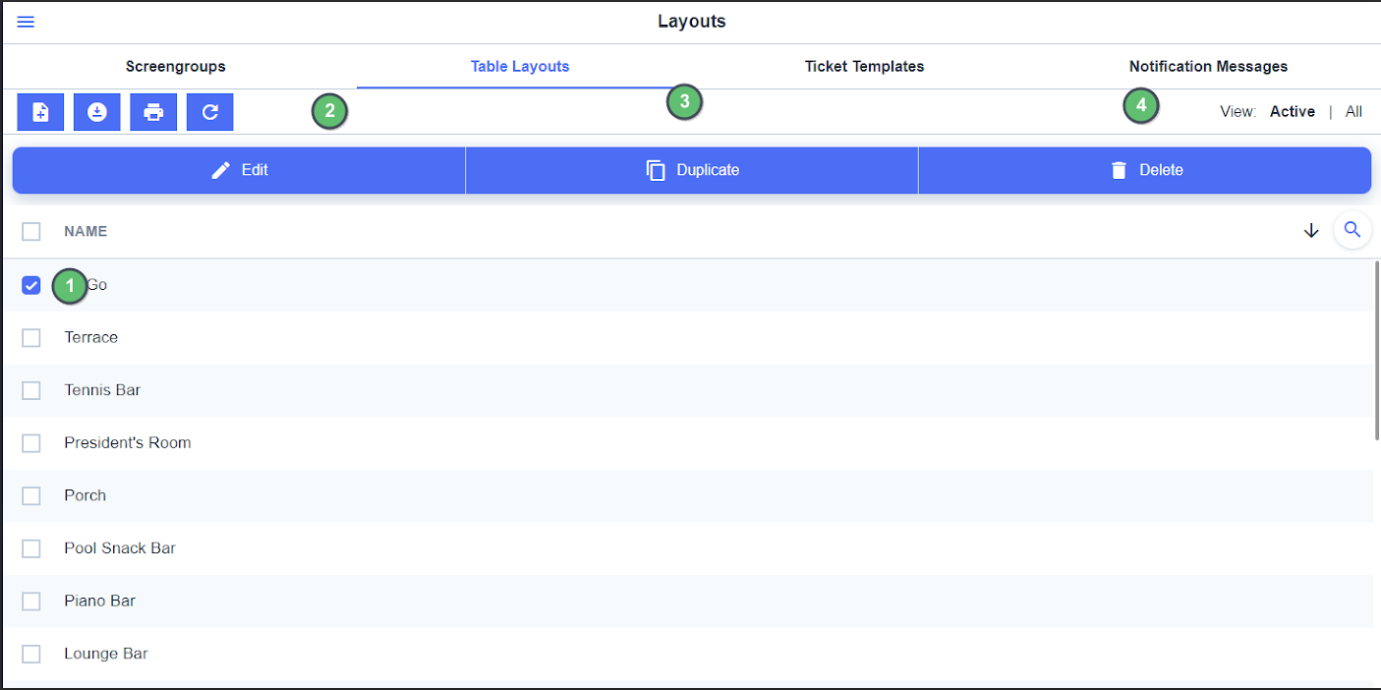
Select an existing layout on the Layout tab’s homepage
Choose the option to Edit
Duplicate
Or Delete.
Assigning Layout to an Area
Please see the Config Site - Area guide for instructions on applying Area Layouts to the area.
Best Practices
FAQs
