Send Paycloud Statement Email from Website
- Emily Carlson
- Benjamin Hacker
Table of Contents
Overview
The Clubessential Email Editor will allow you to send Paycloud statement emails from the website.
Required Permissions
Admin
Editor
Accessing the Tool
To access the email creation tools, follow the steps below depending on your access role.
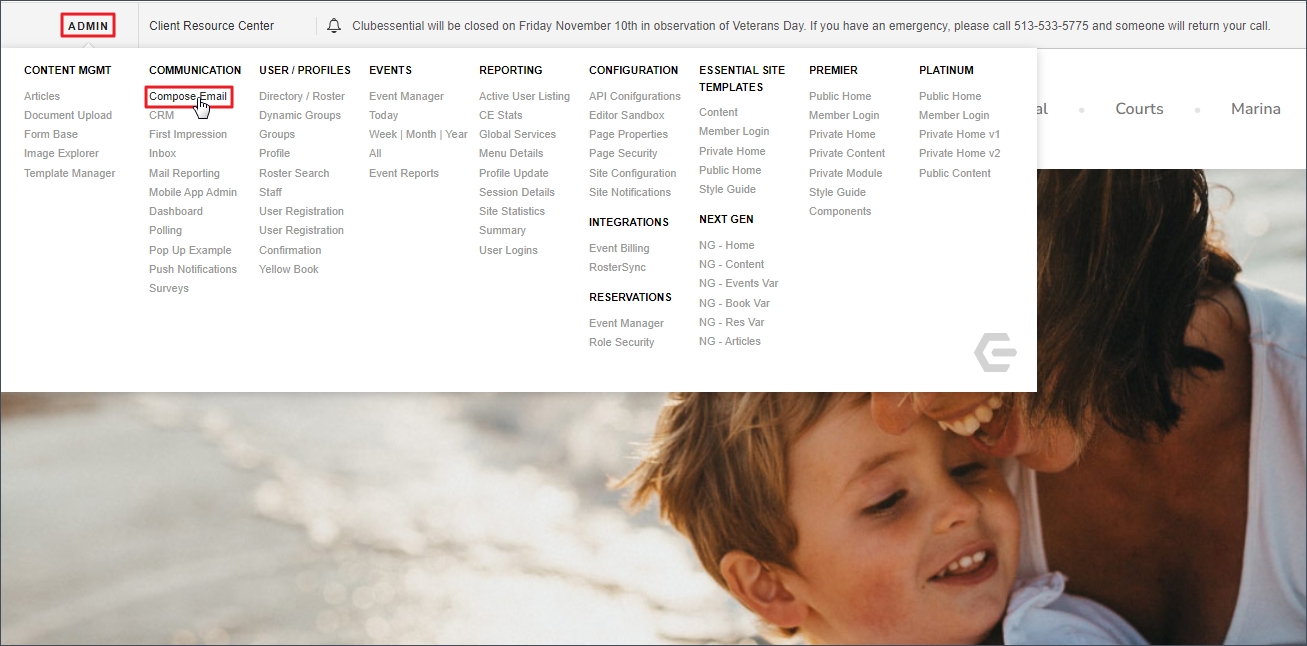
Admins: Hover over Admin bar in the left-hand corner of the screen, select Compose Email.
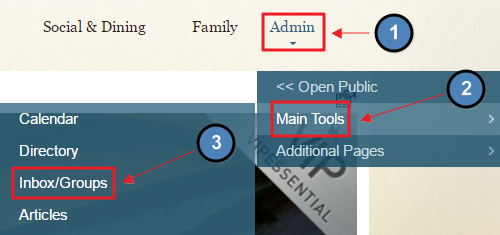
Editors: Hover over Admin in the main navigation, select Main Tools, and then Inbox/Groups.
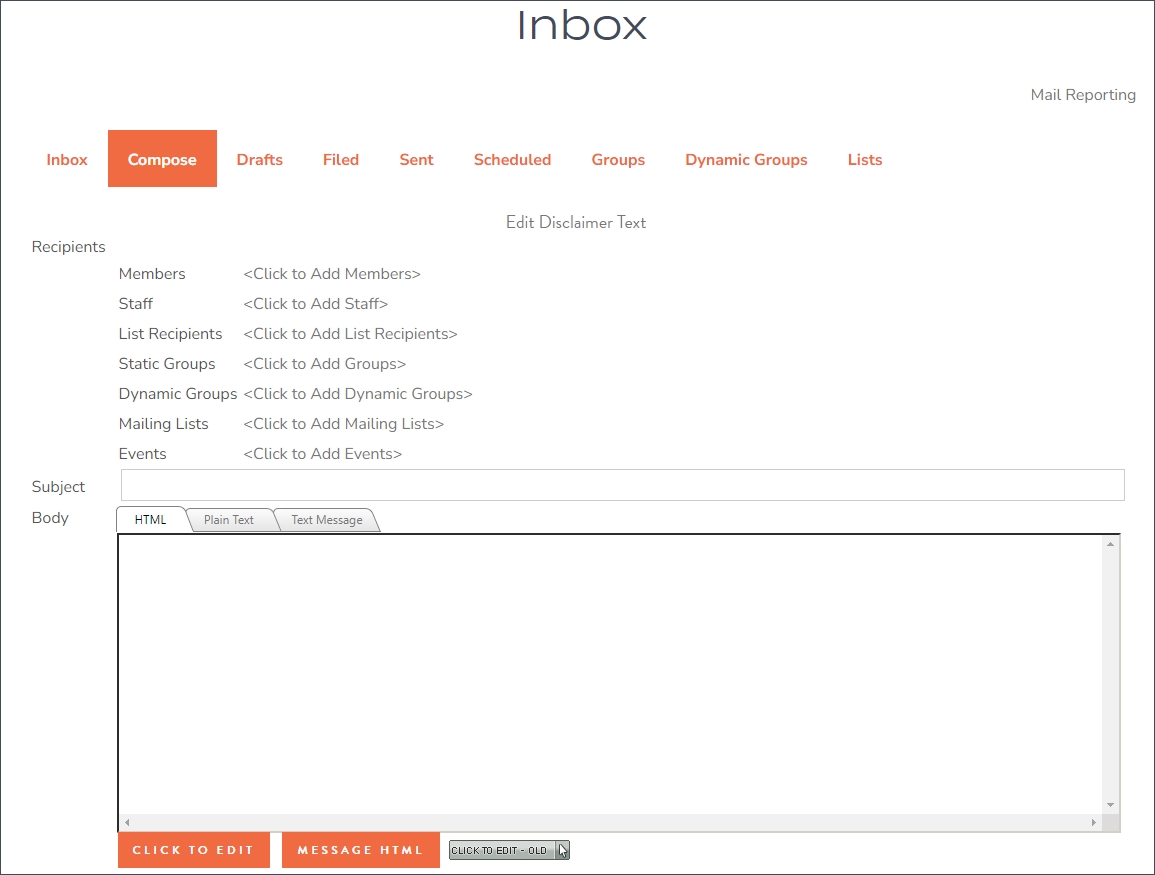
The Email interface screen will launch.
Composing the Statement Email
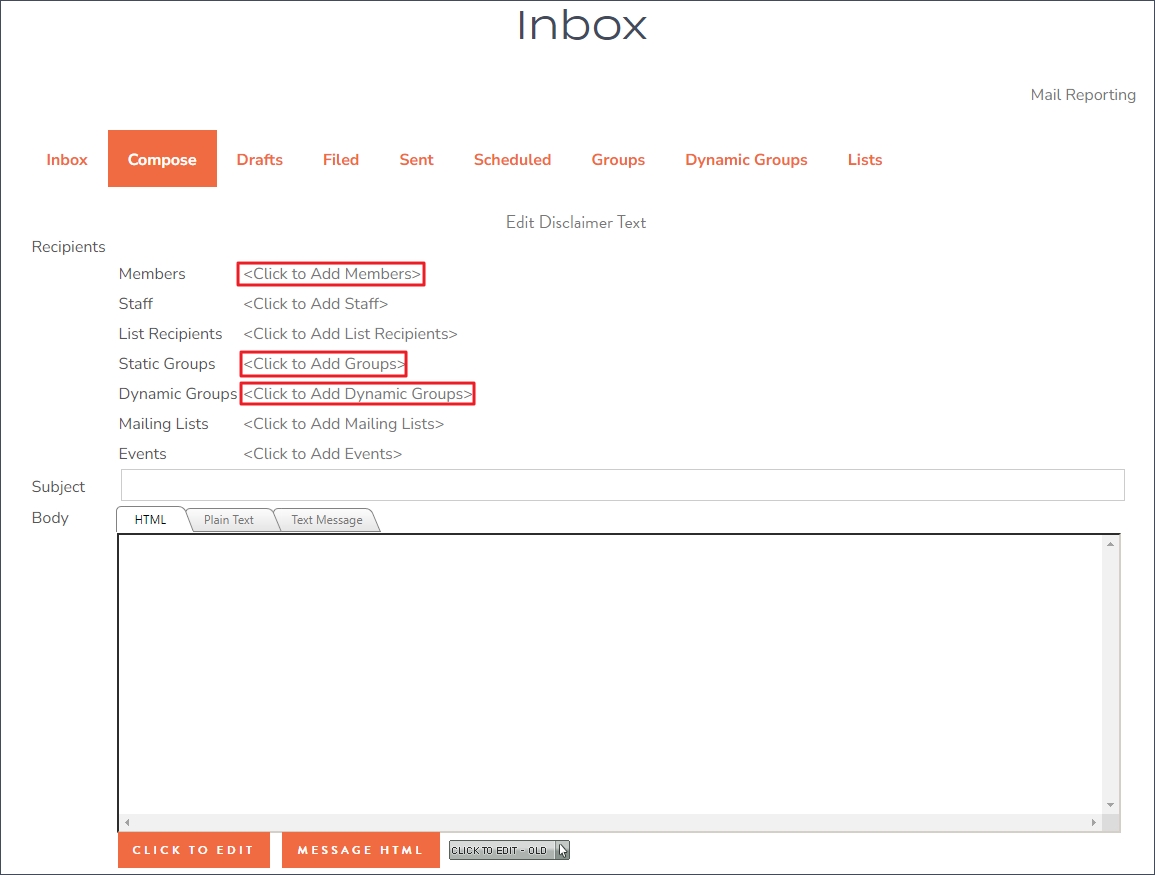
Add Recipients.
Choose the recipients of the email, by clicking on the desired method to assign recipients. For example, to select Members, click on the Available Members name from the listing on the left. Member(s) will be added to the Selected Members column on the right. Click Update Members to add the selected Members to the Recipient list and return to the email.
Members: Select members individually to receive messages.
Static Groups: Send to specific Static (fixed Member) groups
All Members: all members active in the directory
Dynamic Groups: send to specific Dynamic (fluctuate based on defined criteria) groups.
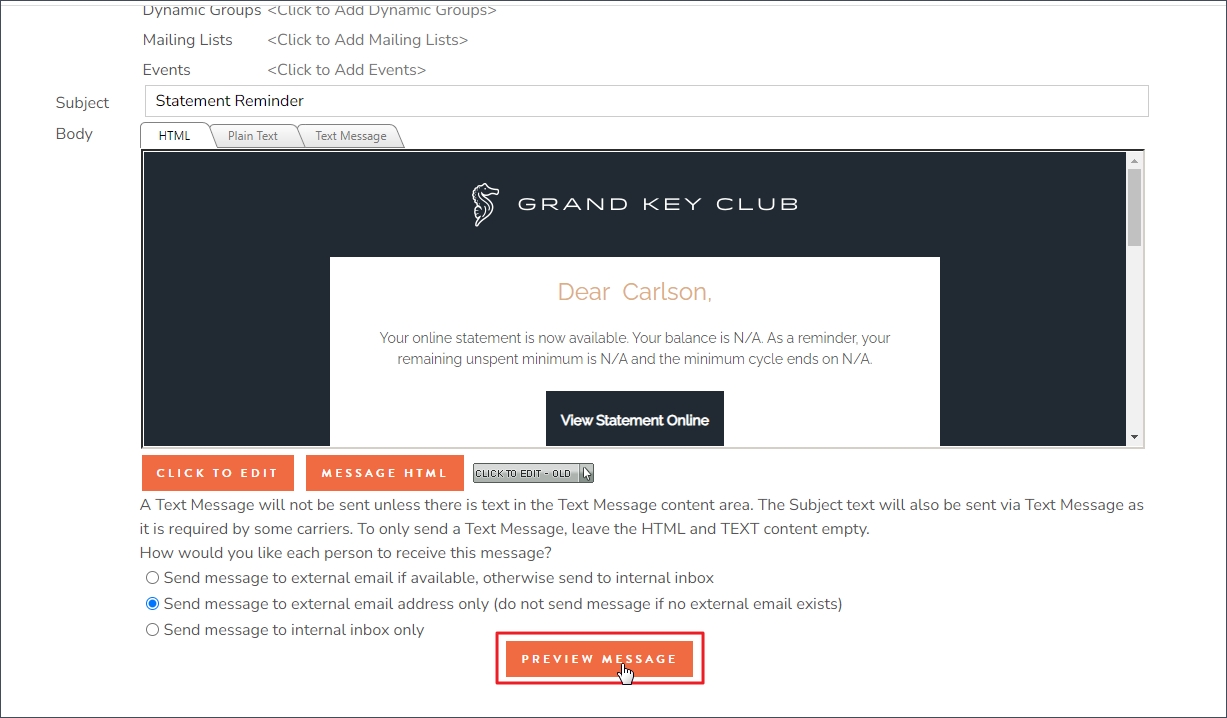
Add Subject.
Click Click To Edit.
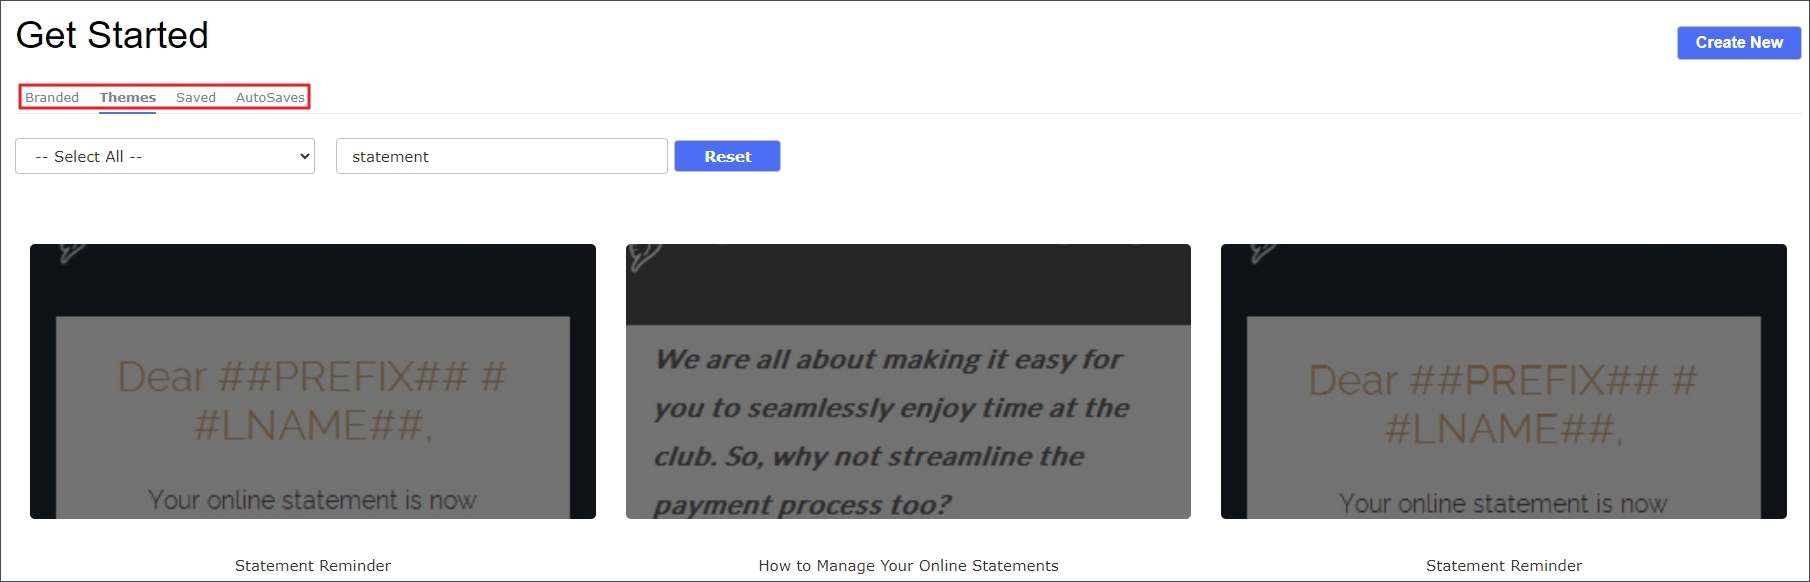
Select a Template or click Create New.
When you first access the new Clubessential Email Editor, you will be taken to the Template Manager. This allows you to quickly start an email from one of the following template/saved email types:
Branded: pre-designed templates branded for your club (available to clubs that paid for this service)
Themes: generic templates you can quickly customize to (there is a Statement Reminder template available)
Saved: email templates you have saved for future use
Auto-Saved: auto-saved recently developed designs
Compose the email to your liking.
Link the Statement.
Place this hyperlink in the email to take the member to their statement. you will need to replace the (myclubsite.com) portion with your club’s URL: https://myclubsite.com/Default.aspx?p=GURL&interface=226&ssid=100083&vnf=1
Updated Example: https://grandkeyclub.com/Default.aspx?p=GURL&interface=226&ssid=100083&vnf=1
NOTE: This link will take your member to a sign in page. Once they sign into this page, the statement will appear. This URL is the same on every statement email.
Click Save.
Click Preview Message.
Complete the Email Delivery Options.
Under Selected Emails, designate whether to use Primary Addresses, Secondary Addresses, or Both (as defined in the Member setup in the club directory).
Track this Message (for viewing/delivery statistics within Mail Reporting) and whether you, the message sender, would like to receive a notification email when sending is complete.
NOTE: Message tracking will also track clicks on anchor links throughout the email.Optional: Check the box to Send Me a Notification Email When Sending is Complete.
Define the next steps for deploying your message:
Send Message Now - Sends the message immediately, this cannot be undone. After sent, it will show in the Sent email tab.
Save Changes - This will place the message in Drafts email tab to revisit later.
Send a Test - This will send a test to selected email addresses. Select an Available User, pulled from the directory, or enter an email address (that can be from outside the system) to receive your test message.
Make Changes - Takes you back to the Compose screen of the Message Center, for further editing.
Schedule for Later - Allows your to select a future time to send the email or set up a recurring schedule.
Related Links
Best Practices
Create a statement template that can be selected for repeated use for ease of email statement process.
Consider setting a recurring scheduled email.
o Make sure your month end process is completed before the recurring scheduled emails are set to be sent.
FAQs
