Static Groups
- Danielle Donley (Unlicensed)
- Emily Carlson
- Kelsie Livingston
Table of Contents
Overview
Communicating with your entire membership at once is sometimes the best method, especially when sending out important communication that is relevant to all members. When communication only applies to a group of members, it is best to use target marketing in emails to effectively deliver the message. Static Groups are created by manually adding members, or allowing for opt-in/opt-out groups.
Required Permissions
Admin
Editor
Static Groups
Static Groups Interface
Inclusion Groups: lists all groups that are Inclusion Groups, meaning any member in this group will receive communication sent to this group.
Exclusions Groups: lists all groups that are Exclusion Groups, meaning any member in this group will NOT receive communication sent to this group. By default, anyone NOT listed in this group will receive communication. This is rarely used, and is usually on used if a select few people wish to NOT receive communication sent to ALL MEMBERS.
Adding Static Groups
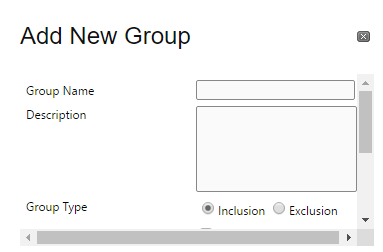
Click the Add Group link. The Add Group Interface will show.
Add a Group Name, which should be detailed based on the type of group.
Add a Description if desired, which would be a few sentences explaining the group.
Choose a Group Type, Inclusion or Exclusion.
Check the Opt-In Group box if members are allowed to Opt-in/Opt-out of the group.
Show Member Listing will allow members to see who belongs to the group.
Allow Invitation by Members gives members the authority to invite other members to the group via email.
Only Allow Actions If in Group gives the above permission only if the member is in the group.
Choose a Group Category if categories are created to organize type of groups.
Click Create Group to continue.
Click Click here to Continue to add members to the group. You may now begin adding members to the group using the Add Members Interface.
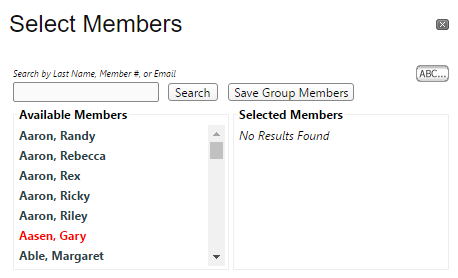
Click Add Members to Group to pull up the Directory Listing. This will bring up the Select Members Interface.
Scroll through the member name display and click on the member’s name in the Available Members column to move the member to the Selected Members box. By default, only members with a last name starting with A will appear. Use the ABC… box to choose a different letter to continue to add members. You may also use the Search Box to search for members by last name, member number, or email.
Once all members are added, click Save Group Members to add the members to the group.
You may also create a Staff Only Group by following the same above steps, but add Staff by clicking on the Add Staff to Group button.
To Remove Users, click on the box next to the user’s name and then click the Remove Selected Users Box.
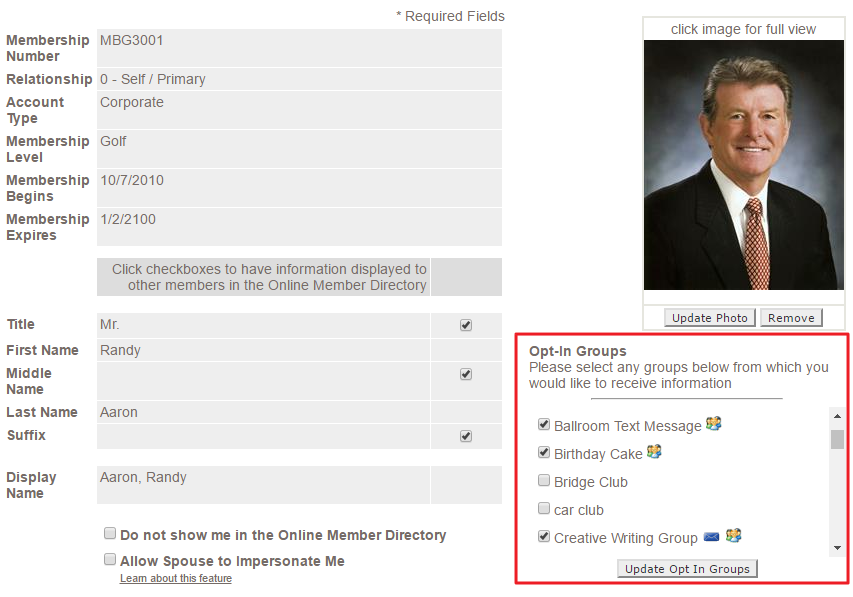
Members Joining Opt-In Groups
Members can join Opt-In Groups in several ways. Opt-In Groups will show on member’s profiles, so they can easily join and leave groups. You may also add an Opt-In Group Plugin to a designated page(s) to market groups. Clubessential can assist with adding this plugin to a page as needed.
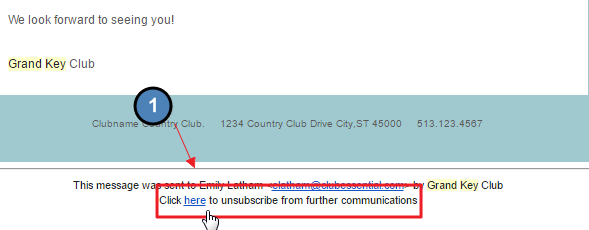
Newsletters are another great way to advertise Opt-In Groups, and offer a way for members to opt-in/opt-out of various groups. At the bottom of every Blast Email will be an Unsubscribe Link. The Unsubscribe Link will take the user to a list of all Opt-In groups, whereupon they may update what groups they are in.
Emailing Static Groups
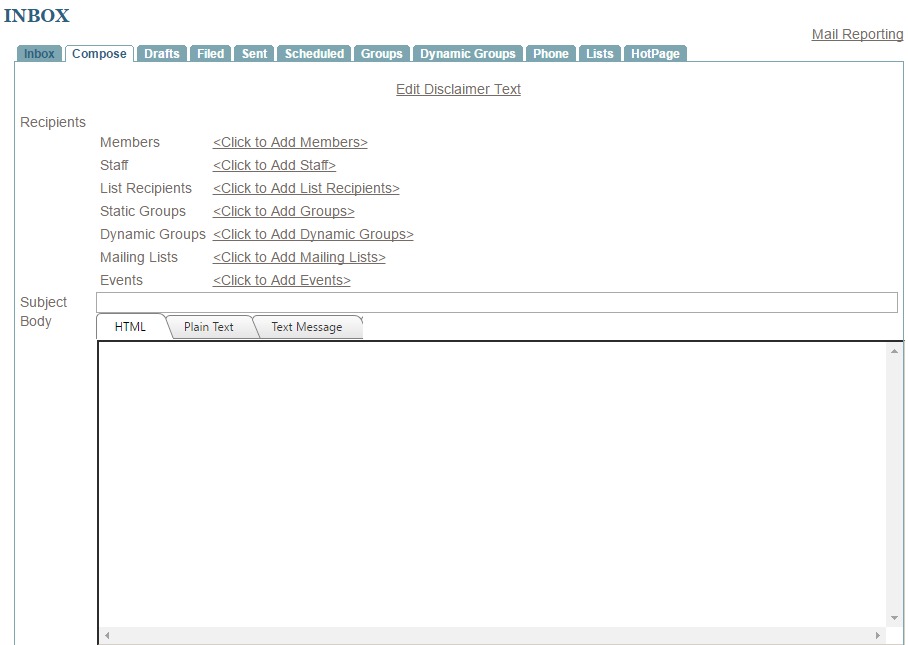
Emails can be sent to Static Groups in two ways, either from the Groups tab or by using the Compose Email interface.
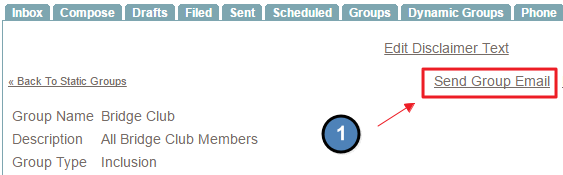
To send from the Groups tab, click on the group name in the Groups tab. Next, click on the Send Group Email link. This will bring you to the Compose Email Interface where you may compose your email.
To send from the Compose Email, go to the Compose Email Interface. Click Add Static Groups link. This will bring up the Select Groups Interface. Scroll to find the desired Static Group and click the Static Group name to move to the selected groups box. Click Update Groups, to then begin composing the email.
Best Practices
By using Dynamic and Static Groups, effective target marketing via the Blast Email System can be achieved. The more groups available, the easier it will be to ensure that the right people receive the right message. This should also increase email open rates as users are not bombarded with messages that are not relevant to their interests.
Want to send out various Newsletters to your membership? Create a Static Group that is an Opt-In Group so members have the choice of receiving the communication. Don’t forget to Cross Market on your Newsletter as members may have varying interests.
FAQs
What’s the best way to get people to opt-in to a Static Group? A: Members have the ability to opt-in to static groups via their profile, or the unsubscribe link in blast emails. A simple email reminder of how to do this in their profile or via the unsubscribe link should encourage members to sign-up. Create specific Static Groups that are relevant to your membership and the types of communication they wish to receive. Use that group to communicate to members see the benefit in belonging to the group.
I have one member that does not want to receive blast emails sent to all membership, but we need to keep his “receive emails” enabled since he belongs to various static groups and dynamic groups that he wishes to receive communication from. How do we remove him from the All Members static group? A: The easiest way to do this, is to create an Opt-Out group. Add that only that specific member to the Opt-Out group. Use this new Opt-Out group to email All Members instead, as this group will contain all member except for the one member in the Opt-Out Group.
